Summary: Microsoft Scripting Guy, Ed Wilson, talks about exporting a directory list to a CSV file and opening the file in Microsoft Excel with Windows PowerShell.
 Hey, Scripting Guy! I have a lot of music files that reside in nested folders. I would like to be able to look at the file information in Microsoft Excel so that I can find, for example, the largest files, or sort them by directory name. Is there an easy way to do this by using Windows PowerShell?
—GB
 Hello GB,
Microsoft Scripting Guy, Ed Wilson, is here. This morning I am sipping a nice cup of Darjeeling tea with a cinnamon stick in it, and checking my email at scripter@microsoft.com. I thought it would be a nice quiet morning because I finished teaching my Windows PowerShell for Writers class last week. But it is not quiet around here for another reason. What does the fox say? keeps wafting across the room from the Scripting Wife’s Surface. I think she has it on extended replay. Anyway, GB, the solution to your issue is rather simple because Windows PowerShell contains a built-in Export-CSV cmdlet.
Note This is the second in a series of posts that talk about working with files and folders by using Windows PowerShell. You should read the first post, List Files in Folders and Subfolders with PowerShell.
Find the music files
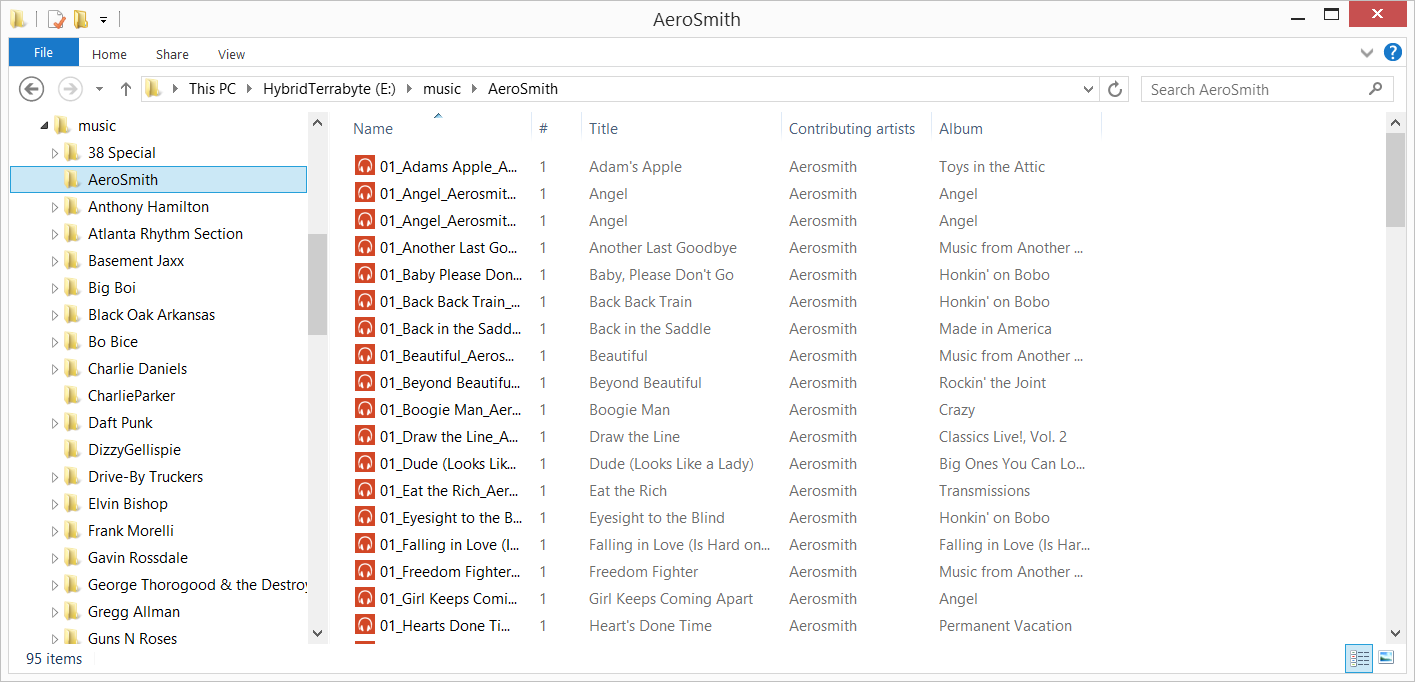
The first thing I need to do is to find my music files. It is not too difficult of a task, because I have a folder named Music that is on my E:\ drive (a 1 TB hybrid expansion drive). I also know that all of my music files are MP3 files, so I can use the Get-ChildItem cmdlet to find all of my files. The following image illustrates my directory structure:
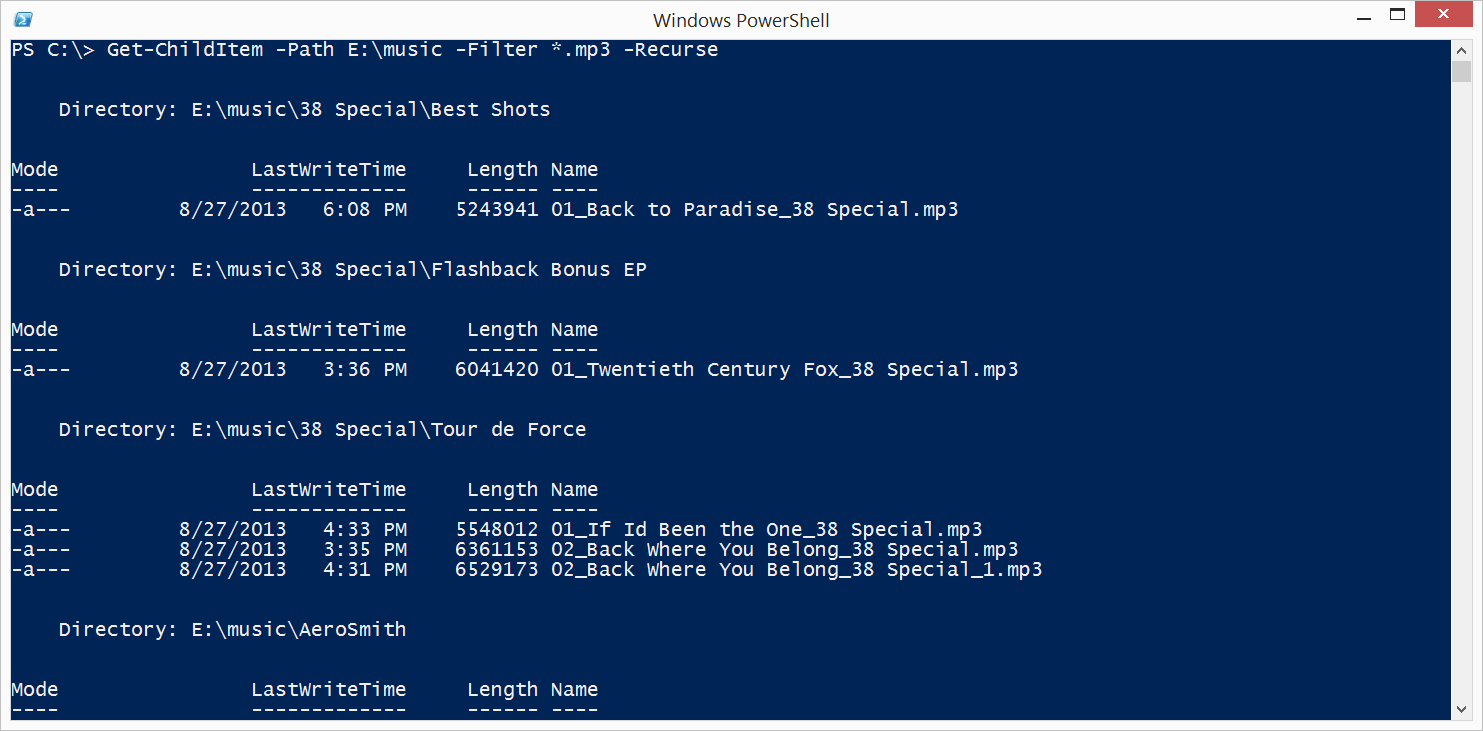
Here is the command to perform a recursive lookup of all the MP3 files in all the folders in the Music folder:
Get-ChildItem -Path E:\music -Filter *.mp3 –Recurse
The command spits out a lot of stuff in the Windows PowerShell console window. I am not worried about that, because I know that I am going to eventually feed the data to a CSV file. The command and the output from the command are shown here:
Find the properties of a file
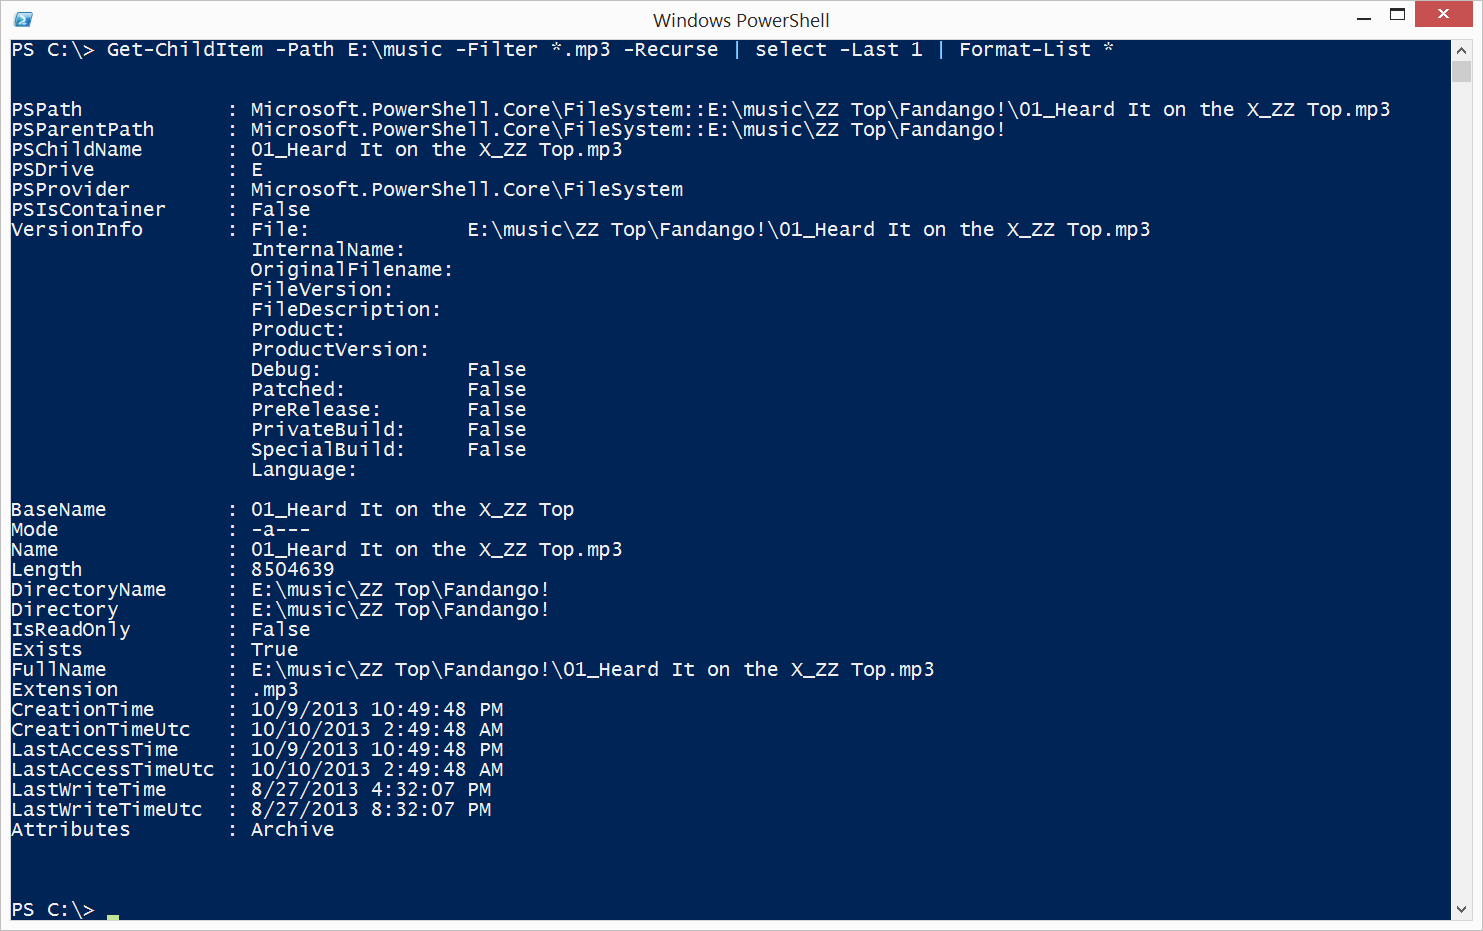
I have succeeded in finding all of my MP3 files. Now I need to figure out what properties I am interested in recording. To do this, I take one file and send it to the Format-List cmdlet so I can see what the sample data would be. Here is the command I use to grab a single file and send the output to the Format-List cmdlet:
Get-ChildItem -Path E:\music -Filter *.mp3 -Recurse | select -Last 1 | Format-List *
As you can see from the following output, the –Last 1 parameter selects the last file and only one file. In this case, the results end up being a ZZ Top song. Here is the command and the output from the command:
Select the properties
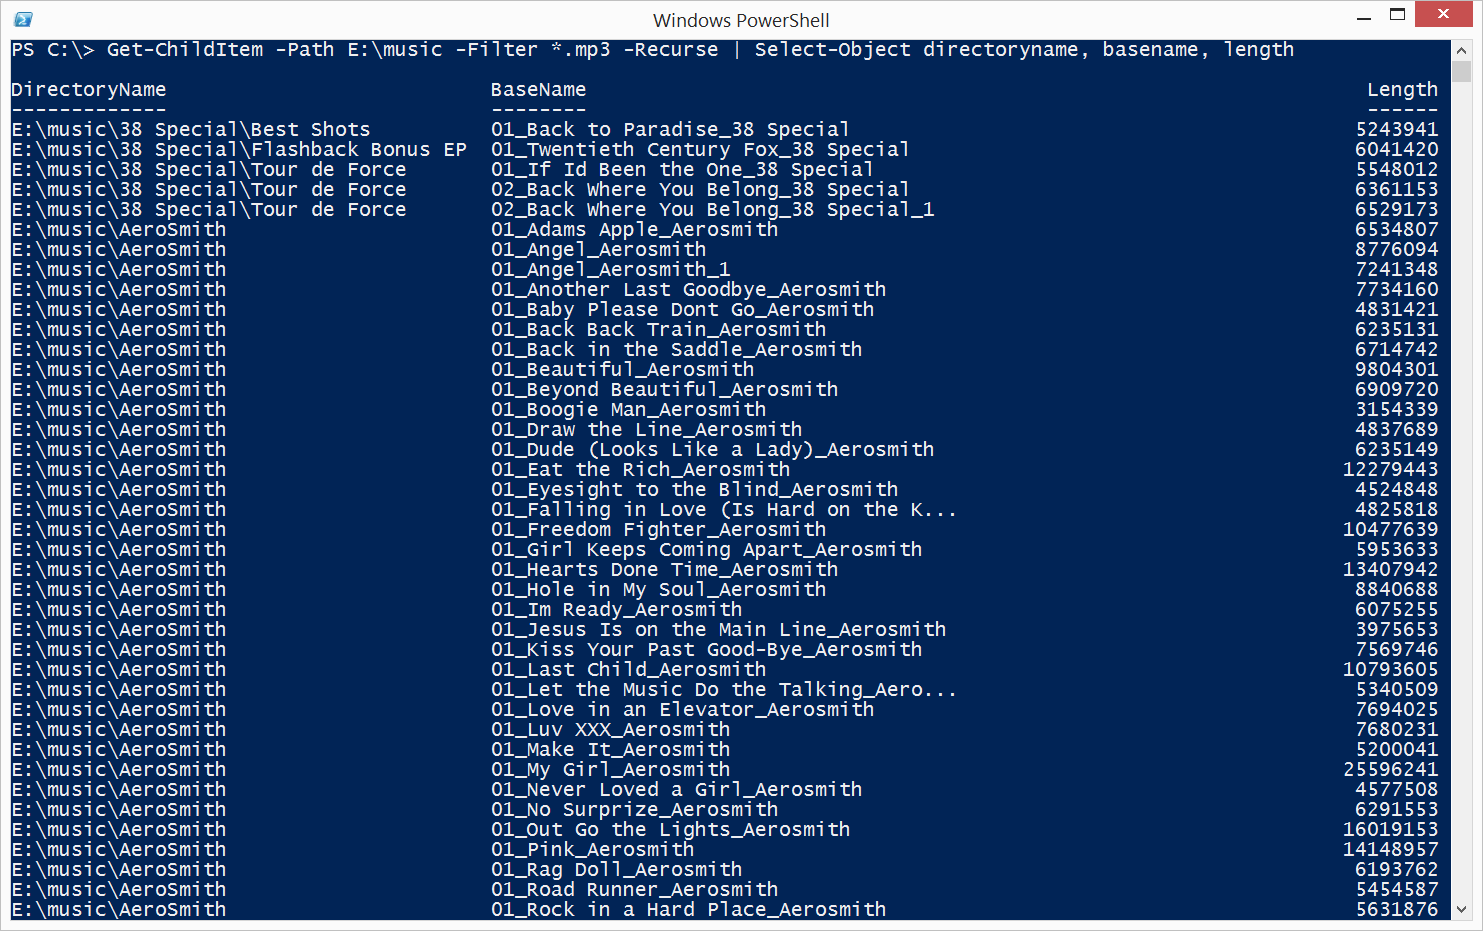
I look at the list of properties and the associated values, and I decide that if I choose DirectoryName, I will get the name of my music group. If I choose the BaseName property, I get the name of the song. If I choose Length, I will know the size of the file, and that will give me an idea of the length of the song—not directly, but at least an idea. So here is the command I try:
Get-ChildItem -Path E:\music -Filter *.mp3 -Recurse | Select-Object directoryname, basename, length
The command and the output are shown in the following image:
Export to a CSV file and to Excel
I am not worried about the arrangement of the data, or about doing any sorting because I am planning to send the output to a CSV file so I can open it in Microsoft Excel. To export the data to a CSV file, I use the Export-CSV cmdlet. I have already selected the properties I am interested in working with, so I do not need to provide anything other than a very simple command.
Because I am going to open the output in Microsoft Excel, the one thing I need to do is to remember to use the –NoTypeInformation switched parameter. This will keep the Type information from being written to the first line of the file. If the Type information is written, it will mess up the column display in Excel.
Also, I need to remember that each of the properties I have selected become the column headings in Microsoft Excel. If I do not want the property names as they exist, I can change it so that I get a clean spreadsheet, but it involves a bit of extra work that I do not want to do. Also remember that the order in which I select the properties will be the order in which they appear as columns in Microsoft Excel. Here is the command to find all my MP3 files; select the length, directory, and file name; and then write it to a CSV file:
Get-ChildItem -Path E:\music -Filter *.mp3 -Recurse | Select-Object directoryname, basename, length | Export-Csv -Path c:\fso\music.csv -Encoding ascii -NoTypeInformation
There is no output from this command. I can open the file in Microsoft Excel by using the Invoke-Item cmdlet and specifying the path to the file. This is because .csv file extension is automatically linked with Microsoft Excel. The abbreviation for Invoke-Item is ii. The command is shown here:
Invoke-Item C:\fso\music.csv
If I do not like the way the output appears, I can delete the file by using the Remove-Item cmdlet. The alias for Remove-Item is RI. Here is the command:
Remove-Item C:\fso\music.csv
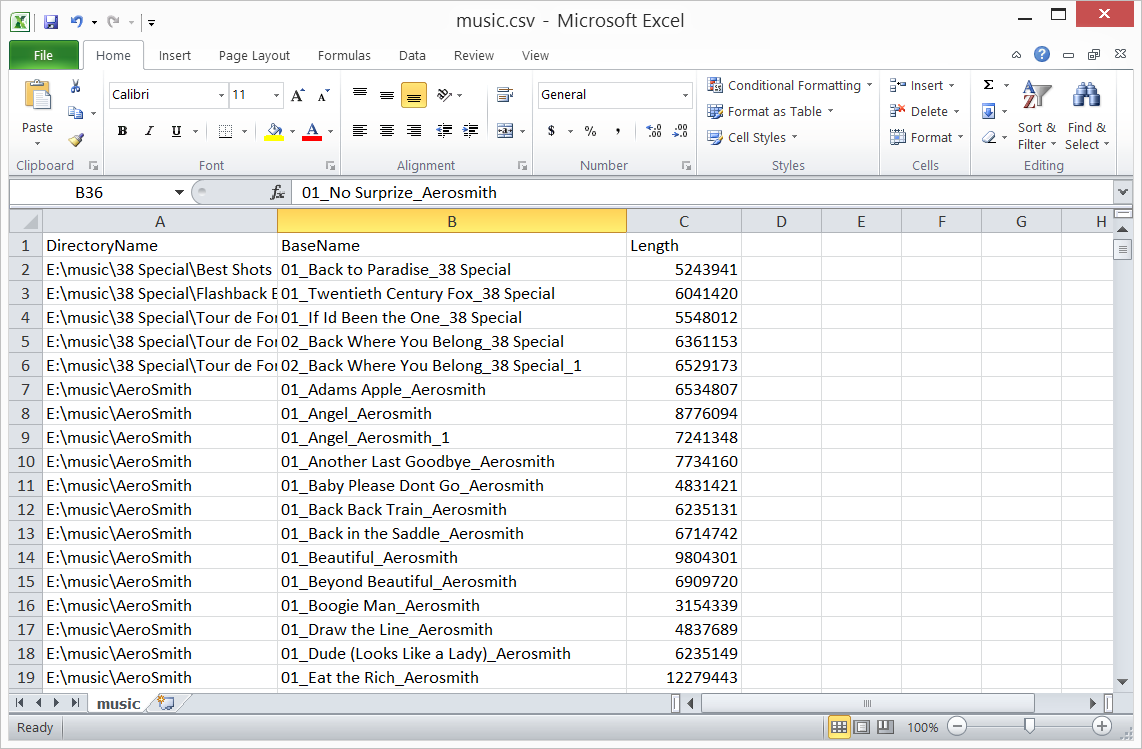
When the file opens in Microsoft Excel, I am presented with the output shown the following image:
GB, that is all there is to using Windows PowerShell to export a directory list to a CSV file and open the file in Microsoft Excel. File Week will continue tomorrow when I will talk about accessing file metadata with Windows PowerShell.
I invite you to follow me on Twitter and Facebook. If you have any questions, send email to me at scripter@microsoft.com, or post your questions on the Official Scripting Guys Forum. See you tomorrow. Until then, peace.
Ed Wilson, Microsoft Scripting Guy

Thanks, perfect article for what I was trying to achieve.