Summary: Learn how to use Windows PowerShell to automatically create Tempdb files in your SQL Server instance.
![]() Hey, Scripting Guy! How can I easily create multiple tempdb data files in my SQL Server instance?
Hey, Scripting Guy! How can I easily create multiple tempdb data files in my SQL Server instance?
—WM
![]() Hello WM, Microsoft Scripting Guy, Ed Wilson, is here. What a great week of SQL guest bloggers, and we have Michael Wells here today to answer your question.
Hello WM, Microsoft Scripting Guy, Ed Wilson, is here. What a great week of SQL guest bloggers, and we have Michael Wells here today to answer your question.
Michael is a database administrator for a large financial firm in the Tampa Bay area. He has been working in IT since 2000, and he has administered all versions of SQL Server, from 2000 and up. Michael runs the Sarasota SQL Server User Group located in Sarasota, FL and has presented at numerous SQL Saturday, CodeCamp, and User Group events.
Contact information: http://sqltechmike.com
Take it away, Michael…
There is a lot of conflicting advice regarding the proper configuration of tempdb. Most experts agree that creating multiple tempdb data files is one part of relieving I/O contention in tempdb. Because you have already done your due diligence and decided that this is the right action to take, let us take a look at how you can go about creating multiple tempdbs via Windows PowerShell scripting.
The full script can be downloaded from the Scripting Guy’s Script Repository, but for demonstration purposes we will break it into the following steps:
- Identifying the parameters
- Determining the CPU and memory specifications
- Calculating the number of files needed
- Building the SQL command
Identifying the Parameters
Before we begin building the script, let us talk about the optional parameters that can be used to customize the calculation.
- maxFileCount
- Used to set an upper limit on the number of files created
- Default value: 16
- maxFileInitialSizeMB
- Used to set an upper limit on the initial file size
- Default value: 1024
- maxFileGrowthSizeMB
- Used to set the file growth limit
- Default value: 2048
- fileGrowthMB
- Used to set the file growth rate
- Default value: 512
- coreMultiplier
- Used to specify how many files to create per processor core
- Default value: 1.0
- outClipboard
- Loads the output into the clipboard instead of returning it to the screen
- Default value: Off
Determining the CPU and Memory Specifications
First, we will look at the number of processor cores and system memory. One of the easiest ways to do this is to use the Get-WMIObject cmdlet. The Get-WMIObject cmdlet allows you to interact with the Windows Management Instrumentation (WMI) the same way you would work with any other object—via properties and methods. For more information, you can go to the WMI Reference in the MSDN Library, or you can dive right in by starting with the following command to list the WMI classes that are available on your system.
Get-WmiObject -List | more
Let us use the cmdlet to access the Win32_Processor and Win32_OperatingSystem classes to get the information that we need.
#get a collection of physical processors
[array] $procs = Get-WmiObject Win32_Processor
$totalProcs = $procs.Count
$totalCores = 0
#count the total number of cores across all processors
foreach ($proc in $procs)
{
$totalCores = $totalCores + $proc.NumberOfCores
}
#get the amount of total memory (MB)
$wmi = Get-WmiObject Win32_OperatingSystem
$totalMemory = ($wmi.TotalVisibleMemorySize / 1024)
This section of code creates an array of Win32_Processor WMI Objects. This array will contain one instance for each physical processor (socket) that is present on the system. Next, we will loop through the array, counting the number of cores on each processor. This will give us a count of the total number of cores in the system. This count ignores hyper-threading, which would otherwise provide an undesired result. We then use the Win32_OperatingSystem object to give us the TotalVisibleMemorySize value, which corresponds to the amount of memory that is seen by the operating system. This will prevent our calculation from being thrown off when a system has more physical memory than the operating system can use (such as a 32-bit system with 4 GB of RAM).
Calculating the Number of Files Needed
Now we need to take the values that we have obtained and apply them along with the parameter options passed in originally so that we can determine how many data files we should create and what size they should be. To accomplish this we will use the following formulas:
File Count = Number of Cores * Core Multiplier
File Size = Total Memory / File Count
This basic logic will work for most cases, but we should add some additional logic to handle those situations where the resulting values are too large or too small. My chosen implementation can be viewed in the following example.
#calculate the number of files needed (= number of procs)
$fileCount = $totalCores * $coreMultiplier
if ($fileCount -gt $maxFileCount)
{
$fileCount = $maxFileCount
}
#calculate file size (total memory / number of files)
$fileSize = $totalMemory / $fileCount
if ($fileSize -gt $maxFileInitialSizeMB)
{
$fileSize = $maxFileInitialSizeMB
}
Building the SQL Command
Finally, we take values that were calculated previously and use them to build the actual T-SQL script.
#build the sql command
$command = “
declare @data_path varchar(300);
select
@data_path = replace([filename], ‘.mdf’,”)
from
sysaltfiles s
where
name = ‘tempdev’;
ALTER DATABASE [tempdb] MODIFY FILE ( NAME = N’tempdev’, SIZE = {0}MB , MAXSIZE = {1}MB, FILEGROWTH = {2}MB );
“ -f $fileSize, $maxFileGrowthSizeMB, $fileGrowthMB
for ($i = 2; $i -le $fileCount; $i++)
{
$command = $command + “
declare @stmnt{3} nvarchar(500)
select @stmnt{3} = N’ALTER DATABASE [tempdb] ADD FILE ( NAME = N”tempdev{3}”, FILENAME = ”’ + @data_path + ‘{3}.mdf” , SIZE = {0}MB , MAXSIZE = {1}MB, FILEGROWTH = {2}MB )’;
exec sp_executesql @stmnt{3};
“ -f $fileSize, $maxFileGrowthSizeMB, $fileGrowthMB, $i
}
return $command
The script output is really a batch that consists of a statement that gets the path to the current tempdb data file, a statement that resizes the current tempdb data file, and when necessary, a group of statements to create the additional files. This output can now be pasted into SQL Management Studio or loaded into a variable and passed to another Windows PowerShell function such as Invoke-SqlCmd or Invoke-SqlCmd2.
Using the Function
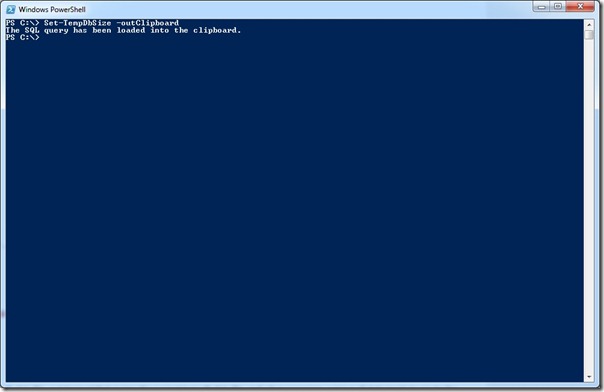
There are a couple of different ways to use this function, based on your personal preference. The simplest path is to call the function by using the outClipboard switch, and then pasting it inside your query editor of choice. This is shown in the following image.
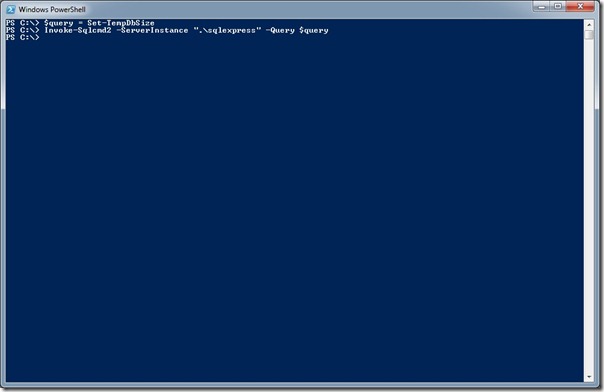
The other option is to create a local variable to hold the result, and then pass it to another function like Invoke-SqlCmd2 as shown in the following image.
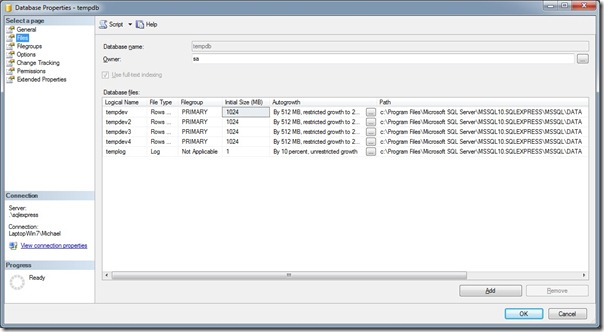
Whichever method you chose, when you run the statement against your SQL Server, you should see the following results in tempdb.
This post showed one possible solution for creating additional tempdb data files on your SQL Server instance by using Windows PowerShell. The Set-TempDbSize function can be adapted and customized based on your organization’s standards.
If you are unsure as to whether you should increase the number of tempdb files in your situation, I recommend that you look into the sys.dm_io_virtual_file_stats dmv. You can also learn more about how to decide the appropriate number of tempdb data files and the many factors that you should take into consideration by reading this detailed blog post from Paul Randal.
Thank you, Michael, for writing this excellent and useful guest blog.
WM, that is all there is to using Windows PowerShell to create easily multiple tempdb files on SQL Server. SQL Guest Blogger week will continue tomorrow when Yan Pan will talk to us.
I invite you to follow me on Twitter and Facebook. If you have any questions, send email to me at scripter@microsoft.com, or post your questions on the Official Scripting Guys Forum. See you tomorrow. Until then, peace.
Ed Wilson, Microsoft Scripting Guy


0 comments