Summary: Install the PSCX and get 80 new cmdlets to ease Windows PowerShell use.
![]() Hey, Scripting Guy! You have been spending quite a bit of time recently talking about functions and modules and the like. What is the big deal, and where would I find such modules?
Hey, Scripting Guy! You have been spending quite a bit of time recently talking about functions and modules and the like. What is the big deal, and where would I find such modules?
—KF
![]() Hello KF,
Hello KF,
Microsoft Scripting Guy Ed Wilson here. Things are pretty exciting around the Scripting House. It seems like the roofers are nearing completion of their project of repairing the storm damage we had, and our solar heater for the swimming pool is working out great. But the most exciting things are the summer speaking engagements I have coming up. The Scripting Wife and I are getting ready for my presentation to the Columbus Ohio Users Group meeting on Thursday, July 21. On Saturday, we will be in Wheeling West Virginia for SQL Saturday. Before that on July 20, I am speaking at the Virtual PowerShell group. On Sunday I head to Seattle where I will be speaking at the TechReady conference. Sound confusing? You can keep up with it all the same way I do: check out the Community Page to see where you can catch the Scripting Guys either in person or at a virtual meeting.
KF, because I am going to be spending so much time in front of the community in the next few weeks (I did not even mention the trip to Corpus Christy, Texas, or SQL Solstice in Raleigh), I thought it would be great to answer your question by using a community driven project. The PowerShell Community Extensions (PSCX) project is a great example of community-driven modules. I have mentioned the PSCX previously, and have even had a guest article written by Microsoft PowerShell MVP Keith Hill that talked about the project.
One thing to keep in mind is that by default, the user location for Windows PowerShell modules does not exist. That location can be in one or two places depending on the version of the operating system. On Windows Vista and later, it is in the Documents folder, but on Windows Server 2003 and before, it is in the My Documents folder. This is illustrated in the following lines of code:
$VistaPath = “$env:userProfile\documents\WindowsPowerShell\Modules”
$XPPath = “$env:Userprofile\my documents\WindowsPowerShell\Modules”
The user location on a Windows 7 computer appears in the following figure. Keep in mind that the folder is not present because no user modules have been copied to this machine yet.
One thing that can be confusing is that by default, the Get-ChildItem cmdlet (dir is an alias) does not display hidden or system files. This can cause misleading results when Explorer is set to display hidden and system files, and the force parameter is not used. The two different views of the folder are shown here:
PS C:\> dir $HOME\documents
Directory: C:\Users\ed.IAMMRED\documents
Mode LastWriteTime Length Name
d—- 7/5/2011 12:53 PM SnagIt Catalog
d—- 6/7/2011 3:04 PM Visual Studio 2010
PS C:\> dir $HOME\documents -Force
Directory: C:\Users\ed.IAMMRED\documents
Mode LastWriteTime Length Name
d—hs 7/3/2011 7:37 PM My Music
d—hs 7/3/2011 7:37 PM My Pictures
d—hs 7/3/2011 7:37 PM My Videos
d—- 7/5/2011 12:53 PM SnagIt Catalog
d—- 6/7/2011 3:04 PM Visual Studio 2010
-a-h- 7/13/2011 3:21 PM 1984 Default.rdp
-a-hs 7/3/2011 7:37 PM 402 desktop.ini
PS C:\>
As I mentioned in a previous article, my Copy-Modules script is not optimized to work with projects that include multiple types of files (such as .dll and .exe). I created it specifically to aid in the installation of simple module files. Therefore, my Copy-Modules script will not install the PSCX properly. However, a simple Copy-Item command will accomplish this (the following command is a single command; I added the backtick character to continue the command on the second line, but normally, you would not need to continue this command on a second line):
Copy-Item E:\Downloads\pscx -Destination `
$env:userProfile\documents\WindowsPowerShell\Modules -recurse
When installing the PSCX, keep in mind you need to unblock the .zip file that you download from CodePlex. This Scripting Wife article talks about unblocking files. As a quick point of reference, a file downloaded from the Internet Zone is blocked from executing. In Windows 7, right-click the file, choose Properties from the shortcut menu, and click the Unblock button. The Unblock button is shown in the following figure.
Speaking of unblocking files, the PSCX has the Unblock-File cmdlet. To use it, you provide a path to the file that needs to be unblocked, as shown here:
Unblock-File G:\Pscx-2.0.0.1.zip
When the above command runs, the Unblock button no longer appears on the Properties tab, as shown in the following figure.
Of course, the Unblock-File cmdlet is not available until you install the PSCX. How did I find that command? After the module is installed, I use the listavailable switch from Get-Module to ensure it was installed properly. I then use the Import-Module cmdlet to import the module. Next, I use the Get-Command cmdlet with the module parameter. These three commands are shown here:
Get-Module –ListAvailable
Import-Module pscx
get-command -Module pscx
After I have a feel for what a module offers, I might choose to only display the cmdlets:
get-command -Module pscx -CommandType cmdlet
Why do I like PSCX so much? For one thing, it offers 87 cmdlets (I used the following command to find out that bit of trivia):
get-command -Module pscx -CommandType cmdlet | Measure-Object
For another thing, the cmdlets are cool, and the project itself is a great model of community participation and cooperation to fill a real need.
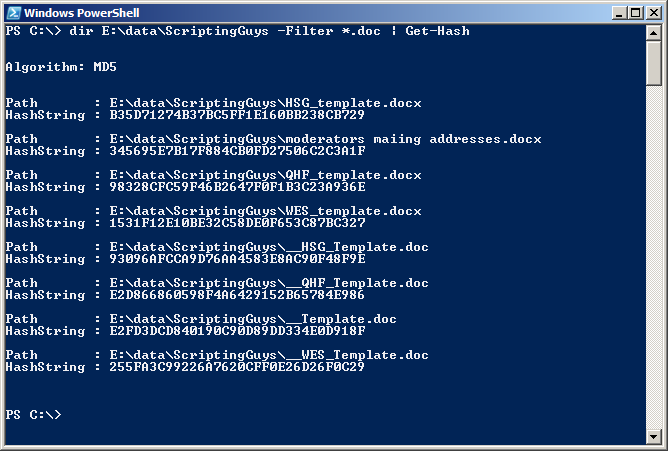
Anyway, KF, here are a couple of things I have found to be useful. One of the things I like to do is to generate a hash. The Get-Hash cmdlet is useful for doing such a thing. It will generate an error if you attempt to generate a hash of a directory, but you can get around that pretty easily by using a filter. The following command gets a directory listing, and filters all files (and folders) that do not match the *.doc filter. I then pipe those files to the Get-Hash cmdlet where a hash generates:
dir E:\data\ScriptingGuys -Filter *.doc | Get-Hash
The command and associated output are shown in the following figure.
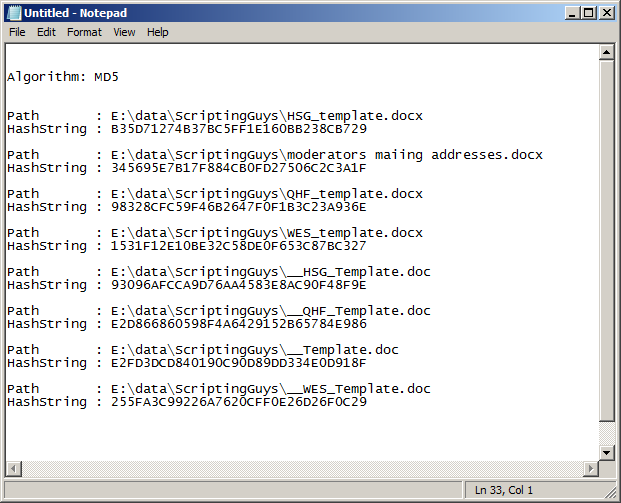
But wait, there’s more! I get tired of mousing around and copying stuff to the Clipboard, so I can paste it into Notepad. What if I pipe the results of the Get-Hash cmdlet to the Set-Clipboard cmdlet? While I am at it, why don’t I go ahead and open Notepad so I can paste directly with Ctrl+V? Oh, yeah, that’s the ticket. Here is the command:
dir E:\data\ScriptingGuys -Filter *.doc | Get-Hash | Out-Clipboard;notepad
The following figure shows Notepad with the hash information pasted in it.
KF, that is all there is to using the PowerShell Community Extensions. Community Week will continue tomorrow when I will talk about more fun with community modules.
I invite you to follow me on Twitter and Facebook. If you have any questions, send email to me at scripter@microsoft.com, or post your questions on the Official Scripting Guys Forum. See you tomorrow. Until then, peace.
Ed Wilson, Microsoft Scripting Guy


0 comments