Summary: Microsoft Scripting Guy, Ed Wilson, shows how to query multiple WMI classes with Windows PowerShell and return a single object.
 Hey, Scripting Guy! I have this script that I have been working on for a while. It queries three different WMI classes. The first two classes are no problem because they only return a single item—for instance, information about the computer or the operating system. But the last class returns information from the disk drives. I have multiple disk drives; therefore, as my script is written now, I keep repeating the computer and the operating system information over and over. I know I am doing something wrong, but I am not sure what to do. Please help.
—FB
 Hello FB,
Microsoft Scripting Guy, Ed Wilson, is here. Today has been one of those days. You know the kind of day: an early morning meeting before breakfast, several meetings in the afternoon, and then another meeting after supper in the evening. Yep, a day’s worth of meetings always offers unique opportunities and challenges.
Between meetings, I check email that comes to scripter@microsoft.com. Personally, I do not check email during meetings because I consider it rude to the presenter. But maybe that is just me. If I attend a meeting, I feel that I should pay attention—or else I do not need to be in the meeting in the first place.
Hmm… something on the forums
FB, interestingly enough, there is a question similar to yours, but not exact, on the Official Scripting Guys Forum. Your problem is that you are trying to create a single object from within your script, yet you are returning multiple objects. In addition, your operating system information and your computer information is a single object, but you have multiple objects that represent your disk drives. This results in a ragged object. The way your script currently works, everything is inside the loop, and you return the same information multiple times. The key is to use Begin, Process, and End in your script.
Begin at the beginning
The Begin section of a script runs one time. This is a great place to put things that you want to use to initialize the script—or things that you do not need to process after you receive the information. In this script, I perform two WMI queries and create a hash table. The two WMI queries obtain computer and operating system information. The hash table is to be used to create a custom object at the end of the script. The Begin keyword accepts a script block (delimited by a pair of curly brackets).
Begin {
[wmi]$os = Get-WmiObject -Class win32_operatingsystem
[wmi]$cs = Get-WmiObject -Class win32_computersystem
[hashtable]$osProperties = @{
‘OSVersion’=$os.version;
‘OSBuild’=$os.buildnumber;
‘SPVersion’=$os.servicepackmajorversion;
‘Model’=$cs.model;
‘Manufacturer’=$cs.manufacturer;
‘RAM’=$cs.totalphysicalmemory / 1GB -as [int];
‘Sockets’=$cs.numberofprocessors;
‘Cores’=$cs.numberoflogicalprocessors;
‘SystemType’=$cs.SystemType}}
Process stuff
The Process portion of the script runs one time for each object it must process. If there are no objects, the Process section does not run. In this portion of the script, the drives return an array of drive objects. The size, the freespace, and the percent of utilization become custom properties on the objects. This is the script that accomplishes this portion of the task:
Process {
[array]$disks = Get-WmiObject -Class win32_logicaldisk -filter ‘drivetype = 3’ |
Select-Object -Property `
@{L = ‘size’; E = {[math]::Round($_.size /1gb,2)} } ,
@{L = ‘free’; E ={[math]::Round($_.freespace /1gb,2)}},
@{L = ‘percent’; E = {[math]::Round(($_.freespace/$_.size)*100,2)}} }
The end
The End keyword, like the Begin keyword, specifies the section of the script that runs one time. This time, however, the section runs one time after the process section. The hash table created in the Begin section is now used to add the disk information to the object. Finally, a new PSCustomObject is created and the properties added. This is the script that accomplishes this task:
End {
[hashtable]$osproperties.Add(‘disks’,$disks)
New-Object -TypeName PSCustomObject -Property $osProperties }
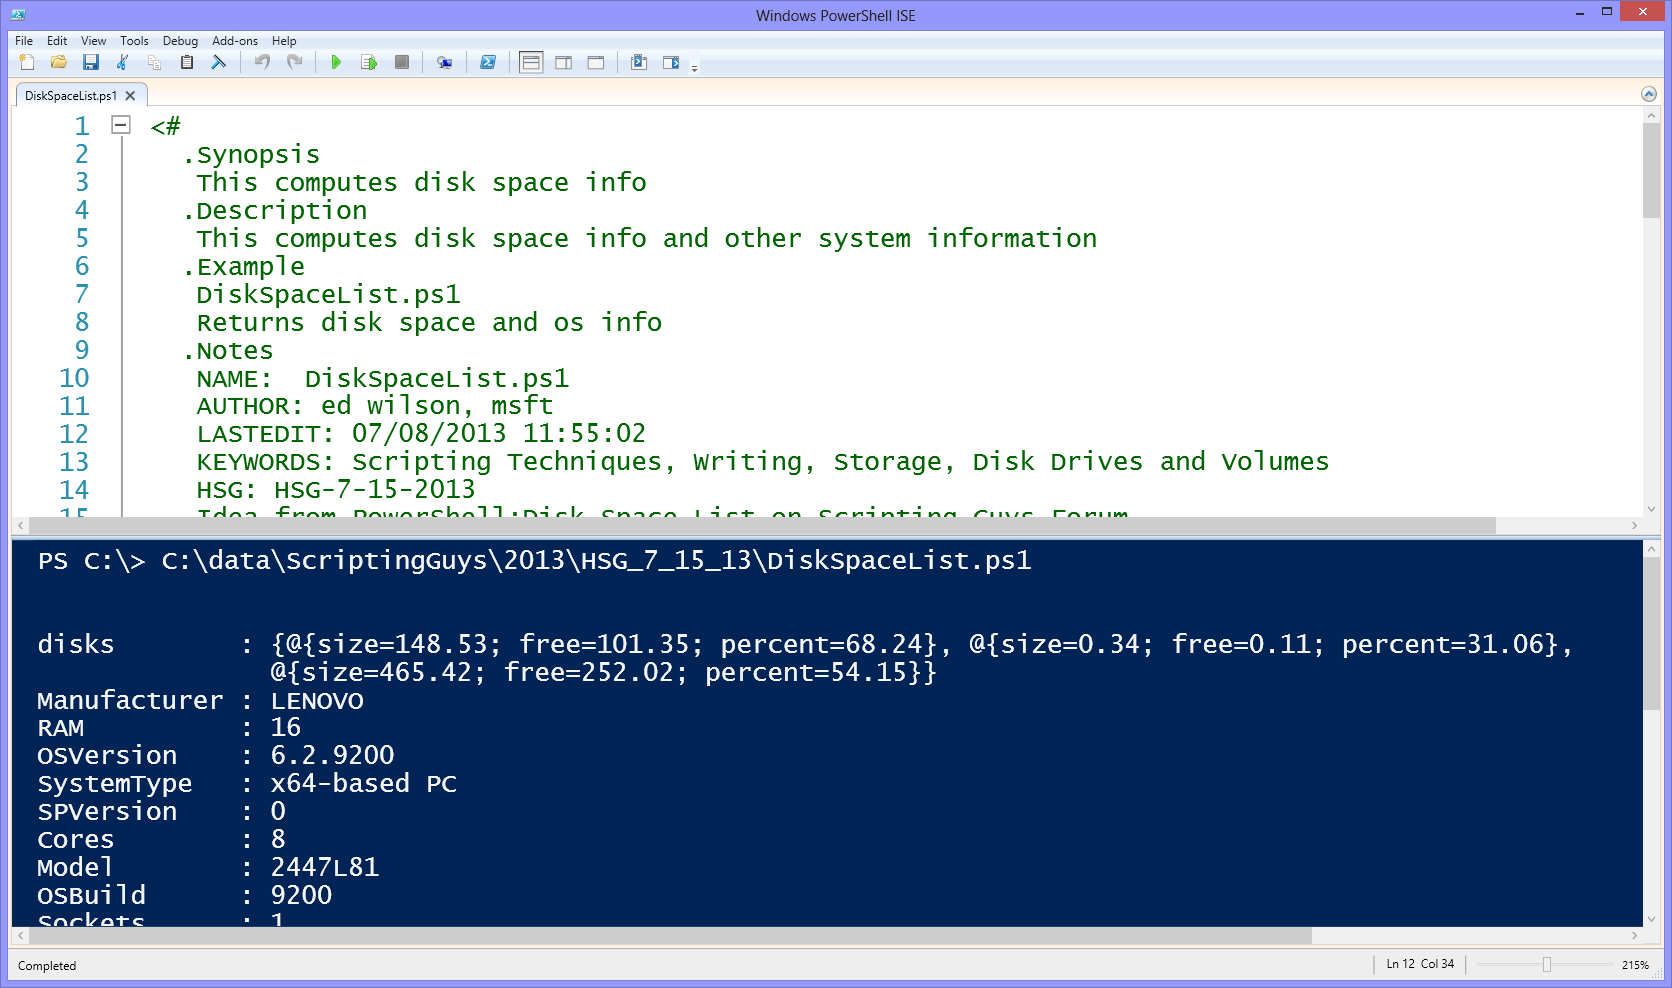
When the script runs, the following results appear:
FB, that is all there is to using multiple WMI classes in the same script. Join me tomorrow when I will talk about more cool Windows PowerShell stuff.
I invite you to follow me on Twitter and Facebook. If you have any questions, send email to me at scripter@microsoft.com, or post your questions on the Official Scripting Guys Forum. See you tomorrow. Until then, peace.
Ed Wilson, Microsoft Scripting Guy


0 comments