

Chris Tjoumas explores the power and flexibility of Azure Service Bus through some fun with Fantasy Football.
For the past 15 years, I’ve been playing fantasy football and probably spend too much time each Sunday during the regular season watching every single game. Rather than trying to convince me to do other things such as finish my home improvement projects or visit a winery (rather than football?!?), my wife decided to join me instead and she created her own women’s league. After several years, her league disbanded, but to keep her and I sharing this hobby of mine, she said that I should create a head to head fantasy app so we can draft teams each week and play against each other. So that’s what I did. I started with the Yahoo Fantasy Sports API, which provides a ton of information, but it doesn’t provide live fantasy points for players. I then proceeded to build my own Azure web app based on scraping stats from HTML scoreboard pages. Over several iterations, I had a fairly robust head to head scoring app which we were able to use each week – and each week we’d have other features we wanted to see added. The latest feature being added is the ability to get alerted when a player on your team scores a touchdown. Since the season ended, it’s been on the backburning, but while recently preparing for the Exam AZ-305: Designing Microsoft Azure Infrastructure Solutions, I realized that Service Bus would be a perfect solution for this feature.
As with any solution that you are architecting, you need to consider your use case and choose the right option. In a communication architecture, you could be looking at messaging (Service Bus) or eventing (Event Grid). The first thing to understand is the difference between a message and an event. With a message, you have raw data produced by a component (my web app), which will be consumed by another component (yet to be determined); with an event, you have a lightweight notification that an event occurred, but it doesn’t have the data that triggered the event. These two options directly map to Service Bus as the message broker and Event Grid as the eventing backplane. Let’s quickly explore each service.
With Event Grid, you have a publish-subscribe model where a publisher such as my app will produce events, and subscribers, such as an Azure Function, will receive these events. Event Grids have a concept of topics, which are basically buckets of different types of events where the publisher decides to send events. Subscribers will subscribe to a topic so when an event occurs, it can handle that event accordingly. Remember, there are no details of the event, just that an event occurred. In my web app example, it would be something such as “a touchdown was scored” rather than “<player name> has scored a touchdown in <game>, bringing the score to <game score>”. Since I wanted the message details, I knew Event Grid wasn’t what I wanted.
With messaging solutions, we have Azure Queue storage and Azure Service Bus. At a high level, Azure Queue storage is limited by the capacity of the storage account that it is using. This is ideal for storing over 80 GB of messages in a queue which your application will poll. Service Bus is intended to be used by applications which need to receive messages without having to poll the queue as well as a guaranteed first-in-first-out (FIFO) ordered delivery. There are two options we can use – Service Bus Queues and Service Bus Topics. The difference is that Service Bus Queues are use the aforementioned FIFO concept where there is a 1:1 relationship between messages and subscribers while Service Bus Topics, similar to Event Grid Topics, allow for a 1:n delivery of messages where there can be multiple subscribers for a topic and a copy of a message is created for each subscriber. A Service Bus queue fits my current use case as I will have only one thing I’m doing – receiving messages when a player scores a touchdown. If I were to maybe want to take this data and store touchdown totals for players so that I could build a separate page showing all players drafted through the year and their performance data for some type of visual analysis, I could have a separate consumer and service bus topics would make sense here. But for now, I’m going to go with one consumer and build out an example with Service Bus queues.
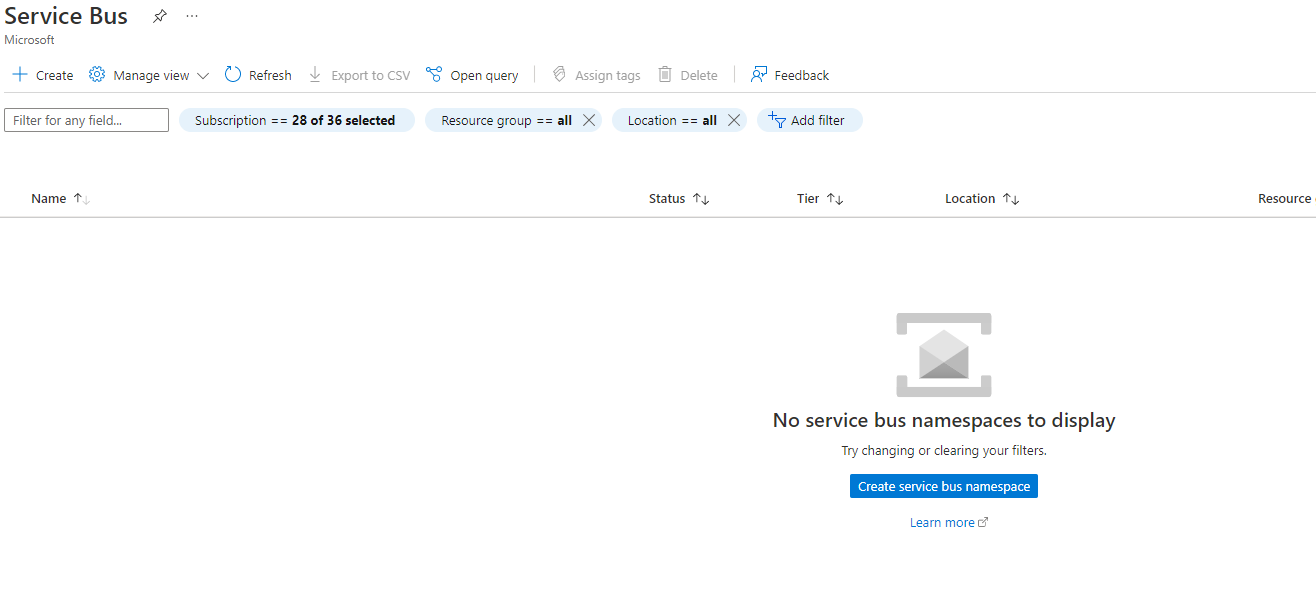
The first thing I will want to do is create a Service Bus. To do that, we need a namespace which provides a scoping container for addressing Service Bus resources in my app. In the search, when I type in Service Bus and select it, I’m prompted to create a service bus namespace:
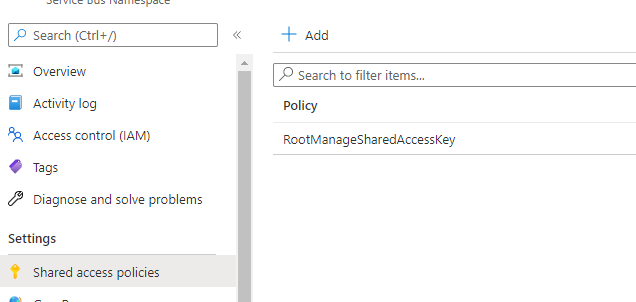
When filling this out, you must have a unique namespace name across Azure and you have to decide on the pricing tier. If I were to use topics and subscriptions, I would need to choose the Standard or Premium tier. However, since I’m not going to do that, I’ll just go with the Basic tier. This provides 1M operations per month, which is more than I’ll need. Everything else can be left default, so I can just review and create the namespace. Once it completes, I click the Go to resource button to get to the home page for my service bus namespace. In order to send messages to the service bus, I’ll need the connection string. To get this, I’ll need to go to Shared access policies on the left, and then click on the RootManageSharedAccessKey policy.
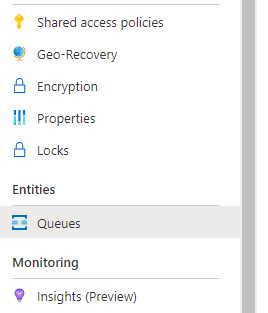
Once I click on this, the SAS Policy will pop out on the right where I can copy the Primary Connection String and save this in a temporary location. Now I can create my queue. Back in the service bus namespace, there is Queues. I’ll click on this and click + Queue to create my queue.

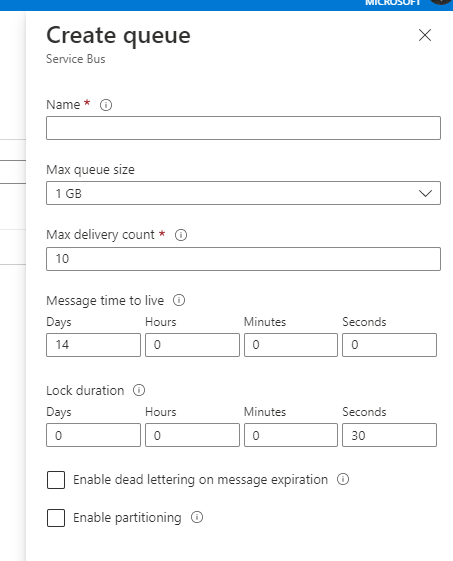
I’ll just fill out a name for the queue and leave all of the defaults as is. Note that this is all part of asynchronous messaging which decouples systems, so there is a Message time to live, indicating that the messages will sit in the queue waiting to be consumed for 14 days in this case. Technically, I only need one day since I’m using this for live games and I really want it to act as quickly as possible, but I’ll keep it at the default and click create. Now I’m all set to start sending messages to my queue!
To send messages to the queue, I’ll create a simple console app. Once I successfully test the app and am able to send messages to the service bus, I can then update my fantasy football app code to send messages to the queue when a player scores a touchdown. I’ll go to Visual Studio 2022 and create a new C# Console App using .NET 6.0. In the new project, I’ll use the NuGet package manager to install Azure.Messaging.ServiceBus for the solution. Rather than duplicating what is already nicely written, you can follow the code sample here. I’ll only need to grab my primary connection string for my queue mentioned earlier as well as the name of the service bus queue and set those to the corresponding properties, which will allow me to create the ServiceBusClient and ServiceBusSender. In the example, there are a couple of important things to note:
- The ServiceBusClient should be used as a singleton for the lifetime of the application, which is a best practice when messages are being published or read regularly
- You need to dispose of the sender and client in order to clean up the network resources
- We run this using asynchronous operations. This should be done with send, receive, and delete operations because there is latency involved in the request and response, so we want these operations to be executed concurrently.
- The messages are sent in batch, which is another best practice to increase the throughput of the queue.
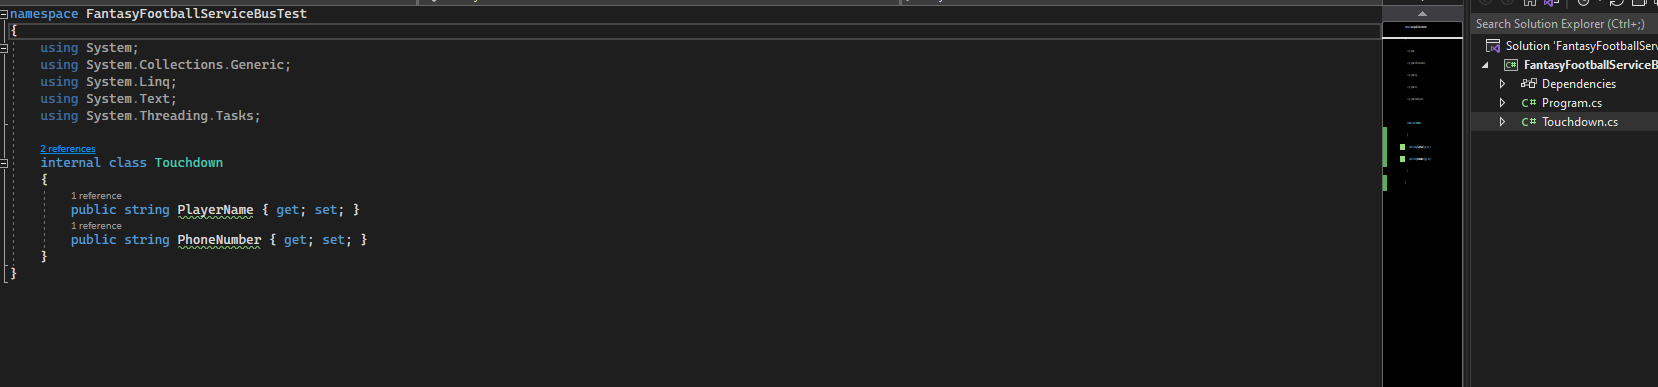
The one thing I added was creating a specific payload in my messages. For now, I want to send in the name of the player who scored the touchdown as well as the phone number of the team manager who has this player so a text message can be sent. To do this, I created a separate class:
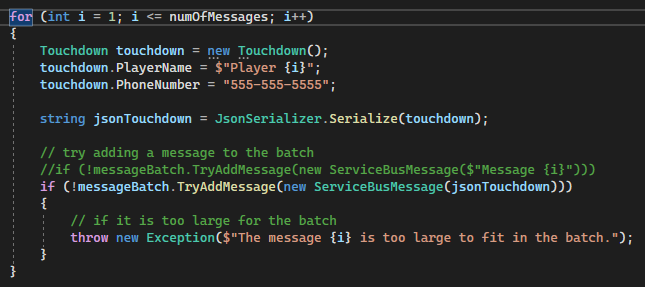
Then in the sample code, I created the Touchdown object in the loop and serialized each one and added it to the batch:
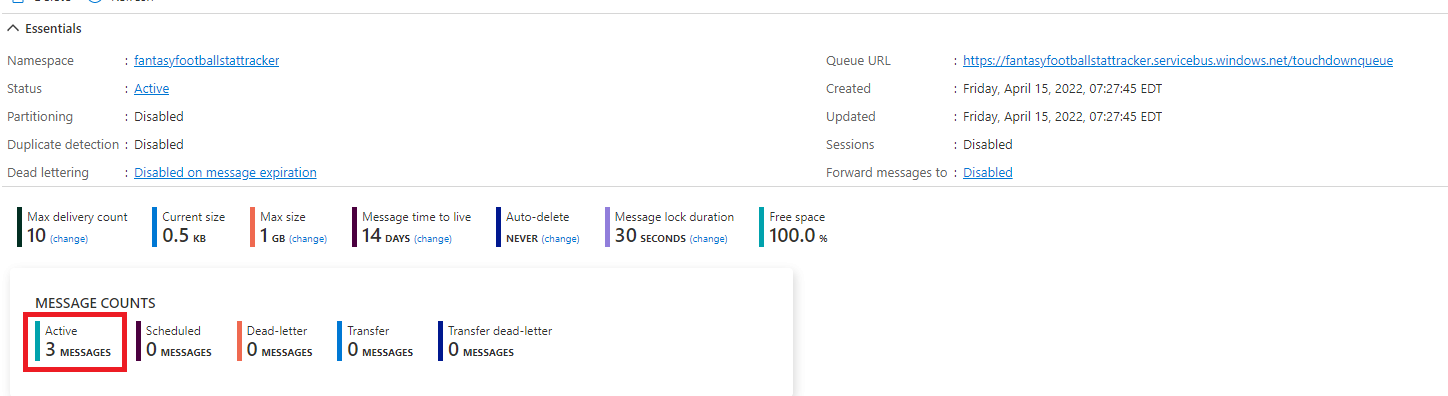
The code will send three messages to the Service Bus. Once I run the app, I can go back to my queue and see that it has three active messages:
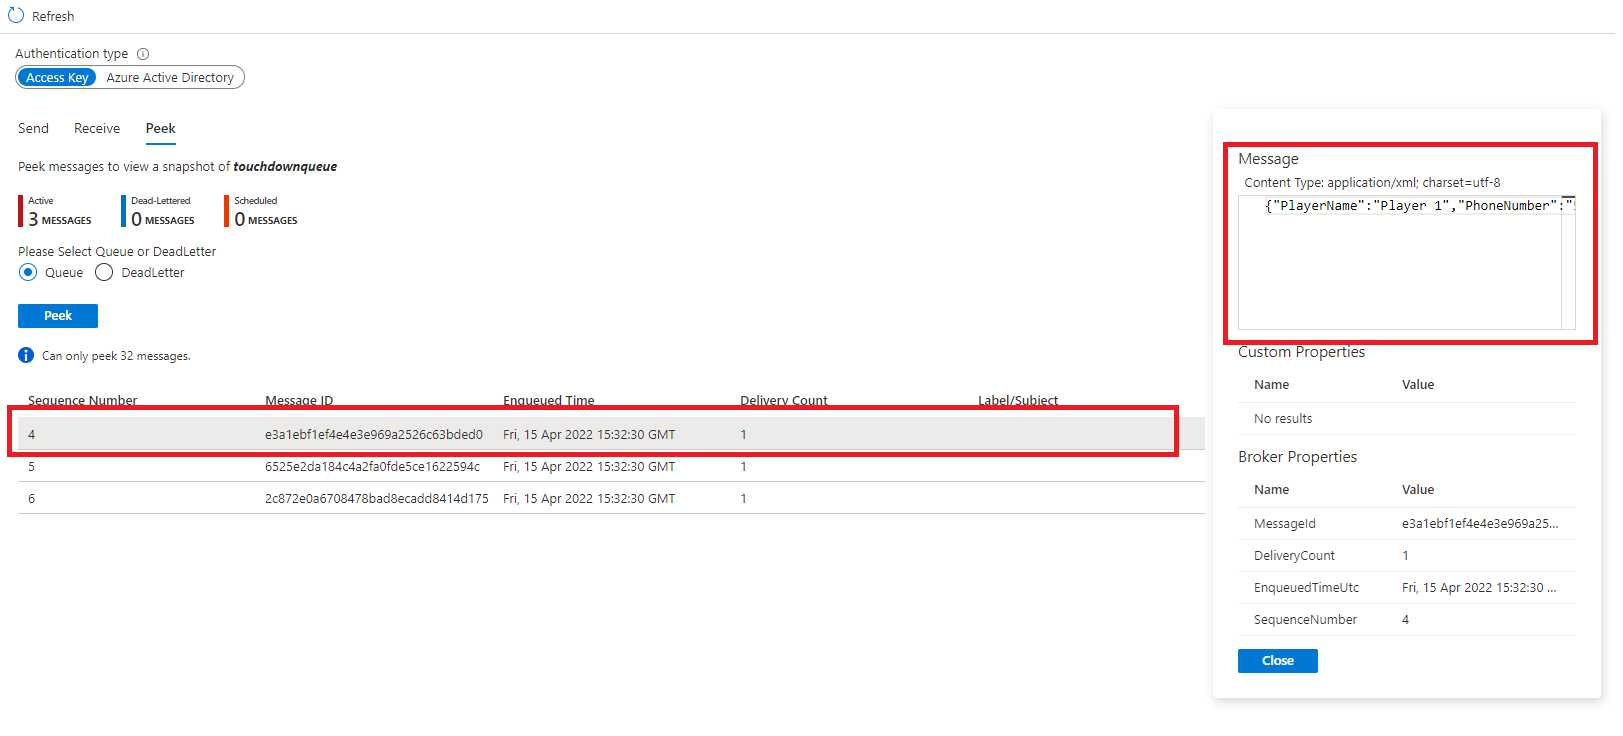
I can use the Service Bus Explorer in the portal to view these messages and verify that you have everything you need in the messages. I selected the option to Peek at the messages so they aren’t removed and you can see the JSON payload of the first message:
Now that everything is set, I’m ready to create the Logic App which will read these messages and text the appropriate team manager that their player has scored a touchdown. However, before I do this, I need to create an Azure Communication Services resource so that I can send a text message. In the portal, I can search for Communication Services and click Create resource. I’ll fill out the subscription, resource group, and resource name, and create the resource. Once it is created, I’ll go to the resource and navigate to Keys and copy the primary connection string and save this temporarily so that I can use it when sending a text message from the logic app. The only other thing that I will need to do is to get a phone number for the communication service. To do that, I’ll click Phone numbers and select Get a number. I’ll choose my region, select An application will be making calls or sending SMS messages, choose Toll-free (Local will not send SMS messages), and select Send SMS. On the next screen, I’ll select a prefix and a quantity and click Search. When the phone number appears, I’ll also copy it so that I can use this in my Logic App. I’ll click Next and complete the order.
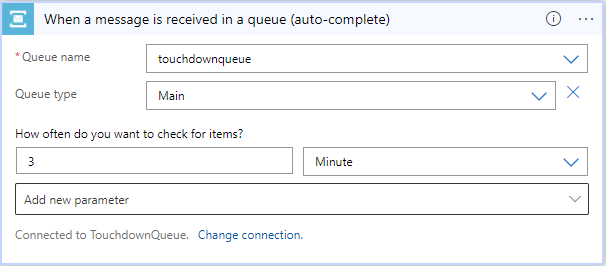
It’s time to create the Logic App. In the Azure portal, I’ll search for Logic Apps and select the option to create one. I’ll give my logic app a unique name, keep the default publish option set to Workflow, choose my region, and select my plan type. Since my workflow will not run often, I’ll select a consumption workflow and click create. Once the logic app is created, I’ll go to the resource and select the Logic Apps Designer. In the designer, at the top there is a “Start with a common trigger”; I’ll select the “When a message is received in a Service Bus queue.” This will show the Service Bus task and I’ll click the option to connect to it, which will only need to be done once. I’ll name your connection, keep the Access Key option for the authentication type, and paste in the primary connection string and click Create. Once it validates, I’ll click Continue and fill out the information on the designer such as:
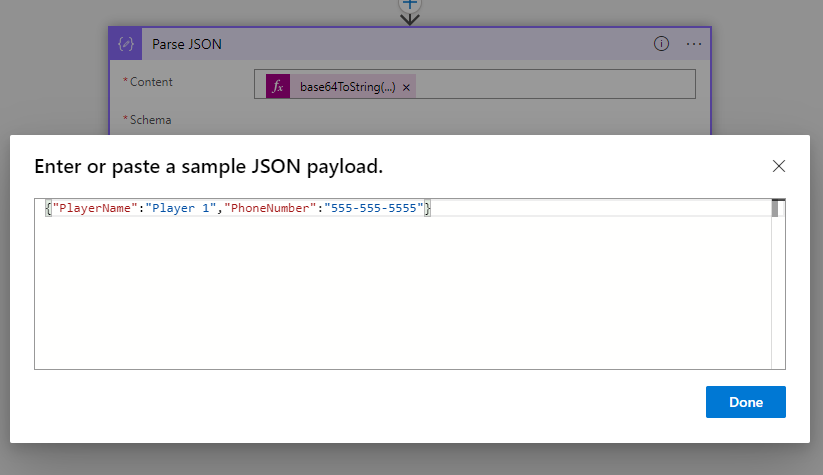
For the next step, I want to process the message, so I’ll search for “Parse JSON” and add that. For the content, we are not able to just use Content because content from Azure Service Bus is in Base64 encoded, so it needs to be converted to a string. In Content, I’ll select Expression and enter base64ToString(triggerBody()?[‘ContentData’]) and click OK. For the Schema, I’ll click the Use sample payload to generate a schema and in the popup, paste in the JSON I’m creating from the sample app, which I can get from going back to the queue and looking at one of the messages in the Service Bus Explorer using the Peek option. So, I’ll have this:
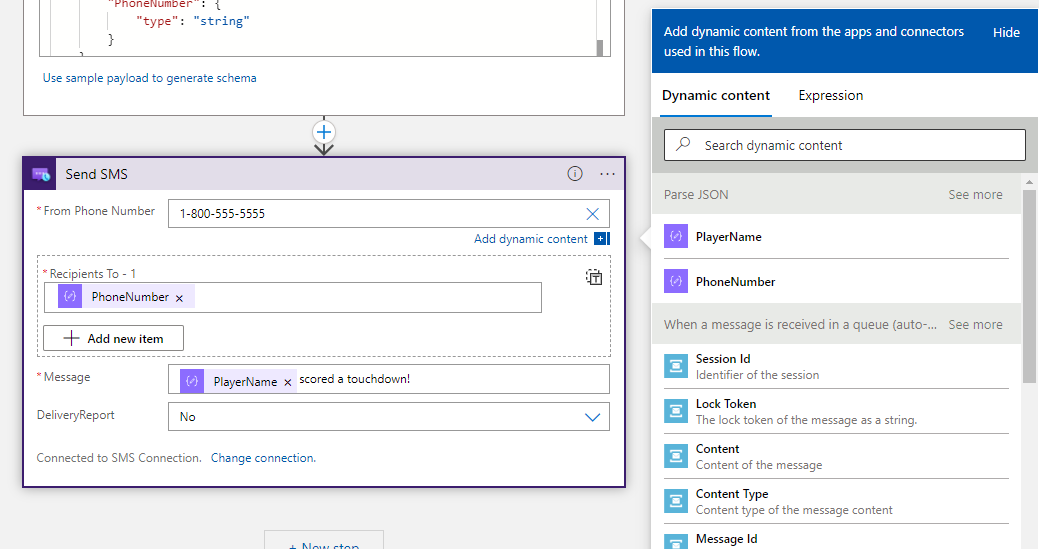
When I click Done, I’ll see the Schema in the Parse JSON function is filled out. I’ll add a new step and search for SMS and add Azure Communication Services SMS. I’ll provide a name for the connection, keep the authentication type as ConnectionString Authentication, and paste in the Communication Service resource connection string I copied earlier. Once it authenticates, I’ll be able to fill out the various fields. For the From Phone Number, I’ll paste in what I copied earlier. Then in the Recipient To and Message fields, I’m able to use the variables from the schema in the previous step. The result will look like this:
Now I can test my logic app since there are three messages in the queue. To do this, I’ll select Run Trigger 🡪 Run in the logic app to run the trigger. Once it completes, I can look at the Run history on the Overview page. Each step in the process should have a green checkmark and a text message should be sent for each message in the queue. At the time of writing this, I was having an error in ordering the phone number, so I added an e-mail option instead to check everything and verify it works properly. This logic app will continue to run and poll the service hub every three minutes, so if I were to run the sample app to send message to the queue, after three minutes, the logic app will run and process those messages.
To recap, what we did here was setup a Service Bus queue to receive messages detailing when a particular player on a fantasy football team scored a touchdown, use a logic app to receive the messages and send a text message to a fantasy football manager that their player scored, and peel back the curtain a little bit to see how much time I spend with a game about fake football. I hope you were able to get a better understanding of the differences between events and messages, when to use them, and how various Azure services can work together to make a complete messaging solution. I encourage you to explore the possibilities of Service Hub and see how you might be able to leverage its power to build your own message-based architecture!
0 comments