
Bill Bevan spotlights row-level security at the user level with Power BI.
Have you ever had to restrict data, but didn’t know how to filter per user? Using Power BI’s Row-level Security (RLS) is a great way to accomplish this. In this short blog you will be introduced to a scenario on how to do just that.
Note: The data used in this blog was downloaded from the ‘Microsoft Contoso BI Demo Dataset for Retail Industry’ that can be found here.
Implementation of this solution is done in three stages, as follows and detailed below:
- Identify source with filter criteria
- Create User Access Table with aligned filter criteria for source
- Create User Roles
- Apply RLS in Power BI Service
Identify Source
The following sample is a subset of data used for the source table example. The GeographyKey column is utilized as the initial step for enabling RLS.
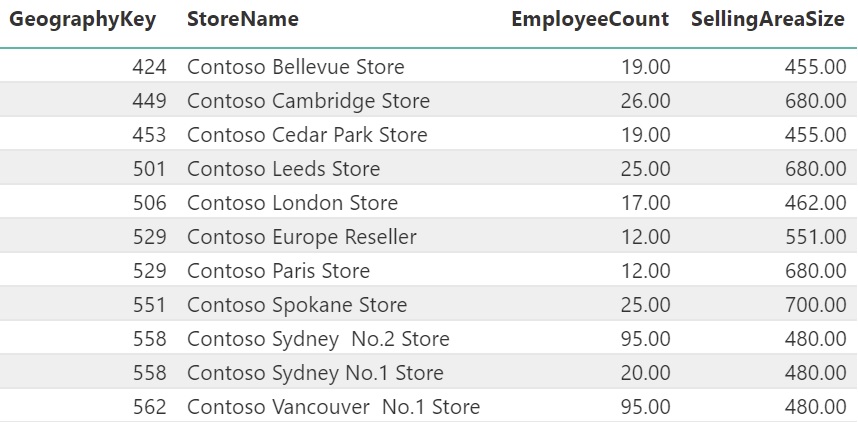
Figure 1.1 – Contoso Store Table Sample
Create User Access Table
The following table was created inside the Power Bi Desktop PBIX file to house the user profiles and their assigned GeographyKey codes. When considering what a user should see, we can look at Yolanda and see that she is assigned to GeographyKey = 424 which equates to the Contoso Bellevue Store.
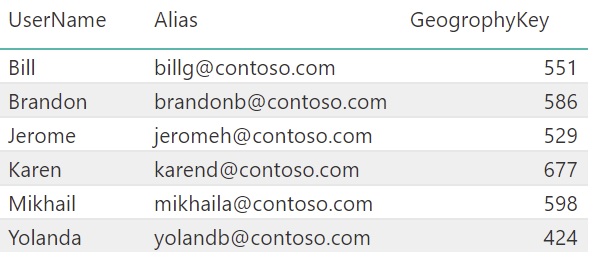
Figure 1.2 – User Access Table
Creating the Table Relationships
Within the Power BI desktop Model area, the following one to many relationship was created, specifically linking the UserTable->GeographyKey to the Stores->GeographyKey (columns).
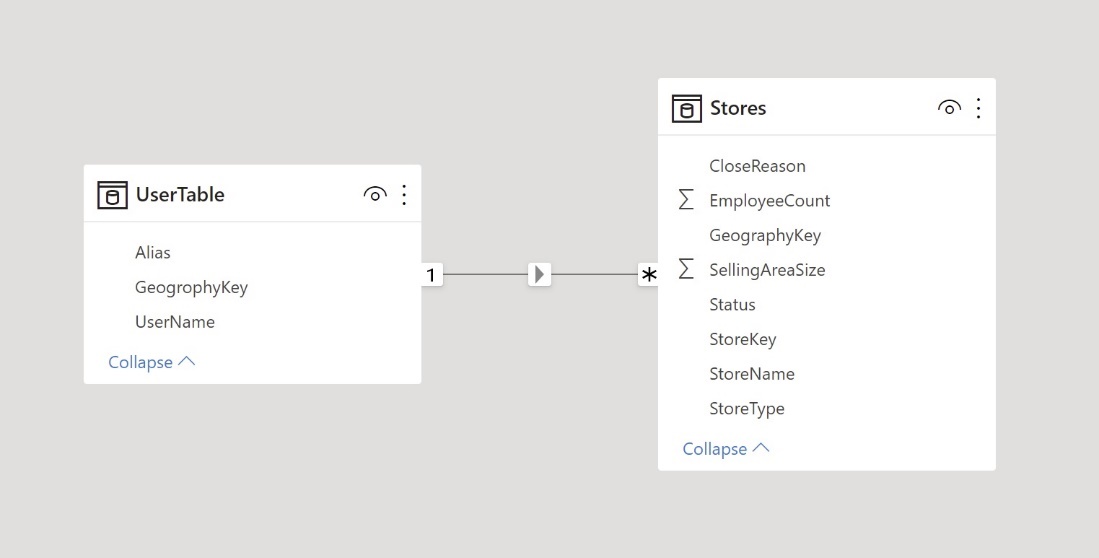
Figure 1.3 – Data Model Relationship View
Create the Role in Power BI Desktop
To get to the Managed Roles dialogue box (shown below), go to the Power BI desktop Model area and on the main ribbon select the Manage Roles button. Select Create under Roles (UserRole), Select the UserTable and insert the DAX expression shown below.
The DAX expression ties the logged in user to the Usertable. When the User principal name is called the return result is the user email domain name (as shown above in the UserTable). Once this is known, the Stores table is filtered for only the associated user’s GeographyKey.

Figure 1.5 – Power BI Service: Manage roles Dialog
Applying RLS in Power BI Service
To complete the RLS configuration, the following steps were applied:
- Published Power BI PBIX to the Power BI service
- On the Power BI Service, located the dataset associated with the published report
- Clicked on the ellipse and select ‘Security’ to get to the graphic below.
- Added the target user to the Members field and hit ‘Add’
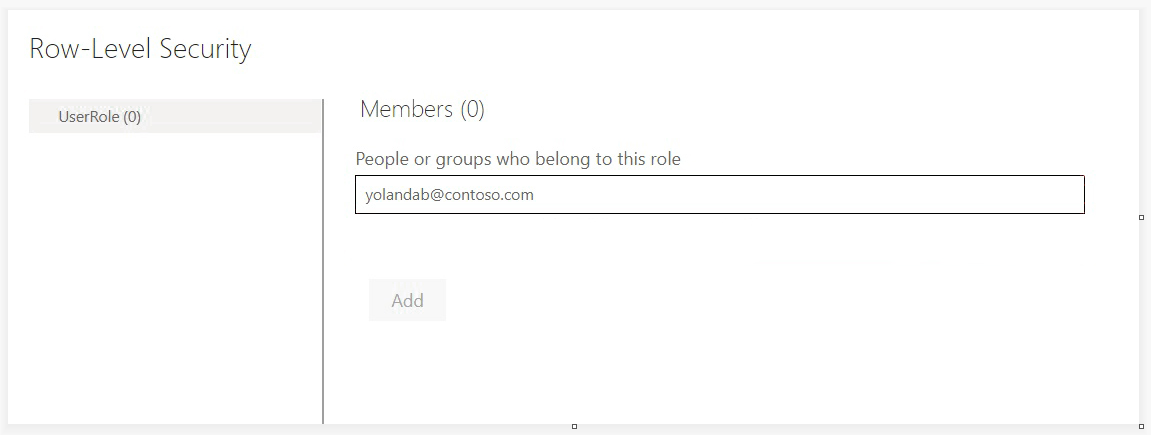
Figure 1.5 – Power BI Service: Dataset Security Dialog
Having plaintext email addresses in data is not a good thing. Is there any way to use e.g. hash or encryption/decryption to avoid potential GDPR issues?
You control the data, so you could just use the users id instead of their email address if you are using power bi embedded. if you aren’t using power bi embedded, then you should be able to use any function available within dax for that I guess, an example from
a few years back https://community.powerbi.com/t5/Desktop/Privacy-Hashing-of-keys/m-p/110574.