App Dev Manager Billy Sun shares tips on getting started with Azure DevTest Lab.
In the past, standing up a fully functional dev/test environment would take weeks if not month, which ultimately delayed team productivity. The whole progress typically would involve, initial request, IT approval and procurement, hardware shipping, software installation and configuration, etc. It is a time-consuming process even if everything goes smoothly. Here is the good news, with the advent of cloud, automation tools for Infrastructure as Code has dramatically improve this process.
Azure DevTest Lab is a SaaS offering by Microsoft that empowers development team to stand up a fully functional dev/test environment in a matter of minutes. All you need is an Azure subscription, few clicks here and there (see docs), and you are done, before your coffee gets cold! Azure DevTest lab is suitable for other purposes too. I have used Azure DevTest lab for workshops, hackathons, so that I have a standardized environment ready to be used without the need of troubleshooting machines configuration, software discrepancy, etc. With DevTest Lab, I no longer have to struggle with complicated instructions for BYOD workshop participants. Glad that I can put that to rest with Azure DevTest Lab.
Azure DevTest lab allows you to add policy to constrain OS, VM size and number of machines to be used in the lab, etc. That’s all great. However, depends on the size of the lab (number of VMs), even if you auto shutdown everything during off-hours, the storage of each .vhd (~127GB) would still incurring cost continuously. If your company has an enterprise agreement where the budget isn’t tight, this might not be a big deal. However, with just a MSDN subscription allot Azure credit, the storage cost of the .vhd can eat up your allowance quickly. Yes, you can delete all the VMs in the lab at the end of the day and add them back in the morning. For few VMs, the storage cost probably is not a big deal and even if we want to do delete/add exercise every day. What about 10, 15 or 50 VMs? That exercise can become tedious, and it defeats the whole purpose, convenience of why using the SaaS. Well, that’s what this blog is about, how to do this efficiently.
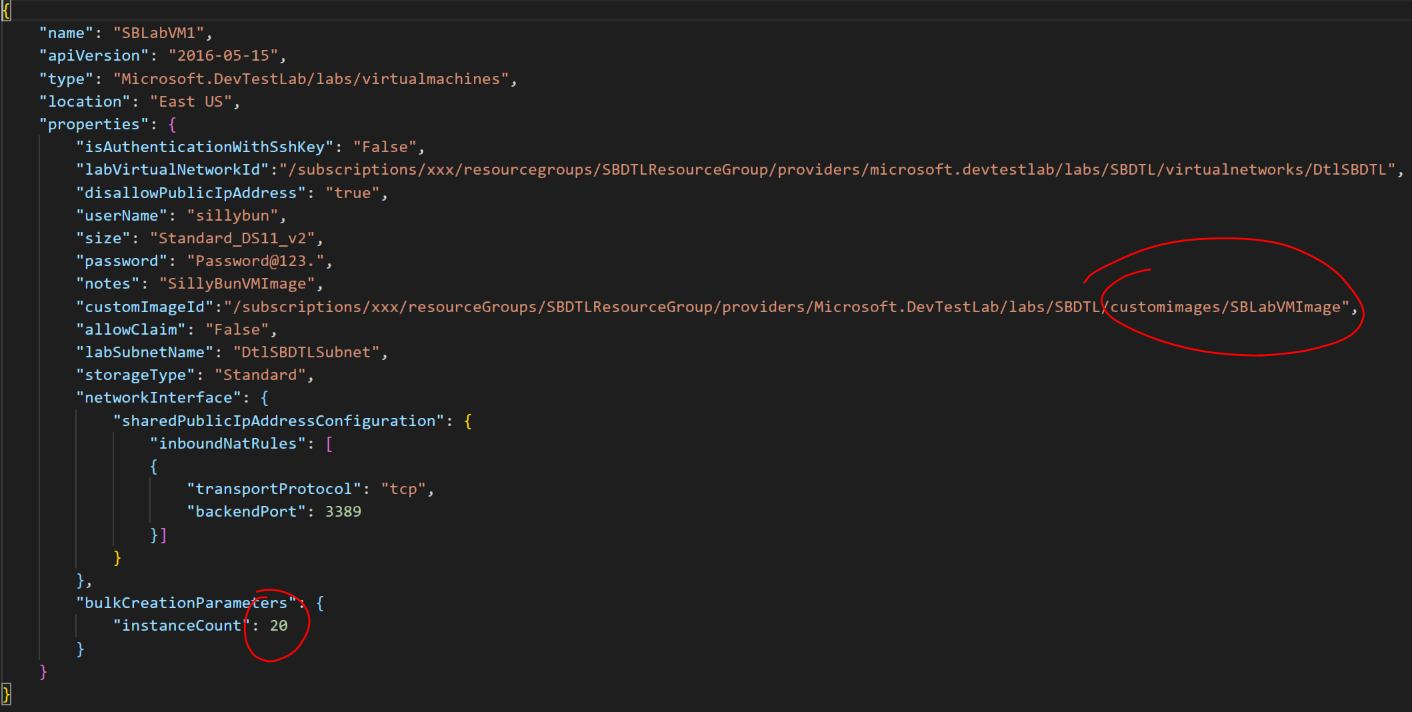
By using PowerShell script with Action, you can delete and add VMs back to the lab to reduce storage cost in a more efficient way. The cmdlet Invoke-AzureRmResourceAction accepts various type of Action. In this case, we want to use the “createEnvironment” action to create VMs in the lab. And the “createEnvironment” action requires parameters on the environment you want to create.
![]()
Parameters is in json format that defines the type of resource that you want to add to the environment. With VM, I can use the bulkCreationParameters to define the number of VMs that I want to add. In my example, I also use a custom VM image so that every VM will be provisioned the same way.

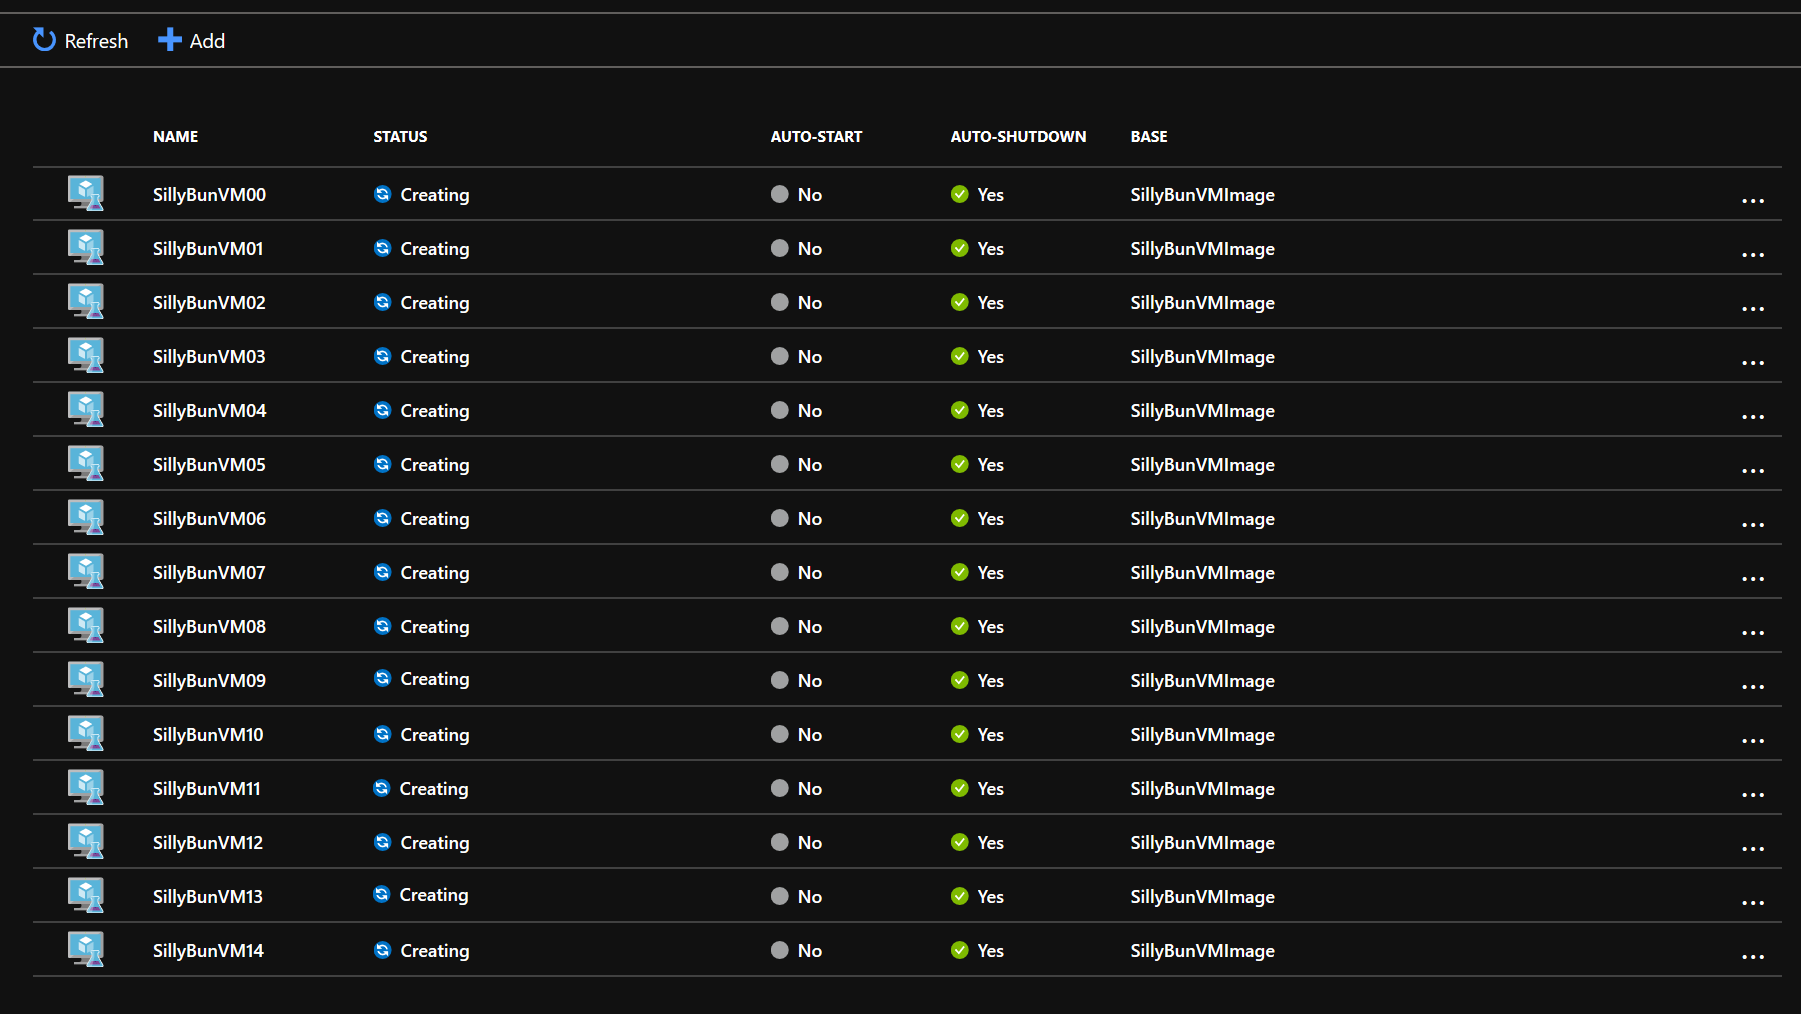
And the provisioning of VMs starts immediate and simultaneously once you kick off the cmdlet.

Once all the VMs are provisioned, you can start a loop in PowerShell script and set all the VMs with “AutoStartOn” to true.

You can even expand the script to add designated data disk to the VM. Deleting VM from the lab in bulk is even simpler. Again, using a loop you just call Remove-AzureRmResource like anything else.

Instead of running these scripts manually every day, you can schedule both the Add and Delete scripts using the Azure Scheduler or Automation.
Azure DevTest lab is a great SaaS that allow you to stand up an environment quickly. Using policy, you can control the cost of the lab effectively. If you have limited budget or credit, you might want to go beyond what the policy can provide. Removing VM disks while they aren’t being used is one of the good ways of saving the total cost of Azure DevTest Lab. I have only provided snippet of scripts that I developed. Please let me know if you would like to get a copy of the script and start saving.

0 comments