In this post, Application Development Manager, Wesam Darwish walks us through how to leverage Azure DevTest – a cost effective, consistent, and streamlined way for quickly deploying a virtual training lab in your environment.
At Microsoft Premier Support for Developers, we provide a variety of training options and a wide range of knowledge transfer sessions that cover both development technologies and processes. The educational sessions we run for our customers empower developers, help increase their expertise, and accelerate time to market while minimizing risks across various stages of the software development lifecycle. Many training sessions include hands-on labs and we provide various options for hosing these labs.
The following approach provides a cost effective, consistent, and streamlined way for quickly deploying a virtual training lab in your environment. This approach does not require each user to dedicate time for additional, tedious installations or preparation steps. This blog post provides a step by step guide to hosting a training environment using Azure DevTest Labs.
This method of running training labs provides lab creators with an option to use identical, configurable, and easily updatable virtual machines (VMs) with minimal setup time, and without requiring trainees to install any additional software aside from the standard Remote Desktop Protocol (RDP) or Secure Shell (SSH) clients. This option also allows lab administrators to control the cost of hosting the training labs by running VMs during specific times of the day, or on specific days of the week. In some cases, the basic installation of the lab VM may not require frequent updates; however, the contents of the training labs may be updated frequently, or may require specific or latest versions of software components to be installed. The following step by step guide addresses these requirements.
Deploying a Training Lab with Azure DevTest Labs
The first step is to create a base VM image that is easily configurable to accommodate the requirement for frequently updated lab content.
Creating a Configurable Base VM Image
After signing in to the Azure Portal, follow the steps below.
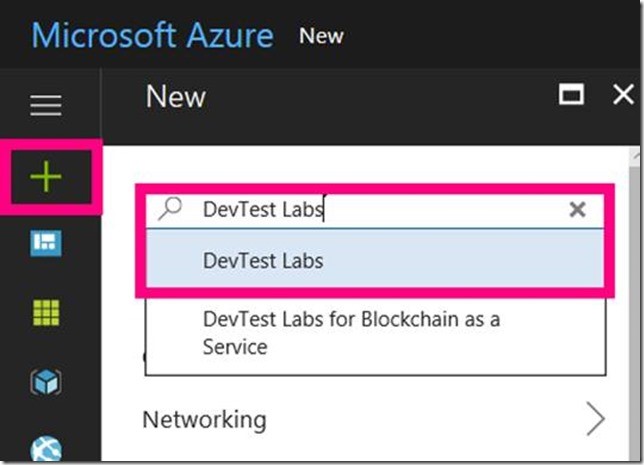
1. In the left navigation pane, click New to create a DevTest Lab. Search for and click DevTest Labs to get started.

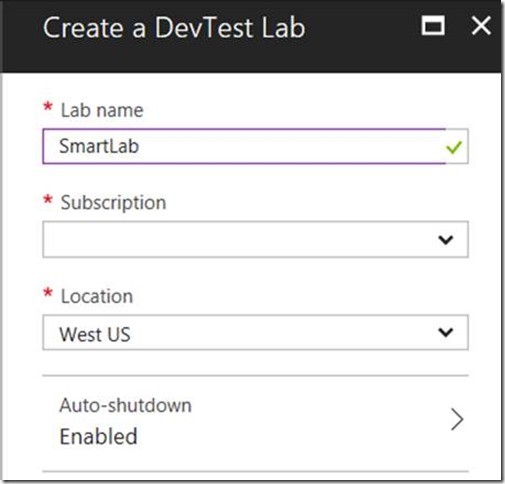
2. Provide a name, choose the desired subscription and location for the new instance, then click the Create button.
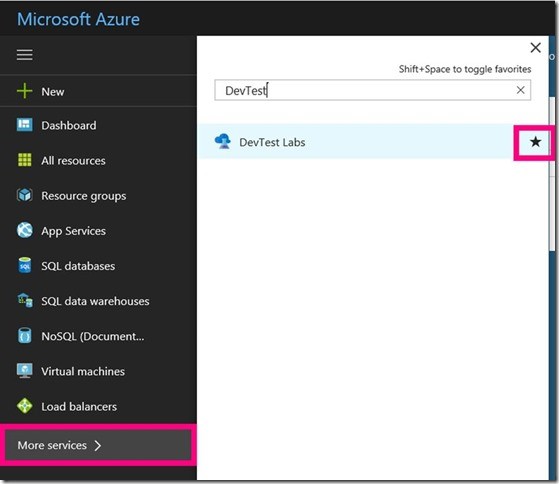
3. After the new DevTest Lab has been created, if you haven’t checked the “Pin it” option when creating it, navigate to all DevTest Labs instances. This can be done by clicking More services in the left navigation pane and searching for DevTest Labs.
Tip: Clicking the star next to DevTest Labs will make it a favorite and have it always appear in the navigation pane.
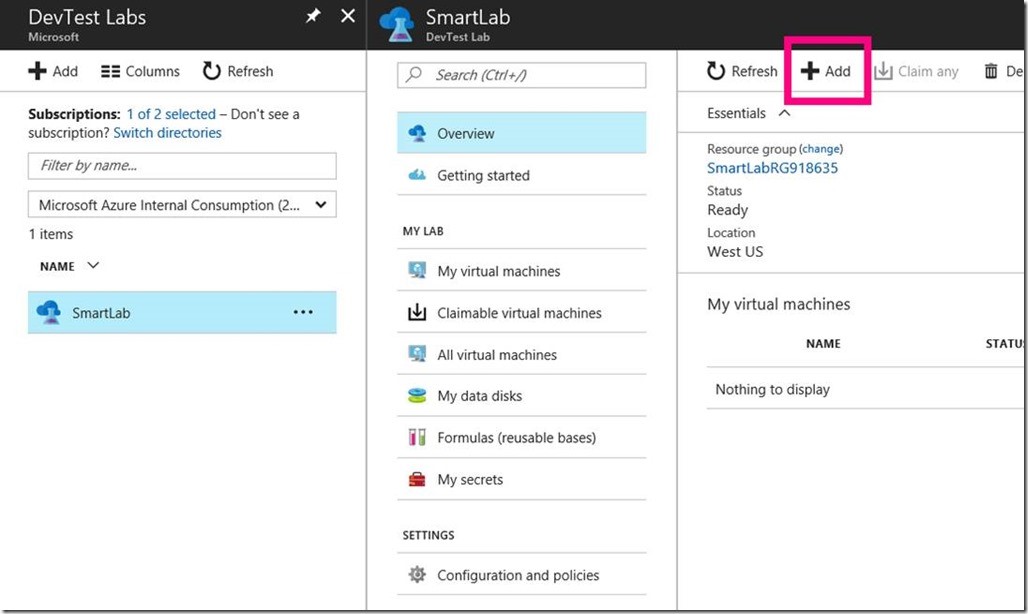
4. To start creating the base image for the training VM, in the new DevTest Lab instance blade, click the Add button.
5. Assuming we’ll be creating a Windows based training machine, we’ll search for a Windows Server 2012 R2 Datacenter image, provide basic information, and click Create
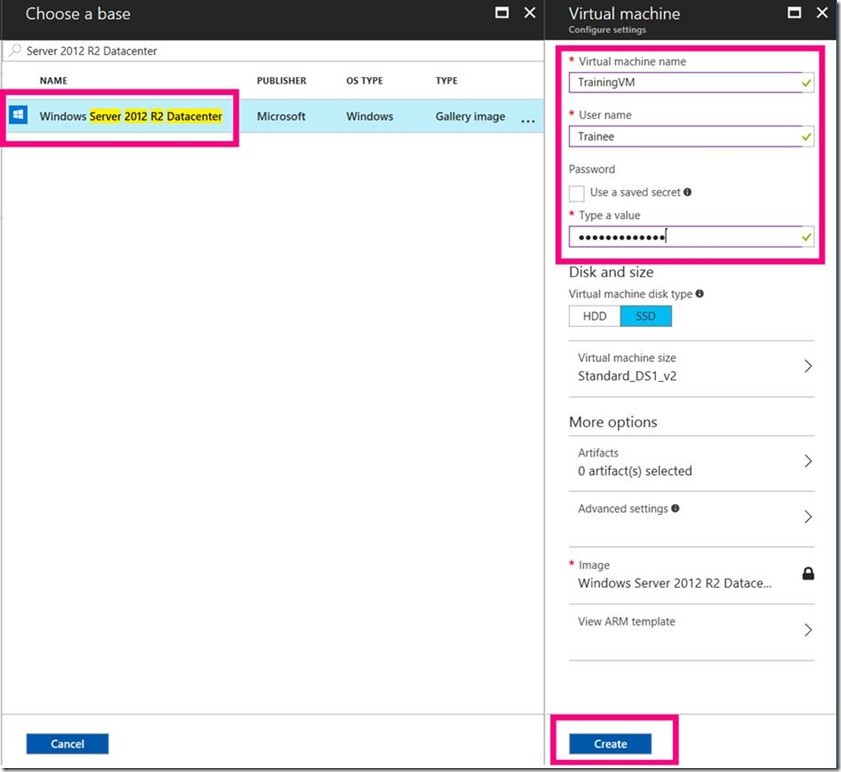
6. When the VM is running, it’s time to log in and install required software that will not need to change frequently. Click the VM name under “My virtual machines” section, and click Connect in the VM blade
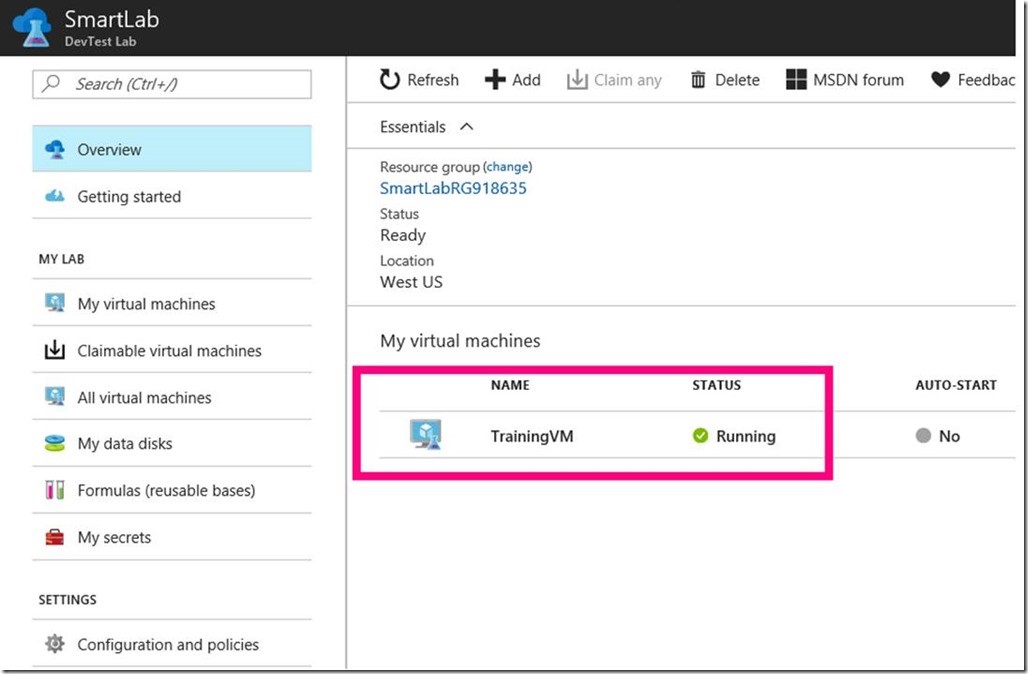
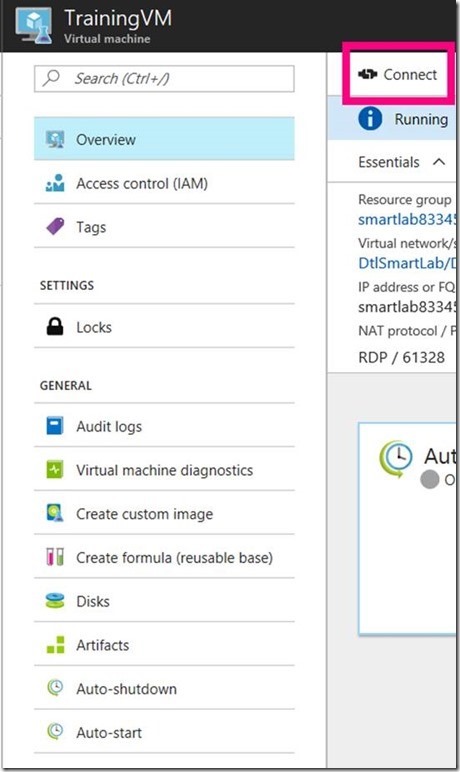
7. After connecting to the VM and installing all required software components that won’t need to be frequently updated, we can now create a custom image based on the current configuration. Before we do that, we will need to Sysprep the VM.
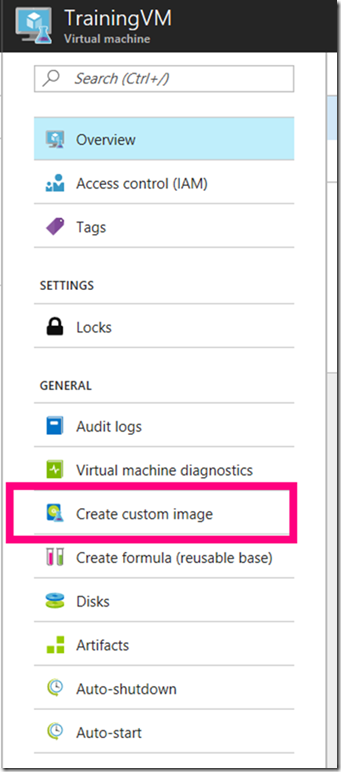
8. When the sysprep step completes, and the VM shuts down, in the VM blade, click Create custom image, provide the required information and click OK.
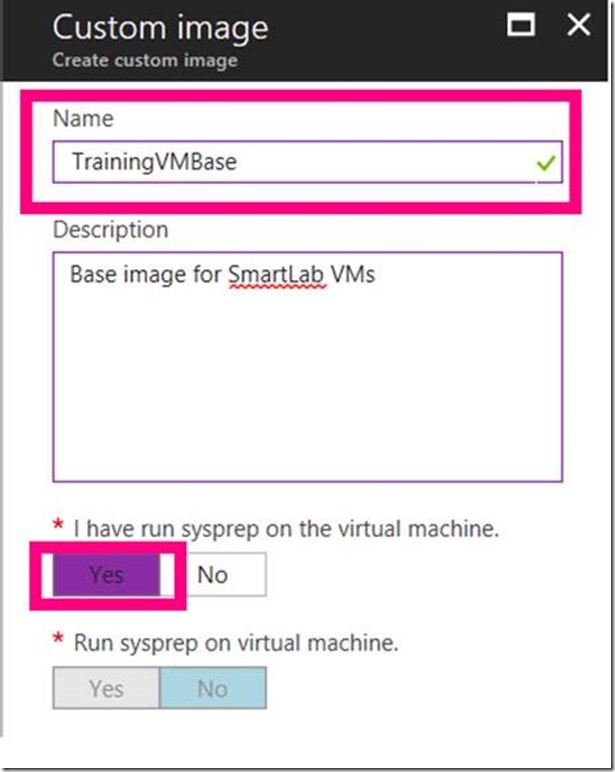
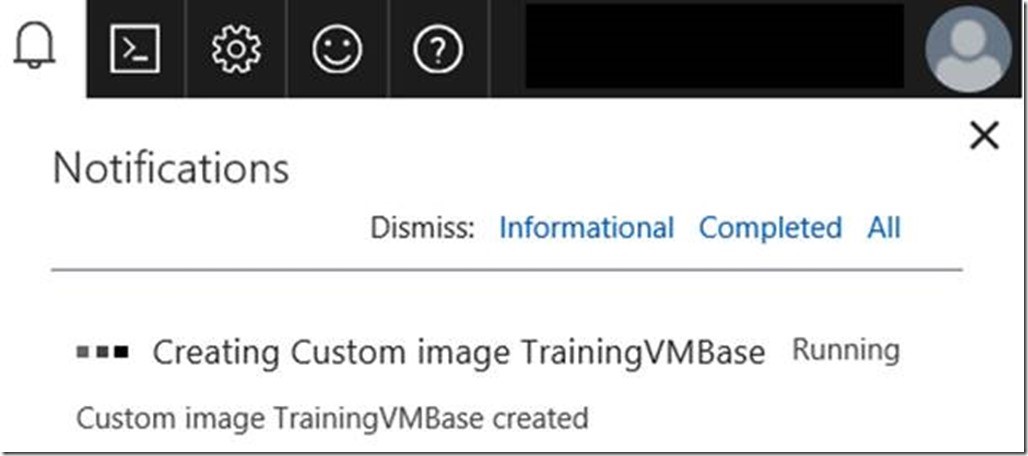
9. The notification center will indicate the progress of the custom image creation process. Wait until this step completes before proceeding.
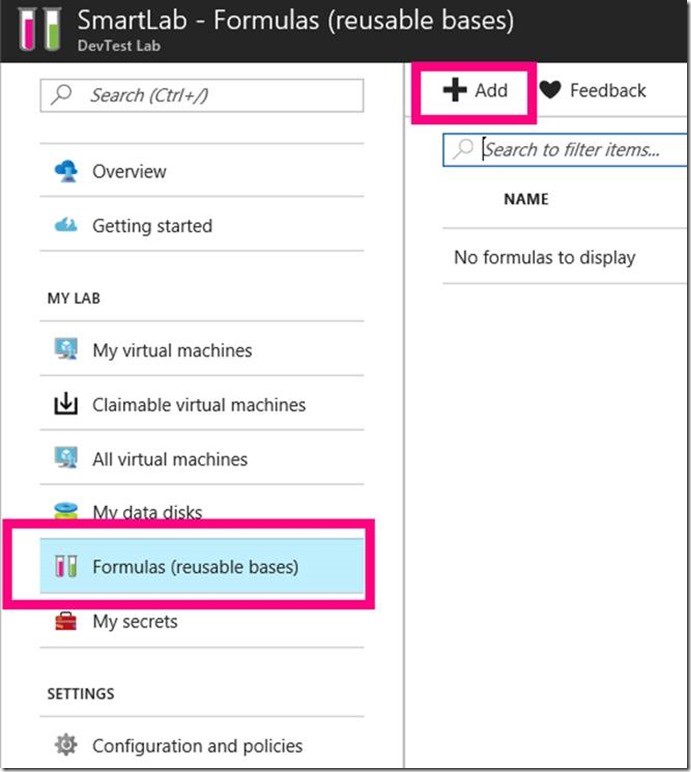
10. When the custom image is ready, we will use a formula to create a reusable template VM for all training machines, which will also contain software components or lab content that require regular updates. In the DevTest lab blade, click Formulas (reusable bases), and click Add
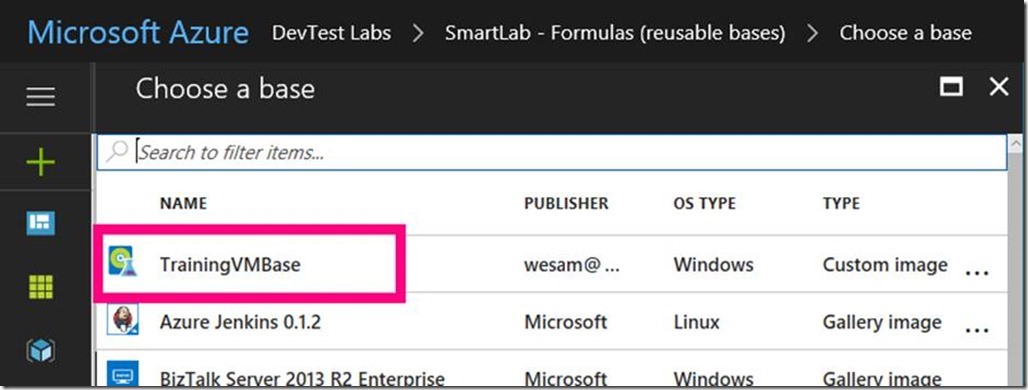
11. Choose the custom image we have just created for the new formula.
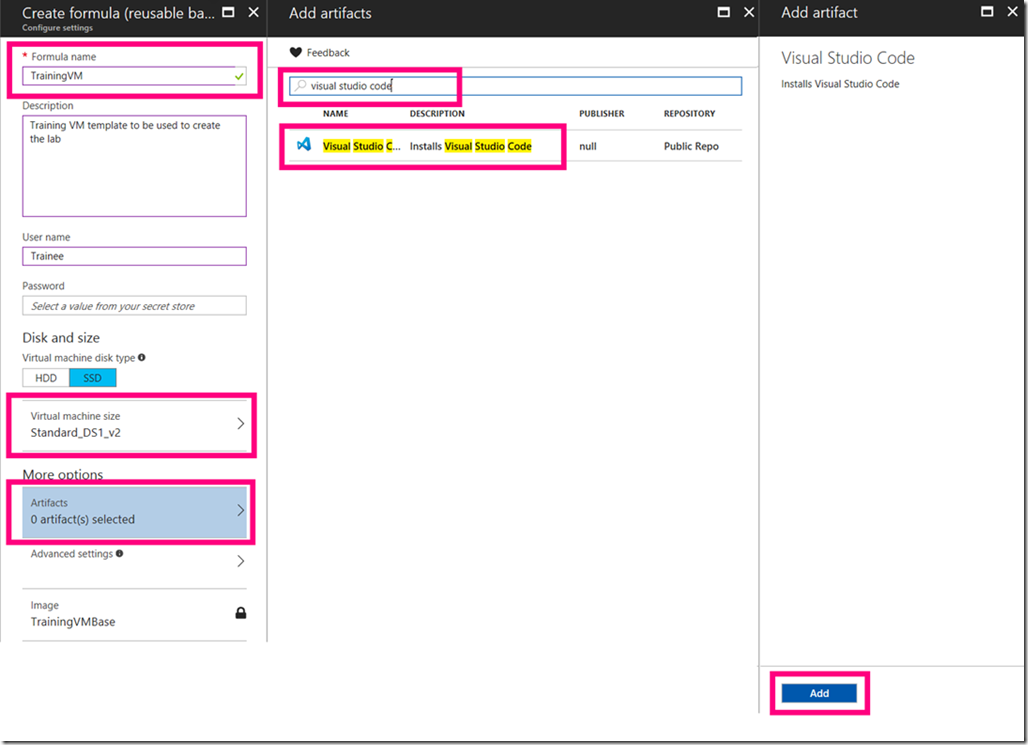
12. The formula we’re creating will define default options for the VMs. To install additional software components or lab content, we’ll use artifacts to define these components. For example, if we wish to always install the latest version of Visual Studio Code before running a training session, artifacts will allow for specifying the actions that need to be performed when the VM is provisioned. In the Create formula blade, specify the required information, the desired VM size, and click Artifacts to add the required software packages, then click Add.
In addition to the set of publicly available artifacts, you can also create custom artifacts to configure your VMs as desired. There are plenty of examples to jump start your experimentation process.
When the formula is ready, we’re good to proceed

Obtaining Lab Content from Source Control
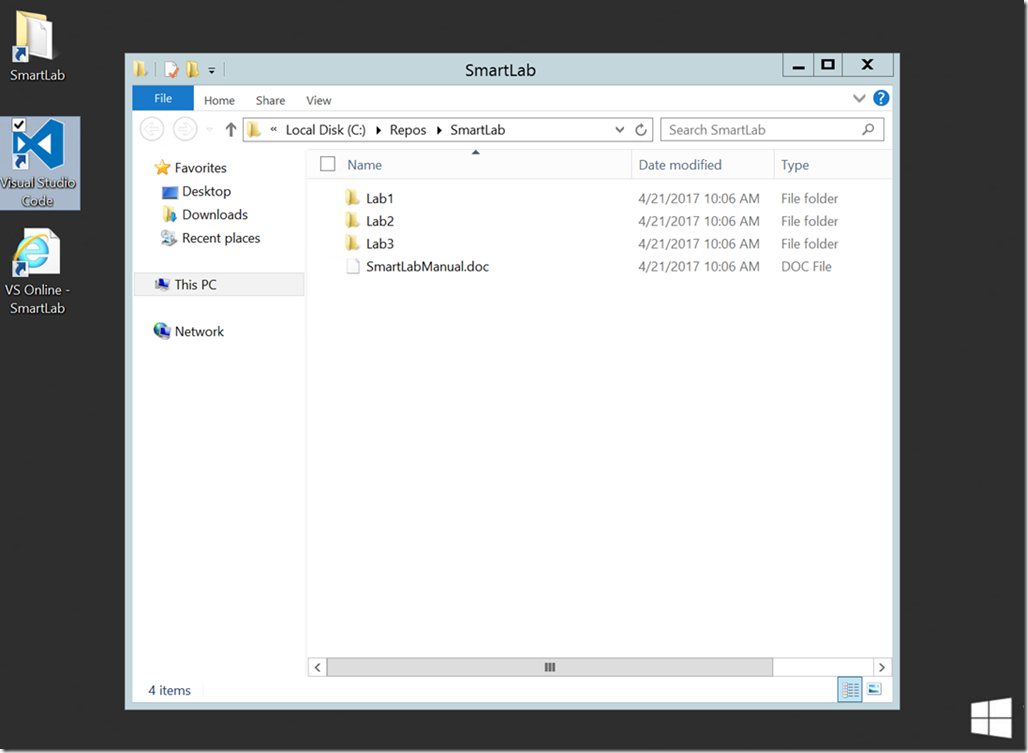
For this lab setup, we would also like lab manuals, documentation, lab exercises, code, and so on to be obtained from source control every time a VM is deployed. For this, we’ve setup a Visual Studio Team Services (VSTS) account with a Git repository that has all we need to run the lab exercises.
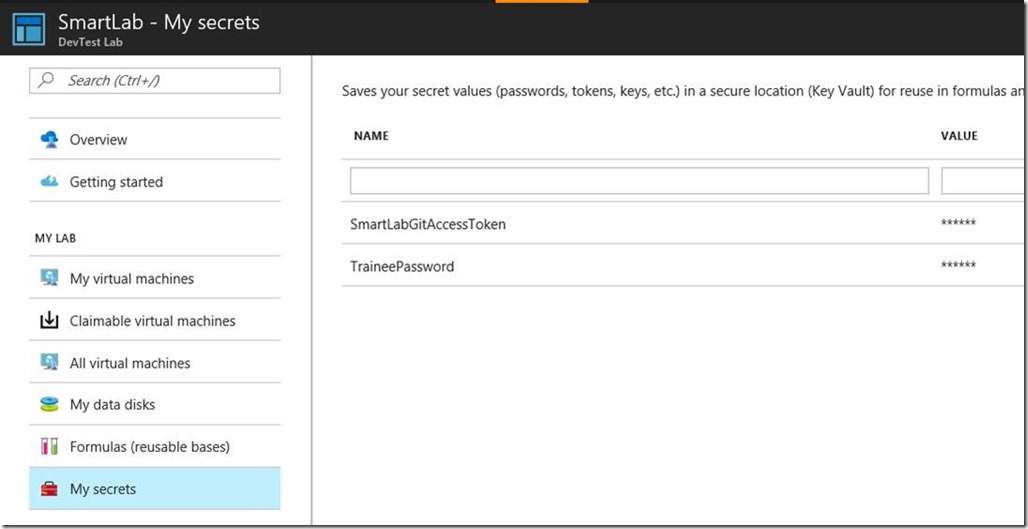
13. Adding an artifact that will allow us to clone a Git repository is straightforward, but before we do so, we’re going to need a to get a Personal Access Token. Once we have the token, we’ll save it in the DevTest lab. Click My secrets, add a new name/value pair and then click Save.
Similarly, we can capture a password for the default user “Trainee”, and we will update the formula we’ve created appropriately.
14. Now we will add a Git artifact that will clone the lab content repository in the VM every time it is deployed. Under Artifacts in the formula blade, search for Git and add the appropriate artifact with the required information. Also, update the Password with the appropriate secret name from the drop-down menu.
15. In this example, we have configured a total of 2 artifacts. Click the Update button to save changes.
Create Lab VM Instances
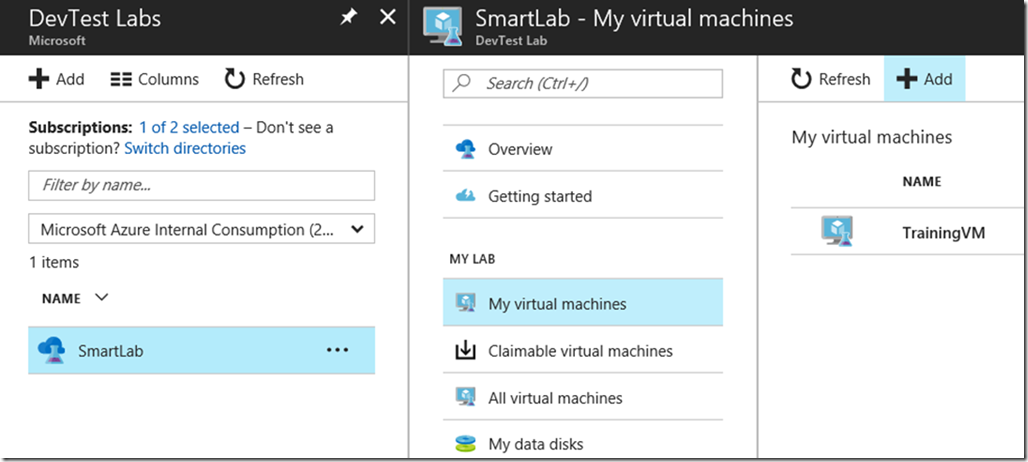
16. In the DevTest Lab blade, click My virtual machines and click the Add button
17. When choosing a base for the VM, select the formula we have just created, provide basic VM information, specify the number of instances you wish to create under Advanced settings, click OK, then click Create
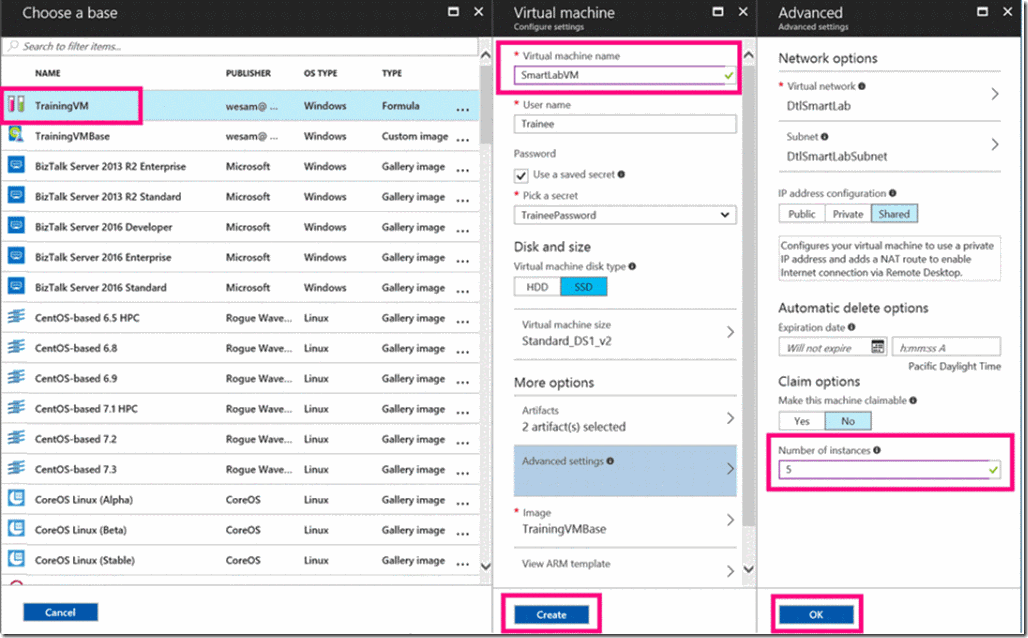
18. Allow some time for the VMs to be created and artifacts to be applied
Establish Auto-start and Shutdown Policies
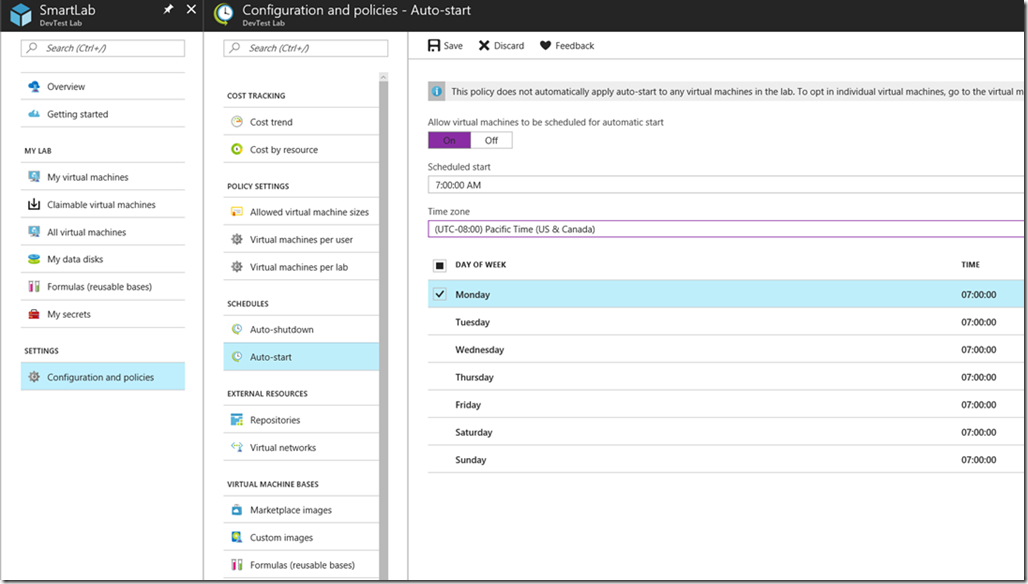
To ensure VMs are available first thing in the morning before training starts, we will set an auto-start policy. We will assume that the lab will run only on Mondays.
19. In the DevTest Lab blade, click Configuration and policies, then Auto-start, then specify the required start time and click Save.
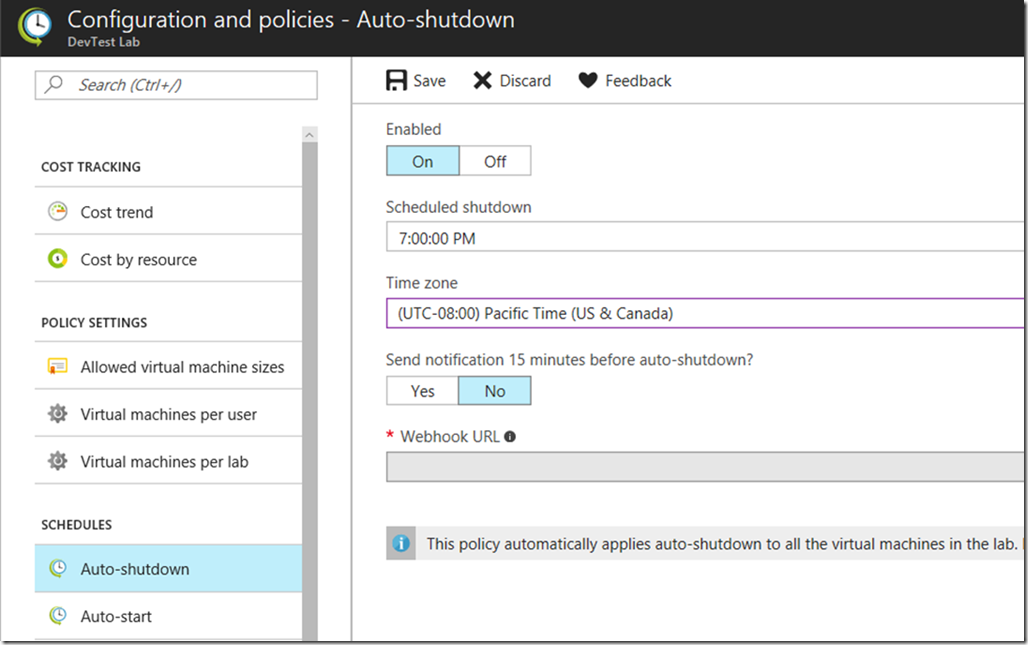
20. To control cost, we will ensure a policy is set for VMs to shut down when the lab is not in use. Click Auto-shutdown, specify the required information and click Save.
After VMs are deployed, all specified artifacts will be automatically applied.
When the VM is running, a trainee can now connect using an RDP client to view the manual and run through the lab exercises.
Premier Support for Developers provides strategic technology guidance, critical support coverage, and a range of essential services to help teams optimize development lifecycles and improve software quality. Contact your Application Development Manager (ADM) or email us to learn more about what we can do for you.





![clip_image002[5] clip_image002[5]](https://devblogs.microsoft.com/wp-content/uploads/sites/31/2019/04/clip_image0025_thumb.gif)

0 comments