

In this blog, you will learn more about using the Power Platform CLI together with Power Platform Solutions. In the previous post, I focused on installing the Power Platform CLI, creating the auth profile and switching environments. In this blog, the solution command group is the superstar!
This blog is part of a multi-part series on the Power Platform CLI.
Previously, the following blogs appeared in this series:
- Part 1 – Getting Started with the Power Platform CLI
- Part 2 – Streamline your solution development with the Power Platform CLI: Create a solution from scratch (This blog)
- Part 3 – Getting Started with Power Platform CLI and Power Pages
- Part 4 – Create multilingual copilots with the Power Platform CLI and Microsoft Copilot Studio
📦 Solution command group
As you expect by now, the solution command group enables you to work with Power Platform solutions. The solution command group has a lot of commands, so it’s too much to talk about all of them in this blog. Instead, I will focus on my favorite ones that will get you started.
To see all commands in the solution command group, run the following command:
pac solution help
This will output the following result:
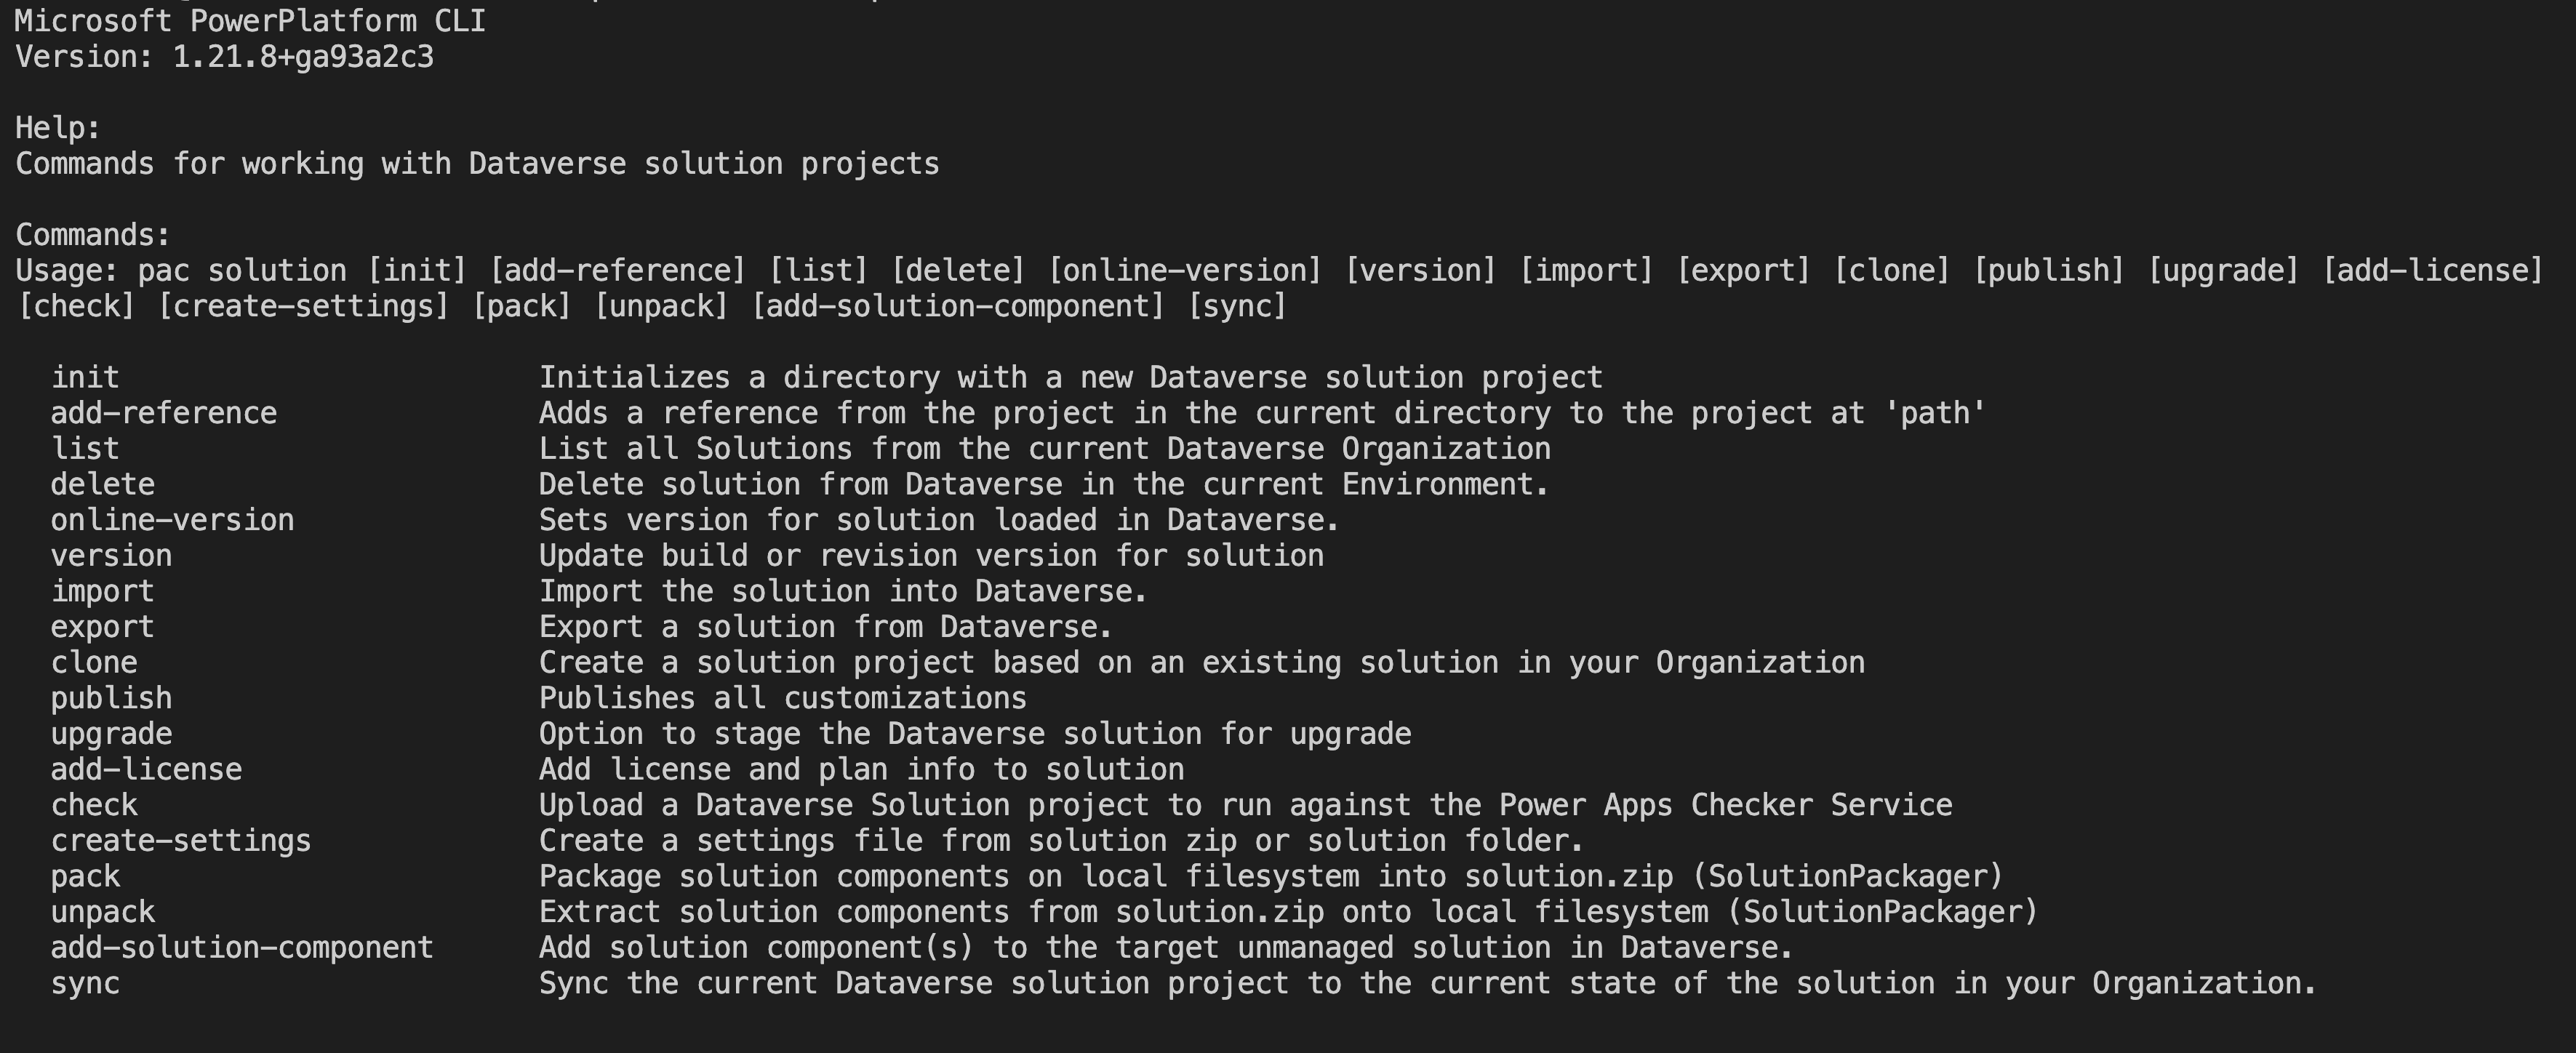
If you have experience with Application Lifecycle Management (ALM) in the Power Platform, these commands might look familiar! A lot of them are available as both Azure DevOps taks and GitHub Actions.
👩🏾💻 Developer scenarios
Like I explained in the earlier blog, in the Power Platform environments are important. Not too long ago, Microsoft announced that you can have up to three developer environments for free! This helps a lot in this story, since you might work on multiple environments, or you might want to try out how and if your solution moves easily from environment A to environment B. In this blog series, I will describe a bunch of developer scenarios, and in this blog, I will start with creating a solution from scratch.
➕ Creating a solution from scratch
This is the easiest scenario. In this case, you can create a solution by using the pac solution init command.
How? Let’s run the help command for that.
🆕 Initialize a solution
pac solution init help will show you all that you need to know.
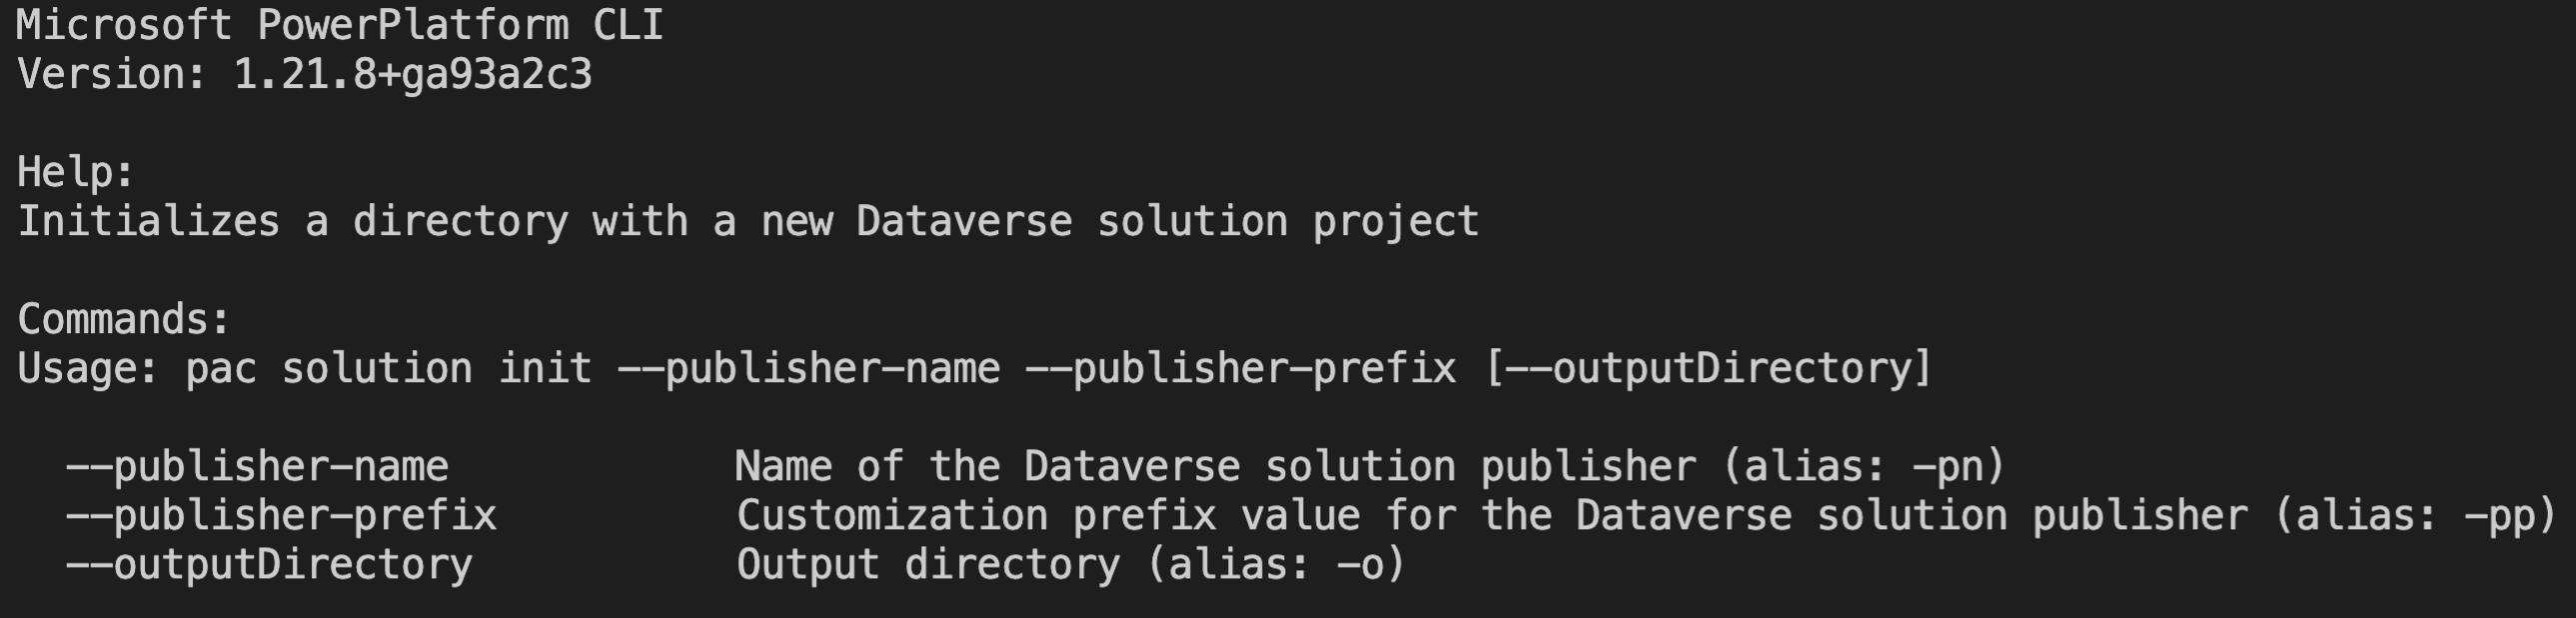
This shows that there are two required arguments:
- Publisher Name (–publisher-name or alias -pn)
- Publisher Prefix (–publisher-prefix or alias -pp)
And one optional one:
- Output Directory (–outputDirectory or alias -o)
Let’s initialize our first solution by running the below command:
pac solution init --publisher-name Microsoft --publisher-prefix msft
When you open the directory in Visual Studio Code, you will see the Solution.xml file, in the src/Other folder. Open that, and let’s explore what’s in there!

The first thing that I see is that the solution unique name is SolutionDemo, which is the directory I ran the pac solution init command in. That name gets duplicated in the LocalizedName property as well. The version (1.0) and Managed (value is 2 now, which stands for solution package type both) properties Also, I see the publisher’s name Microsoft as the unique name of the publisher. Below that we also see the prefix msft.
Just a heads up: when using the output directory argument, the solution name will be that name. So, it could be handy to use this option instead.
⚙️ Build the solution
Now, we only have our solution, but there’s nothing added to the solution. The solution also doesn’t exist in a Power Platform environment as well. So, let’s first see if we can build the solution and import it into a Power Platform environment.
First, we need to run dotnet build. This builds the project and creates a zip file which we can use for import.
🆕 Git init and git commit
Now is a suitable time to run the git init command to initialize a git repo in your solution folder. This will be useful, because you can then do a git commit for a first init commit. Later, this will be helpful because we can then see the differences between what we committed now and what we have later after we added some things to the solution in the maker portal.
⬆️ Import the solution
Importing a solution can be done by running the pac solution import command. Run pac solution import help to get all the details about the command:

You can use the optional arguments for various scenarios. An example is adding the --publish-changes argument to publish the changes after a successful import. But for now, let’s use the standard command to import the solution.
pac solution import
This will import the solution in the currently active environment. If all went well, you should be able to see your solution in the environment:

The solution is empty because there is nothing added to the solution yet. Select “Objects” in the left navigation and let’s add something to the solution:
- Add a canvas app (New > App > Canvas App, App name:
Test App& click create)- Add a button to the app, save the app & go back to the solution.
Although this is not a functional app, it will show you what this does to the solution folder when we’re done with our next step.
🔄 Sync the solution
Because we already have a solution locally, we can make use of pac solution sync. We are going to synchronise the solution in two different ways now:
First, we will use the standard sync command with no arguments.
pac solution sync
The above command synchronises the solution from the Power Platform environment back to the local folder.
After the sync is completed, we can see that five files are changed. This is because the canvas app has been added to the solution.
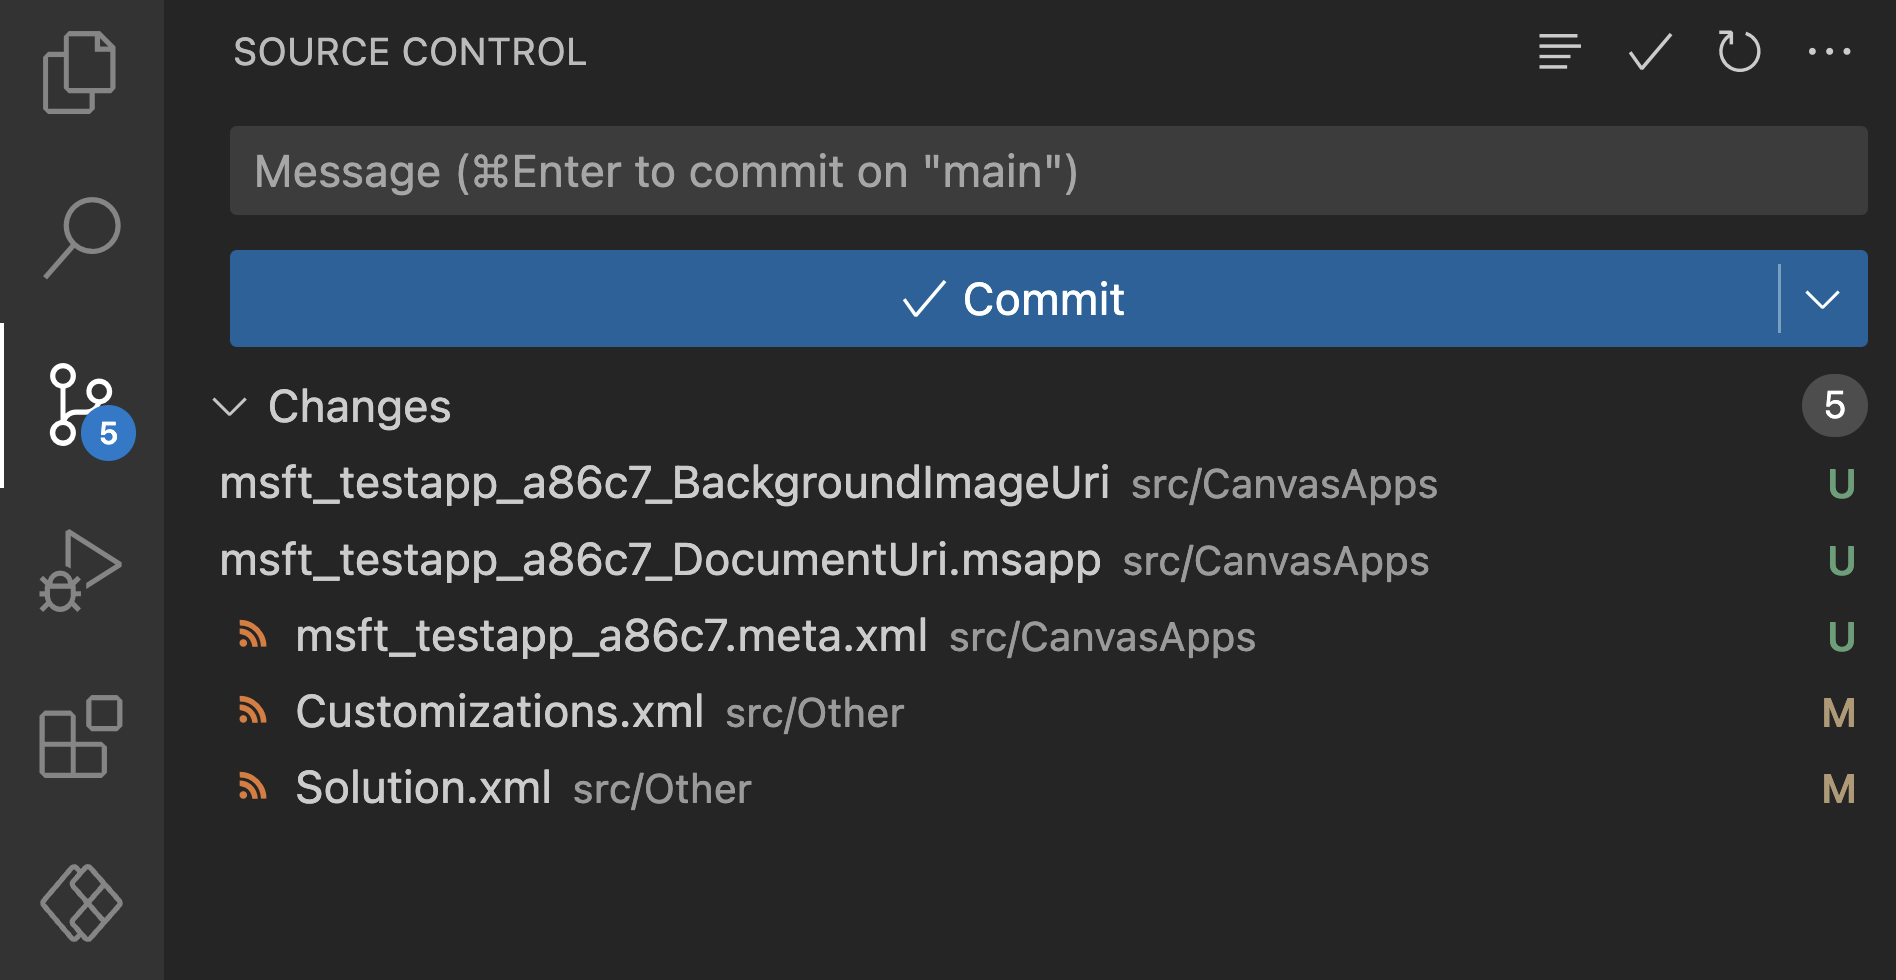
Because the solution sync by default doesn’t unpack canvas apps yet, we can’t see what’s in the canvas app. But the pac solution sync commands has some tricks up its sleeve:
Let’s run the following command and see what happens.
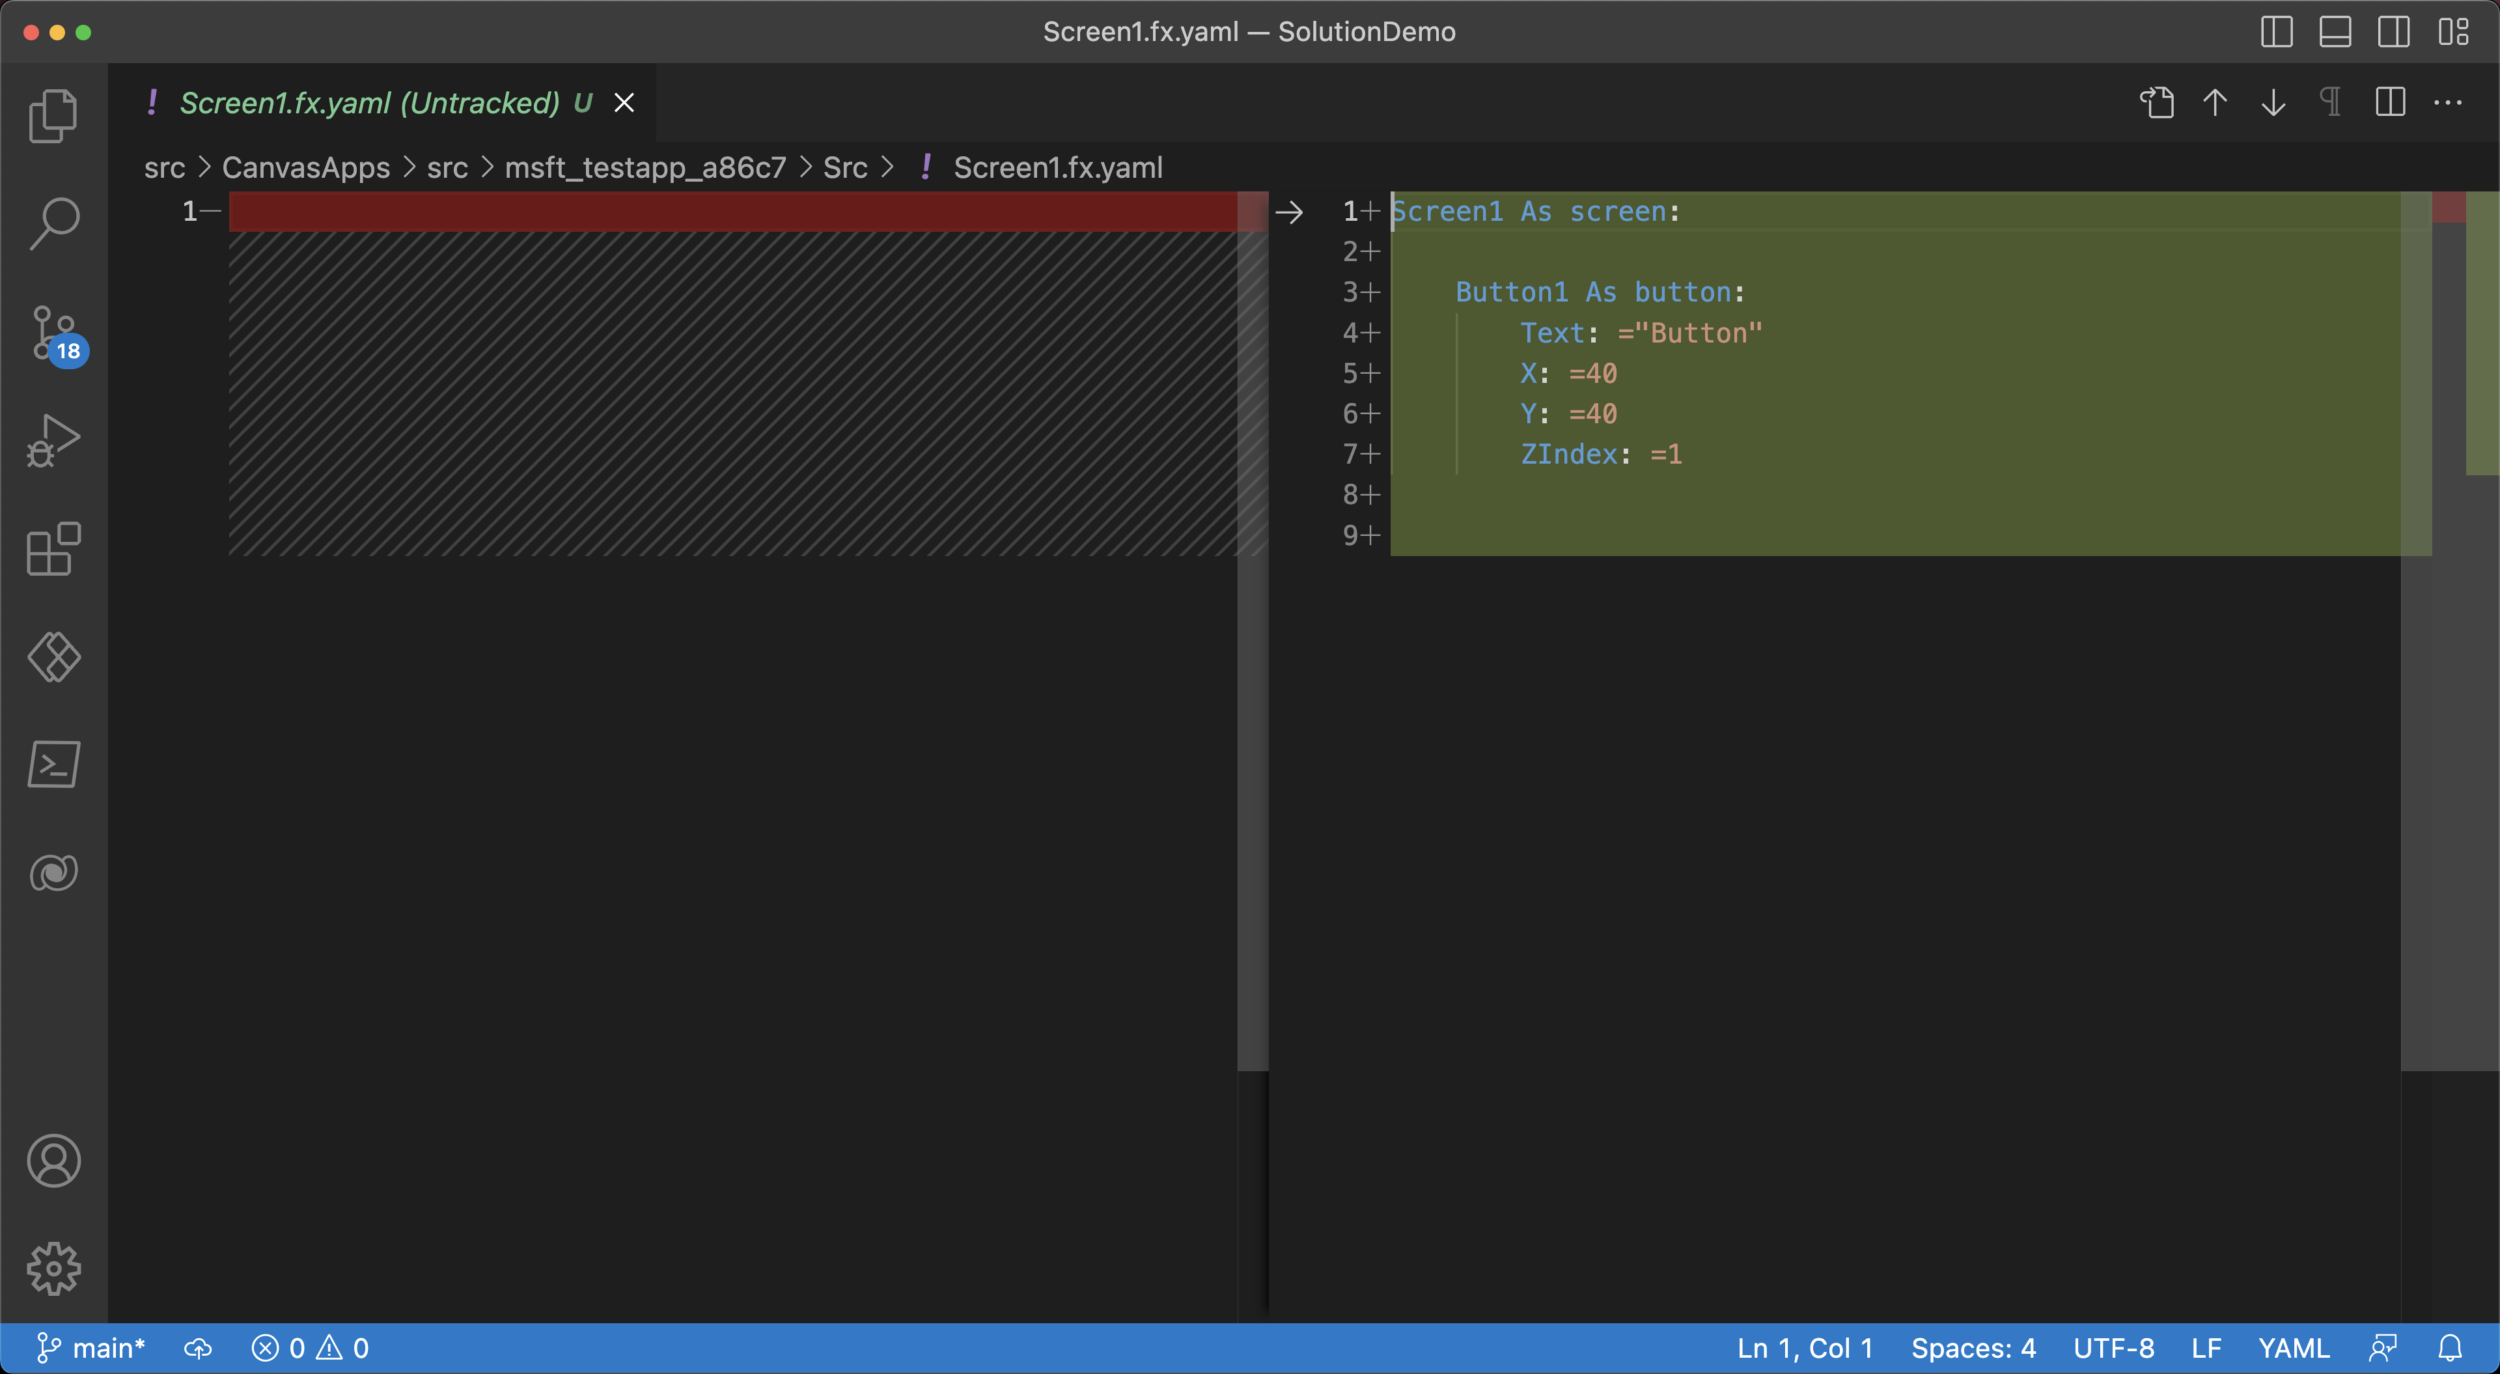
pac solution sync --processCanvasApps

There are eighteen changes now in the solution. This is because the above command also unpacked the canvas app that is in our solution. We can now for instance see the Screen1.fx.yaml file, which is a representation of the screen with the button we added in the maker portal.
When you open that file, you can see that we added a button here:
Commit these changes and keep on working on your solution. If you run pac solution sync after each set of changes, and you commit these changes, you’ll build up a history of changes. That’s really helpful when others might take over the project later! They can then see exactly which changes you made for a certain requirement.
🎁 Wrap up
This was a tour around some of the solution commands. In the future, I will also write a blog post on how to work with solutions that are already in source control, like for instance in a GitHub repository.
For now, this is the first step into the solution command group. If you want to see more commands, look at the video below!
📺 Power Platform CLI Solutions
A while back, I had a great chat with David Jenni to talk about the solution command group for the Power Platform CLI. Check it out to see it live in action!
0 comments