Building and extending Microsoft Teams with apps can feel overwhelming. Or maybe you’re just learning that it’s possible to extend Teams with embedded UI content, custom search, and more. There’s a lot to absorb around what Teams has to offer, and there are so many tools and technologies to help you build the right app. You might want to re-use what you’re familiar with, and if you’re anything like me, that’s .NET and Visual Studio. Keep reading this article to learn how simple it is to get started building apps for Teams using Teams Toolkit for Visual Studio.
Get Teams Toolkit for Visual Studio, now generally available
We are thrilled to announce the generally availability of Teams Toolkit for Visual Studio! If you don’t have it already, you need to download and install Visual Studio 2022. Once installed, modify your installation to include the ASP.NET web development workload and be sure to select the checkbox for Microsoft Teams development tools – that will add Teams Toolkit to Visual Studio. See the example below.
Create your Microsoft Teams app project
After Teams Toolkit is installed, start by Creating a new project in Visual Studio 2022 and selecting the Microsoft Teams App project template.
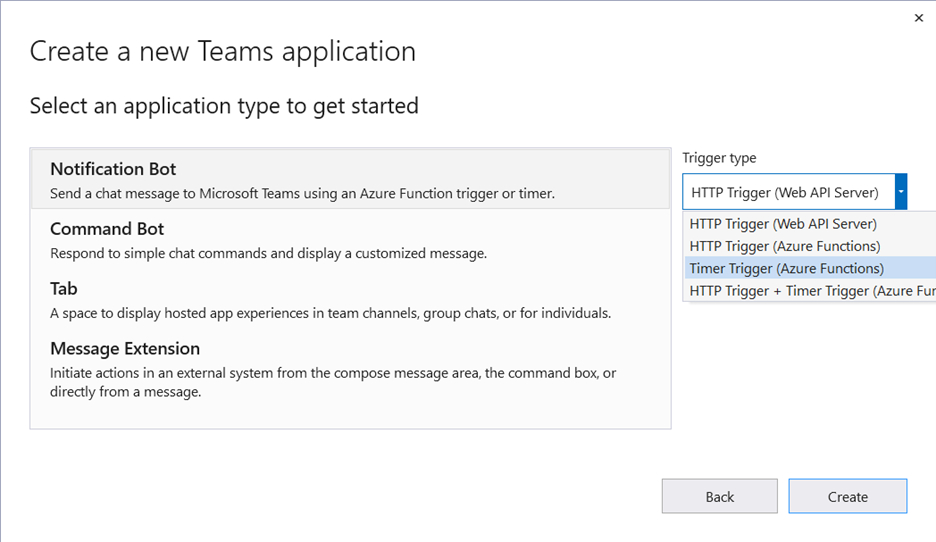
After you name the project and select next, you have a few application types to choose from. You can always adjust your Teams app later to include other options, but these will help you start in the right direction for the solution you have in mind.
For example, I want to post a message in a channel each day with my assigned GitHub issues, so I select the Notification Bot option with the Timer Trigger.
Finish by selecting Create, and Visual Studio will load the solution.
Run and debug your app inside a Teams web client
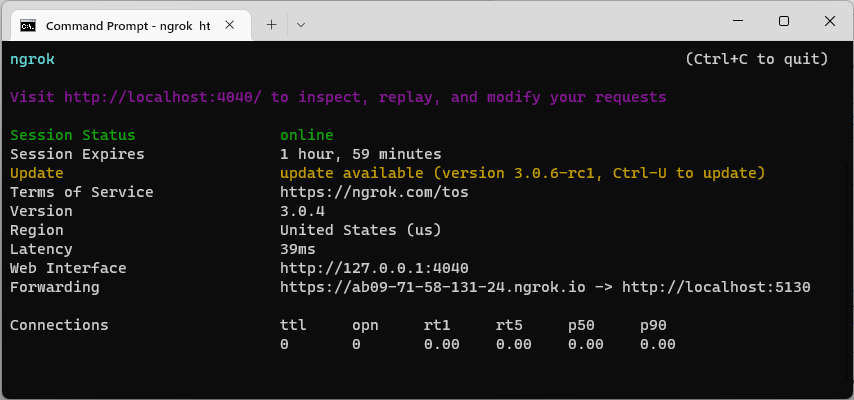
At this point, only the solution is created. You still need to configure an app registration in the Teams organization in which you want to develop. Without the toolkit, you would need to navigate between the Teams Developer Portal, Azure Portal, and Bot Framework Portal to configure this app. You also need a way for Bot Framework (cloud resource) to communicate with your localhost project – typically done with a network tunneling solution. Currently, we recommend using ngrok. After you download and install ngrok, run ngrok http 5130 to start the tunnel.
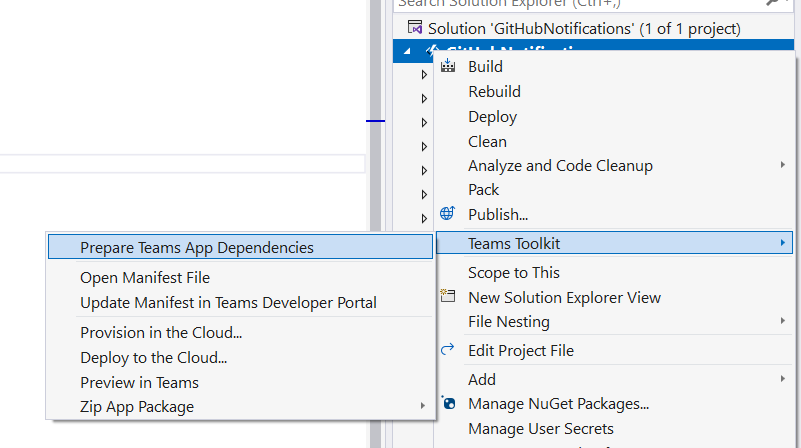
Next, Teams Toolkit can help with the app registration and configuration between portals. Right-click on the Azure Function that was created and select the Teams Toolkit > Prepare Teams App Dependencies menu item.
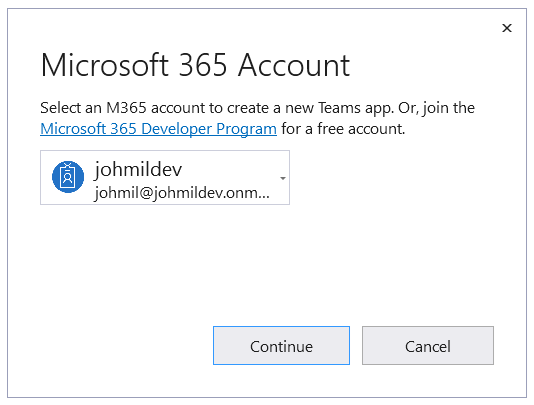
A dialog is displayed where you can decide which Teams organization this app will be developed in. Select the corresponding Microsoft 365 account for that organization. I’m using my free Microsoft 365 Developer Program account to develop this app in a pre-configured, sandboxed Teams organization.
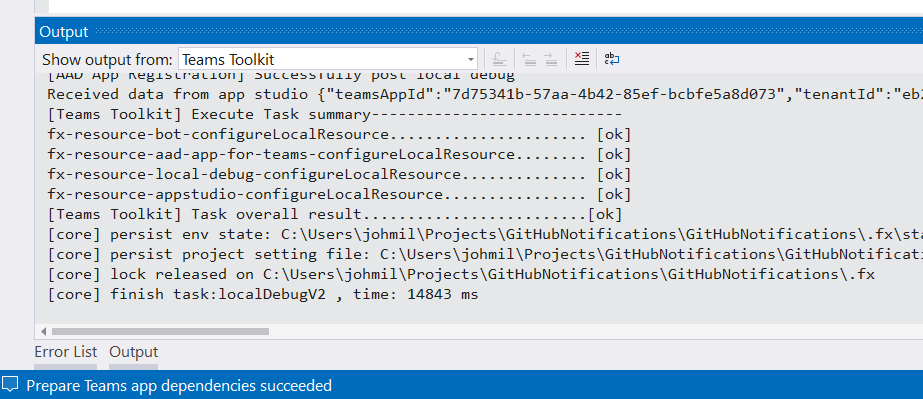
After selecting or adding your Microsoft 365 account, select Continue. The Output > Teams Toolkit window shows the progress of registering and configure the app.
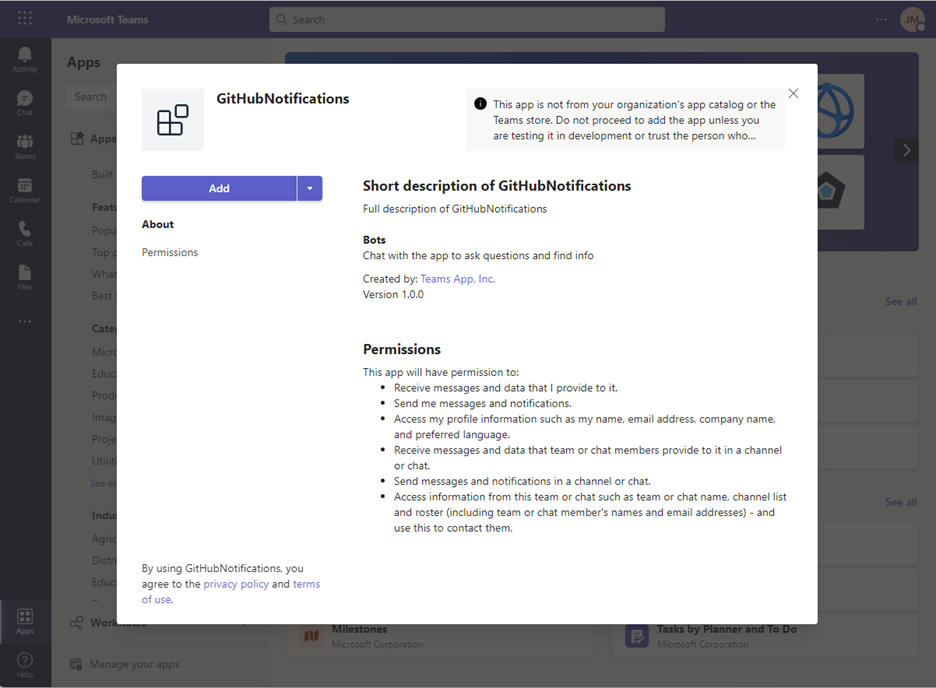
Now that the app is registered in my Teams organization and configured in Bot Framework, I can run and debug using the Debug > Start Debugging menu or pressing the F5 key. Visual Studio will launch a browser that opens Teams with my app installation dialog.
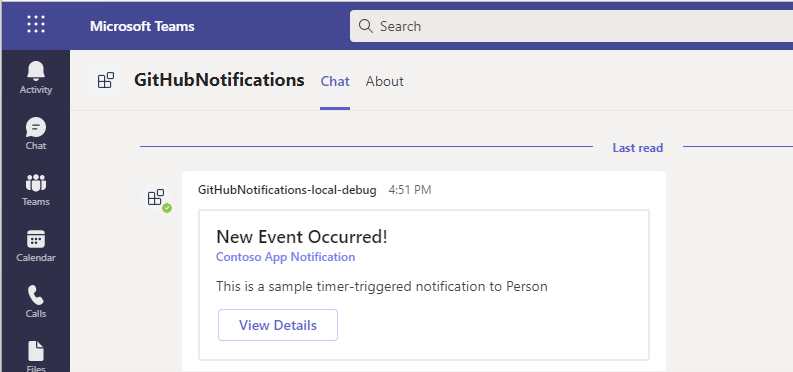
Selecting the Add button will continue to add my app to Teams as a personal app – viewable only to me. I selected the Timer Trigger, which defaults to sending a notification every 30 seconds and can be customized.
Customize the data
Now that I have my notification posting where I want, I can customize what is displayed. I’d like to show my assigned GitHub issues each morning as a reminder to triage them.
There are three files I’ve begun to customize, NotifyTrigger.cs, NotificationDefault.json, and NotificationDefaultModel.cs.
In NotifyTrigger.cs, I’m using octokit.net, a .NET library for interacting with the GitHub API to grab issues in a repository I want to monitor.
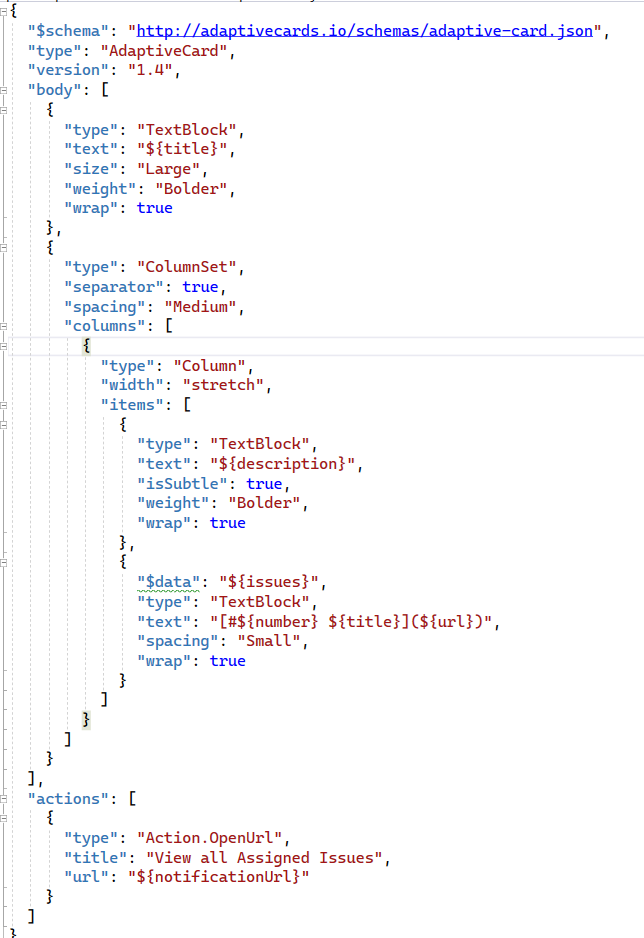
The NotificationDefault.json file is an Adaptive Card, which creates the UI for the notification you saw earlier. I’ve customized this so I can list each issue with a link to make it easy to triage.
Next, I modified the NotificationDefaultModel.cs to match my new Adaptive Card definition. This makes it nice to work with in C# and easily bind the values and data.
I can modify the cadence of this notification by changing the TimerTrigger attribute in NotifyTimerTrigger.cs.
public async Task Run([TimerTrigger("0 0 7 * * *")]
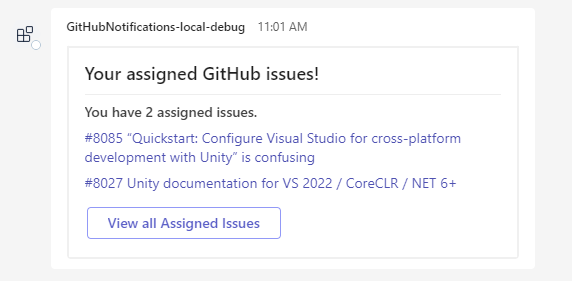
Now when I run my app again, I see my customized notification showing that I have two assigned issues in this repository!
Create your notification
That’s it! By following along, you’ve seen all there is to creating a complete Teams application using .NET, Visual Studio, and Teams Toolkit.
In just a few edits I was able to set up a daily reminder for my assigned GitHub issues and display it how I wanted. From here, you could further extend this and collect info from more repositories or make a totally different type of notification.
Resources
- Get the GitHub code
- Learn more about getting started with Microsoft Teams development
- Teams Toolkit documentation
I’d love to hear what you’re creating and how Teams Toolkit can help you build solutions – reach out on Twitter to chat so we can build better tools together!
Happy coding!



On the ‘Microsoft 365 Account’ pop-up, 9 times out of 10 the Continue button is disabled for me on multiple PCs with Visual Studio 2022 version 17.3.4.
Also, in case this means anything, the account that I select has the Microsoft red-green-blue-yellow icon with the following label:
Microsoft account
Right underneath it has a yellow exclamation mark saying ‘Re-enter your credentials’, but no matter how many times I re-enter my credentials, this warning never goes away.
Great article!
Do you think this can be modified to use GRAPH API to post notifications in TEAMS about the service health of MS Technologies?
It's great to see the Teams Toolkit continue to evolve because I am huge advocate for leveraging Teams as integration point for the enterprise applications. Although I think this is a useful post. It seems to be something of an over simplification of actual tasks that I initially encountered trying to build and publish to Teams in an Enterprise environment. I am not sure what it is about Teams, maybe it's the mixed portal salad of my app, the developer portal, the bot portal, and the Azure portal that makes it feel like a lot of ceremony. Or maybe it's...
Thanks for that overview. Can I also leverage actionable messages in that dialog? If yes, is there in-place update of cards supported in the chat?
The short answer is yes. Using the toolkit doesn’t impose any limitations on what’s possible with Teams Platform. The dialog is an Adaptive Card.
I like this, going to try and integrate it into our web app.
Great! Let me know how it goes – would love any feedback you have so we can improve.