
When you need folks to respond on demand, you could use a Kaizala Form. You could design a form from the group up using HTML / JS and KASClient SDK [documented here] or you could design a form from the Kaizala Management Portal [demonstrated in this post].
For the demo, I am picking a scenario where user in the group could Report a Lost Item using a custom form and send out an email notification whenever a response is submitted.
Though in this example, we would be emailing the response, you could use Flow connectors to store responses in a data base, add an item on a SharePoint list, etc. You get the idea. I will write another post to extend the flow built here to store responses in Excel sheet.
Broadly, I would divide this task in two parts:
- Part A: Design a custom form on Kaizala Management Portal and assign it to a group
- Part B: Design a flow to send an email
Part A: Design a custom form on Kaizala Management Portal
In Part A, I would be creating a custom form and associating it with a Kaizala group. The form would I will create a simple form to report a lost item which will have two fields:
- Text field to capture the lost item
- Date field to capture the date when item was lost
Steps:
- Navigate to https://manage.kaiza.la
- If you are not already logged in, hit SIGN IN button and log in
- Click on the New Kaizala Action button and choose Create action
- Customize the card
- Select an icon for the card
- Enter the title and description
- Enter the questions / fields for the form
- Customize the strings (if required)
- Hit Submit button
- You will be taken to the page of the newly created action that will have its details
Creating the custom form

Adding questions to the form

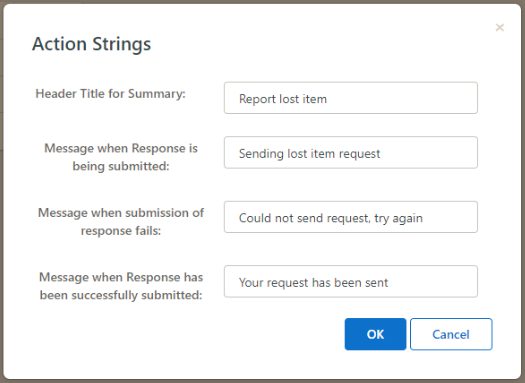
Modify strings
You could customize the strings by hitting the Modify Strings button
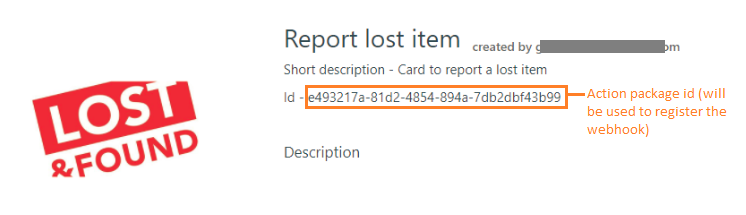
Custom form created
Once the custom form is created you will be taken to the page like below. Note the action package id, we will be using it to subscribe to this form / action’s responses.
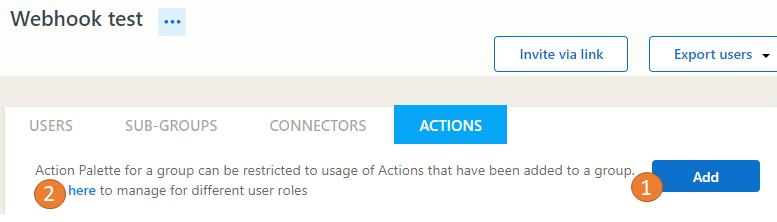
Map the action to a group
Navigate to the group where you want this action to be present and click on the ACTIONS tab. Click on Add to add the action and subsequently click on the link here to configure showing action on the palette for the group.
Add action to the group by searching for the action, select it and click Publish button. Make sure you want to give permissions to Members / Admins (selected both here).

Manage the action palette by clicking on here link and selecting for whom the action palette should be managed. What this means is, only those actions that are configured here would show up for those users in the action palette on the phone.

Part B: Design a flow to send an email
In order to get the responses from the form, we would need a trigger on action response. In the absence of a trigger in Kaizala Flow connector for action response, we could use a HTTP trigger in Flow and register a webhook to it.
At the time of writing this blog post, Kaizala Flow connector did not support getting responses for custom actions and hence used the WebHook approach. However, this has now been released by Kaizala team making it very simple to get responses from custom forms – refer the post, Flow scenario #2b: Get response from custom Kaizala forms.
To send an email notification on action response, what we would be doing is:
- Create a flow with a HTTP trigger and add an action to send email of the body (which would be the json of the action response)
- Save the flow to get the URL
- Use the URL got in the above step to register a webhook on action response
- Send a sample response from the card
- Use the JSON to parse the answers and build the flow to send specific fields
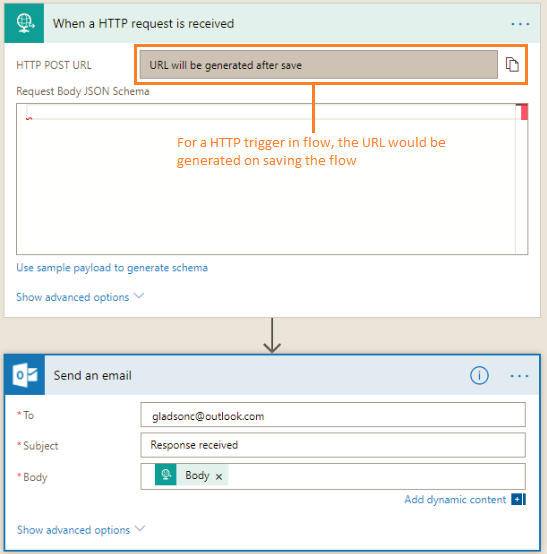
Step 1: Create the flow
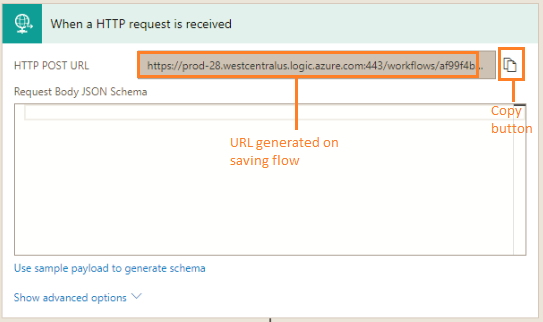
Go to http://flow.microsoft.com to create the flow. In case you are new to flow, you could read this post to get started. Add a HTTP trigger and an action to send an email. Use the Body from the HTTP trigger for the email (this would be the JSON for the Action Response). Save the flow.
Step 2: Copy the URL
After you have saved the flow, the HTTP POST URL would appear, click on the copy button to copy the URL.
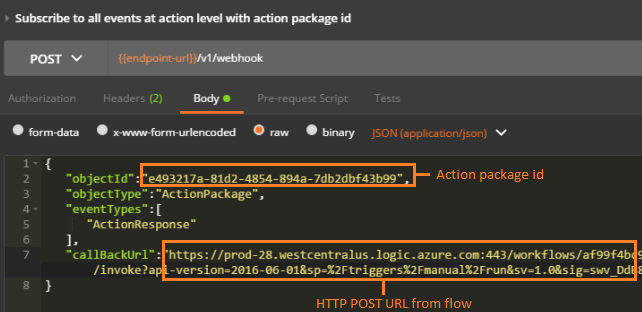
Step 3: Setup a webhook for the form response
Subscribe to the ActionResponse event for the ActionPackage / form we just created in Part A by registering a webhook. (In case you are new to webhooks, refer this post). I have used Postman REST client to register webhook on the ActionPackage with the HTTP POST URL from flow.
Step 4: Send a sample response from the card
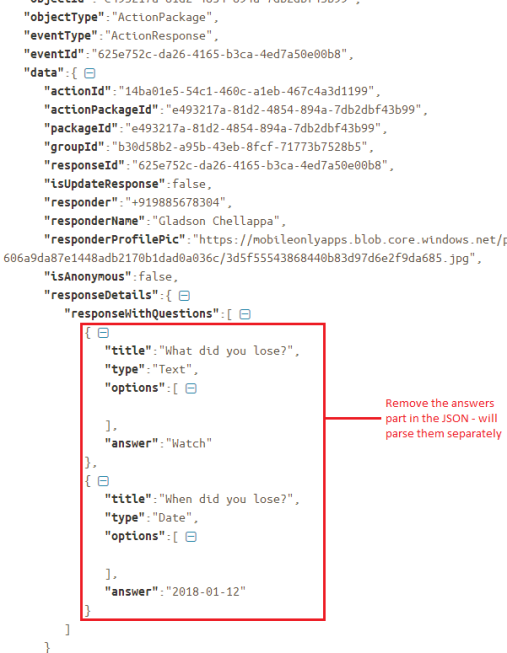
Since we have an email notification of the HTTP trigger body, we should receive an email with the ActionResponse payload. Underlined the portions in JSON that we will extract in the next step.

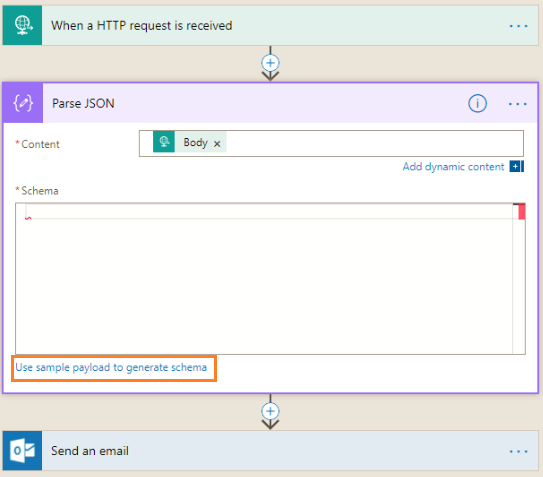
Step 5: Parse the JSON in flow to extract the form response
We will parse the JSON as a 2 step process: first extract the answer array – responseWithQuestions and then parse the JSON of the individual answers (element in the array). Add an action to Parse JSON as the second step.

After you have inserted, click on “Use sample payload to generate schema” link
In order to parse the responseWithQuestions without parsing the answers, copy the JSON from email and remove the answers from the array (red box below).
Add three “Initialize variable” actions to store
- response array
- lost item
- lost time
- Add a Apply To Each action to iterate through the response array and parse the item’s JSON to get the details.
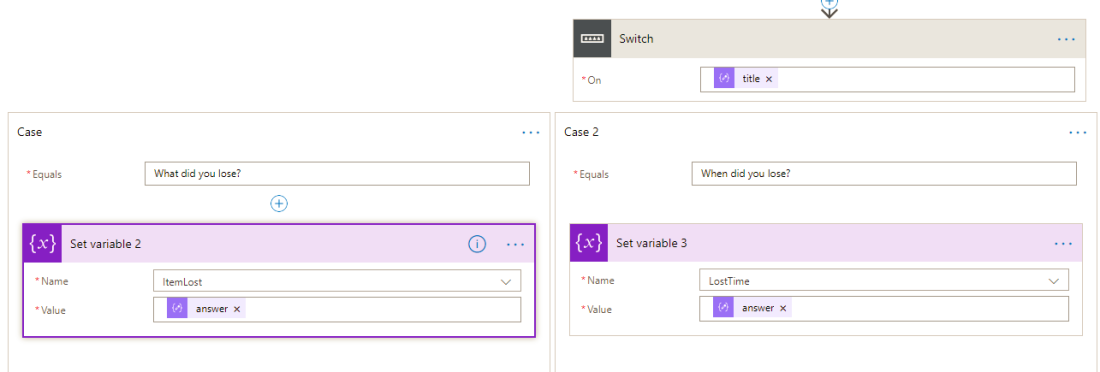
Add a Switch action for each question to get their responses and store in the respective variables using Set variable action.
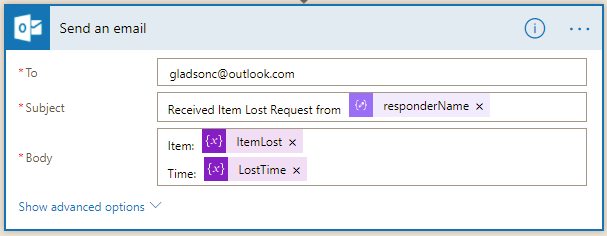
Now you could modify the Send email action to have a refined subject with the responder’s name and the email body to have the response details (like below).
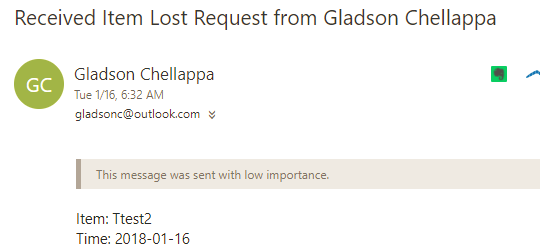
Submitting a response now should send an email notification that looks like this:
I have exported the flow created in the process as a .zip file and shared here. In case you want to take a look at the flow, you can Import on https://flow.microsoft.com.

I hope that was helpful. I plan to write a follow-up blog to have the responses stored in an Excel file. In case you found any step unclear / face any problems during the process, please drop me a note through the contact page.
0 comments