
Azure IoT Edge for DevOps was initially released on April, 2018 and recently has an important update with new version 1.1.0. Here’s some big changes in this version:
- Support to put deploy task in the release pipeline and use artifact to pass the deployment.json
- Integrate with iotedgedev CLI to do docker related work
- Suppport to use Windows Build Agent(Hosted VS2017) which will use Windows Container to build docker image
- Automatically fill in docker credentials in deployment.json with the corresponding docker credentials set in build pipeline
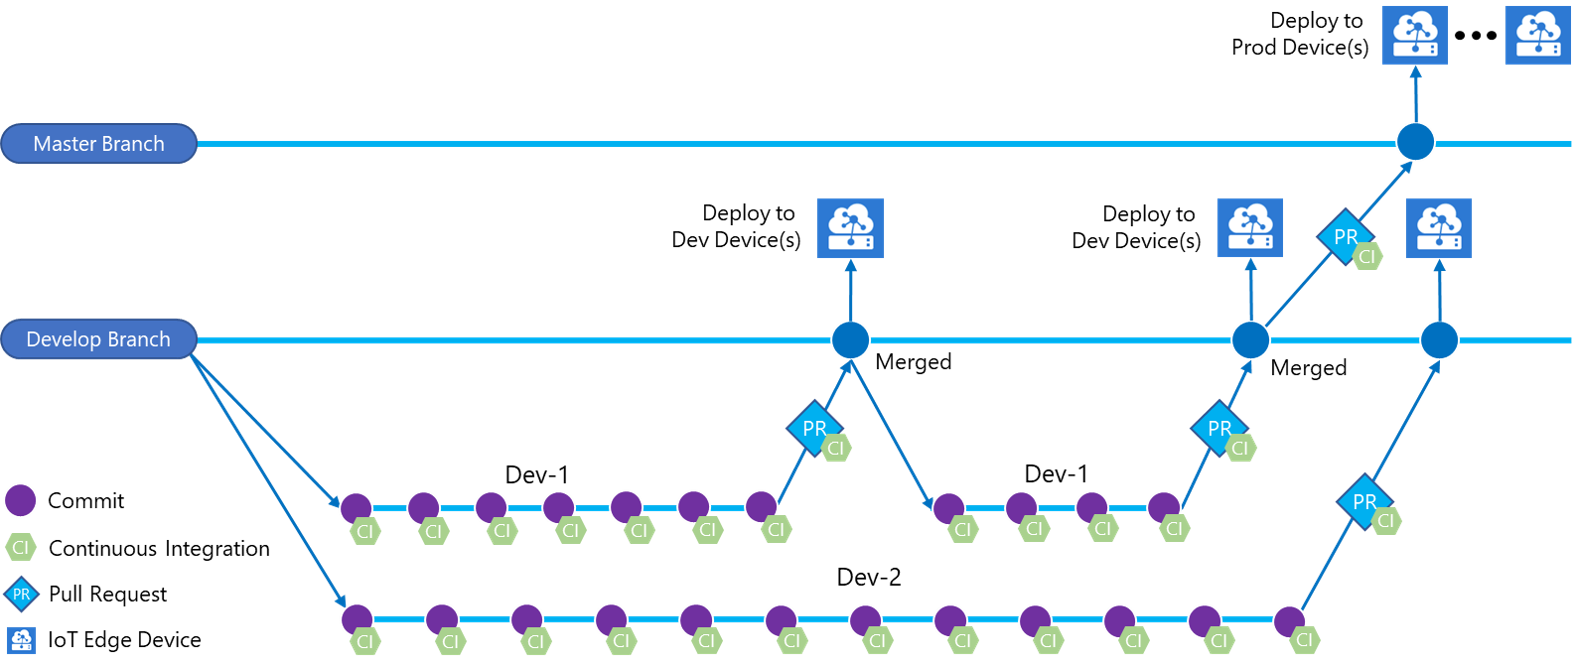
The most important change is that now deployment task can be defined and executed in release pipeline, which will provide convenience for users to deploy to a set of stages of environment(Dev environment/ QA test/ Production).
Previously user has to set the both build and deploy task in build pipeline. You can still use the old way to set up your CI/CD pipeline, but we recommend to separate the build/deploy task in build/release pipeline. It’s easier to manage your environment in this way. Now let’s go through the process to setup a brand new CI/CD pipeline for Edge project.
Prepare Azure DevOps account and extension
- Prepare your Edge solution. If you don’t have one, you can refer to this guide to create a new one.
- Sign into your Azure DevOps organization (https://your-account.visualstudio.com) and open the project where you checked in the sample app.

-
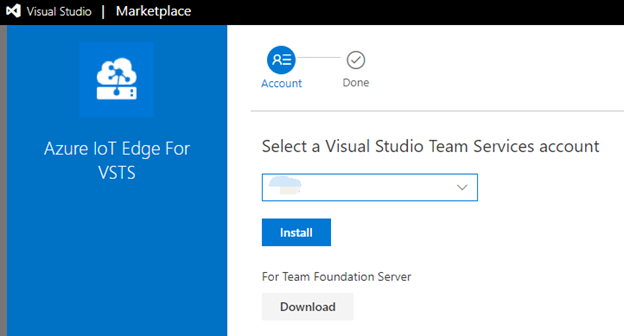
Visit Azure IoT Edge For Azure DevOps on Azure DevOps Marketplace. Click Get it free and follow the wizard to install this extension to your Azure DevOps organization or download to your TFS.
Setup build pipeline
-
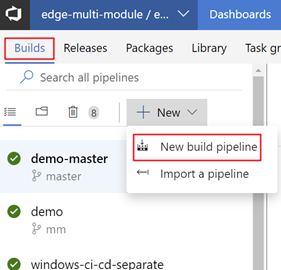
In your Azure DevOps, open the Build & Release hub and, in the Builds tab, choose + New pipeline. Or, if you already have build pipelines, choose the + New button.
-
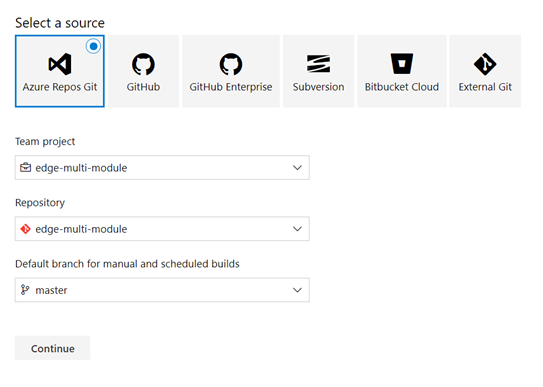
If prompted, select the Azure DevOps Git source type; then select the project, repository, and branch where your code is located. Choose Continue.
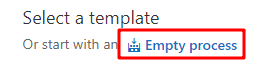
In Select a template window, choose start with an Empty process.
- In the pipeline editor, choose the agent pool.
- If you would like to build your modules in platform amd64, choose Hosted Linux Preview
- If you would like to build your modules in platform windows-amd64, choose Hosted VS2017

-
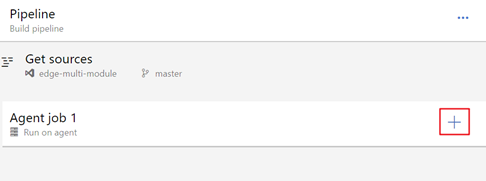
In Agent job, click “+” to add 2 tasks in the build pipeline.


-
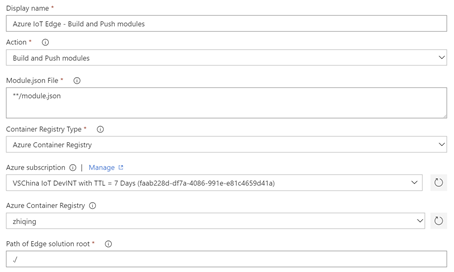
In the first Azure IoT Edge task, update the Display name to Module Build and Push, and in the Action dropdown list, select Build and Push. In the Module.json File textbox, add below path to it. Then choose Container Registry Type, make sure you configure and select the same registry in your code. This task will build and push all your modules in the solution and publish to the container registry you specified. If your modules will be pushed to different registries, you can have multiple Module Build and Push tasks. In some cases, the Edge solution is not under the root of the code repository. You can specify Path of Edge solution root in build definition.
-
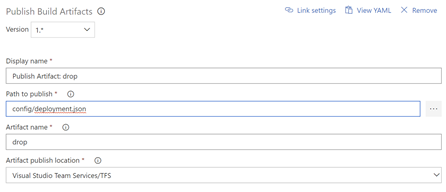
In Publish Build Artifacts task, you would specify the deployment file generated by the build task. Set the Path to publish to “config/deployment.json”. If you set Path of Edge solution root in the last task, you will have to join the root path here. For example, if path of Edge solution root is “./edgesolution”, then the Path to publish should be “./edgesolution/config/deployment.json”.
-
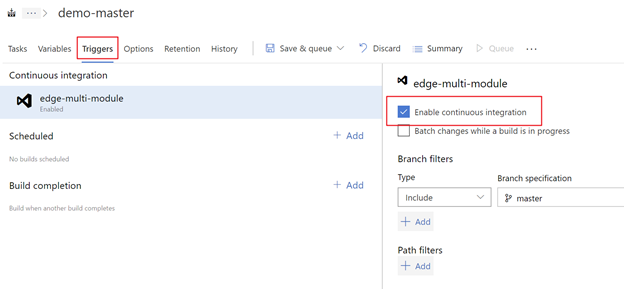
Open the Triggers tab and turn on the Continuous integration trigger. Make sure the branch containing your code is included.
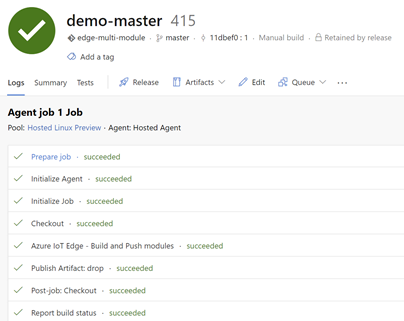
 Save the new build pipeline. Click the Save button.
Setup release pipeline
-
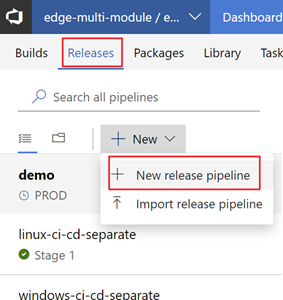
In the Releases tab, choose + New pipeline. Or, if you already have build pipelines, choose the + New button.
 In Select a template window, choose start with an Empty job.
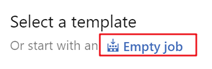
-
Then the release pipeline would initialize with one stage: Stage 1. For a real scenario, usually exists multiple stages. Let’s rename the Stage 1 to QA and treat it as a test environment.

-
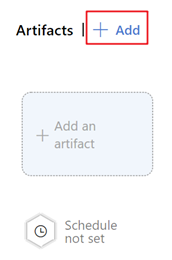
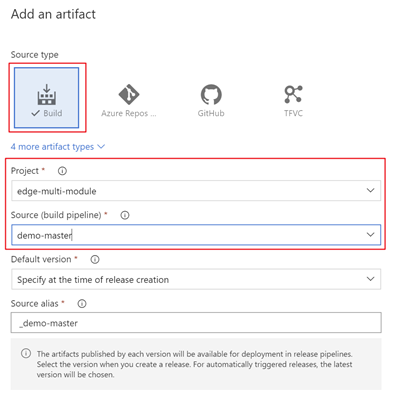
Link the release to the build artifacts. Click Add in artifacts area.
In Add an artifact page, choose Source type Build. Then select the project and the build pipeline we just created. Then Click Add.
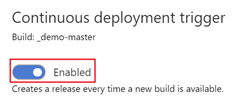
Open continuous deployment trigger,

-
Then we edit QA stage and configure it with the task

Deployment task is platform-insensitive. So you can choose either “Hosted VS2017” or “Hosted Linux Preview” in the Agent pool.
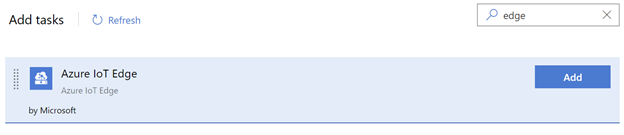
Click “+” and add 1 task.

-
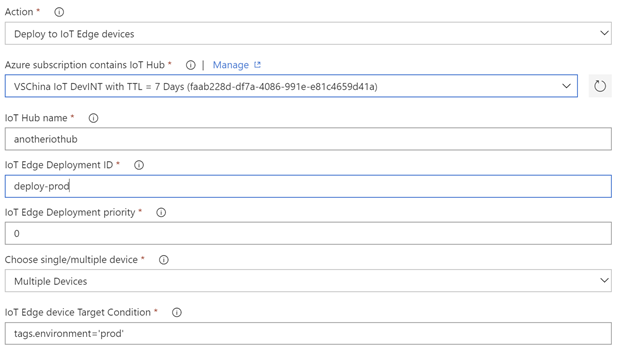
In the Azure IoT Edge task, in the Action dropdown list, select Deploy to IoT Edge device. Select your Azure subscription and input your IoT Hub name. You can specify an IoT Edge deployment ID and the deployment priority. You can also choose to deploy to single or multiple devices. If you are deploying to multiple devices, you need to specify the device target condition. For example, if you want to use device Tags as the condition, you need to update your corresponding devices Tags before the deployment.
Here the stage is QA, so we deploy to devices with environment property set to “qa”.
 Save the new release pipeline. Click the Save button. And then click Pipeline to go back to the pipeline.
 -
Next we add a new stage “PROD”. We can simply clone the Stage QA and make some changes.
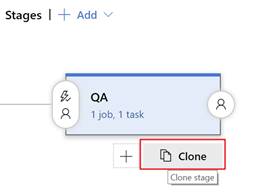
We rename cloned stage to PROD, and then edit the tasks.
We deploy to devices with environment property set to “prod”, and set the deployment id as “deploy-prod”. Click the Save button. And then click Pipeline to go back to the pipeline.
-
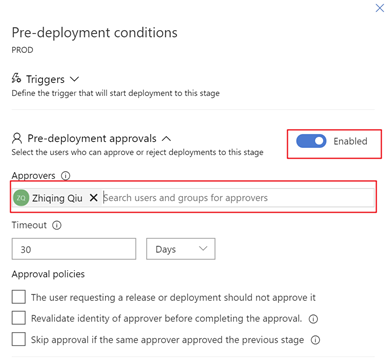
Currently, our build artifact will be triggered continuously on QA stage and then PROD stage. But most of the times we need some manual test on the QA devices and approve the new version manually to PROD environment. So we can setup an approval in PROD stage.
We set Enabled in Pre-deployment approvals. And fill in the Approvers input. Then click Save.

-
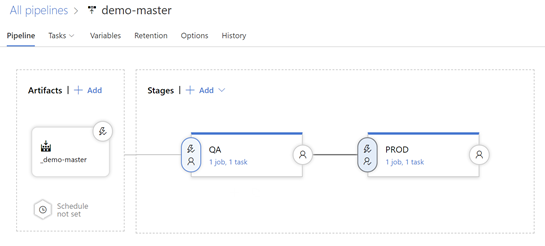
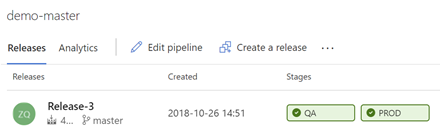
Now our release pipeline completed and it should be looked like this
Have a try!
The successful build would trigger a release to QA stage.
The successful deployment to QA stage would trigger a notification to the approver.
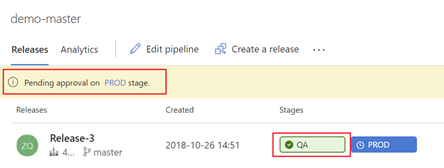
After the approver approve this change, it can be deployed to PROD.

Then we succeed!
As always, we would love to get your feedback via comments below. You can also email vsciet@microsoft.com to let us know what you think.
0 comments