UPDATE June 11, 2012 – This blog post series has been updated by our new beginner’s guide hosted here.
**
This blog post is part of the Beginner’s Guide series with the goal to get you productive fast.
Here we walk quickly through the entire cycle of Agile planning: Create a backlog, plan a sprint, set capacity for your team, and viewing a task board for the daily standup.
Note that these steps are based on the Scrum process template and will vary with other templates.
1
|
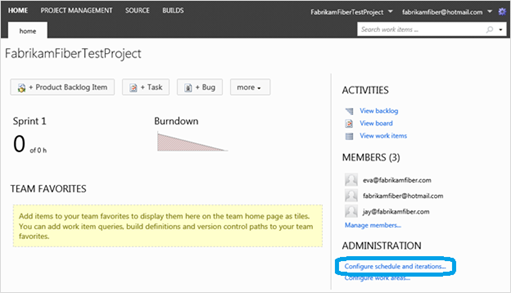
Go to your Home page to set the dates for your iterations.
Under Administration, click Configure schedule and iterations.

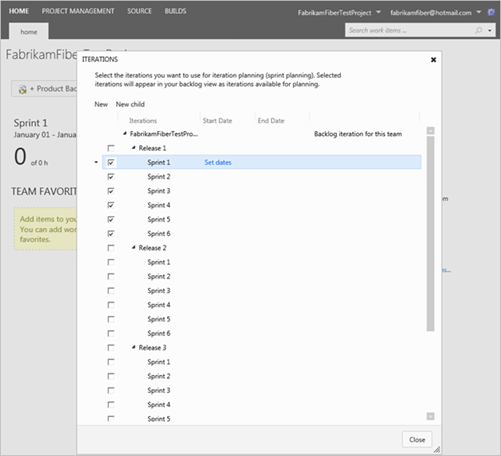
You can edit sprint names, add new sprints, set your sprint schedule, and more. For now, let’s just set the dates for the first sprint. Click Sprint 1 and then click Set dates.

|
2
|
Set dates for your first sprint
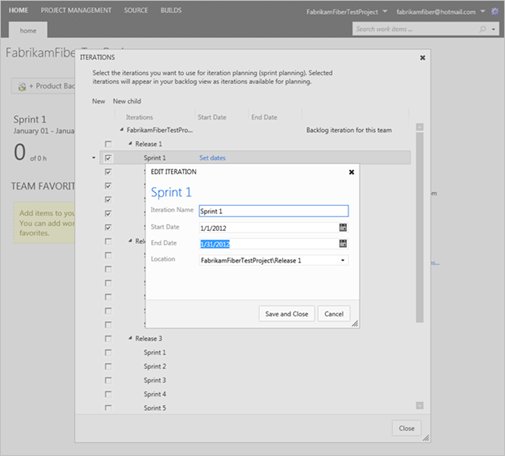
Enter a start and end date for your sprint.
|
|
|

Click Save and Close
Click Close on the Iterations window.
|
3
|
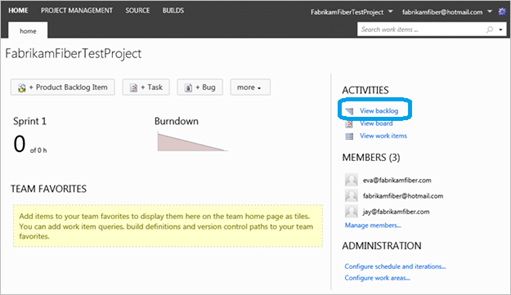
On the Home page and, under Activities, click View backlog.
|
|
|

|
4
|
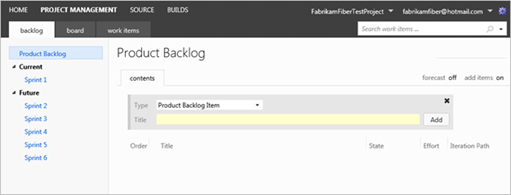
Add a new backlog item.
|
|
|

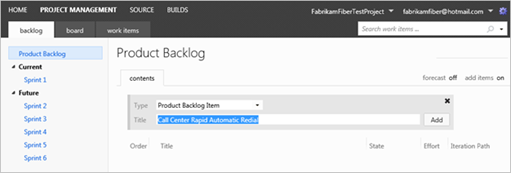
Just type a title and click Add.

Your item is saved to the backlog. Add more if you like. To reprioritize, you drag them up and down.

|
5
|
Move a backlog item to the current sprint.
Simply drag the item to the sprint.
|
|
|

|
6
|
Now select the current sprint.
Click on Sprint 1. You’ll notice that your backlog item now has a + sign next to it.
|
|
|

|
7
|
Create a task.
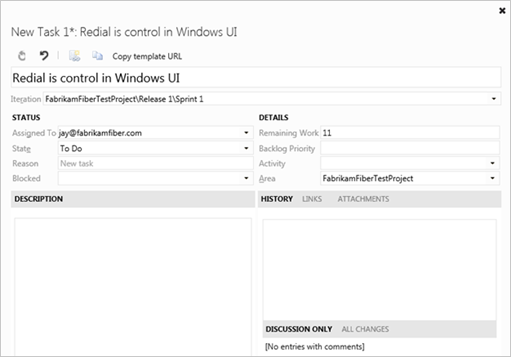
Click the + sign next to the backlog item and the task dialog opens. To get started, let’s just provide Title, Assigned To, and Remaining Work.
|
|
|

When you are finished, click Save and Close.
Now, your sprint backlog looks like this, showing the new task and the work details pane.

|
8
|
Set Capacity for your team.
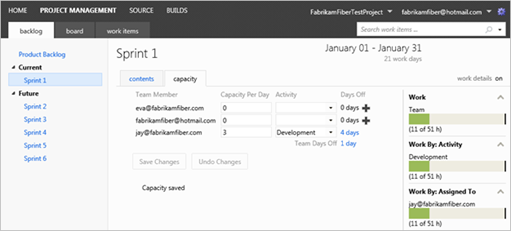
In the backlog section, in the current sprint, click the Capacity tab. Here, you can set capacity, activities, and days out of office for vacations and holidays. As you set capacity, activity, and days off, graphical information about hours and capacity is automatically generated in the pane on the right.

In the work details pane on the right, you notice three colors. This is what they mean:

|
|
|
Click Save Changes when you are finished.
|
9
|
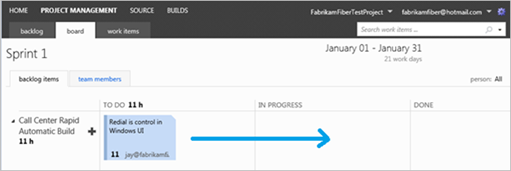
Review the board.
Click the board tab. To show work as started, simply will drag it over to IN PROGRESS.
|
|
|

You can also add new tasks by clicking the + sign.

|
10
|
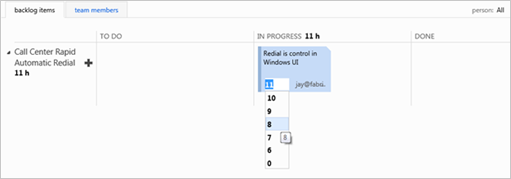
Make changes to tasks directly from the board.
|
|
|
You can change remaining hours…

…and you can change owners, right on the board.

|
Done! You’ve added items to your backlog, put them in a sprint, created tasks and team capacity, and started work.
Now you can click the backlog tab, create your backlog, and get working on it.







0 comments