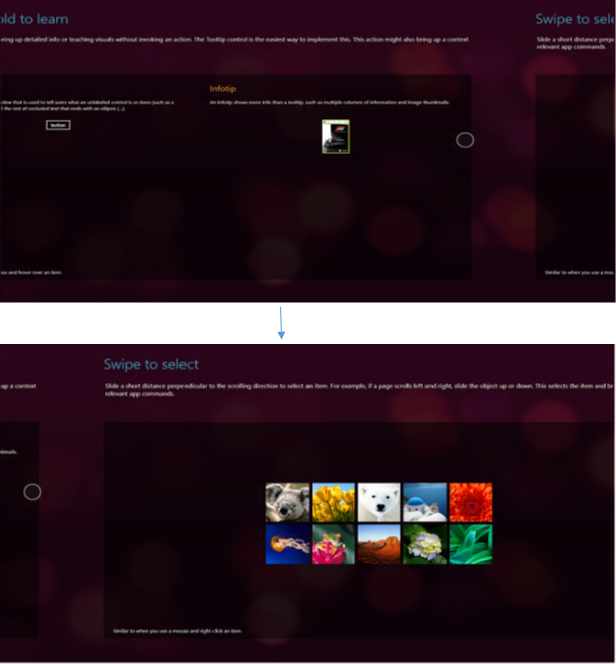
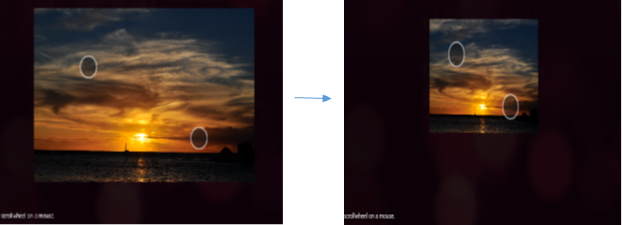
As part of Coded UI Test’s support for windows store apps introduced in Microsoft Visual Studio 2012 as detailed in this blog , there is now playback support for touch gestures on Windows Store Apps. These gestures are only a simulation and hence one would not need to have a touch monitor to use these API’s. Currently these API’s can only be used under the CUIT for Windows store project.
All the members in this family of Coded UI Test gesture API’s have two modes of operation so to speak:
- A gesture can be performed on a control
- A gesture can be performed on an absolute screen coordinates. We term this a Control-less Gesture which will be detailed in a separate blog post. However when using this mode of operation the gesture action is to be framed such that it works the same across resolutions.
In the former case the way a gesture searches for a control is similar to how a CodedUITest Mouse action does today. In the section that follows, we walkthrough each of the gesture API’s provided with examples. Please refer to the end of the blog post for a sample project demonstrating this support.
Gesture classification and walkthrough
The list of touch API’s can be broadly classified into two categories:
- Static Gestures – Static interactions triggered after an interaction is complete.
Eg: Tap, Double Tap and Press-and-Hold. - Manipulation Gestures – Involves direct manipulation of the object.
Eg: Slide, Swipe, Flick, Pinch, Stretch and Turn.
Before we proceed with the different gesture API’s provided and their usage it is important to understand the parameters that can be passed to them and their units.
- Length in pixels
- Duration in milliseconds
- Direction in degrees
- Point coordinates in pixels again.
Static Gestures:
Tap / Double Tap:
A tap simulates a left mouse button click.
 // A simple tap on a button control.
 Gesture.Tap(button);
 // A tap at the bottom left part of the screen to bring up the start screen. A control-less gesture.
 Gesture.Tap(new Point(5, UITestControl.Desktop.BoundingRectangle.Height - 10));
A double tap on the other hand simulates a double click which can come into play in cases where one would need to select a word or depending on the app, magnify content.
// A double tap at a point inside a textbox control to highlight a word.
 Gesture.DoubleTap(textbox, new Point(10,10));
Press and Hold:
A press and hold gesture involves a single finger tap which extends for a given duration, the effect of which is similar to a right mouse click. This gesture is mostly used to bring up tool tips or context menus. For instance the following code brings up a context menu on an image control.
// A press and hold on an image control for a default duration of 1200 ms.
 Gesture.PressAndHold(imageControl);
Manipulation Gestures:
Slide:
A slide is used primarily for panning interactions but can also be used for drawing, moving or writing.
Scenarios include:
- Pan a scrollable container control to bring hidden content into view.
- Draw using the slide API in a painting App.
Parameters:
- Start Point
- End Point
- Duration – Default value being 500ms.
The values of the start and end points correspond to the coordinates on the screen or relative to a specified control. For instance a panning interaction from (200,300) to (400,300) will result in a slide from (200,300) for 200 pixels. In the following code sample the two slide actions have the same effect but each represents a mode of operation – Control and Control-less.
 Point absoluteStartPoint = new Point(control.BoundingRectangle.Right -10, control.BoundingRectangle.Top + control.BoundingRectangle.Height/2);
 Point absoluteEndPoint = new Point(control.BoundingRectangle.Left + 10, control.BoundingRectangle.Top + control.BoundingRectangle.Height/2);

 Point relativeStartPoint = new Point(control.BoundingRectangle.Width - 10, control.BoundingRectangle.Height / 2);
 Point relativeEndPoint = new Point(10, control.BoundingRectangle.Height / 2);

 // A slide on the control for the default duration.
 Gesture.Slide(control, relativeStartPoint, relativeEndPoint);

 // A slide on absolute screen coordinates for the default duration (Control-less mode)
 Gesture.Slide(absoluteStartPoint, absoluteEndPoint);
Swipe:
A swipe is a short slide with the primary intention of selection. Swipe is always associated with a control and hence this is the only gesture that cannot be operated in a control-less mode.
Scenarios include:
- Swipe down on a tile to select it
- Swipe across an email in you inbox to select it.
Parameters:
- Direction – Specified either by the UITestGestureDirection enum or an angle in degrees.
- Length – Default value being 50 pixels.
 // A swipe downwards on the control for a length of 40 pixels.
 Gesture.Swipe(selectableImageControl, UITestGestureDirection.Down, 40);
Flick:
A flick gesture can be associated with a rapid slide in a scenario where one would quickly want to go through a long list of items. This gesture is characterised by its high speed.
Parameters:
- Start Point
- Length
- Duration
- Direction – Specified either by the UITestGestureDirection enum or an angle in degrees.
Note: Although flick, slide and swipe seem similar they differ in their purpose of usage and are hence designed to be comfortably used for their appropriate objective.
Flick is fast if the gesture is to cover a large distance in a short duration and is slow if it is to cover a short distance for a long period of time. The below code snippet illustrates this on the start screen. Notice that as the duration of the gesture increase flick approaches slide.
 Point relativeStartPoint = new Point(startScreen.BoundingRectangle.Width-100,startScreen.BoundingRectangle.Height/2);

 // A fast flick on the start screen.
 Gesture.Flick(startScreen, relativeStartPoint, (uint)startScreen.BoundingRectangle.Width / 2, UITestGestureDirection.Left, 2);
 // A relatively slower flick.
 Gesture.Flick(startScreen, relativeStartPoint, (uint)startScreen.BoundingRectangle.Width / 2, UITestGestureDirection.Left, 15);
Pinch/Stretch:
Pinch/Stretch is essentially used for one of the following types of interactions: optical zoom, resizing or semantic zoom.
Scenarios included:
- Zoom in a map
- Zoom in a semantic zoom control.
Parameters:
- Point1 – Indicating where one touch contact is placed initially
- Point2 – Indicating where the other touch contact is placed initially
- Distance each finger moves
Note: Pinch never overshoots beyond the point of contact of the two touch points.
As an example the pinch gesture below performs a simple zoom out on an image control.
 Point relativePoint1 = new Point(imageToZoom.BoundingRectangle.Width/4, imageToZoom.BoundingRectangle.Height/4);
 Point relativePoint2 = new Point(3 * imageToZoom.BoundingRectangle.Width/4, 3* imageToZoom.BoundingRectangle.Height/4);

 // A pinch on a control with each touch contact moving a 100 pixels towards each other.
 Gesture.Pinch(imageToZoom, relativePoint1, relativePoint2,100);
Turn:
This gesture rotates a control in either clockwise or counter-clockwise direction.
Parameters:
- Point1 – Indicating the focal point for rotation.
- Point2 – Indicating the point on the circumference of the turn.
- Angle of Turn.
 Point relativePoint = new Point(imageToTurn.BoundingRectangle.Width - 10, 10);

 //Rotate an image about a focal point for 90 degrees clockwise.
 Gesture.Turn(imageToTurn, new Point(10, 10), relativePoint, 90);
Note: For a more generic scenario where one would want to rotate a control around its mid-point only the control and the angle of turn needs to be specified and the gesture logic takes care of the rest.
// Rotate the control around its midpoint for 180 degrees clockwise.
 Gesture.Turn(imageToTurn, 180);
UITestGestureDirection
This enumeration helps in easily specifying the 4 basic direction in which a gesture can be performed and has the following members:
- Right equivalent to 0 degrees from the horizontal.
- Down equivalent to 90 degrees from the horizontal.
- Left equivalent to 180 degrees from the horizontal.
- Up equivalent to 270 degrees from the horizontal.
Flick and swipe have overloads which accept this enumeration as a direction.
Limitations
- Currently there is no support for creating a custom gesture through Coded UI Test either by sending raw touch input or by coalescing two or more gestures.
- UI Synchronization is not enabled for gestures which means that a gesture call will not block until the app responds to it.
- The input injection libraries that our gestures implement have a limitation that prevents them from working correctly to activate the edges in a multi-monitor config. Hence, we recommended using Mouse.Click() or Keyboard.Sendkeys() alternatives in place of edge gestures in these scenarios. For instance, in case an app bar needs to be brought up, you can use a Mouse.Click(MouseButtons.Right) or Keyboard.SendKeys(“Z”,ModifierKeys.Windows). For a Charms bar you can use Keyboard.SendKeys(“C”, ModifierKeys.Windows). However usage of gestures for edge actions would work fine in a single monitor scenario. You can use a slide or a flick to bring up either the charms or the app bar like below:
 // To bring up the charms bar.
 Gesture.Slide(new Point(Screen.PrimaryScreen.Bounds.Width - 1, Screen.PrimaryScreen.Bounds.Height / 2),
 new Point(Screen.PrimaryScreen.Bounds.Width - Screen.PrimaryScreen.Bounds.Width / 4, Screen.PrimaryScreen.Bounds.Height / 2));

 // To bring up the app bar.
 Gesture.Flick(new Point(Screen.PrimaryScreen.Bounds.Width / 2, Screen.PrimaryScreen.Bounds.Height - 1),
 (uint)Screen.PrimaryScreen.Bounds.Height / 4, UITestGestureDirection.Up, 5);
Additional Resources
- MSDN documentation on touch gestures: http://msdn.microsoft.com/en-us/library/windows/apps/hh761498.aspx .
- Find attached a sample CodedUITest project demonstrating an E2E scenario using touch gestures. Please download and deploy the C# version of the sample app before running the test.


0 comments