UPDATE June 11, 2012 – This blog post series has been updated by our new beginner’s guide hosted here.
**
This blog post is part of the Beginner’s Guide series with the goal to get you productive fast.
This post walks you step-by-step to get your source code stored in your Team Foundation Services Preview account.
1 |
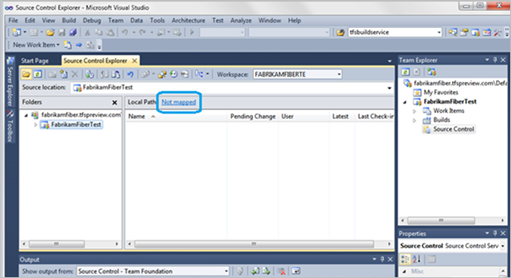
Open Visual Studio 2010, connect to your TFS Preview account, and open
|
|
|
2 |
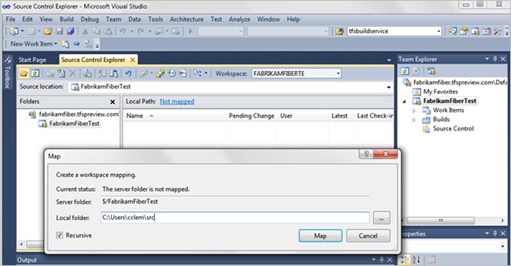
Map files on the server to your workstation.When you click Not mapped, the Map dialog box is launched. You’re going to select a folder on your local drive that will mirror the folders in source control. This is called your workspace. Choose a folder where you want to store your source-controlled files, for example: C:UsersYourNamesrc. |
|
There is more information available about setting up workspaces on MSDN. See Create and Work with Workspaces. |
|
3 |
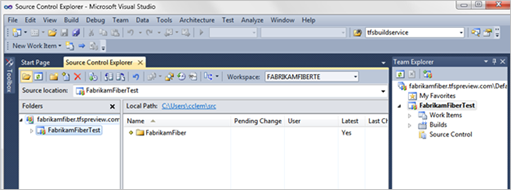
Add files/folders to Source Control.You can simply drag and drop files from Windows Explorer. |

|
|
4 |
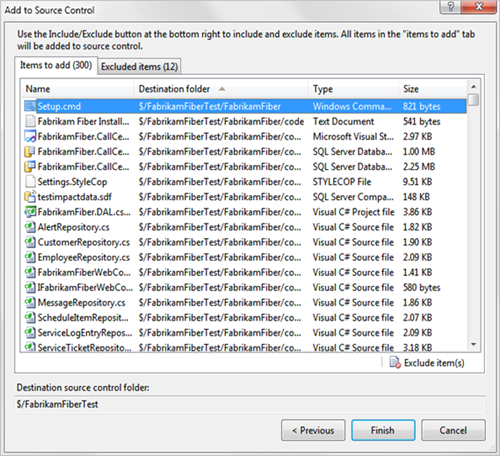
Select specific files to upload.When you have the correct files ready, click Finish. |
|
There is more information available about adding files to source control on MSDN. See Add Files to Version Control. |
|
5 |
Verify that files have been added.It will have a yellow + sign next to it. |
|
|
6 |
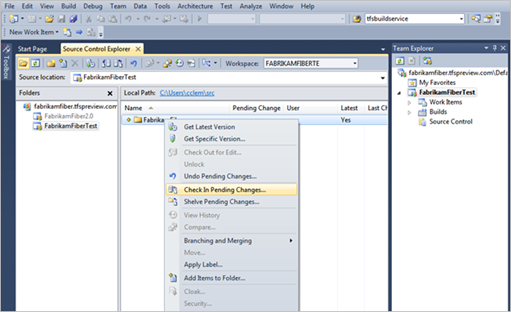
Check in Pending Changes.Your folder and files are not actually checked in and available for other team members to work on until you right-click the folder and click Check In Pending Changes. |
|
|
7 |
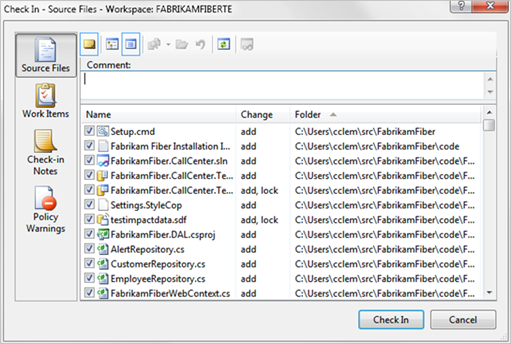
Finalize Check in Pending Changes.This will upload all of your files, and add them to your source repository in the cloud. Click Check In and you’re done. |
|
Congratulations! Your source is now in the cloud, yet still accessible via the Visual Studio interface.
If you are new to Version Control and Source Control Explorer, or simply want to dig deeper,
you’ll find extensive coverage on the MSDN website: Using Version Control.

0 comments