
In this blog post we will dive into how Visual Studio supports teams of C and C++ developers. We’ll begin by creating a small C++ program and placing it in a Git repository in Visual Studio Team Services. Next we’ll see how to commit and push updates and get updates from others. Finally, we will work with GitHub repos using the GitHub extension for Visual Studio.
Adding an Existing C++ Project to Git in Visual Studio Team Services
In this example, you will create a small sample application and use Visual Studio to create a Git repository in Visual Studio Team Services. If you have an existing project, you can use it instead.
To get started you’ll need an account on Visual Studio Team Services. Sign up for a free Visual Studio Team Services account. You can use a personal, work or school account. During the process, a new default project may be created but will not be used in this example.
- Download the sample project from and unzip it into a suitable working directory. You can also use one of your own C++ projects; the steps will be the same.
- Start Visual Studio 2017 and load the CalculatingWithUnknowns solution. Expand the Source Files node in Solution Explorer to see the solution files:

- The blue status bar at the bottom of the Visual Studio window is where you perform Git-related tasks. Create a new local Git repo for your project by selecting Add to Source Control in the status bar and then selecting Git from the . This will create a new repo in the folder the solution is in and commit your code into that repo.
- You can select items in the status bar to quickly navigate between Git tasks in Team Explorer.

-
 shows the number of unpublished commits in your local branch. Selecting this will open the Sync view in Team Explorer.
  shows the number of uncommitted file changes. Selecting this will open the Changes view in Team Explorer.
 shows the current Git repo. Selecting this will open the Connect view in Team Explorer.
 shows your current Git branch. Selecting this displays a branch picker to quickly switch between Git branches or create new branches.
-
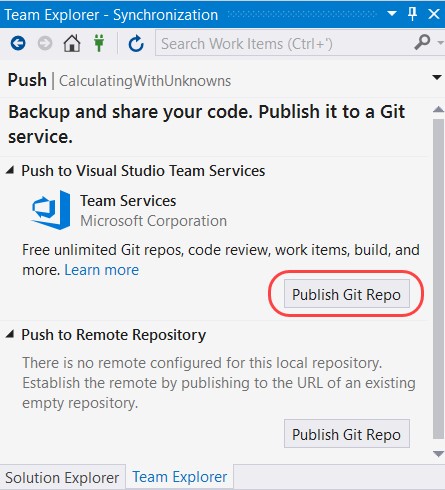
- In the Sync view in Team Explorer, select the Publish Git Repo button under Publish to Visual Studio Team Services.

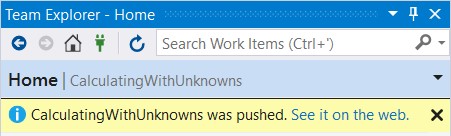
- Verify your email and select your account in the Account Url drop down. Enter your repository name (or accept the default, in this case CalculatingWithUnknowns) and select Publish Repository. Your code is now in a Team Services repo. You can view your code on the web by selecting See it on the web.

As you write your code, your changes are automatically tracked by Visual Studio. Continue to the next section if you want to learn how to commit and track changes to code, push your changes and sync and get changes from other team members. You can also configure your C++ project for continuous integration (CI) with Visual Studio Team Services.
Commit and Push Updates and Get Updates from Others
Code change is inevitable. Fortunately, Visual Studio 2017 makes it easy to connect to repositories like Git hosted in Visual Studio Team Services or elsewhere and make changes and get updates from other developers on your team.
These examples use the same project you configured in the previous section. To commit and push updates:
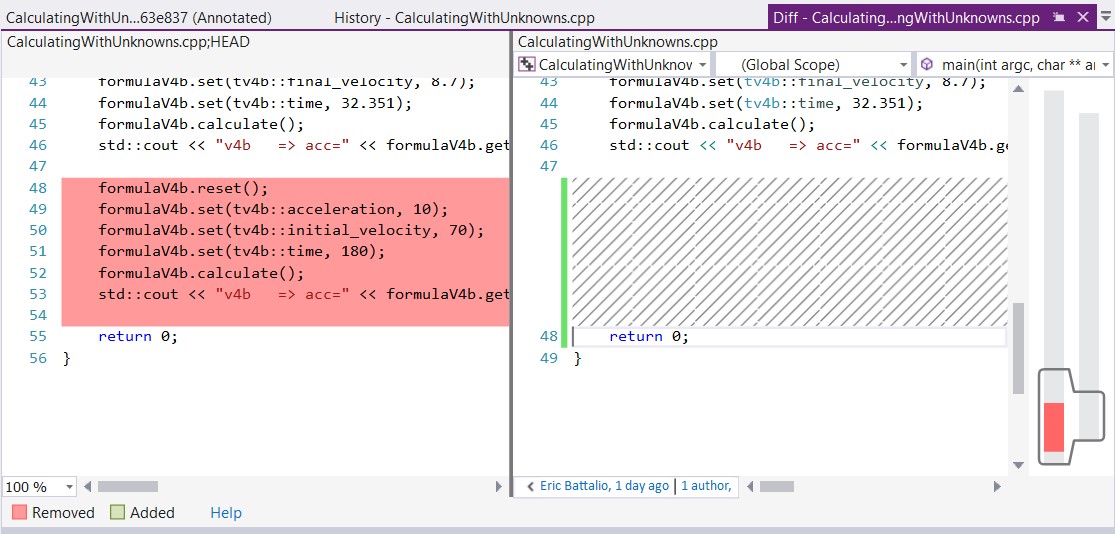
- Make changes to your project. You can modify code, change settings, edit text files or change other files associated with the project and stored in the repository – Visual Studio will automatically track changes. You can view changes by right-clicking on a file in Solution Explorer then clicking View History, Compare with Unmodified, and/or Blame (Annotate).
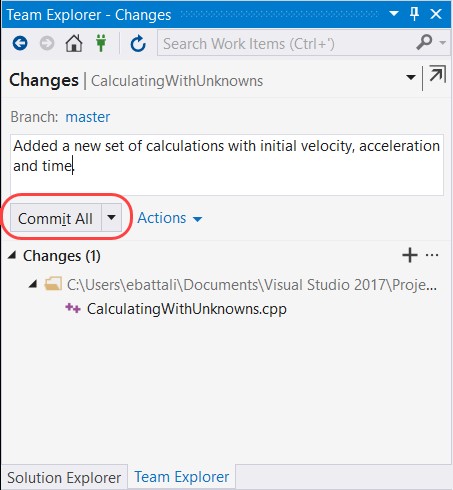
- Commit changes to your local Git repository by selecting the pending changes icon from the status bar.
![]()
- On the Changes view in Team Explorer, add a message describing your update and commit your changes.
- Select the unpublished changes status bar icon or the Sync view in Team Explorer. Select Push to update your code in Team Services/TFS.
To sync your local repo with changes from your team as they make updates:
- From the Sync view in Team Explorer, fetch the commits that your team has made. Double-click a commit to view its file changes.
- Select Sync to merge the fetched commits into your local repo and then push any unpublished changes to Team Services.
- The changes from your team are now in your local repo and visible in Visual Studio.
Work with GitHub repos using the GitHub Extension for Visual Studio
The GitHub Extension for Visual Studio is the easiest way to connect your GitHub repositories in Visual Studio. With the GitHub Extension, you can clone repos in one click, create repositories and clone it in Visual Studio in one step, publish local work to GitHub, create and view pull requests in Visual Studio, create gists and more.
In this section, we walk through installation, connecting to GitHub and cloning a repo.
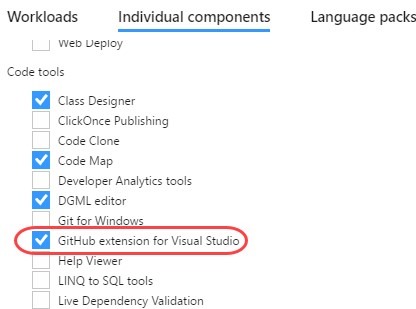
- Install the GitHub Extension for Visual Studio. If you already have Visual Studio installed without the extension, you can install the GitHub Extension it from the Visual Studio GitHub site. You can also select it as part of the Visual Studio installation process. To install (or modify) with Visual Studio 2017, run the installer and click Individual components and then click GitHub extension for Visual Studio under Code tools, then proceed with other selections and installation (or modification):
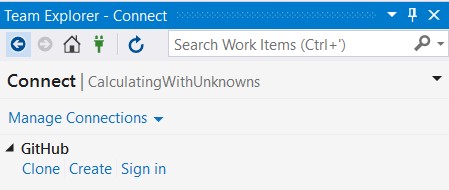
- On the Connect view of Team Explorer, expand the GitHub connection and select Sign In. Provide your GitHub credentials to complete sign in.
- Click Clone to bring up a dialog that shows all the repositories you can access. If you want to clone one, select it and then click Clone.
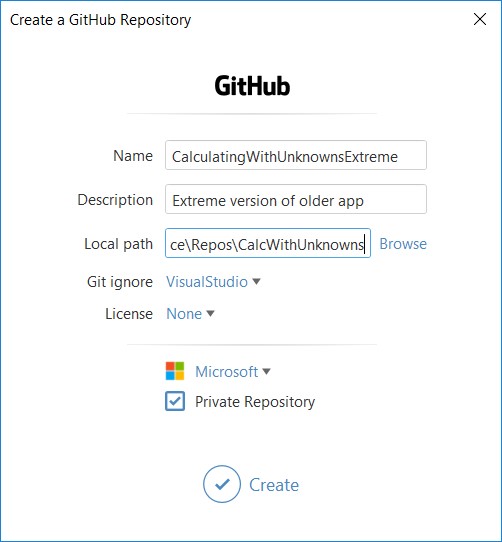
- To create a new repo, click Create and provide information about the repository. You can choose among several Git ignore preferences and licenses and choose whether your repo is public or private. If you have a private account, you will be restricted to private repositories.
- To publish an existing project on your machine, click on the Sync tab in the Team Explorer window to get to the Publish to GitHub
To learn more about the extension, visit the GitHub Extension for Visual Studio page.
0 comments