

We are excited to announce a brand-new extension for building and debugging Makefile projects in Visual Studio Code: Makefile Tools (preview)! The extension is in pilot stages, but we’ve curated a list of over 70 popular opensource Makefile projects that work with Makefile Tools. Give it a try and let us know what you think!
Installing the extension
First, install the Makefile Tools extension from the VS Code Marketplace.
Activating the extension
Once the extension is installed, it will activate when it finds a Makefile in your project’s root folder. If your project’s Makefile is not in the root folder, you can use the Makefile Path setting to instruct the extension where to find it. Update Makefile Path by going to File > Preferences > Settings and then selecting makefile under Extensions.

After updating Makefile Path, type “makefile” into the Command Palette and run a Makefile Tools command to re-activate the extension.
Configuring your project
By default, the extension will attempt to use a make program that resides within your $PATH to configure the project. If your make.exe is not in your $PATH, update the Make Path setting by going to File > Preferences > Settings and then selecting makefile under Extensions. The Make Path setting tells the extension where to find your make executable.

You can also specify the make Path by selecting the pencil icon to the right of the Make button in the extension’s side panel.
![]()
Once your make path is properly set, accept the prompt to allow Makefile Tools to configure IntelliSense.
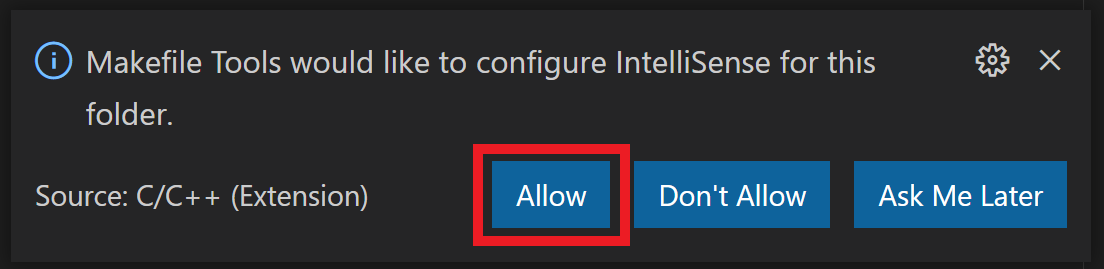
If you don’t see that notification, or you accidentally dismissed it, you can grant Makefile Tools permission to configure IntelliSense by running “C/C++: Change Configuration Provider” from the Command Palette and selecting Makefile Tools.
Now you’re ready to configure your project! If you normally run make from the command line without passing it any additional arguments, you shouldn’t need to do anything else at this point.
If you regularly pass additional arguments to make, use the Makefile Tools’ Configurations setting (makefile.configurations in settings.json) to specify those arguments. Makefile.configurations is an array of configuration objects, each with a name and makeArgs property that holds the arguments to pass to make. To help you out, we’ve documented the correct configurations for over 70 popular open-source repositories. For example, to create a configuration for littlekernel, where you need to pass “PROJECT=armemu-test” to make, your settings.json would look something like this:
"makefile.configurations": [
    {
        "name": "littlekernel",
        "makeArgs": ["PROJECT=armemu-test"]
    }
]
To choose the configuration for a project, select the Makefile Tools icon in the left explorer menu.
![]()
Hover over Configuration and select the pencil icon to choose a configuration for your project.
![]()
If you didn’t define any configurations in makefile.configurations, the extension will automatically select a default one.
Building targets
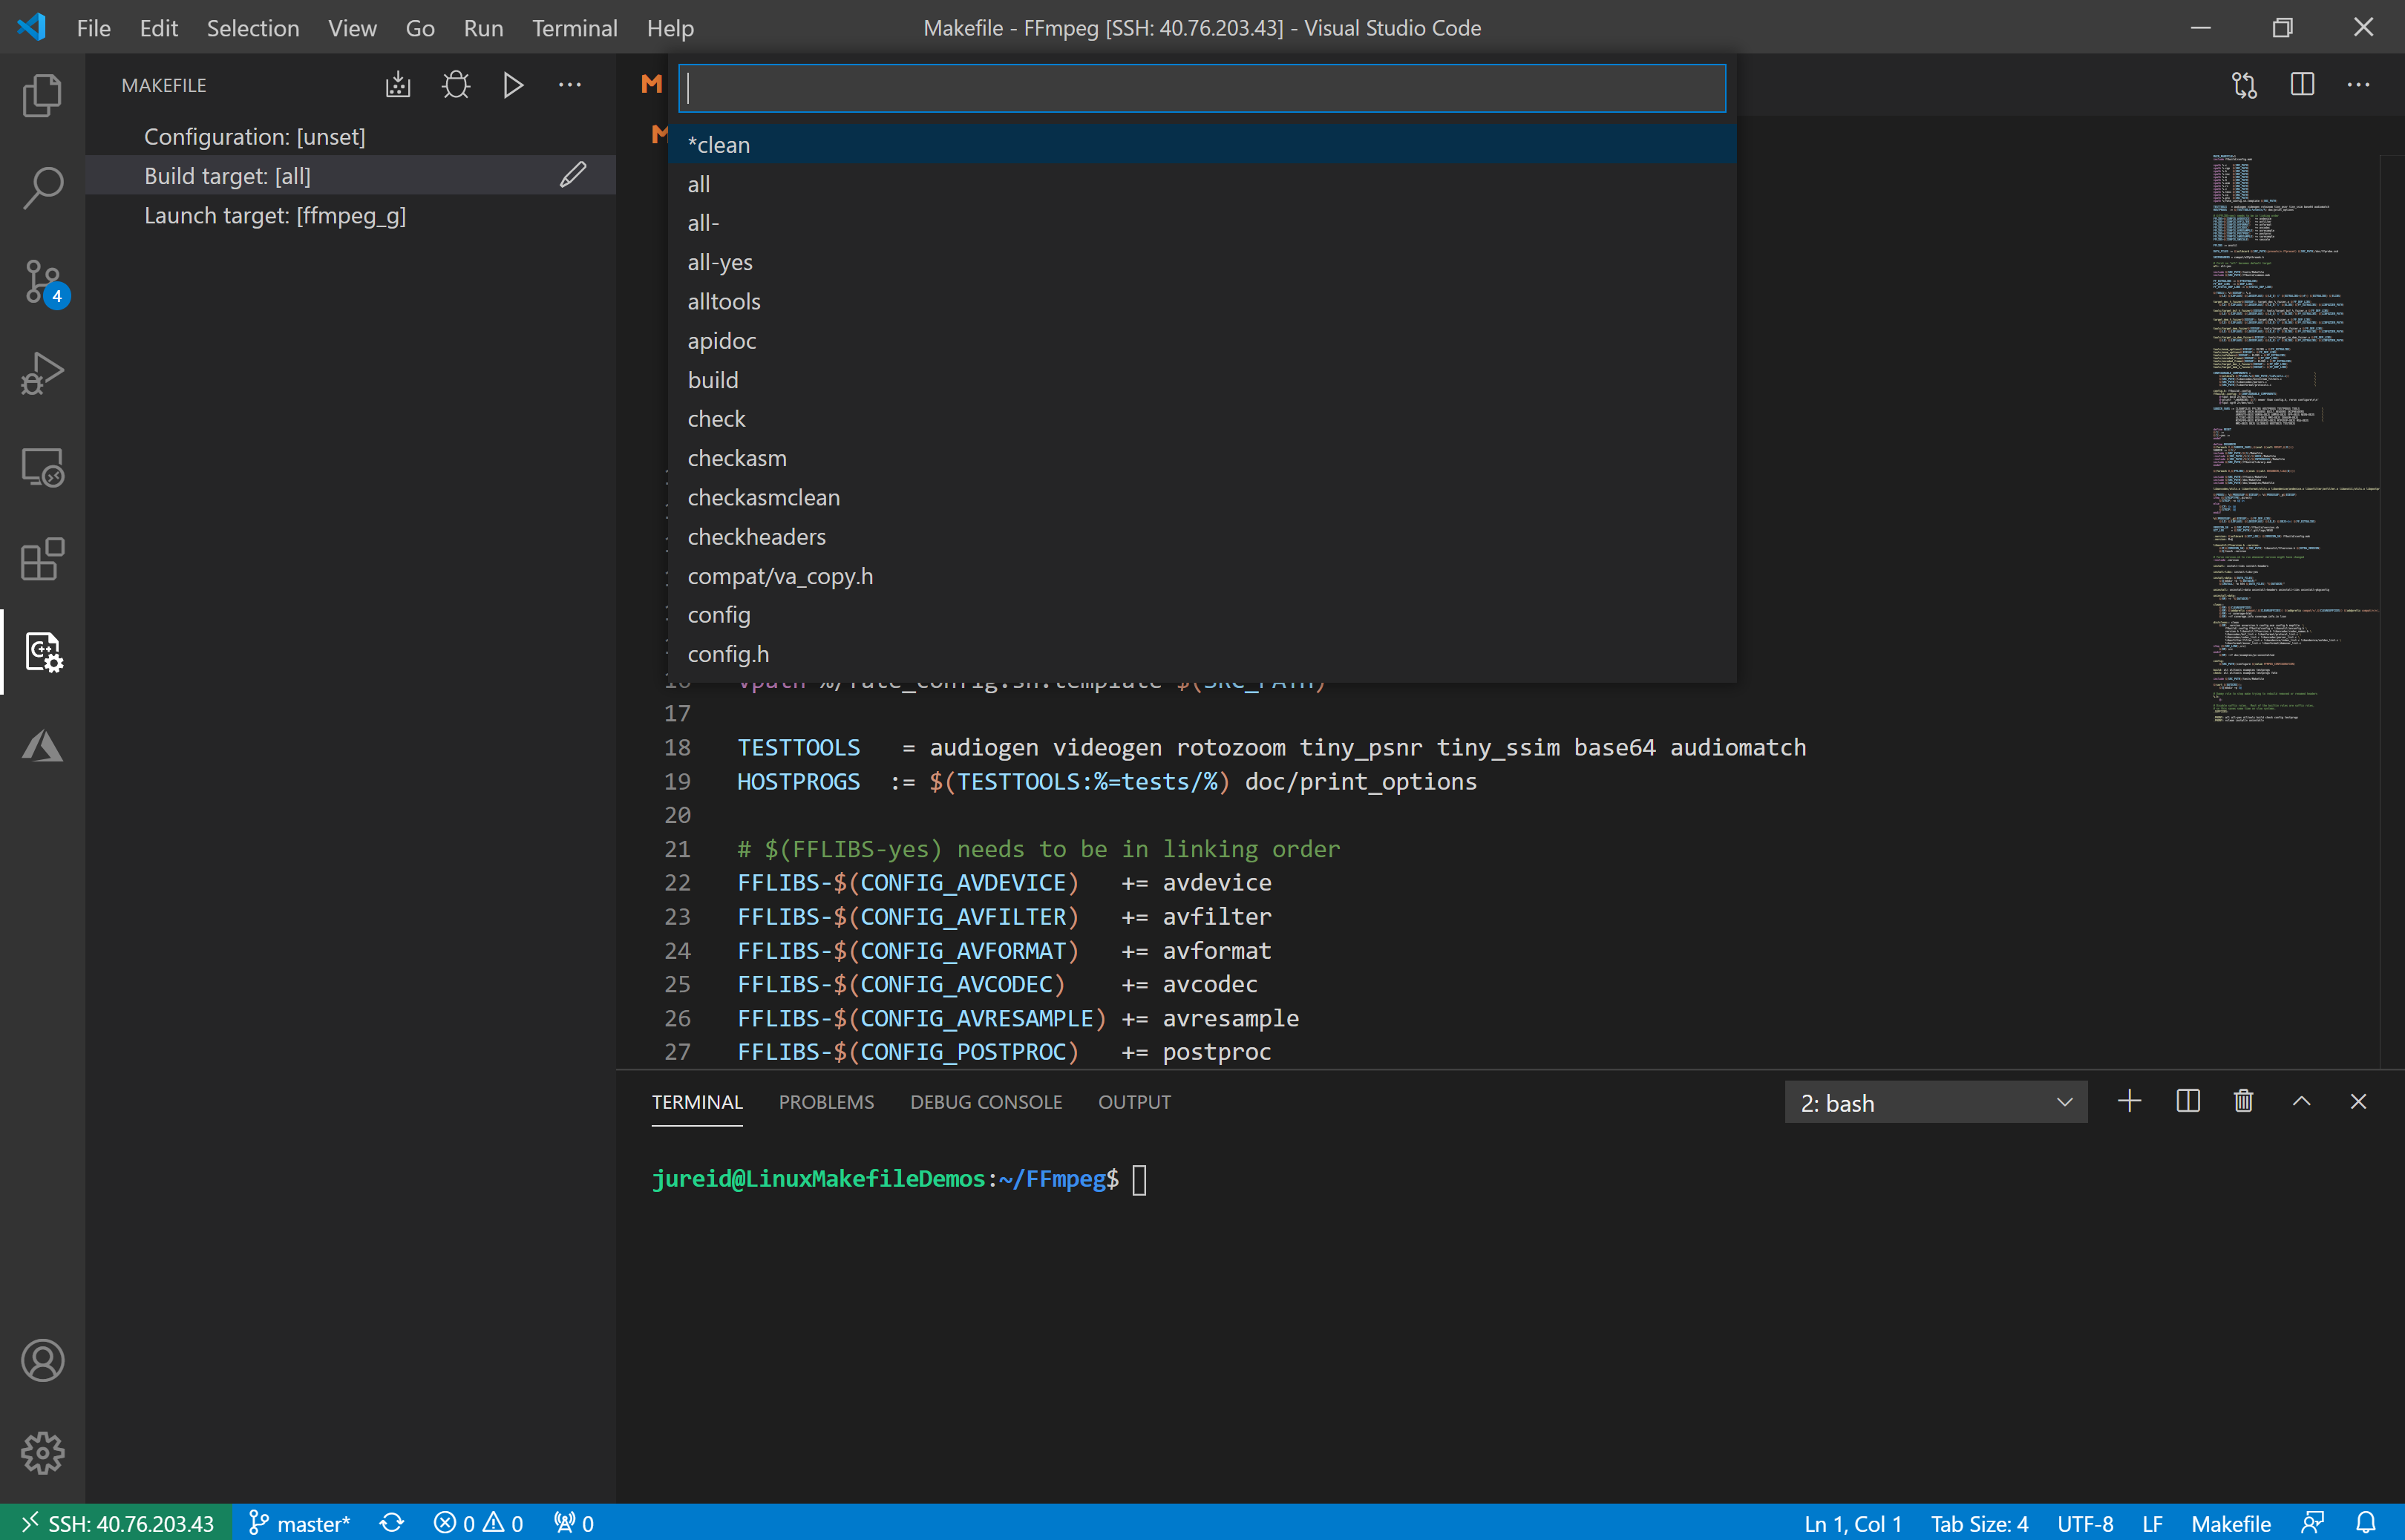
After configuring your project, you’re ready to build. Choose a Build target by selecting the pencil icon that appears on hover.
![]()
Then choose from the list of targets found in your project’s Makefile.
After setting the Build target, click the Build icon.
![]()
Debugging and running targets
To run/debug your program, use the pencil icon to select a Launch target. A configuration for the selected target will be added to the makefile.launchConfigurations setting. If you need to pass additional arguments to your targets, add the binaryArgs property to the target’s configuration in makefile.launchConfigurations. You can also set MIMode, miDebuggerPath, and stopAtEntry in makefile.launchConfigurations.
![]()
Once the Launch target is set, select the Debug icon to start a debugging session.
![]()
To run the program without debugging, select the Run in Terminal button.
![]()
Makefile Tools commands
You can find all the Makefile Tools commands by opening the Command Palette and typing “makefile”. For your convenience, there are commands for building clean and building ALL that you can run without changing the Build target.

Makefile Tools settings
To find all Makefile Tools settings, go to File > Preferences > Settings and then select makefile under Extensions. The settings you’ll probably use the most are:
- configurations (tells the extension which arguments to pass to make when configuring your project)
- defaultLaunchConfiguration (global debugger settings)
- launchConfigurations (debugger settings for specific launch targets)
- makePath (path to your make executable)
- makefilePath (path to project’s Makefile)
- buildLog (alternative to dry-run)Makefile Tools settings
Other features
Since releasing this extension, we have developed other features to make your life when working with Makefiles easier. To learn more about these, please see this blog post for problem matching and compilation database generation and this blog post for variable expansion.
Known limitations
This is a preview release of Makefile Tools, and although we’ve tested it with over 70 repositories, you may need to do some fiddling to configure your project for the first time. Please feel free to submit a PR to this document, adding your repository and its correct configuration settings, to help anyone who might be trying to build the same project.
Check out our troubleshooting guide for a list of known limitations and work-arounds.
What do you think?
Download the Makefile Tools extension for Visual Studio Code today, give it a try, and let us know what you think. If you run into any issues, or have any suggestions, please report them in the Issues section of our GitHub repository.
We can be reached via the comments below or in email at visualcpp@microsoft.com. You can also find our team on Twitter at @VisualC.
This is a great start! Here are a few ideas:
* Tie the Build target into Ctrl+Shift+B so I don't I have to go to the Make view each time I want to build
* Add an editable Clean target that is separate from the build target. Currently, it appears that it's hardcoded to "clean", but sometimes a Makefile will have multiple cleaning targets (distclean and mrproper come to mind).
* When I was selecting the Build target, the first thing that came to mind was wondering why it wasn't like the Build target drop-down box at the top of...
Top stuff! Just when you think VS Code can’t get any better… it does!
I am a little bit surprised that there wasn’t a makefile plugin before now, or even that it wasn’t built in. No matter, it’s a welcome addition and working very well with my project!
Seems like “you guys” *Microsoft and Microsoft Dev team*
are listening Developer who using Windows Environment.
Well done and thank you.