
Content outdated
For up-to-date documentation see Walkthrough: Build and Debug C++ with Microsoft Windows Subsystem for Linux 2 (WSL 2) and Visual Studio 2022.For an overview of the Visual Studio capabilities described in this article, see Develop C and C++ applications.
Visual Studio 2019 version 16.1 added native support for using C++ with the Windows Subsystem for Linux (WSL). WSL lets you run a lightweight Linux environment directly on Windows, including most command-line tools, utilities, and applications. In Visual Studio you no longer need to add a remote connection or configure SSH in order to build and debug on your local WSL installation. This will save you time getting up and running in a Linux environment and eliminates the need to copy and maintain sources on a remote machine. In order to use our native support for WSL you will need to install the Linux Development with C++ workload in Visual Studio.
In this blog post, we’ll first look at how to set up WSL. We will then walk-through how to use it with a CMake project and a MSBuild-based Linux project. We recommend using CMake for all C++ cross-platform development. If you are just getting started with our native support for CMake, be sure to check out our CMake Support in Visual Studio introductory page too.
WSL1 versus WSL2
Our native support for WSL works best with WSL1. Our support executes all commands locally through wsl.exe and relies on Windows drives mounted under the /mnt folder (e.g. /mnt/c/Users…) to access local source files from WSL. These commands are slower with WSL2 because performance across the Windows and Linux operating systems is faster in WSL1 than WSL2. Learn more about the differences between WSL1 and WSL2 here.
To avoid these slowdowns, you can install and run SSH on your local WSL2 installation and add a new SSH connection to WSL2 as if it were a remote machine. Stay tuned to the C++ Team Blog for more information on our WSL2 support.
Setting up WSL
You can find details on how to install WSL here, but the easiest way is to download your distro of choice (Ubuntu, Debian, etc.) from the Microsoft Store.
To configure your WSL installation to work with Visual Studio you need the following tools installed: a compiler (GCC or Clang), gdb, rsync, and zip. If you are using CMake, then you will also need to install an underlying build system (Ninja or Unix Makefiles). You can install them on distros that use apt with the following commands:
sudo apt update
sudo apt install g++ gdb make ninja-build rsync zip
In this tutorial, I’ll use GCC and Unix Makefiles.
The inclusion of rsync and zip allows Visual Studio to extract header files from your WSL instance to the Windows filesystem to use for IntelliSense. Due to the lack of visibility into the root file system of WSL from Windows, a local rsync copy is done inside WSL to copy the headers to a Windows visible location. This is a one-time operation that Visual Studio performs to configure IntelliSense for Linux connections.
Visual Studio CMake projects and WSL
Let’s start by looking at a simple CMake project.
1. Start Visual Studio 2019 (version 16.1 or later) and create a new CMake project using the “CMake Project” template or open an existing one.
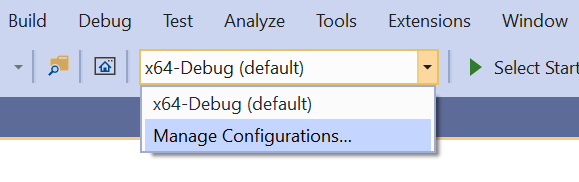
2. Navigate to the configuration drop-down menu and select “Manage Configurations…” This will open the CMake Settings Editor.
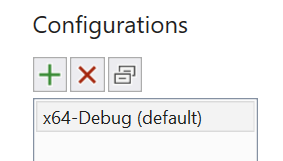
 3. Visual Studio creates an x64-Debug configuration by default. You can add a new WSL configuration by clicking on the green plus sign above the configuration manager on the left-hand side of the editor.
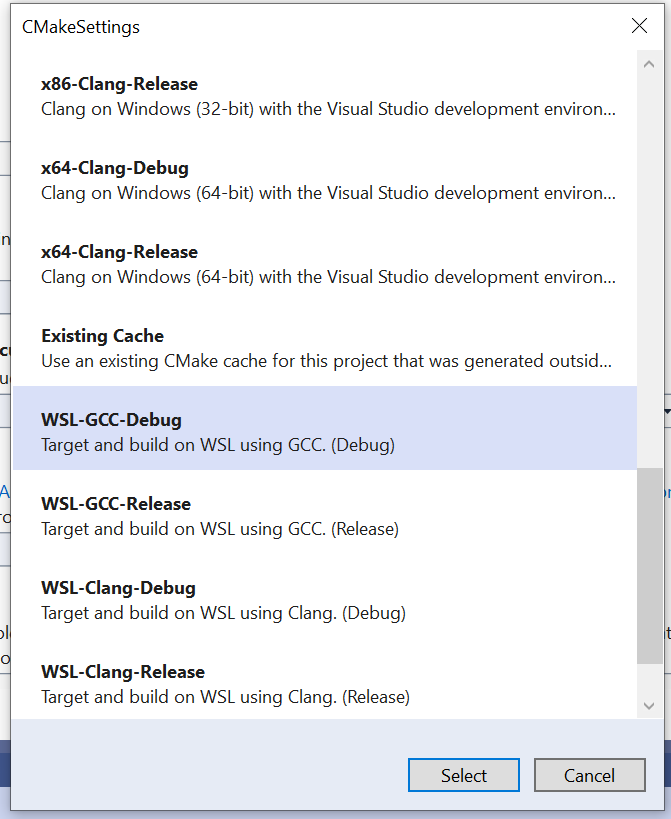
 4. Select a WSL-GCC-Debug configuration. If you are building with Clang, then you can select a WSL-Clang-Debug or WSL-Clang-Release configuration.
 5. By default, Visual Studio will pick up on your default WSL configuration. If you have side-by-side installations of WSL, then you can specify which WSL executable Visual Studio should use by setting the “Path to WSL executable” property under the “General” section of the CMake Settings Editor.
6. Select Unix Makefiles as your generator. If you are using Visual Studio 2019 version 16.6 or later, then Visual Studio will attempt to use Ninja by default. Scroll down to the bottom of the CMake Settings Editor and click the link to “Show advanced settings”. Set the “Generator” to Unix Makefiles.

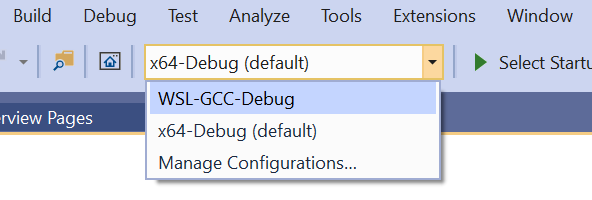
7. Save the editor (Ctrl + S) and select your WSL-GCC-Debug configuration as your active configuration using the configuration drop-down menu at the top of the page. This will start the cache generation of your WSL configuration.
 8. If you don’t have CMake on your WSL installation, then you will be prompted to automatically deploy a recent version of CMake from Visual Studio. If you are missing any other dependencies (gcc, gdb, make, rsync, zip) then see above for Setting up WSL.
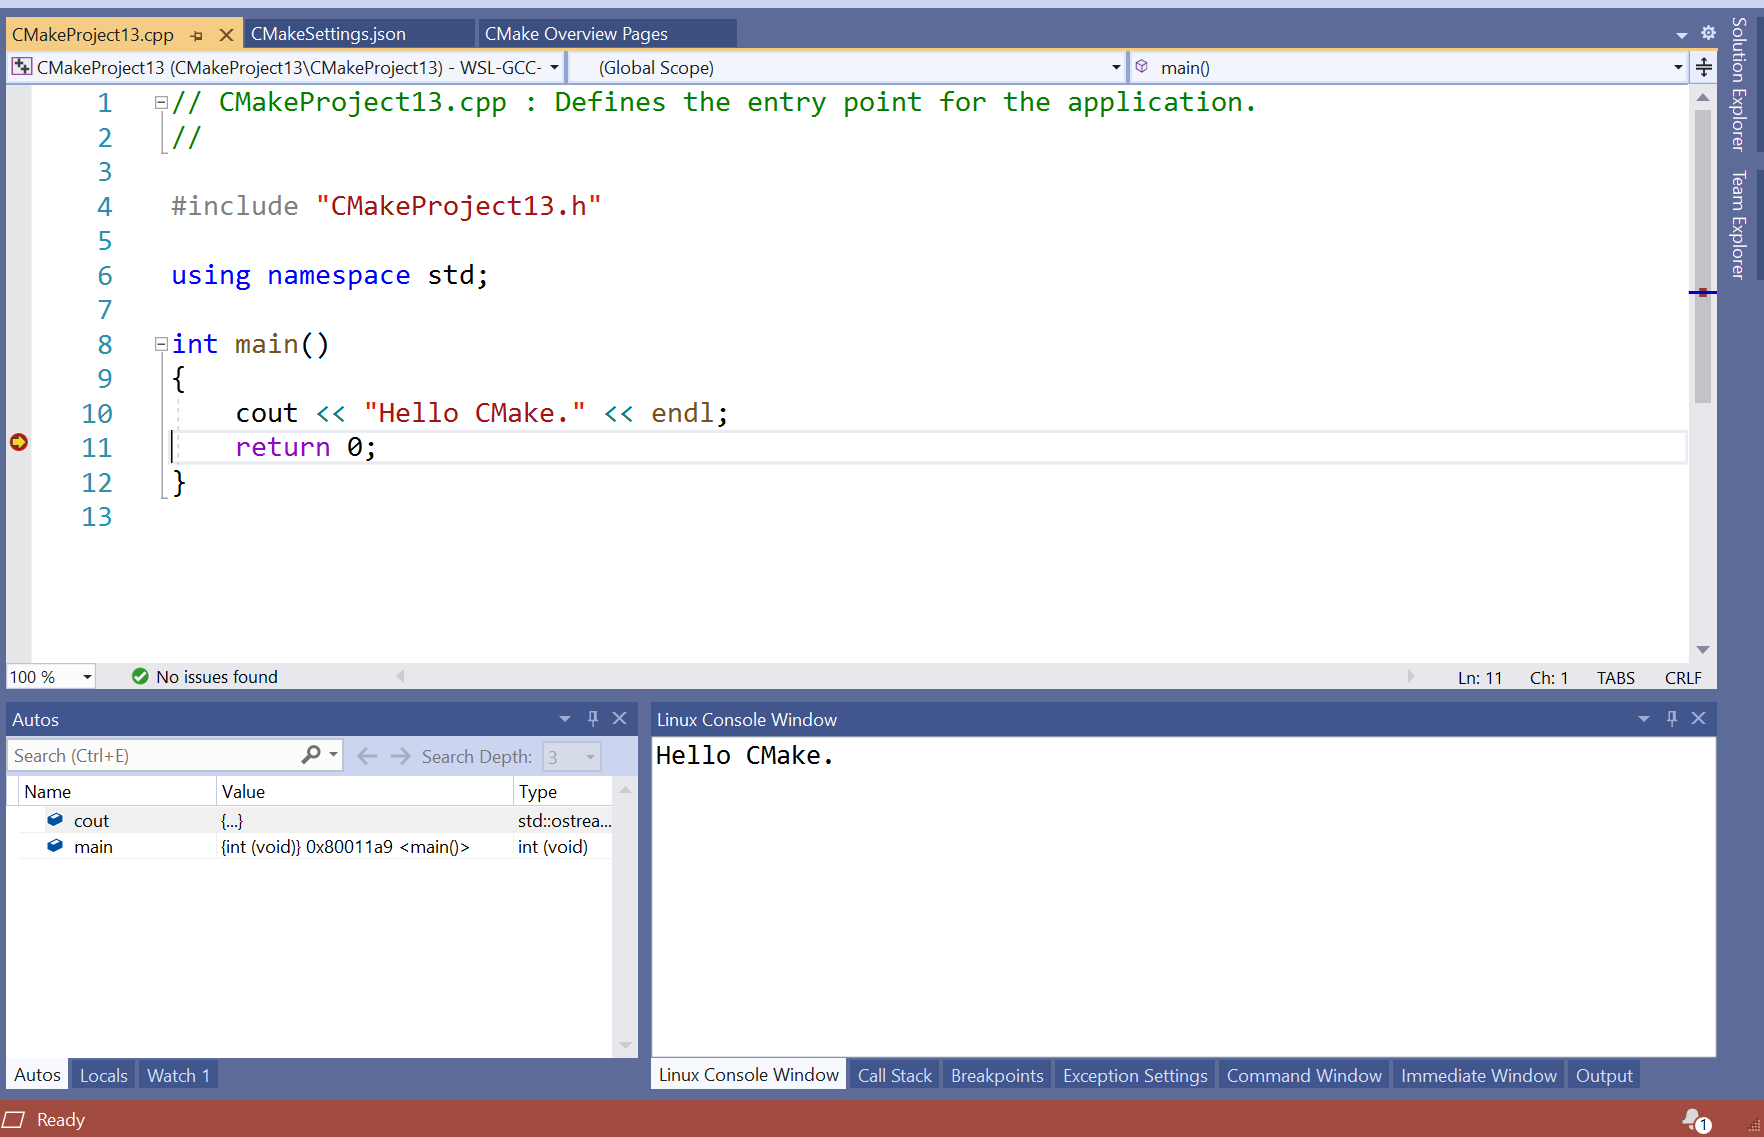
9. In the Solution Explorer expand the project subfolder and in the .cpp file set a breakpoint in main() .
10. In the launch bar change the launch target from “Current Document” to your project name.
11. Now click “Start” (Debug > Start) or press F5. Your project will build, the executable will launch, and you will hit your breakpoint. You can see the output of your program (in this case, “Hello CMake”) in the Linux Console Window.
Visual Studio MSBuild-based projects and WSL
We also support using WSL from our MSBuild-based Linux projects in Visual Studio. Here are the steps for getting started.
1. Create a new Linux Console Application (you can filter platform by Linux and look for “Console App”) in Visual Studio 2019 version 16.1 or later or open an existing one.
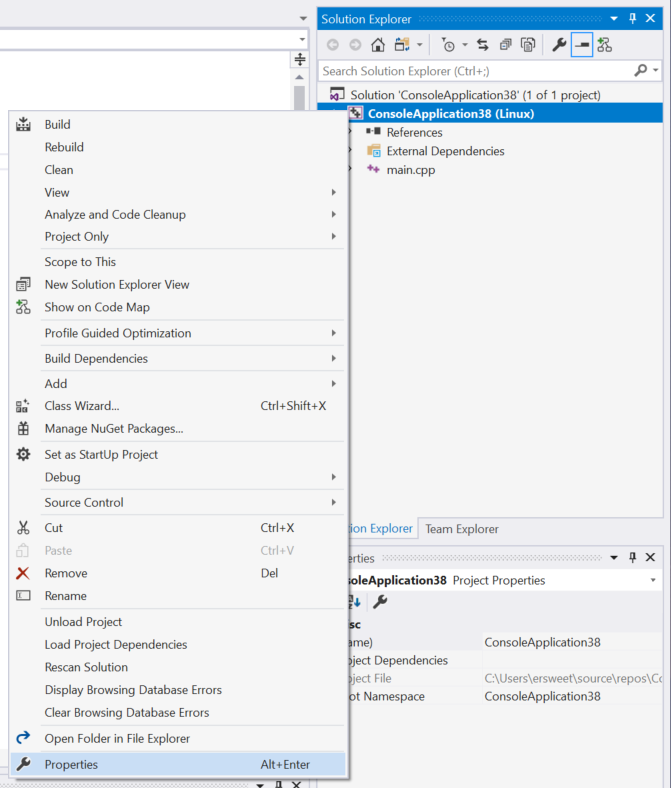
2. Right-click on the project in the Solution Explorer and select “Properties” to open the Project Property Pages.
3. In the dialog that opens you will see the “General” property page. On this page, there is an option for “Platform Toolset.” Change this from “GCC for Remote Linux” to “GCC for Windows Subsystem for Linux.” If you are building with Clang, then you can select the “Clang for Windows Subsystem for Linux” toolset.

4. By default, Visual Studio will target the WSL installation that is set as the default through wslconfig. If you have side-by-side installations of WSL, then you can specify which WSL executable Visual Studio should use by setting the “WSL *.exe full path” option directly below “Platform Toolset.” Press OK.
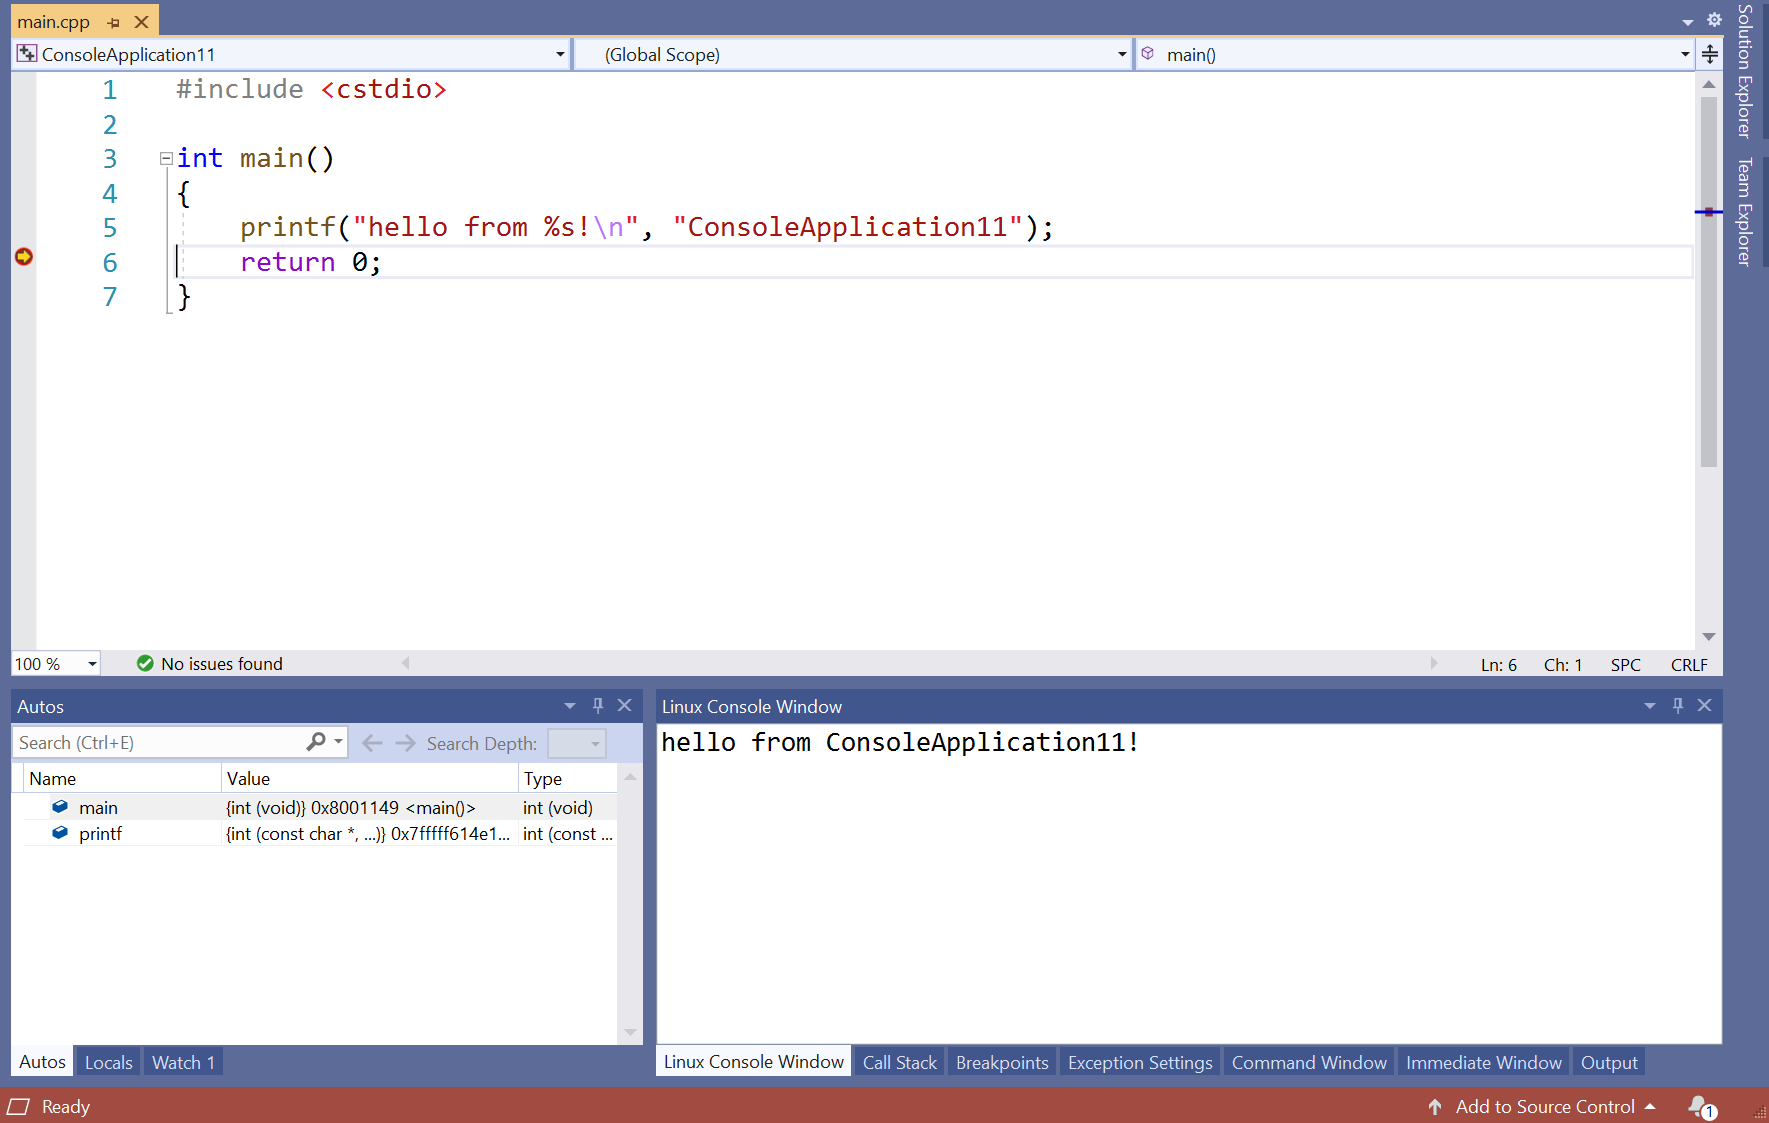
5. Set a breakpoint in main.cpp and click “Start Debugging” (Debug > Start Debugging). If you are missing any dependencies on your WSL installation (gcc, gdb, rsync, zip) then see above for Setting up WSL. You can see the output of your program in the Linux Console Window.
Give us your feedback!
If you have feedback on WSL or anything regarding our Linux support in Visual Studio, we would love to hear from you. We can be reached via the comments below or Twitter (@VisualC). If you encounter other problems with Visual Studio or MSVC or have a suggestion, you can use the Report a Problem tool in Visual Studio or head over to Visual Studio Developer Community.
Coming soon…
More announcements about AddressSanitizer integration for Linux projects, Code Analysis quick fixes, and Quick Info improvements are coming to the C++ Team Blog later this week. Stay tuned!
I am trying to set command line arguments for the debugging but to set that I needed to create debug config but in that config I am not sure where can I describe “program” and “cwd”?
Great feature! But I am unable to compile even the simple hello.c console app offered by VS2019 when creating a new project. WSL was already set up and working as required, and the MSBuild was properly configured with the minor difference that "Platform Toolset" is now entered as "GCC for Windows Subsystem for Linux" instead of "WSL_1_0" (as of VS2019 version 16.5). Then the "build" action launches the compiler and outputs
1>------ Build started: Project: ConsoleApplication, Configuration: Debug x64 ------
1>Starting remote build
1>Compiling sources:
1>main.cpp
but then the build simply freezes and never finishes - I have to kill the "MSBuild.exe"...
Tangentially related: I'd like to use Linux executables (e.g. bison ) from Visual Studio Community 19.
I currently call win_bison from a 'build event' like this:
d:\flex-bison\win_bison --output="d:\ngspice-25m\src\spicelib\parser\inpptree-parser.c" --defines="d:\ngspice-25m\src\spicelib\parser\inpptree-parser.h" "d:\ngspice-25m\src\spicelib\parser\inpptree-parser.y"
I' tried to change this to:
c:\windows\system32\wsl.exe bison --output="/mnt/d/ngspice-25m/src/spicelib/parser/inpptree-parser.c" --defines= ... [ etc. ]
but whatever I try, VS always says WSL is not an executable program.
Other executables can be called in this way, just not wsl.exe .
Comments?
Nice feature. Adding “sudo apt-get update” as the first command in Ubuntu WSL would be helpful to the not so savvy linux users.
Hi Erika
I’ve followed both of your tutorials above and they work great! Is there any way to add files/folders from the WSL file system though? Or do all of the source files reside on the windows file system?
I’ve been able to open folder/files through VSCode connected remotely to WSL, just wondering if it is possible in VS2019?
Hi Kelly, at this time we don’t support opening files stored in the Linux file system. You can upvote and track the status of this Developer Community suggestion.
Hi, Erika.
Thanks for the article. We need sudo option for start debugging. My program must run in sudo mode. Otherwise it is impossible to run. E.g. using netlink requires root or sudo ….
Workaround for remote debug is to connect with root account to ssh and use it as remote debugger connection.
but wsl is preferable so please let us know if this issue is in stack.
Can’t find WSL in configuration list (VS2019 16.3.8)
How do I use the clang-8 webassembly support within this feature set?
Erika this may be a tangential question but perhaps you can help me. I built an computer intensive AI windows executable that runs on the customers PCs. It can run standalone but I occasionally need for this code to talk to a remote server or to my company website hosted on the cloud. So I want to do this programmatically invisibly to the user. I need a socket or something with the password of the server and server IP address and so on. It seems simple but it appears difficult from Visual Studio visual C++. The server is running Linux...
I’m really enjoying this feature. My current CMake project requires me to debug using elevated privileges on Linux. Is there a way to specify running the debug session in WSL as sudo or root user? I’ve used VisualGDB for the same capabilities and there is an option to run as sudo.
Hi Kevin, unfortunately we don’t currently support sudo commands for remote Linux connections or WSL.
So I followed this setup guide and I’m getting an error after I add WSL-Debug in the configurations manager and try to build. Output: 1> CMake generation started for configuration: ‘WSL-Debug’.1> Found cmake executable at $HOME/.vs/cmake/bin/cmake.1> C:\Users\JDBHa\Documents\Visual Studio Projects\CMakeProject1/CMakeLists.txt does not exist
EDIT: So I moved my project folder to the root of C drive instead of documents and it’s working now. although i’m not entirely sure why.
Hi Erica, got problem trying to use clang on WSL-Linux.
I use libc++, but Intellisense can’t understand that from my CMakeLists.txt, and suggests things using libstdc++ headers (in particular I’m trying to get Intellisense suggestions for stuff from <filesystem> header).
Project compiles and debugging works just fine, only Intellisense don’t work properly.
My CMake file:
cmake_minimum_required(VERSION 3.10)project (brain)add_compile_options(-stdlib=libc++)add_compile_options(-std=c++17)
add_executable(brain main.cpp)target_link_libraries(brain c++ c++fs)
Thanks for the feedback. Can you please report a problem on Developer Community? This will allow you (and others who have the same issue) to engage with the team directly and track the status of the issue as we work to resolve it.