You can now combine the award-winning Splunk® Enterprise with the power and security of the Azure Government Cloud! Splunk provides the leading platform for Operational Intelligence. Splunk searches, monitors, analyzes and visualizes machine-generated big data from websites, applications, servers, networks, sensors and mobile devices – all in real time.
Customers use Splunk to deepen business and customer understanding, mitigate cybersecurity risk, improve service performance and reduce costs. Splunk Enterprise indexes machine data in real time, enabling multiple roles across the organization—from system administrators to business analysts—to rapidly gain insight from the massive amounts of machine data generated by your environment.
- Lower total cost of ownership and operation
- Speed time-to-value
- Rapidly scale your solution
- Increase collaboration with access to your data anywhere, anytime and by any authorized user
You can launch a Splunk® Enterprise Standalone VM from Github to Azure Government via Azure Quickstart Templates. Using this Quickstart ARM template designed specifically for Azure Government Cloud, Splunk Enterprise can be run from a single installation!
Step-by-step for Launching Splunk® Enterprise standalone to Azure Government Cloud
- Go to the solution templates in Azure QuickStart Repo on GitHub. They can be found by searching for “Splunk on Ubuntu”, or by clicking here. For step-by-step deployment instructions for solution templates from Github in to Azure Government Cloud, see our technical documentation, please read before deploying the template.
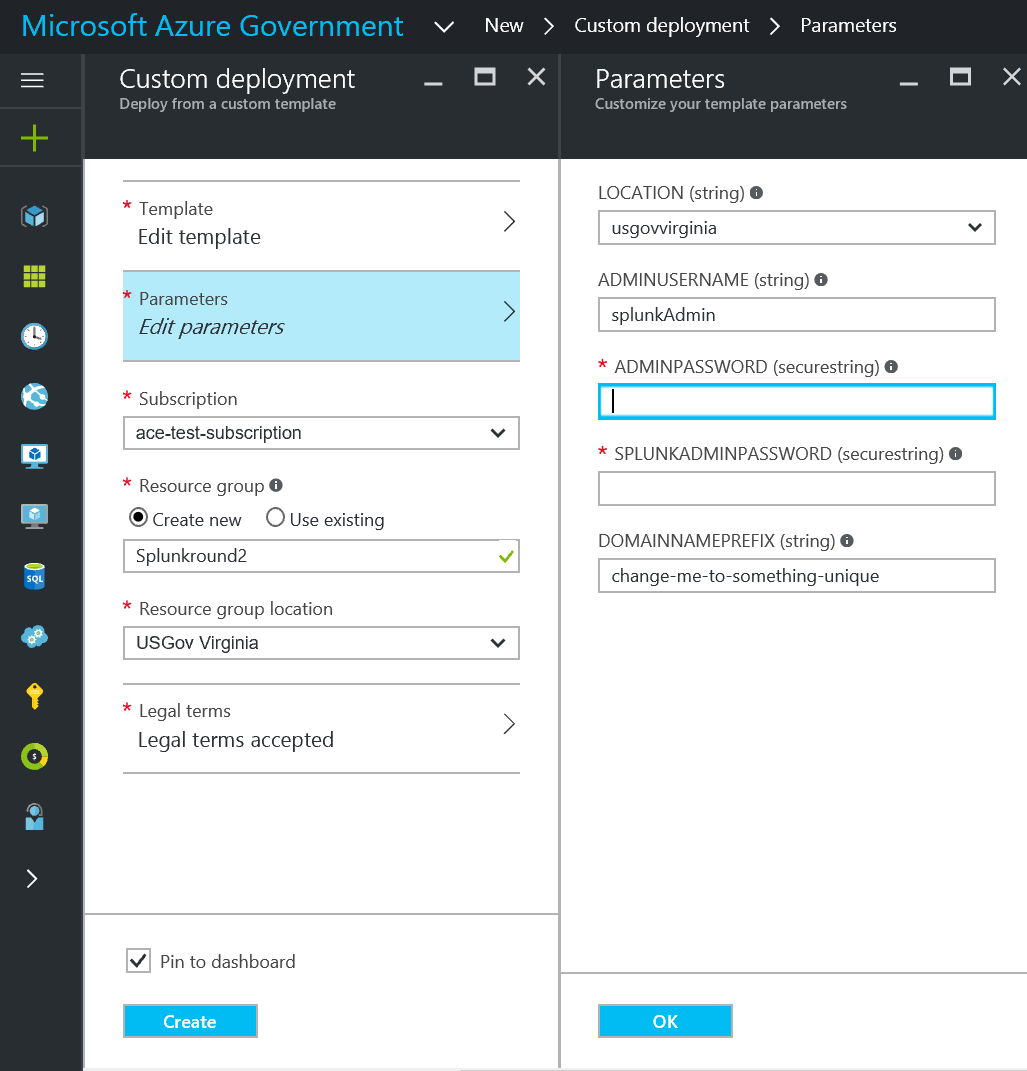
- Once you’ve deployed the solution template in Azure Government, a browser page will open the template deployment blade in the Azure Government portal. In the Parameters blade, complete required fields, then click “Okay”.
Tips for successful deployment:
- Domain prefixname needs to follow DNS requirements:
- Recommended location USGovVirginia, Splunk recommends Premium Storage/DS, available in Iowa (soon).
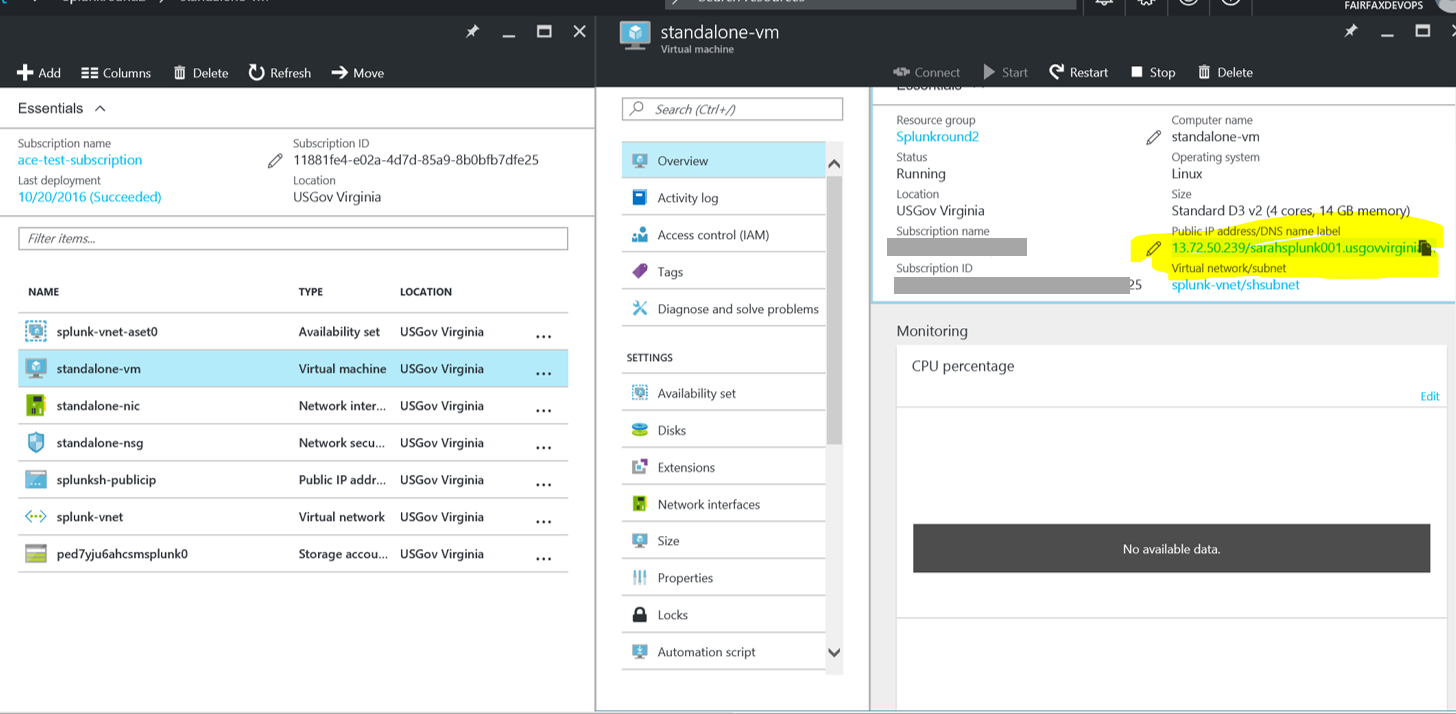
- Deploying will take several minutes. Once the VM is running, it will show up in your dashboard. Click on your VM and bring up this view, then click on the “Standalone VM”
- A view, like the screenshot below, will open showing the details of your Splunk VM DNS. Copy the DNS name, and paste into your broswer as https://(yourDomainNamePrefix).usgovvirginia.cloudapp.azure.com.
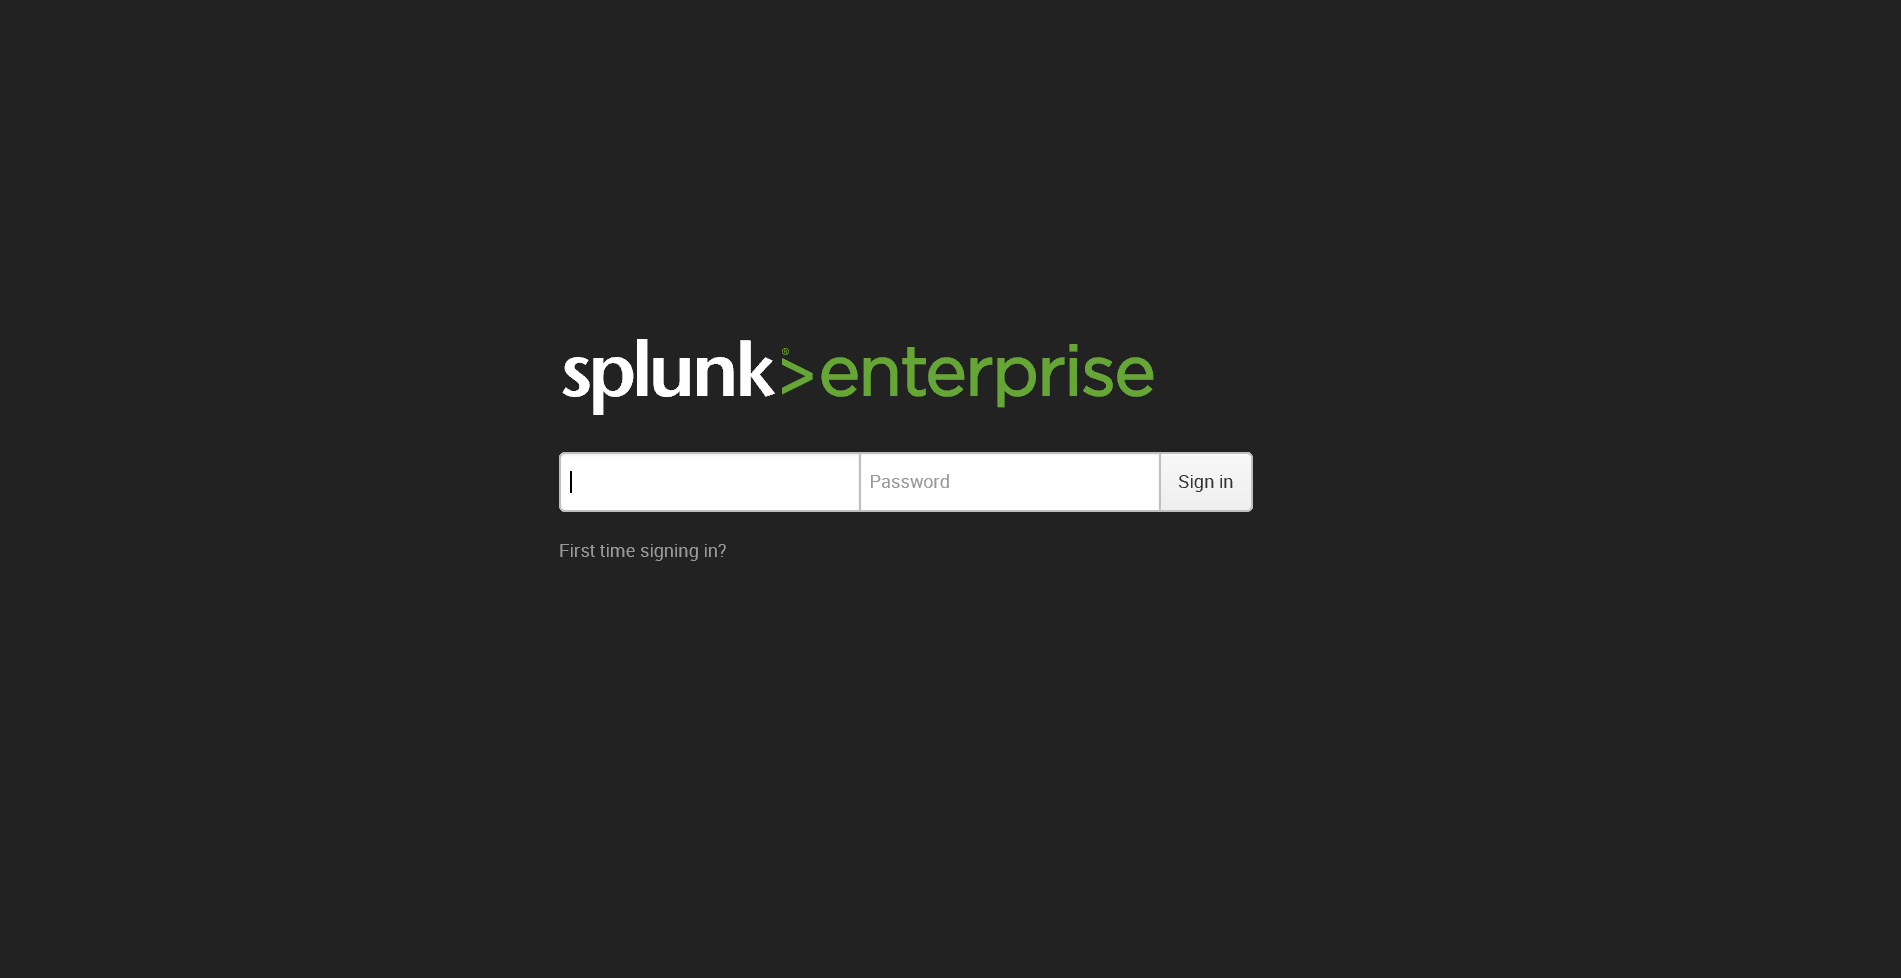
5. In the Splunk Log in page, enter the user name (admin) and the splunkadminpassword you set when creating the Splunk VM
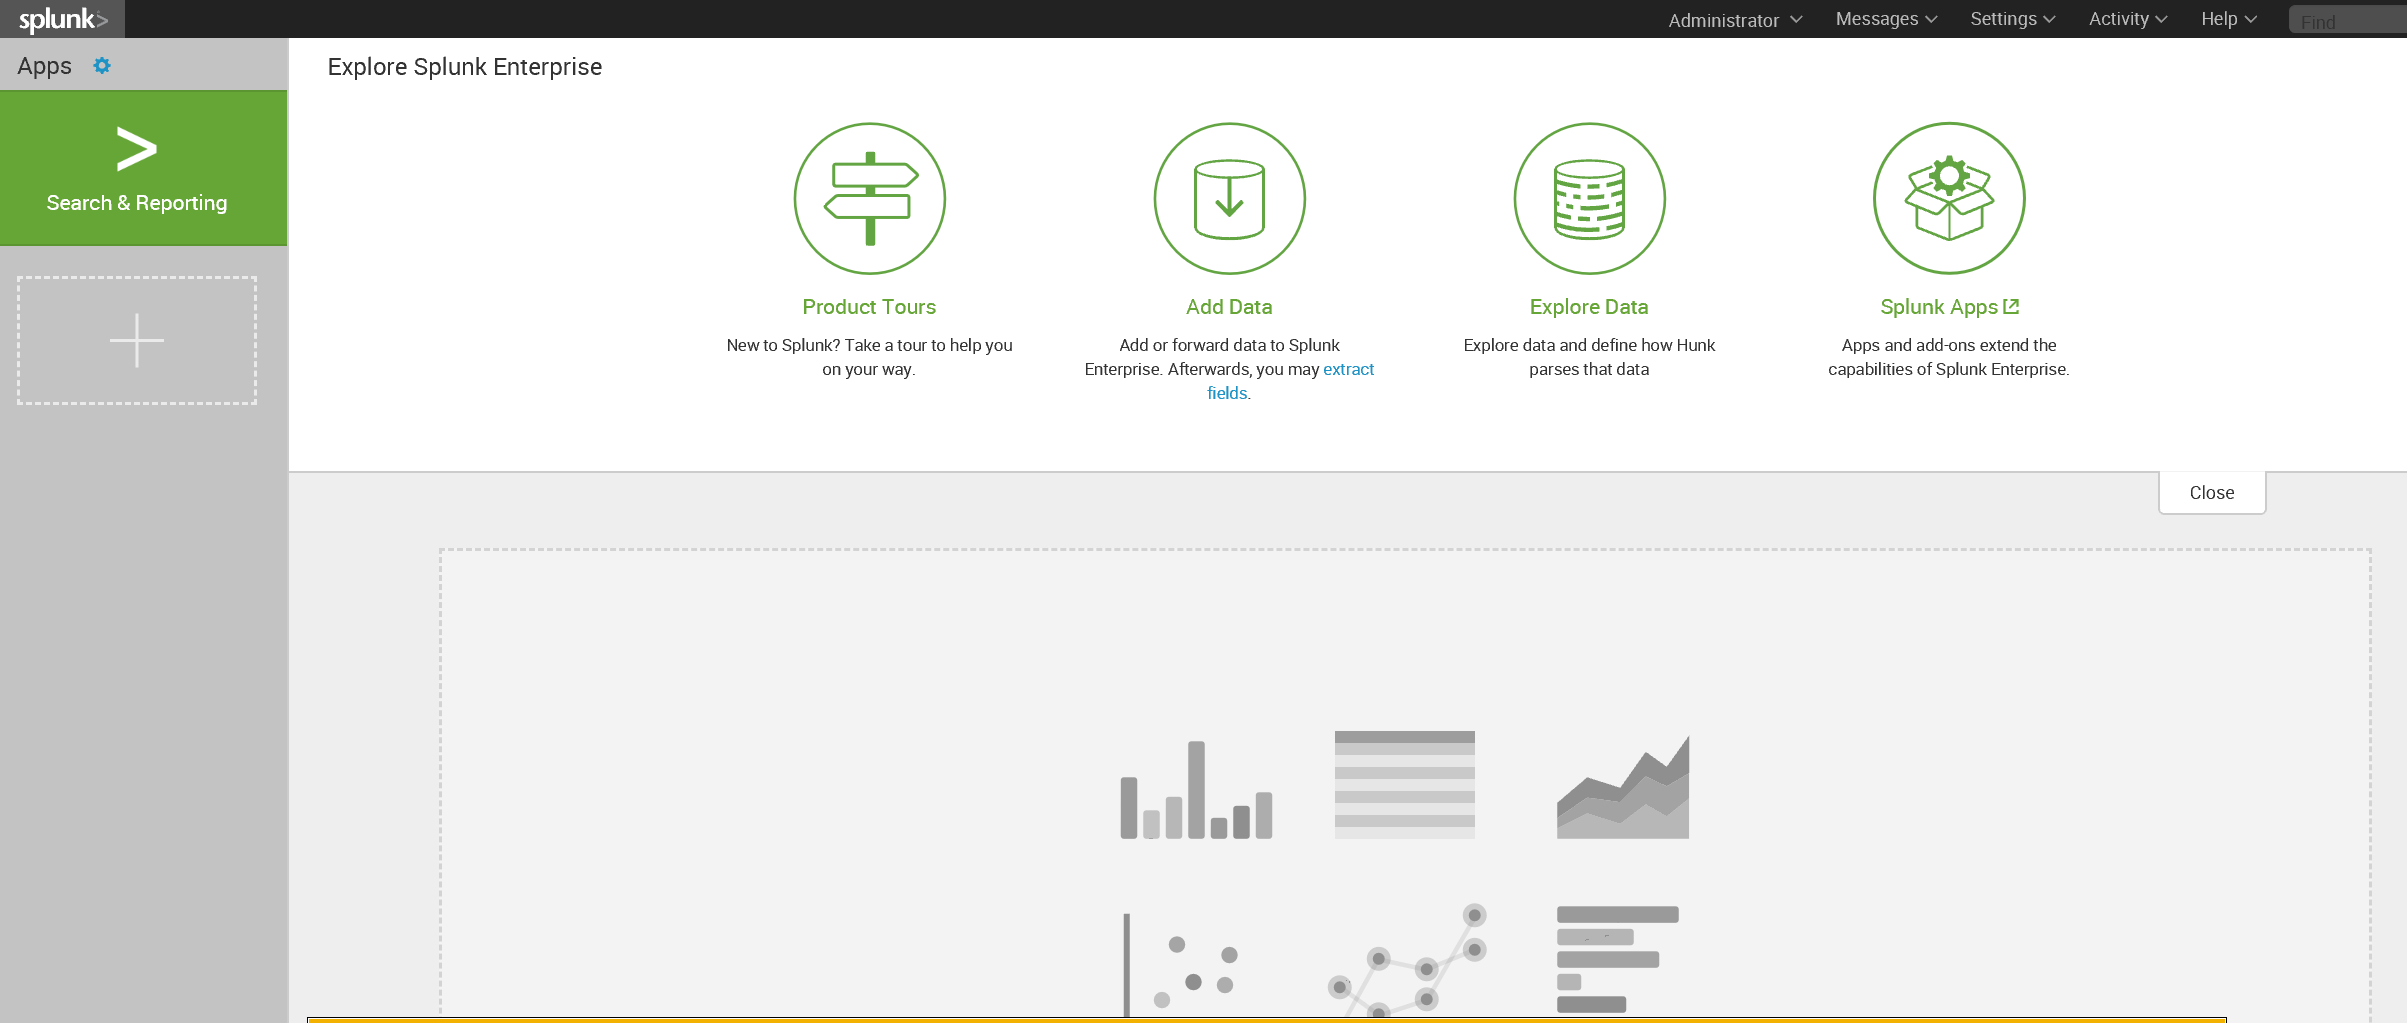
- Now you have your Splunk Enterprise Standalone Dashboard hosted on your Azure Government hosted VM! To start set up, go here:https://www.splunk.com/en_us/resources/videos.html
We welcome your comments and suggestions to help us continually improve your Azure Government experience. To stay up to date on all things Azure Government, be sure to subscribe to our RSS feed and to receive emails, click “Subscribe by Email!” on the Azure Government Blog. To experience the power of Azure Government for your organization, sign up for an Azure Government Trial.


0 comments