With over 130 unique permissions available to Android developers, it’s hard to know exactly which ones to specify. Worse yet, it’s not only scary for your app’s users to see just how many permissions you require, but it’s increasingly difficult to explain why you need so many permissions. Android Marshmallow introduces an entirely new spin on application permissions in an attempt to not only simplify permissions, but also to reduce the number of permissions needed.
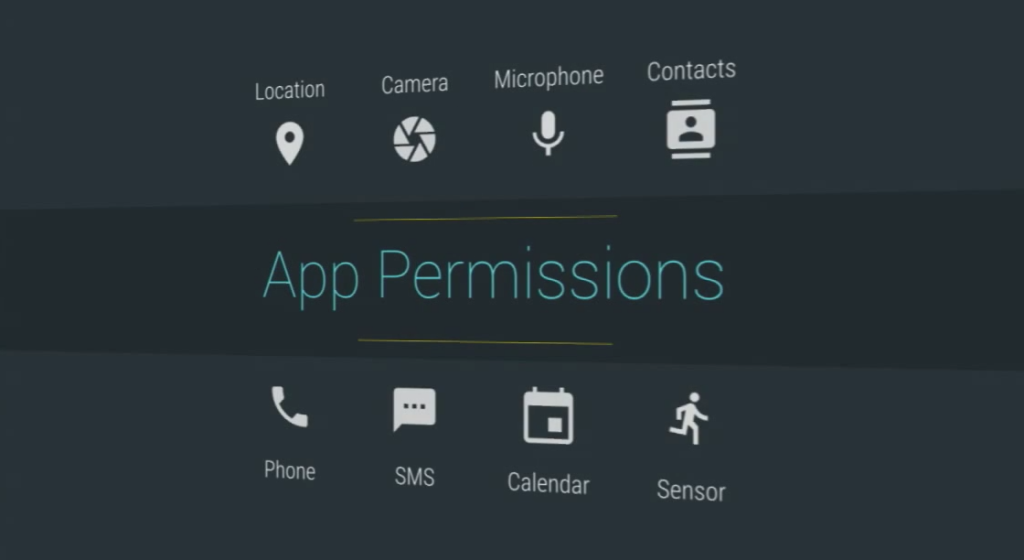
Normal Permissions
Marshmallow attempts to flip the script on permissions by having a pre-defined list of normal permissions that are automatically granted at installation time and which users can never revoke (exactly how permissions work today). All other permissions are not marked as normal and require that developers request permission manually from their users. These operate similarly to iOS’s permission system and can be revoked later on.
Simplified Permissions
Traditionally, when developing an Android application, it was required to specify each and every permission needed when calling a specific API. This meant that if you needed to use the GPS to get the user’s location, it was required to specify the ACCESS_FINE_LOCATION and ACCESS_COARSE_LOCATION permissions. Permission Groups attempt to simplify permissions that are performing similar operations, such as Location, Contacts, Phone, Sensors, SMS, and Storage. An app group currently bundles together anywhere between one and seven permissions into a single permission group. This means you can request all of the permissions in a group in a single go!
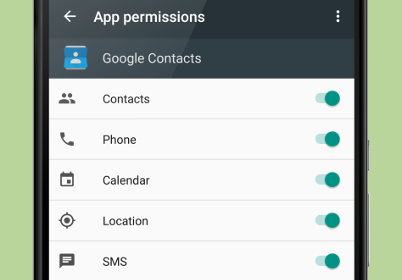
If you use any of the permissions found in one of the permission groups, or a permission that is not specified as normal, then it’s required to follow the new flow to request a permission from your user.
Permission Workflow
In the past, the only thing that was required for developers was to check a check box in your project settings for the permissions the app needed. While this part of the app set up is the same, you must incorporate a way to request any non-normal permissions from your users and disable application functionality based on their response. I have attempted to visualize the new workflow here so you can follow along as I walk you step-by-step through determining the GPS location using my Geolocator Plugin for Xamarin.
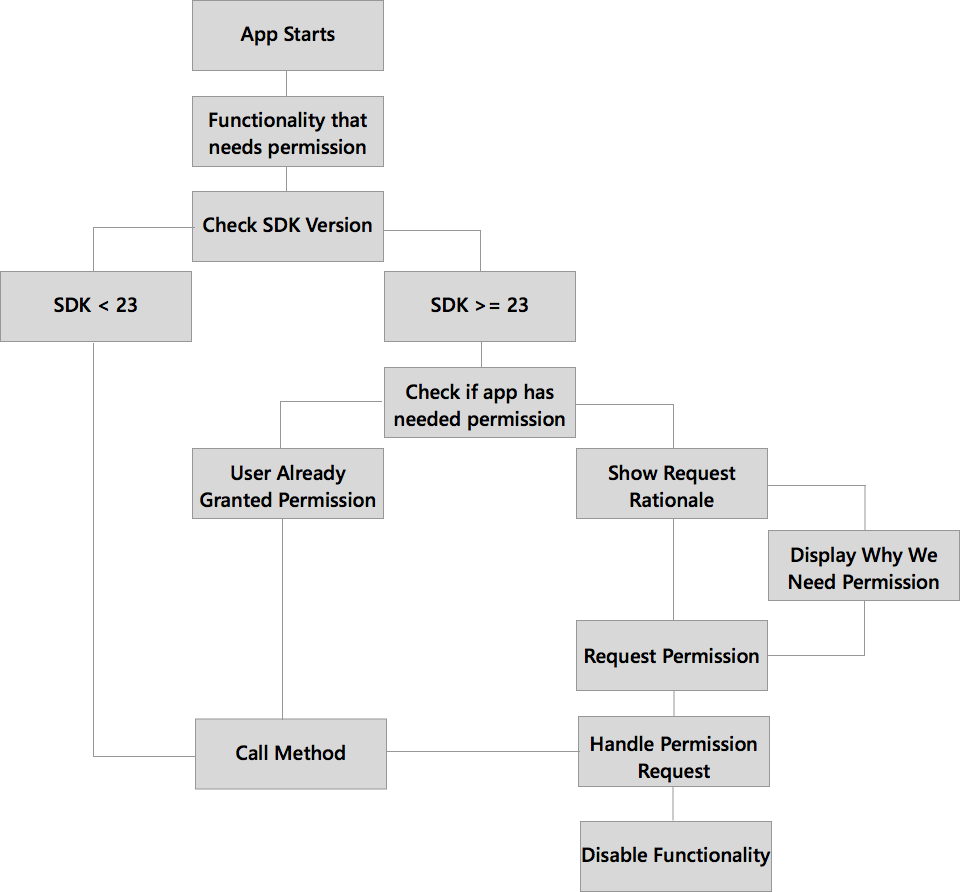
Getting Started
It’s important to determine which permissions are required and which have been upgraded to the new permission groups. In this instance, the Geolocator Plugin requires both fine and coarse location permissions, which have been grouped into android.permission-group.LOCATION. It’s still necessary to add these two permissions in the AndroidManifest.xml, but the use of these permissions is only requested at runtime, not during install, on Android Marshmallow and above.
<uses-permission android:name="android.permission.ACCESS_COARSE_LOCATION" />
<uses-permission android:name="android.permission.ACCESS_FINE_LOCATION" />
Alternatively, you can open your Android project options and check these two permissions under Android Application.
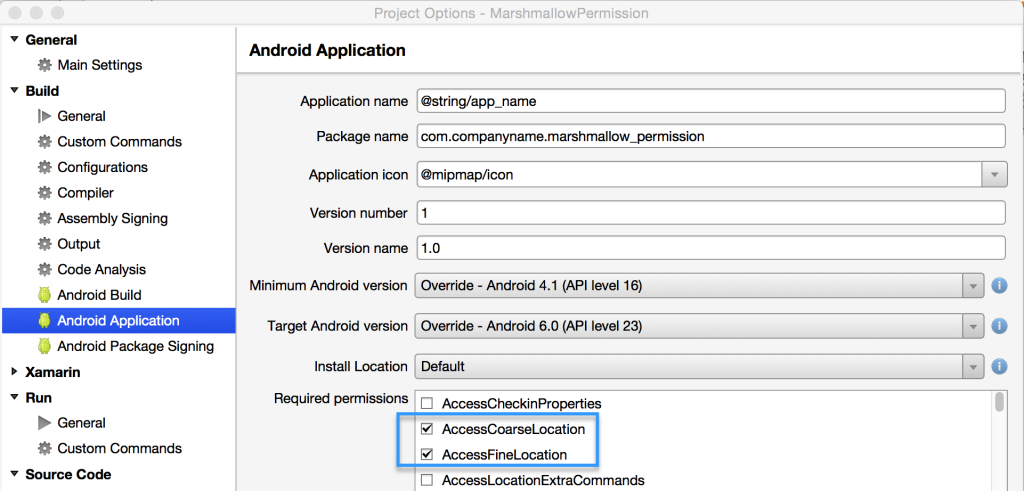
Set Target SDK
Notice that in the project settings above that the Target SDK is set to API 23+. It must manually be overridden and NOT set to “use compile”.
Check the SDK Version
Runtime permissions are an Android Marshmallow feature. This means that if the user is on an older version of Android, there’s no need to call any of the new runtime permission workflows. It’s simple to check the SDK version before making the call to an API by using the Build.Version.SdkInt enum.
async Task TryGetLocationAsync()
{
  if ((int)Build.VERSION.SdkInt < 23)
  {
    await GetLocationAsync();
    return;
  }

  await GetLocationPermissionAsync();
}
Now, let’s implement the GetLocationPermissionAsync method for Marshmallow and use the new runtime permissions. The first thing to do is to define the entire permission group that the app needs access to as well as a unique identifier to be used when requesting permission.
  readonly string [] PermissionsLocation =
    {
      Manifest.Permission.AccessCoarseLocation,
      Manifest.Permission.AccessFineLocation
    };

const int RequestLocationId = 0;
Check if Permission Granted
Users now have the ability to revoke runtime permissions whenever they desire. This means that you can’t assume the app has access to the permission, even if it had been granted previously. You can check to see if permission is still granted by calling a new method on the Context called CheckSelfPermission(string permission). This method returns an integer specifying permission granted or denied.
If permission has already been granted, then it’s time to call our Geolocator, but we must handle the denied state on first run or if the permission has been revoked.
const string permission = Manifest.Permission.AccessFineLocation;
if (CheckSelfPermission(permission) == (int)Permission.Granted)
{
  await GetLocationAsync();
  return;
}

//need to request permission
Optionally Display Rationale
It’s best practice to explain to users the need for a specific permission before it’s time to actually request it. If the application is a turn-by-turn directions map application, there’s probably no need to tell the user why the Location permission is needed. However, a user may be confused as to why Location is needed in a photo application, for instance, so it’s good to prompt the user. Additionally, the ShouldShowRequestPermissionRationale(string permission) method can be called to determine if the permission request was denied by the user previously. If this method returns true, then it’s most likely the perfect time to tell the user exactly why the permission is needed before requesting it again.
if (ShouldShowRequestPermissionRationale(permission))
{
  //Explain to the user why we need to read the contacts
  Snackbar.Make(layout, "Location access is required to show coffee shops nearby.", Snackbar.LengthIndefinite)
          .SetAction("OK", v => RequestPermissions(PermissionsLocation, RequestLocationId))
          .Show();
  return;
}

Request Permission
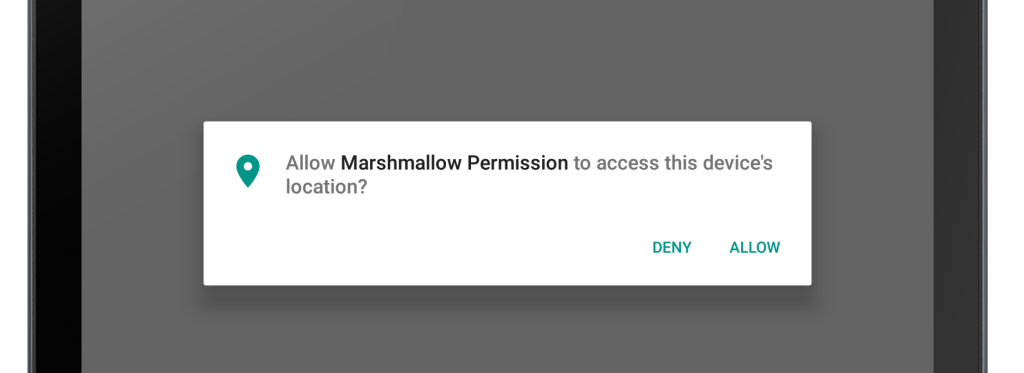
Finally, it’s time to request the permission and handle the permission request with the RequestPermission(string[] permissions, int requestCode) method. This method will return right away and prompt the user for the specified permission(s). Here’s what the full workflow to ask for the location permission looks like:
async Task GetLocationPermissionAsync()
{
  //Check to see if any permission in our group is available, if one, then all are
  const string permission = Manifest.Permission.AccessFineLocation;
  if (CheckSelfPermission(permission) == (int)Permission.Granted)
  {
    await GetLocationAsync();
    return;
  }

  //need to request permission
  if (ShouldShowRequestPermissionRationale(permission))
  {
    //Explain to the user why we need to read the contacts
    Snackbar.Make(layout, "Location access is required to show coffee shops nearby.", Snackbar.LengthIndefinite)
            .SetAction("OK", v => RequestPermissions(PermissionsLocation, RequestLocationId))
            .Show();
    return;
  }
  //Finally request permissions with the list of permissions and Id
  RequestPermissions(PermissionsLocation, RequestLocationId);
}
Handle Permission Request
After the user has granted or denied the permission request, it’s time to handle the response and turn on or off the functionality. This can be accomplished by overriding the OnRequestPermissionsResult in the Activity where the permission was requested. This method returns the result code (the one specified when requesting permission) and a result of granted or denied:
public override async void OnRequestPermissionsResult(int requestCode, string[] permissions, Permission[] grantResults)
{
  switch (requestCode)
  {
    case RequestLocationId:
    {
      if (grantResults[0] == Permission.Granted)
      {
        //Permission granted
        var snack = Snackbar.Make(layout, "Location permission is available, getting lat/long.", Snackbar.LengthShort);
        snack.Show();

        await GetLocationAsync();
      }
      else
      {
        //Permission Denied :(
        //Disabling location functionality
        var snack = Snackbar.Make(layout, "Location permission is denied.", Snackbar.LengthShort);
        snack.Show();
      }
    }
    break;
  }
}
Get Geolocation!
Finally, if we have the granted permissions, it’s time to get the location of the device:
async Task GetLocationAsync()
{
  textLocation.Text = "Getting Location";
  try
  {
    var locator = CrossGeolocator.Current;
    locator.DesiredAccuracy = 100;
    var position = await locator.GetPositionAsync(20000);

    textLocation.Text = string.Format("Lat: {0}  Long: {1}", position.Latitude, position.Longitude);
  }
  catch (Exception ex)
  {
    textLocation.Text = "Unable to get location: " + ex.ToString();
  }
}
Backwards Compatibility
Be aware that the APIs I covered in this blog are new in Android 6.0 Marshmallow, which means you should only call them on devices running SDK 23 or higher. To simplify the process of checking runtime permissions, the Android Support v4 and v13 libraries have been updated in Revision 23 (currently in pre-release), which includes ContextCompat.CheckSelfPermission() for checking permissions. Additionally, both ActivityCompat and FragmentCompat have an added RequestPermissions() and ShouldShowRequestPermissionRationale() method, which means we can actually remove the original SDK check, which turns our full code into:
async Task GetLocationCompatAsync()
{
  const string permission = Manifest.Permission.AccessFineLocation;
  if (ContextCompat.CheckSelfPermission(this, permission) == (int)Permission.Granted)
  {
    await GetLocationAsync();
    return;
  }

  if (ActivityCompat.ShouldShowRequestPermissionRationale(this, permission))
  {
    //Explain to the user why we need to read the contacts
    Snackbar.Make(layout, "Location access is required to show coffee shops nearby.", Snackbar.LengthIndefinite)
            .SetAction("OK", v => ActivityCompat.RequestPermissions(this, PermissionsLocation, RequestLocationId))
            .Show();

    return;
  }

  ActivityCompat.RequestPermissions(this, PermissionsLocation, RequestLocationId);
}
Learn More
To learn more about getting started with Android Marshmallow (currently in Preview) be sure to read through the getting started documentation and browse full samples of the latest features of Marshmallow, which includes runtime permissions. In addition to the available Marshmallow samples, I’ve also provided this location sample using the Geolocator Plugin on my GitHub.
