Native Android Facebook Authentication with Azure App Service
Authentication![]() is critical to applications success. Look at your app, and I bet the very first things that your users will do is sign up or log in to their account. This will probably, in turn, leverage some form of social authentication. Each social authentication provider is a little bit different, and some, such as Facebook, offer a native SDK to simplify the login process and offer additional functionality specific to their service. Previously, we looked at how to integrate the Facebook SDK for iOS to offer a native login experience and how to integrate with Azure Mobile Apps, part of Azure App Service. Today, I’ll show you how to log in with the Android Facebook SDK to simplify the login process on Android and with Xamarin.Forms.
is critical to applications success. Look at your app, and I bet the very first things that your users will do is sign up or log in to their account. This will probably, in turn, leverage some form of social authentication. Each social authentication provider is a little bit different, and some, such as Facebook, offer a native SDK to simplify the login process and offer additional functionality specific to their service. Previously, we looked at how to integrate the Facebook SDK for iOS to offer a native login experience and how to integrate with Azure Mobile Apps, part of Azure App Service. Today, I’ll show you how to log in with the Android Facebook SDK to simplify the login process on Android and with Xamarin.Forms.
Why use Native SDKs?
Azure Mobile Apps offers a simple LoginAsync method that will invoke a secure login process leveraging Chrome Custom Tabs. However, this still requires users to type in their existing user name and password, even if they already have the provider’s application installed on their device. Leveraging the native SDK for Facebook, Google, or Microsoft enables a secure and streamlined experience and provides native user interface controls that make your users feel safe when logging in.
Signing up for Facebook Auth
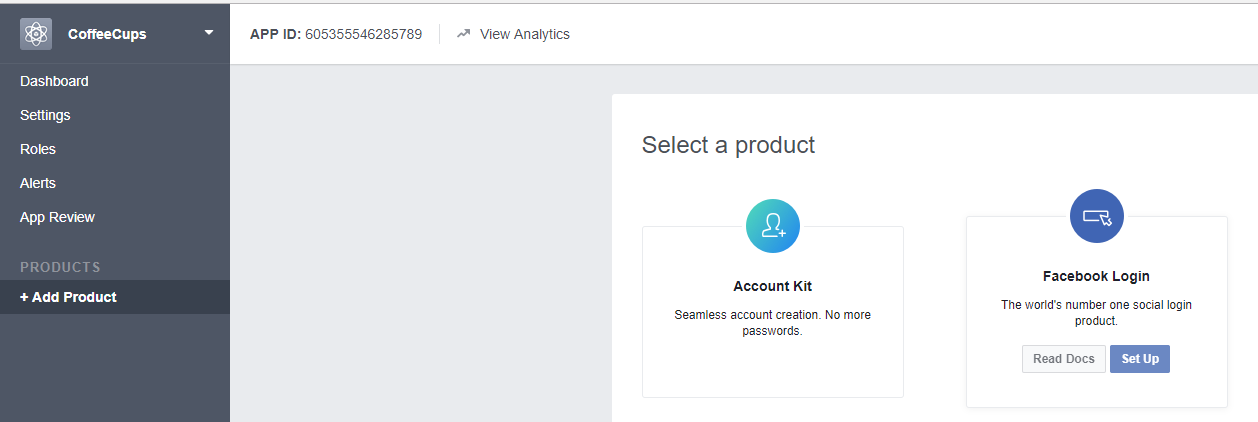
Before we even begin to integrate Facebook authentication into our app, we must register a new application on the Facebook Developer site.
Next, we’ll want to add a proper oAuth redirect, which can be done by adding a “Facebook Login” product:

For this application, we’ll be using Azure App Service, which means we can specify a redirect URL such as:
https://[AppServiceApplicationURL]/.auth/login/facebook/callback
You can learn more about configuring this by reading through the Azure App Service Authentication with Facebook documentation.
Getting Started
With our Facebook application set up, we can now start integrating the Facebook Android SDK, which is available from NuGet, into our application. This is the Xamarin.Android binding to the official SDK provided by Facebook, which allows us to use all of the features available to Java and Kotlin developers.

When installing this NuGet, it’s important for us to ensure that we have installed the latest Android Support Libraries as well, as they are a dependency.
Configuring Our App
There’s a bit of additional setup that we must perform before implementing the login process. We can add the Facebook App Id that we received and our app’s name inside of our string resources:
Coffee Cups
605355546285789
The Facebook SDK will look for this metadata that we can expose using assembly flags. I tend to add these into my AssemblyInfo.cs file along with permissions that are required:
[assembly: MetaData("com.facebook.sdk.ApplicationId", Value = "@string/app_id")]
[assembly: MetaData("com.facebook.sdk.ApplicationName", Value = "@string/app_name")]

[assembly: Permission(Name = Android.Manifest.Permission.Internet)]
[assembly: Permission(Name = Android.Manifest.Permission.WriteExternalStorage)]
Registering Our Android App with Facebook
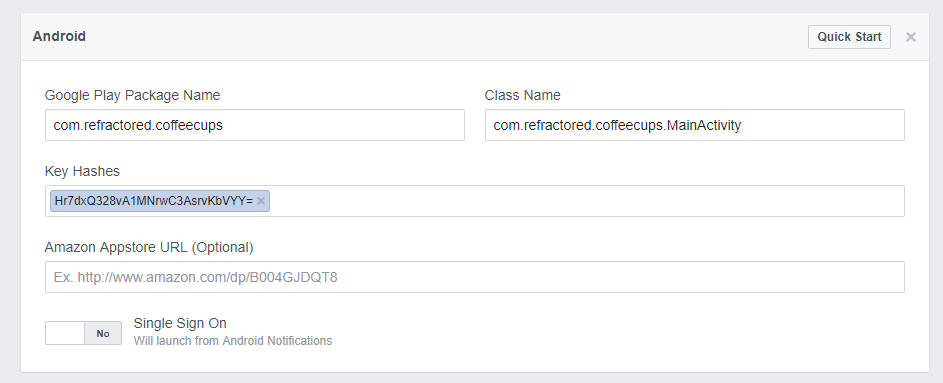
We can add a new platform of Android in the Facebook Developer site under Settings, so Facebook has additional information about our application. This will require our package name, class name, and key hashes.

Our package name comes directly from the AndroidManifest.xml. The class name can be set manually on the Main Activity such as:
[Activity (Label = "Coffee Cups", Icon = "@drawable/icon",
        Name = "com.refractored.coffeecups.MainActivity",
        MainLauncher = true,
        ConfigurationChanges = ConfigChanges.ScreenSize | ConfigChanges.Orientation)]
Finally they key hashes can be found using the Android Keystore Signature tool for Visual Studio. For now, we can just use the default debug keystore, however, we would want to use the keystore that we use to sign our application with before publishing the app to the app store.
Adding a Facebook Login Button
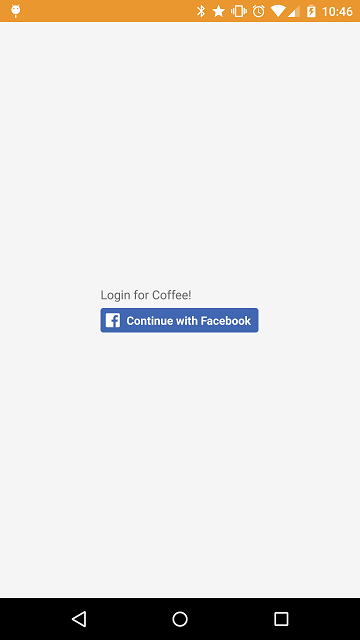
Now, it’s time for us to finally add in a login button to kick off the entire process. If you’re developing a Xamarin.Android application using a native Android user interface, you can simply insert the LoginButton that comes from the Facebook SDK:
Xamarin.Forms Custom Control
If you’re using Xamarin.Forms, we must write a very small custom control. First, in our shared code, create a FacebookLoginButton that we can access in our XAML:
public class FacebookLoginButton : Xamarin.Forms.View
{
}
This can then be added into any page of our application:
Then we can write a small custom renderer that will display the native login button:
using CoffeeCups.View;
using Xamarin.Forms;
using CoffeeCups.Droid;
using Xamarin.Forms.Platform.Android;
using Xamarin.Facebook.Login.Widget;

[assembly: ExportRenderer(typeof(FacebookLoginButton), typeof(FacebookLoginButtonRenderer))]
namespace CoffeeCups.Droid
{
    public class FacebookLoginButtonRenderer : ViewRenderer
    {
        LoginButton facebookLoginButton;
        protected override void OnElementChanged(ElementChangedEventArgs e)
        {
            base.OnElementChanged(e);
            if(Control == null || facebookLoginButton == null)
            {
                facebookLoginButton = new LoginButton(Forms.Context);
                SetNativeControl(facebookLoginButton);
            }
        }

    }
}
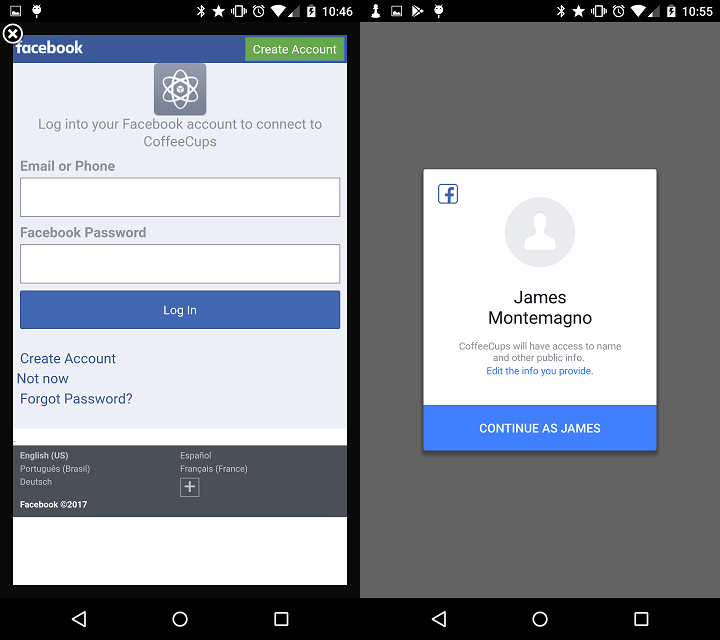
Since we're using the native Facebook SDK, when the users log in they will see the native Facebook login pop up, or, if they have the Facebook app installed, they can immediately log in with one button click:

Handling the Login Process
When the user logs in, we must handle the actual login events if it was successful, canceled, or if an error occurred. In our MainActivity, or whatever Activity the login button is shown on, we can implement a simple interface, IFacebookCallback, to handle these events.
class FacebookCallback : Java.Lang.Object, IFacebookCallback where TResult : Java.Lang.Object
{
    public Action HandleCancel { get; set; }
    public Action HandleError { get; set; }
    public Action HandleSuccess { get; set; }

    public void OnCancel()
    {
        HandleCancel?.Invoke();
    }

    public void OnError(FacebookException error)
    {
        HandleError?.Invoke(error);
    }

    public void OnSuccess(Java.Lang.Object result)
    {
        HandleSuccess?.Invoke(result.JavaCast());
    }
}
Now, we can initialize the Facebook SDK, register for login callbacks, and handle them properly:
ICallbackManager callbackManager;

protected override void OnCreate (Bundle bundle)
{

   //Standard OnCreate Intialization

    FacebookSdk.SdkInitialize(ApplicationContext);
    callbackManager = CallbackManagerFactory.Create();

    var loginCallback = new FacebookCallback
    {
        HandleSuccess = loginResult =>
        {

            var facebookToken = AccessToken.CurrentAccessToken.Token;
            //Login here
        },
        HandleCancel = () =>
        {
            //Handle Cancel
        },
        HandleError = loginError =>
        {
            //Handle Error
        }
    };

    LoginManager.Instance.RegisterCallback(callbackManager, loginCallback);

    //Finish or load Xamarin.Forms app here
}

protected override void OnActivityResult(int requestCode, Result resultCode, Intent data)
{
    base.OnActivityResult(requestCode, resultCode, data);

    callbackManager.OnActivityResult(requestCode, (int)resultCode, data);
}
Notice that we're now able to get access to the Facebook access token, which will enable us to log in and make additional calls to the Facebook service.
Logging in to App Service
With this token, we can log in to our Azure App Service using the MobileServiceClient.
var facebookToken = AccessToken.CurrentAccessToken.Token;
var token = new JObject();
token["access_token"] = facebookToken;
var user  = await Client.LoginAsync(MobileServiceAuthenticationProvider.Facebook, token);
When we do this, we’ll get back a MobileServiceUser which contains a new token that's unique to our App Service's backend. It’s worth noting that this token is not the same as the Facebook token we sent, and it should be stored to re-hydrate the MobileServiceUser in the future.
Learn More
As we have seen here, it's to our advantage to use the native authentication SDKs when possible in our application to streamline the login process for our users, which can be done with just a few lines of code. To learn more about Azure Mobile Apps as a backend for your mobile app, be sure to read through the great documentation including how to add other login providers to your mobile applications with custom URL schemes. Additionally, you can find my sample app Coffee Cup, which I used to demonstrated the concepts in this blog post, on GitHub.

 Light
Light Dark
Dark
0 comments