
Drawer navigation and master-detail UI are two powerful patterns that guide users through content in applications with significant amounts of data or many pages. Xamarin.Forms provides the MasterDetailPage to help you implement both presentation styles.
Using MasterDetailPage in Xamarin.Forms
MasterDetailPage does a lot of the work for you if you know how to specify a split view vs. a drawer. You also need to be aware of the situations where Xamarin.Forms will override your selection. Once you know how it works, MasterDetailPage is a great tool to help you create responsive applications that run on a wide selection of device types and operating systems.
Specify Split or Popover Behavior
The Xamarin.Forms MasterDetailPage can give you a classic side-by-side master-detail display or a sliding-drawer menu. The best option depends on your data and the properties of the runtime device.
Identifying the Two Styles
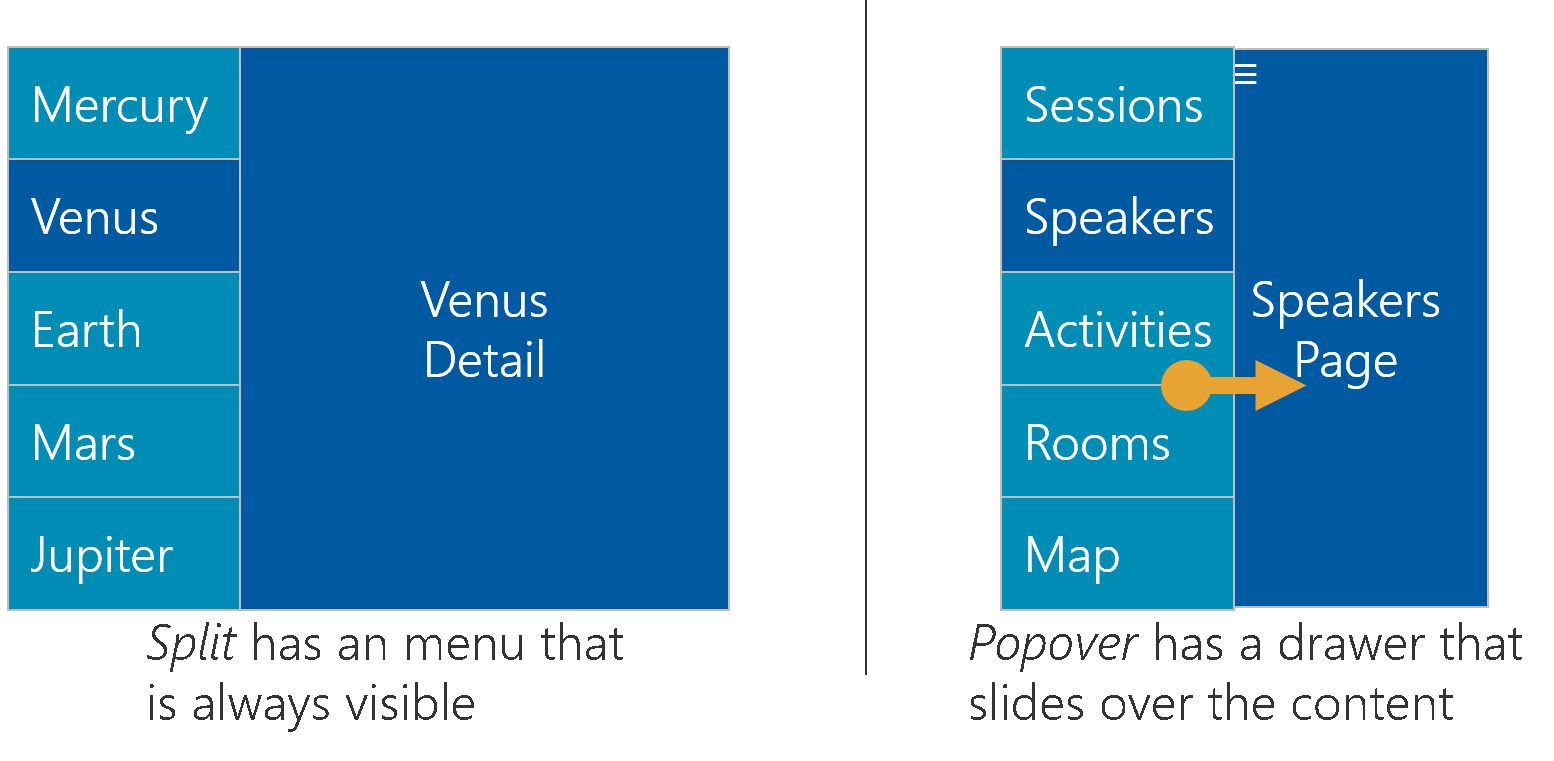
Xamarin.Forms uses the term Split for a side-by-side view and Popover for a sliding-drawer, as shown below.
Specify Your Preference
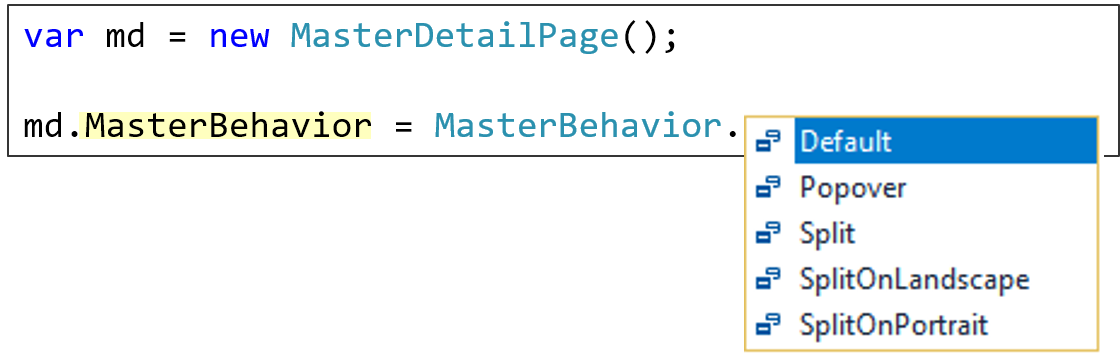
MasterDetailPage has a property called MasterBehavior that lets you specify your choice of split vs. popover. The value is an enumeration with the five options shown below.
Xamarin.Forms uses three factors to determine whether to use a split or popover display at runtime:
- Whether or not you’re running on a mobile phone.
- What settings you have set for MasterBehavior.
- The screen orientation.
Phone Behavior
Xamarin.Forms always chooses popover behavior on a phone. Your setting for MasterBehavior and the screen orientation are not used in the calculation.
Non-Phone Behavior
Xamarin.Forms uses your MasterBehavior setting and the device orientation to determine master behavior on non-phone devices:
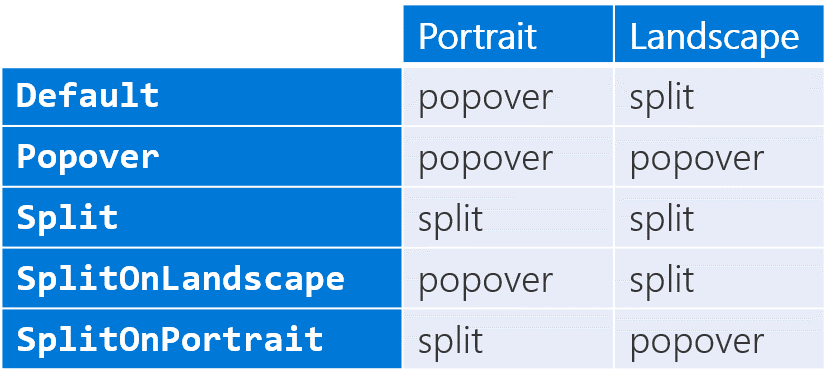
Notice how you get popover behavior regardless of screen orientation in the Popover row in the table above.
The Split row is analogous. When you ask for Split behavior, that’s what you get, regardless of screen orientation (except on phones as discussed above).
The next two rows are more interesting because they consider screen orientation. If you choose SplitOnLandscape, you get the split view when the screen is wide and popover when the screen is narrow.
SplitOnPortrait gives you the opposite—split view when the screen is narrow and popover when it is wide.
Finally, notice that the Default behavior is the same as SplitOnLandscape.
Choose a Data-Appropriate Display
Now that we’ve seen the options, let’s finish with some brief guidance on which you should use in your apps. Generally, you choose a setting for MasterBehavior based on the type of data you need to display:
- Homogenous Collection: Favors split behavior to display a collection of items that all have the same type. You will likely specify either Split or SplitOnLandscape.
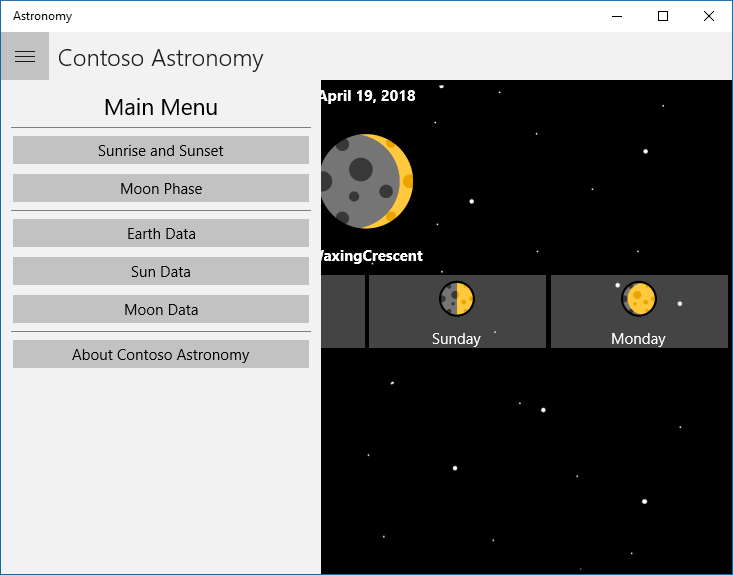
- Navigation Menu: Favors popover behavior when you are implementing drawer navigation (shown below). You will likely choose Popover, so the drawer is always hidden until the user asks for it to appear.
Wrapping Up
Understanding how and when to use MasterDetailPage is essential for anyone building a responsive UI for a large-scale app. To learn more, check out the new Xamarin University course, Master-Detail and Drawer Navigation (XAM290).
Enjoy this post? Discuss it on the forums!
MasterBehavior does not work on iOS and to my knowledge, never has. Is there any plan to do this? The new Shell can do it, but the Shell doesn’t have FlyoutItem binding.