
Xamarin.Forms allows you to build native UIs from a single, shared codebase with over 40 pages, layouts, and mix-and-match controls. One of the most powerful aspects of Xamarin.Forms is that you not only have access to the controls that we surface, but you have 100% access to all of the native APIs on each platform as well.
Accessing Native APIs in Shared Code
Accessing native APIs using Xamarin.Forms is done in one of three ways: the dependency service, custom renderers or through plugins for Xamarin. The dependency service in Xamarin.Forms allows shared code to easily resolve interfaces to platform-specific implementations, so you can easily access platform-specific features like text-to-speech, geo-location, and battery information from your PCL or Shared Project.
User interfaces built with Xamarin.Forms look and feel native because they are native — they’re rendered using the native controls for each platform. For example, if you use an Entry control in Xamarin.Forms, on iOS this will be rendered as a UITextField, on Android as an EditText, and on Windows Phone as a TextBox. Developers can easily tap into these native renderings of Xamarin.Forms controls by using custom renderers, which can be used to do everything from small tweaks of the existing control or building entire pages.
Implementing a Custom Renderer
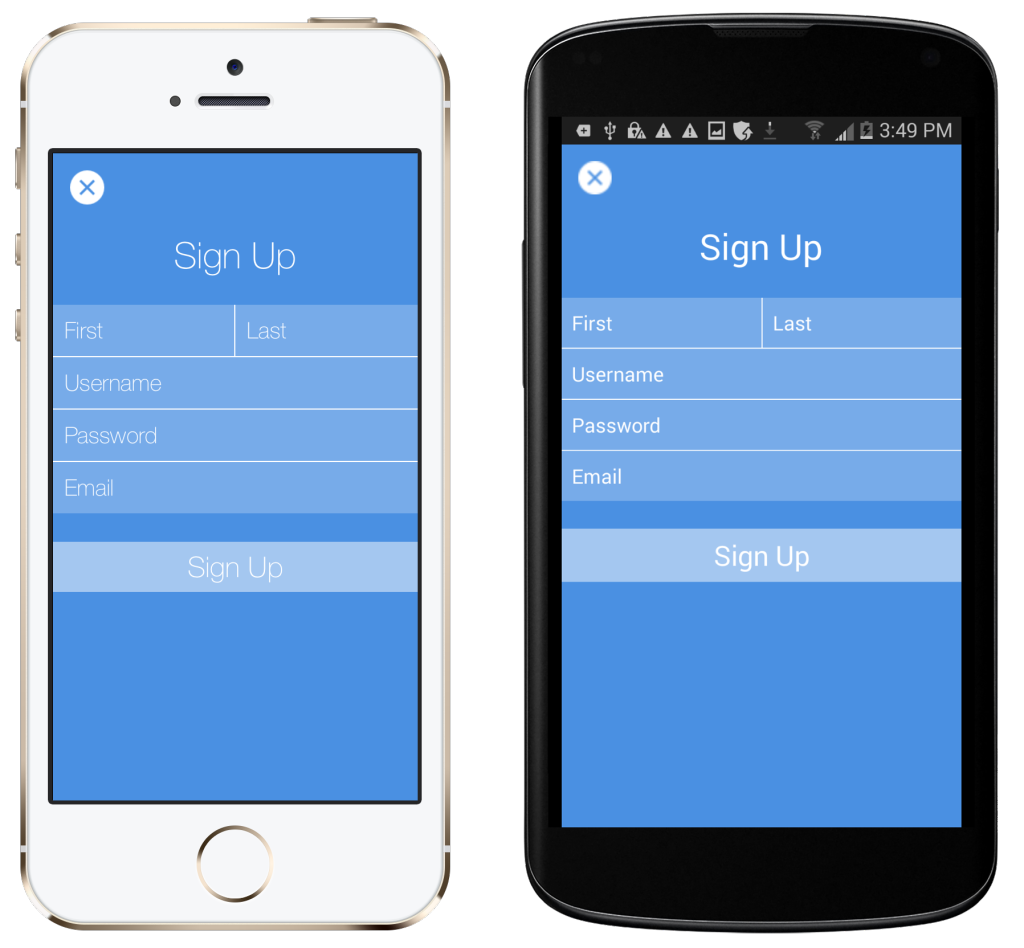
In Moments, a Snapchat clone built with Xamarin.Forms and Microsoft Azure, I made extensive use of the built-in Xamarin.Forms controls. However, there were a few places I wanted a finer level of customization. Let’s look at how easy it is to tweak the Entry control’s placeholder font and color using custom renderers in the sign up page featured above. Each custom renderer has two main parts: a subclass of the control being extended and platform-specific implementations that are used to customize a control’s appearance.
Subclassing Existing Controls
In the Shared Project or PCL where your Xamarin.Forms user interface logic resides, create a subclass of the control that you wish to extend, as seen below:
public class MomentsEntry : Entry
{
    public MomentsEntry ()
    {
        TextColor = Color.White;
    }
}
Platform-Specific Implementation To customize the control’s appearance, we must create custom renderers on each platform for which we wish to customize the given control. Each Xamarin.Forms control has a renderer class that can be subclassed on each platform, such as EntryRenderer.
public class MomentsEntryRenderer : EntryRenderer
{
}
Next, override the OnElementChanged method. This method is where all the customization for the control takes place. All customization is done using the Control property, which is just an instance of the native mapping for the particular renderer subclassed. For example, on iOS, this would be a UITextField and on Android an EditText. Altering the placeholder color and font was as easy as altering a few properties, as seen below in both the iOS and Android implementations:
iOS
public class MomentsEntryRenderer : EntryRenderer
{
    protected override void OnElementChanged (ElementChangedEventArgs<Entry> e)
    {
        base.OnElementChanged (e);

        if (Control != null)
        {
            Control.BackgroundColor = UIColor.FromRGB (119, 171, 233);
            Control.BorderStyle = UITextBorderStyle.None;
            Control.Font = UIFont.FromName ("HelveticaNeue-Thin", 20);
            Control.SetValueForKeyPath (UIColor.White, new NSString ("_placeholderLabel.textColor"));
            Control.Layer.SublayerTransform = CATransform3D.MakeTranslation (10, 0, 0);
        }
    }
}
Android
public class MomentsEntry : EntryRenderer
{
    protected override void OnElementChanged (ElementChangedEventArgs<Entry> e)
    {
	    base.OnElementChanged (e);

	    if (Control != null)
        {
	        Control.SetHintTextColor (ColorStateList.ValueOf  (global::Android.Graphics.Color.White));
	        Control.SetBackgroundDrawable (null);
        }
    }
}
Finally, to enable Xamarin.Forms to properly find and render your custom control, you must add the [assembly] attribute above the class. The first parameter references the Xamarin.Forms control you wish to alter the renderer for, while the second parameter references the platform-specific renderer for the custom control:
[assembly: ExportRenderer (typeof (Moments.MomentsEntry), typeof (Moments.iOS.MomentsEntryRenderer))]
The Results

Wrapping It All Up
Custom renderers in Xamarin.Forms make it easy to extend existing Xamarin.Forms controls, create your own controls, or even build entire pages using native APIs. To get started, be sure to check out the docs or watch this video from Xamarin’s Mark Smith, and you’ll be up and running with custom renderers in no time!