
At some point, while working with Xamarin to build awesome mobile apps, you may have received an exception or error notification from the Xamarin framework code, Mono runtime, or Base Class Library (BCL). If this happened, you may have stepped through that code to see if the error was in your code, or whether it was a bug in the framework code. After locating the error, you might even have wanted to file a pull request to merge that fix into the framework itself. Since Mono and the Xamarin frameworks, i.e. Xamarin.iOS, Xamarin.Android, and Xamarin.Forms, are all open source, you can contribute to debugging!
Debugging in Xamarin.Forms
In this four-part series, we’ll cover the debugging process and steps in each source code for Xamarin.Forms, Xamarin.iOS, Xamarin.Android, and Mono. We’ll start with building Xamarin.Forms from the source code, creating a NuGet package, and referencing that package from your solution in your apps.
Although it is possible to build Xamarin.Forms on a Mac via the command line, doing so would not build the UWP platform assemblies for Xamarin.Forms. As such, we’ll be using a Windows PC with Visual Studio 2017 for this post.
Get the Xamarin.Forms Source Code
There are a number of ways to get the Xamarin.Forms source code. The official Xamarin.Forms repository on GitHub is located here. We recommend forking the Xamarin.Forms repository to your own GitHub account and cloning your fork to your computer. If you don’t have a GitHub account, you can create one here. If you’re already familiar with using Git and GitHub, get the source code using your preferred method and skip to the next section.

In order to use the Team Explorer pane with Git and GitHub, you’ll also need to add the GitHub Extension for Visual Studio.
Cloning the Repository
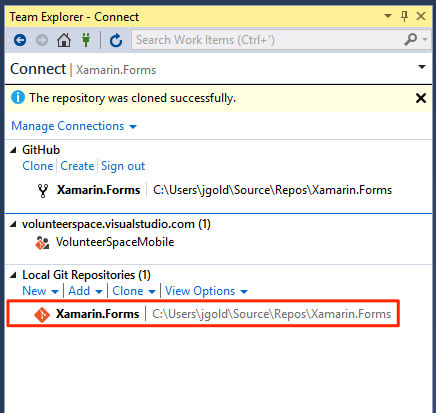
Once installed, follow these instructions to clone the repository. Then double-click the Xamarin.Forms repository in the Local Git repositories section to see the available solutions.
Now that you have the Master branch opened in your IDE, let’s switch branches so that the source code lines up with the latest 2.5.0 release of Xamarin.Forms.
If you’re specifically looking to see if an issue is fixed in the Master, you can go ahead and attempt to build the Master branch, or download nightly builds from the Master through this NuGet package. Test your app against this pre-built master NuGet package to easily see if the particular issue you’re experiencing has already been fixed.
Revert to a Released Version of the Source Code
Before we build, go ahead and switch to the 2.5.0 branch, which has the final commits for the latest 2.5.0 release version.
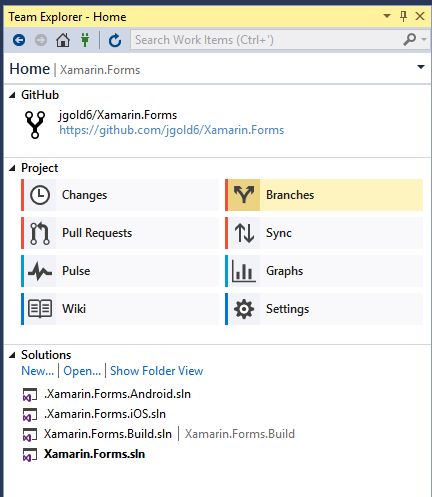
- In the Team Explorer – Home tab, click the Branches button.

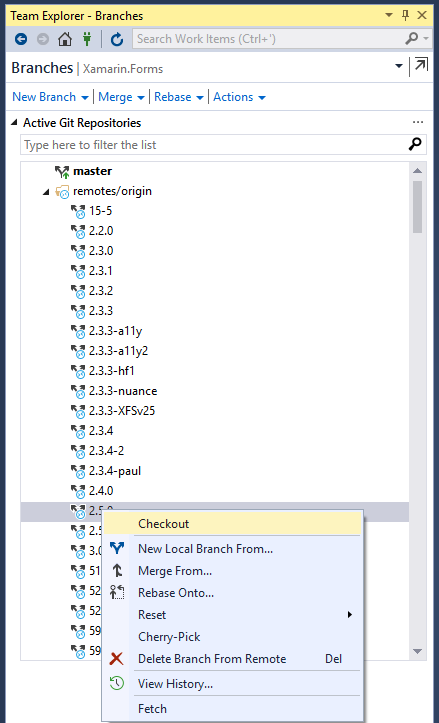
- In the Team Explorer – Branches tab, expand the remotes/origin node.
- Right-click the 2.5.0 branch and select Checkout. This downloads and selects the 2.5.0 branch as the active local branch.

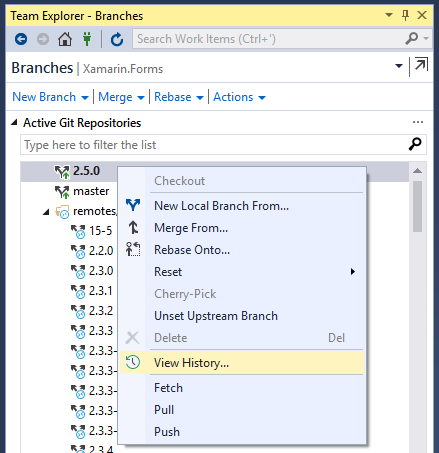
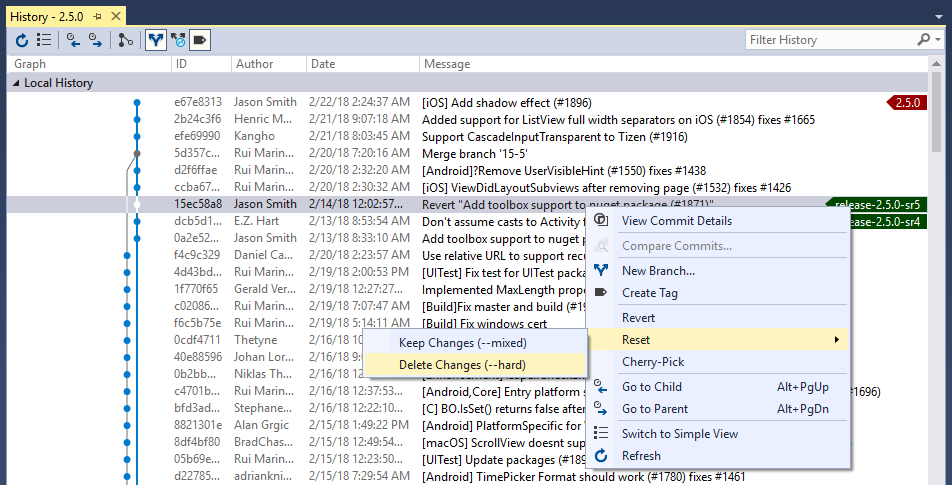
- To see all of the commits in the 2.5.0 branch, right click on the 2.5.0 local branch and select View History

- This will open a History – 2.5.0 document. On the right, you’ll see tags, including one for release-2.5.0-sr5. Reset the branch to this commit by right-clicking on the commit and selecting Reset > Delete Changes (–hard).

- Now go back to the Home tab of Team Explorer, and open Xamarin.Forms.2017.sln.
You should now have the source code that was used to build the 2.5.0 release of Xamarin.Forms open in Visual Studio.
Build Xamarin.Forms
Before building, it’s a good idea to make sure your Android SDK is up-to-date and has the latest Android platform SDKs installed. If you’re unfamiliar with the Android SDK, here’s a guide to working with it using the Xamarin Android SDK Manager.
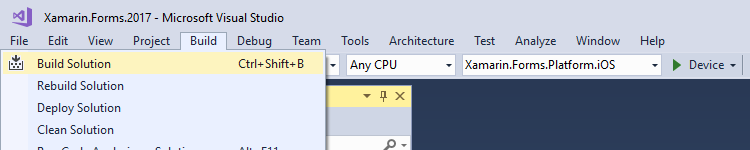
At this point, you should just have to select the “Any CPU” platform option and build your solution with Build > Build Solution:
The build output may show that the build failed, but this might not matter. There are projects in the solution that don’t need to be built to create the NuGet package, like test projects. You may still be able to successfully create a NuGet package depending on which projects fail to build. Additionally, some projects have the Treat warnings like errors option enabled in the project properties.
Create your Xamarin.Forms NuGet Package
Use the command line to create your NuGet package. You may need to make some changes to the Xamarin.Forms.nuspec file. There are still elements there that refer to win80/81 and winRT assemblies, so you won’t have these assemblies if you built in Visual Studio 2017. To fix this, open the Xamarin.Forms.nuspec file (in the .nuspec folder) and delete all <group> elements that refer to winRT, wp80, win81, or wpa81. Also delete all <file> elements in the <–Windows Phone 8–>, <–WinRT Phone–>, and <–WinRT Desktop–> sections. An edited version of this file is in this Github repository.
- Open a command prompt and navigate to the root of your local Xamarin.Forms repository.
- Enter the following to run a script that will create the NuGet package (see [1] below): .create-nuget.bat all
If successful, your Xamarin.Forms.<version_number>.nupkg file will be in the .nuspec folder. If the packaging fails, you’ll see output telling you what file(s) could not be found. For instance, if you didn’t update the Xamarin.Forms.nuspec file, as noted above, you will see errors about missing WinRT and Windows Phone assemblies.
[1] It has come to my attention that the .create-nuget.bat file is not consistently updated and might not create a viable package. There is now a message to that effect in the initial output from the script. So instead of using the .create-package.bat script, try the following after rebuilding Xamarin.Forms.sln:
- Copy nuget.exe into the Xamarin.Forms .nuspec folder (get `nuget.exe` at https://www.nuget.org/downloads
- Open a command prompt
- Navigate to Xamarin.Forms .nuspec folder
- Run command:
nuget.exe pack Xamarin.Forms.nuspec -properties configuration=debug;platform=anycpu -Version 9.9.0
Use Your Xamarin.Forms NuGet Package
Now you need to create a folder on your system to use as a local NuGet package source. It doesn’t matter where you put this. Once you create the folder, move the Xamarin.Forms.<version_number>.nupkg file to this folder. Then:
- Create a new Xamarin.Forms solution using the Shared Project or .NET Standard code sharing strategy in Visual Studio.
- Right-click on your solution in the Solution Explorer and select Manage NuGet Packages for Solution.
- Click on the settings icon in the upper right of the NuGet – Solution document:

- In the Options window that opens, click the + button.
- Enter a Name for the package source, like “My Local NuGet Source”.
- Click the … (browse) button next to the Source field and browse to the folder created above.

- Click the Update button and then click OK.
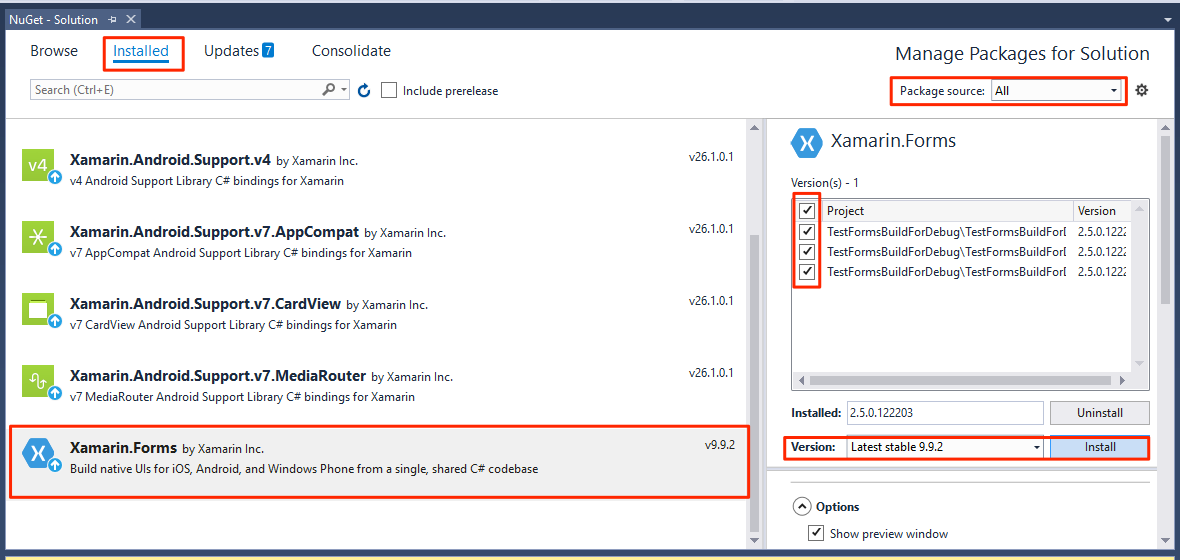
- Select the Installed tab then scroll down and select Xamarin.Forms.
- Make sure Package source: All is selected in the upper right.
- Select all of the projects in the project list.
- In the Version drop down list, select the version of Xamarin.Forms you just created (likely version 9.9.x) and click the Install button:


Once this completes, you’re set to step into some Xamarin.Forms source code.
Step Into the Source Code
You can now open any file of your Xamarin.Forms solution that makes a call into the Xamarin.Forms source code and place a breakpoint on a line that makes such a call. An obvious place to start would be the call to Xamarin.Forms.Forms.Init(…), which is in AppDelegate.cs (iOS), MainActivity.cs (Android), and App.Xaml.cs (UWP). When the IDE breaks, step into the code and the Forms.cs file should open to allow you to review. You can also set breakpoints directly in the Xamarin.Forms source code files, and Visual Studio will break when those lines are hit.
To confirm the source code file in your cloned Xamarin.Forms repository is indeed the file that opens in Visual Studio, right click on the file tab, select Open Containing Folder, and a File Explorer window will open with the source code file highlighted. You can then edit the Xamarin.Forms source code file, rebuild and repackage Xamarin.Forms, and test again with your new source code changes.
Congratulations, you’re now stepping into and through Xamarin.Forms source code!
Summary
Now you can build Xamarin.Forms from the source code, create a NuGet package, reference that package from your solution, and step into the Xamarin.Forms source code to see what’s going on. If you discovered a bug or came up with an improvement during your development, please feel free to contribute!
Enjoy this post? Discuss it in the Xamarin Forums.
It’s been a while since this post, and Xamarin is already in its version 4.
Could you please lead the way on how to choose the right branch when trying to debug the latest versions?
Thanks!
The Branch name should be the Major.Minor version number, e.g. 4.2.0 for 4.2.x.x version. Then choose the exact release by the Tags as noted in step 5 of the “Revert to a Released Version of the Source Code” section.