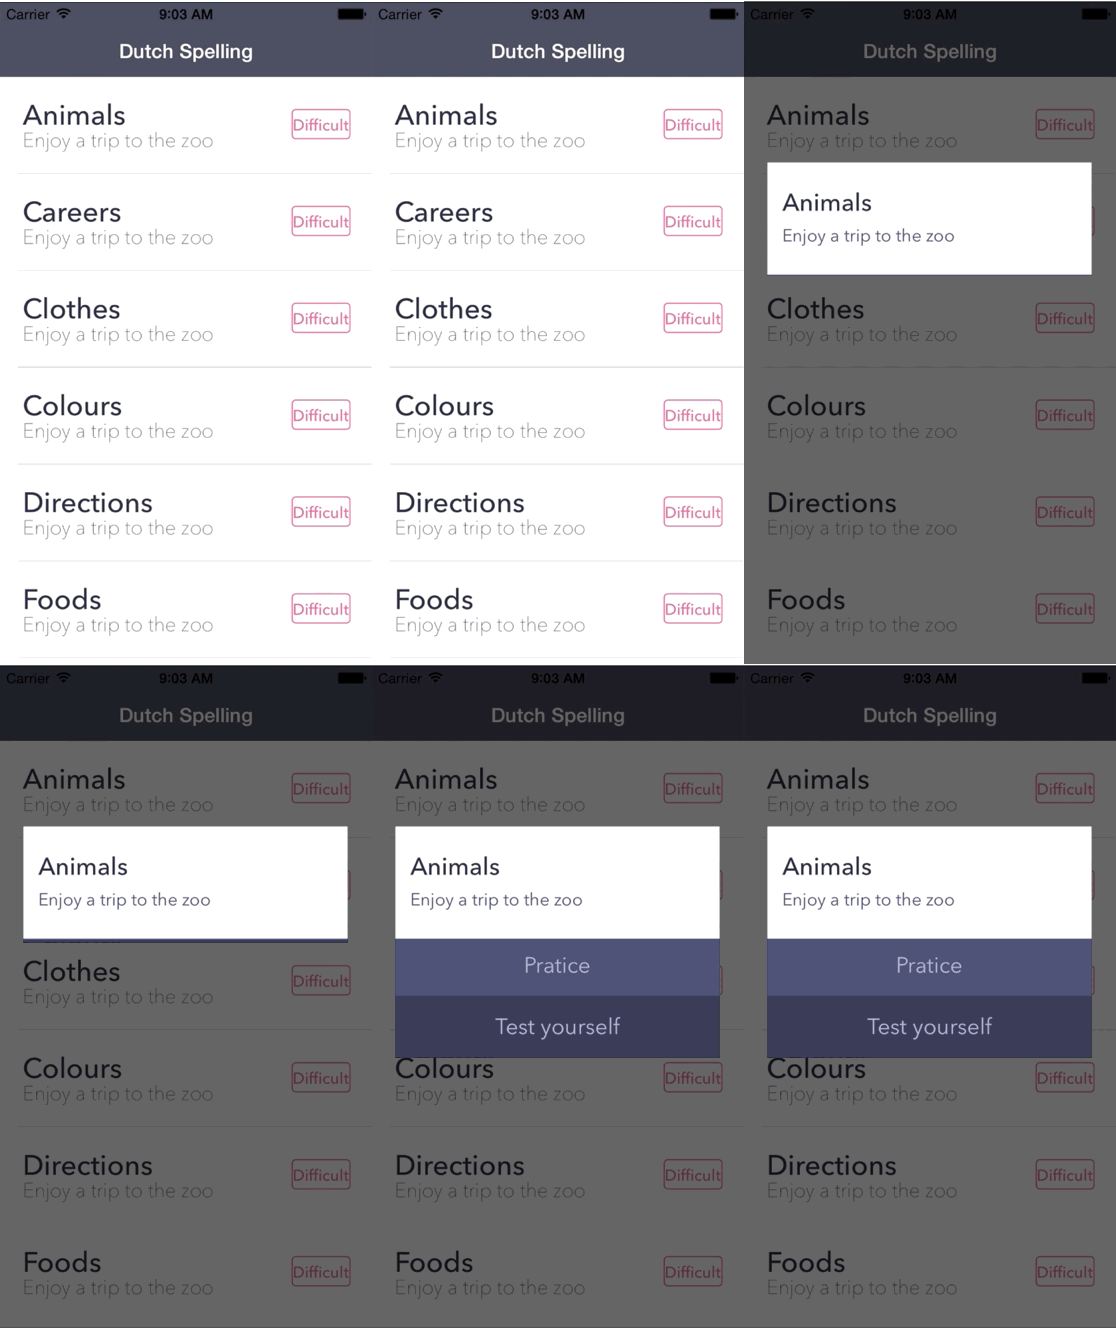
Last month, I wrote a blog post on creating beautiful animations using iOS APIs. Subtle use of animations and transitions in iOS can turn an average app into a five-star app. iOS has many built-in transitions between views that can be leveraged as a great starting point for adding animations to your iOS apps. However, with just a little bit of work, you can create custom transitions that will give your app a unique experience, spice up an otherwise generic user experience, and take your iOS app to the next level.
Getting Started
Normally, when we call the following API, we would expect our view to animate in from the left side:
PresentViewControllerAsync(ourViewController, true);
If we want to spice up our app with a custom transition, we can continue to use the same API to present the new UIViewController, but we’ll need a way to tell iOS about our custom transition. iOS gives us an easy way to customize a UIViewController’s transition via the delegate pattern: just set the view controller’s transition delegate to a subclass of UIViewControllerTransitionDelegate.
Every time you ask iOS to present a new view controller, UIKit will check to see if it has a transition delegate to use in place of the default transitions. If you don’t provide a transition delegate, it will use the built in transitions (i.e. animating the new view in from the left, or, if a modal transition, from the bottom).
Creating a Custom Transition
Transitions are made up of three subclasses: UIViewControllerAnimatedTransitioning, UIViewControllerTransitionDelegate, and UIPresentationController. I suggest starting with a subclass of UIViewControllerAnimatedTransitioning and then moving on to the transition delegate, as the AnimatedTransitioning class is where we’ll implement our custom transition.
Implementing UIViewControllerAnimatedTransitioning
To implement UIViewControllerAnimatedTransitioning, you must use two main methods. The TransitionDuration method defines exactly how long the transition should last, while the AnimationTransition method is where all the magic of actually making a UIViewController animate happens. Below is a sample implementation that I’ve taken from the iOS version of my Dutch Spelling app:
public class MyCustomAnimator : UIViewControllerAnimatedTransitioning
{
    public bool IsPresentation = true;
    CGRect startFrame = CGRect.Empty;

    public MyCustomAnimator(CoreGraphics.CGRect frame)
    {
       startFrame = frame;
    }

    public override double TransitionDuration (IUIViewControllerContextTransitioning transitionContext)
    {
       //How long will the transition last?
       return 0.8;
    }

    public override void AnimateTransition (IUIViewControllerContextTransitioning transitionContext)
    {
       //Where we'll add our transition!
    }
}
The key part of UIViewControllerAnimatedTransitioning is the AnimateTransition method. This method allows you access to both the current view controller and the new view controller you want presented to the user. You can animate the view controllers view using the wonderful iOS animation APIs, which allow you to scale, fade, rotate, and create beautiful transitions. You can see how I have implemented the AnimateTransition method to show a basic transition:
public override void AnimateTransition (IUIViewControllerContextTransitioning transitionContext)
{
    //The current view controller
    var fromVC = transitionContext.GetViewControllerForKey (UITransitionContext.FromViewControllerKey);
    var fromView = fromVC.View;

    //The view controller we wish to present to the user
    var toVC = transitionContext.GetViewControllerForKey (UITransitionContext.ToViewControllerKey);
    var toView = toVC.View;

    //ContainerView is where our animation will live
    var containerView = transitionContext.ContainerView;

    var isPresentation = IsPresentation;
    if (isPresentation)
    {
        containerView.AddSubview(toView);
    }

    var animatingVC = isPresentation ? toVC : fromVC;
    var animatingView = animatingVC.View;

    var appearedFrame = transitionContext.GetFinalFrameForViewController (animatingVC);
    var dismissedFrame = this.startFrame;

    var initialFrame = new CGRect(0, toView.Frame.Height + 100, toView.Frame.Width, toView.Frame.Height);
    var finalFrame = isPresentation ? appearedFrame : dismissedFrame;
    animatingView.Frame = initialFrame;

    var lessonOptionsVC = toVC as LessonTypeViewController;
    var defaultFrame = lessonOptionsVC.ContainerView.Frame;
    lessonOptionsVC.ContainerView.Frame = new CGRect(lessonOptionsVC.ContainerView.Frame.X, -500, lessonOptionsVC.ContainerView.Frame.Width, lessonOptionsVC.ContainerView.Frame.Height);

    UIView.AnimateNotify (0.5f,
                0,
                300.0f,
                5.0f,
                UIViewAnimationOptions.AllowUserInteraction | UIViewAnimationOptions.BeginFromCurrentState,
                () => {
                animatingView.Frame = finalFrame;
                lessonOptionsVC.ContainerView.Frame = defaultFrame;

            },  new UICompletionHandler((bool finished) => {
                if(!isPresentation){
                    fromView.RemoveFromSuperview();
                }
                transitionContext.CompleteTransition(true);
     }));
}
Implementing UIViewControllerTransitionDelegate
The main purpose of the UIViewControllerTransitionDelegate class is to manage the animator object that performs the animations. It will need to reference a subclass of UIViewControllerAnimatedTransitioning, which contains a few key properties that must be overloaded:
public class MyCustomOptionsTransitionDelegate : UIViewControllerTransitioningDelegate
{
    CoreGraphics.CGRect startFrame;
    private MyCustomOptionsTransitionDelegate lessonOptionsPresentationController;

    private LessonOptionsAnimator animationTransitioning;
    public LessonOptionsAnimator AnimationTransitioning
    {
       get
       {
          if (animationTransitioning == null) {
             animationTransitioning = new LessonOptionsAnimator(startFrame);
          }
          return animationTransitioning;
       }
    }

    public LessonOptionsTransitionDelegate (CoreGraphics.CGRect startFrame)
    {
       this.startFrame = startFrame;
    }

    public override UIPresentationController GetPresentationControllerForPresentedViewController (UIViewController    presentedViewController, UIViewController presentingViewController, UIViewController sourceViewController)
    {
        return new LessonOptionsPresentationController(presentedViewController, presentedViewController);
    }

    public override IUIViewControllerAnimatedTransitioning GetAnimationControllerForDismissedController(UIViewController dismissed)
    {
        return null;
    }

    public override IUIViewControllerAnimatedTransitioning GetAnimationControllerForPresentedController(UIViewController presented, UIViewController presenting, UIViewController source)
    {
       var transitioning = AnimationTransitioning;
       transitioning.IsPresentation = true;
       return transitioning;
    }
}
Conclusion
Using custom transitions and animations is an easy way to make your app stand out in the Apple App Store and take your app to the next level. To learn more about the animation APIs available for iOS, check out our documentation.

