Bringing Platform-Specific Functionality to Xamarin.Forms Apps
Xamarin.Forms comes with over 40 pages, layouts, and controls for you to build beautiful, native mobile apps that run on iOS, Android, and Windows 10. In addition to the massive productivity benefits of code sharing, one of my favorite features of Xamarin.Forms is that we aren’t limited in what our applications can do; we have access to 100% of the controls and APIs for iOS, Android, and Windows. There are many ways you can take advantage of platform-specific functionality in Xamarin.Forms apps, from custom renderers to native view declaration to effects.
Today, we’re happy to show you a new way to bring native functionality into your cross-platform mobile apps as part of our Xamarin.Forms 2.3.3 prerelease with platform-specifics. Platform-specifics allow you to take advantage of awesome native functionality that is only available on select platforms that Xamarin.Forms targets. In this blog post, you’ll learn how to consume some of the prebuilt platform-specifics in Xamarin.Forms and how create your own platform-specifics.
Introduction to Platform Specifics
Getting Started
Platform-specifics requires that you have the latest Stable channel release, which also allows you to take advantage of the new iOS 10 and Android Nougat APIs in your mobile apps. Xamarin.Forms 2.3.3-pre introduced support for platform-specifics, as well as native view declaration and bindings, so you must be using at least that version of Xamarin.Forms to use this feature. As with all versions of Xamarin.Forms, don’t update any of the Xamarin.Android.Support packages; Xamarin.Forms will automatically update these packages if a newer compatible version is available.
What are platform-specifics?
Platform-specifics make it super easy for you to implement features or behaviors that only apply to one platform without requiring custom renderers. You can easily consume a platform-specific via a fluent code API or XAML. Platform-specifics are similar to effects, except that platform-specifics are generally only available on one platform, such as a translucent navigation bar on iOS. This allows the Xamarin.Forms API surface to contain features that are only available on certain platforms for more platform-specific customization out-of-the-box.
Consuming Platform-Specifics
Consuming platform-specifics can be done in a two easy steps:
- Bring in the
Xamarin.Forms.PlatformConfigurationnamespace and the corresponding platform-specific namespace (e.g.Xamarin.Forms.PlatformConfiguration.iOSSpecific,Xamarin.Forms.PlatformConfiguration.AndroidSpecific, etc.). - Apply the platform-specific using the
On<T>()fluent API.
There are several platform-specifics built into Xamarin.Forms available for you to consume now:
- [iOS] Blur support for any
VisualElement - [iOS] Translucent navigation bar
- [Windows] Toolbar placement options
- [Windows] Partially collapsed navigation bar (with icons) on
MasterDetailPage - [Android] AdjustResize/AdjustPan
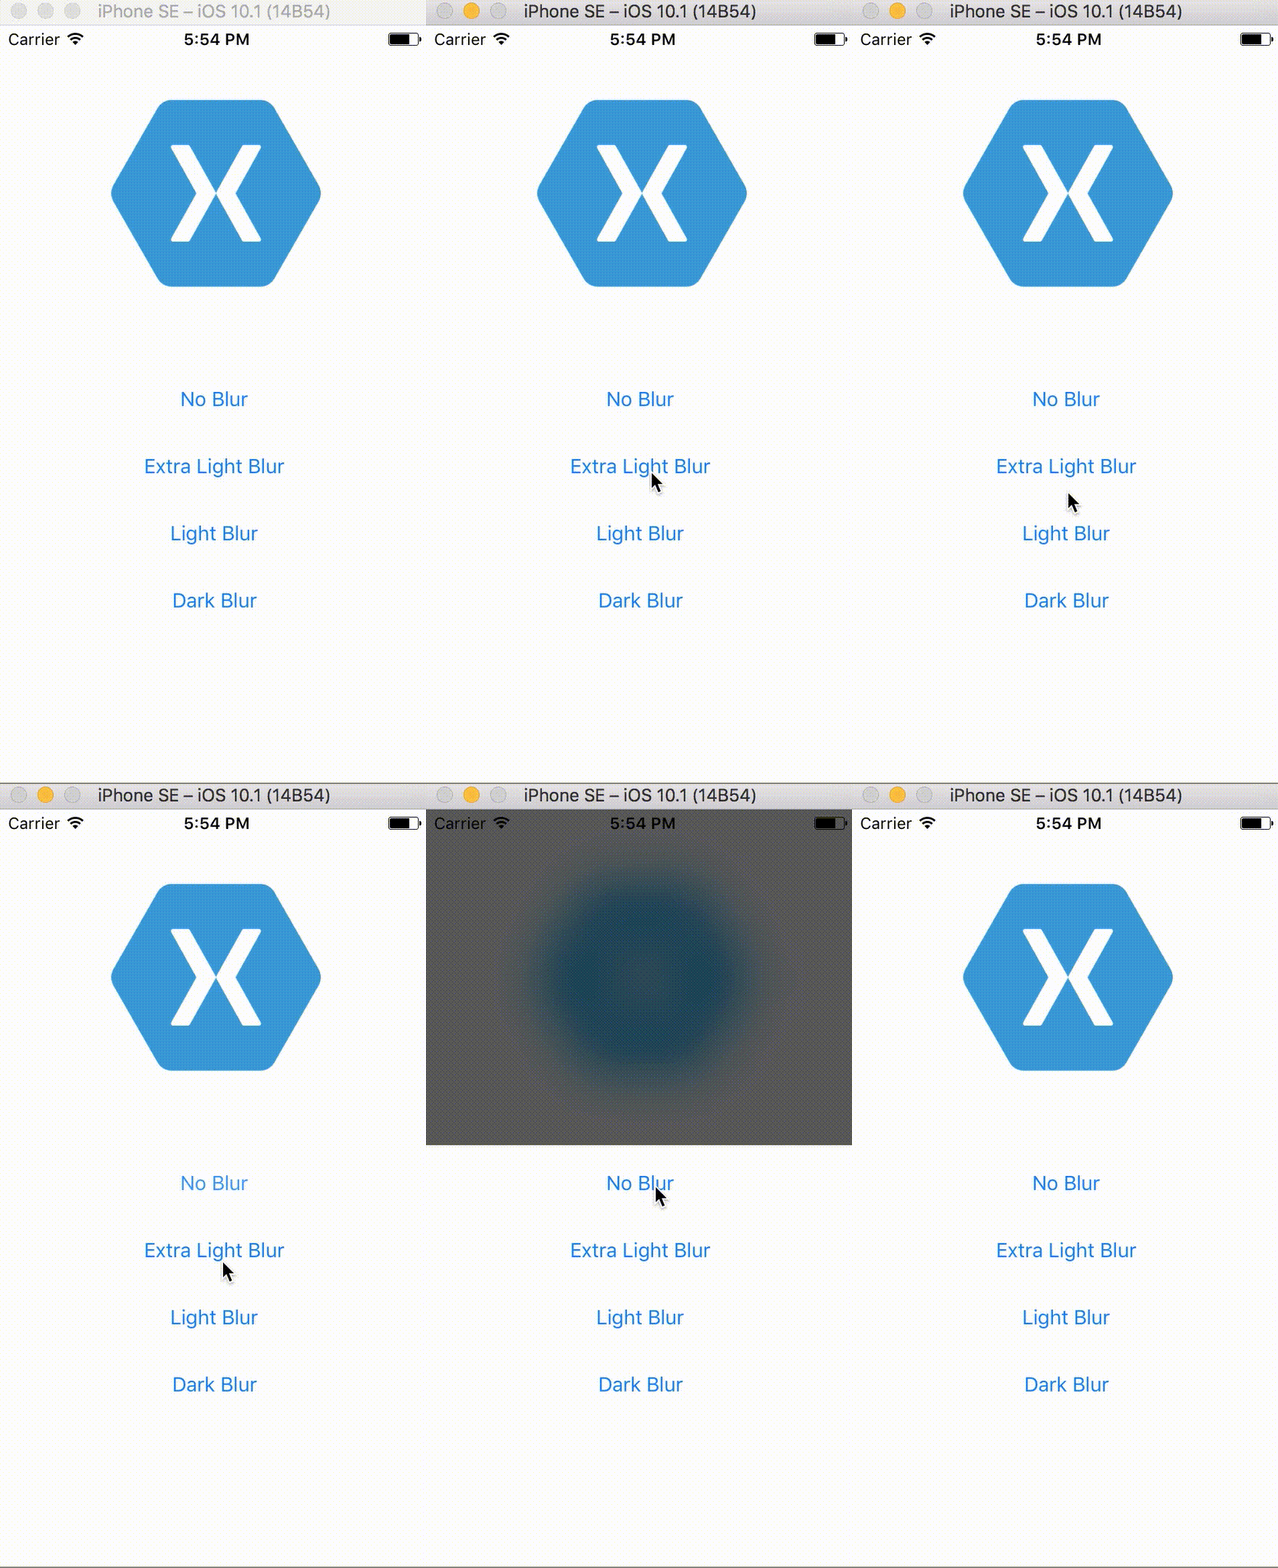
Let’s apply a Xamarin.Forms platform-specific for blurring any VisualElement on iOS. We’ll create an app that shows the Xamarin logo, along with some buttons to change the blur effect on the image. Ensure your Xamarin.Forms NuGets in all projects is set to at least Xamarin.Forms 2.3.3-prerelease. Add the following XAML to a blank XAML page:
This XAML will work on any platform, but suppose we want to spice it up and add a blur effect to our image on iOS. When the button is clicked, let’s apply the built-in platform-specific for blurring UI elements in the code-behind.
using Xamarin.Forms;
using Xamarin.Forms;
using Xamarin.Forms.PlatformConfiguration;
using Xamarin.Forms.PlatformConfiguration.iOSSpecific;

namespace PlatformSpecifics
{
	public partial class PlatformSpecificsPage : ContentPage
	{
		public PlatformSpecificsPage()
		{
			InitializeComponent();

			button1.Clicked += (sender, e) =>
			{
				logo.On().UseBlurEffect(BlurEffectStyle.None);
			};

			button2.Clicked += (sender, e) =>
			{
				logo.On().UseBlurEffect(BlurEffectStyle.ExtraLight);
			};

			button3.Clicked += (sender, e) =>
			{
				logo.On().UseBlurEffect(BlurEffectStyle.Light);
			};

			button4.Clicked += (sender, e) =>
			{
				logo.On().UseBlurEffect(BlurEffectStyle.Dark);
			};
		}
	}
}
Build and deploy the app to the iOS Simulator, and you’ll be able to apply a platform-specific blur to the Xamagon logo.

If you build and deploy the app to an Android emulator or device, you’ll notice that the platform-specific isn’t available, and no action occurs when you click the buttons to apply the blur.
Built on Open Source
In addition to the Xamarin SDKs being open sourced on GitHub, Xamarin.Forms is also open source! We want it to be as easy as possible for developers to contribute to Xamarin.Forms. There have already been several pull requests to add platform-specifics to Xamarin.Forms, so if you have ideas, be sure to submit a pull request with the platform-specifics you think Xamarin.Forms should include. Being part of an open source project means much more than just writing code—there are many ways you can contribute. We would love to hear your feedback on native view declaration and bindings on the Xamarin Forums and Bugzilla if you experience issues.
Wrapping Up
In this blog post, we learned how to use the new platform-specifics feature in Xamarin.Forms 2.3.3 and above to add functionality that’s only available on select platforms to our application from shared code. For more information about platform-specifics, visit the Xamarin Forums. For a full listing of platform-specifics, view our Platform Specifics Gallery. The sample used in this blog post is available for download on my GitHub.

 Light
Light Dark
Dark
0 comments