
When developing mobile apps, you often run into an instance where your app needs some kind of authentication mechanism to protect its contents.  Some mobile app developers choose to create their own repository to create a username/password based solution. Others choose a social media authentication provider such as Facebook, Twitter, or LinkedIn. Using Xamarin.Auth makes authenticating to services such as these extremely simple to implement.
However, in the case of enterprise apps, people don’t want to remember ‘yet another’ username/password combo and social media authentication is the least expected solution. Users expect their organization account to allow them to use different resources and apps within their system. Welcome to the world of Azure Active Directory (or Azure AD for simplicity).
Azure AD allows developers to secure resources such as files, links, and Web APIs using the same organizational account that employees use to sign in to their systems or check their emails. This should sound a bit familiar, as it is the same authentication mechanism behind Office 365.
Let’s take a look at how to integrate Azure AD into your mobile app with two simple steps.
Step 1: Registering the application with Azure AD
- First navigate to https://manage.windowsazure.com and log in with your Microsoft Account or Organization Account in the Azure Portal. If you don’t have an Azure Subscription, you can get a trial from http://www.azure.com
- After signing in, go to your Active Directory (1) and select the Active Directory where you want to register the application (2)

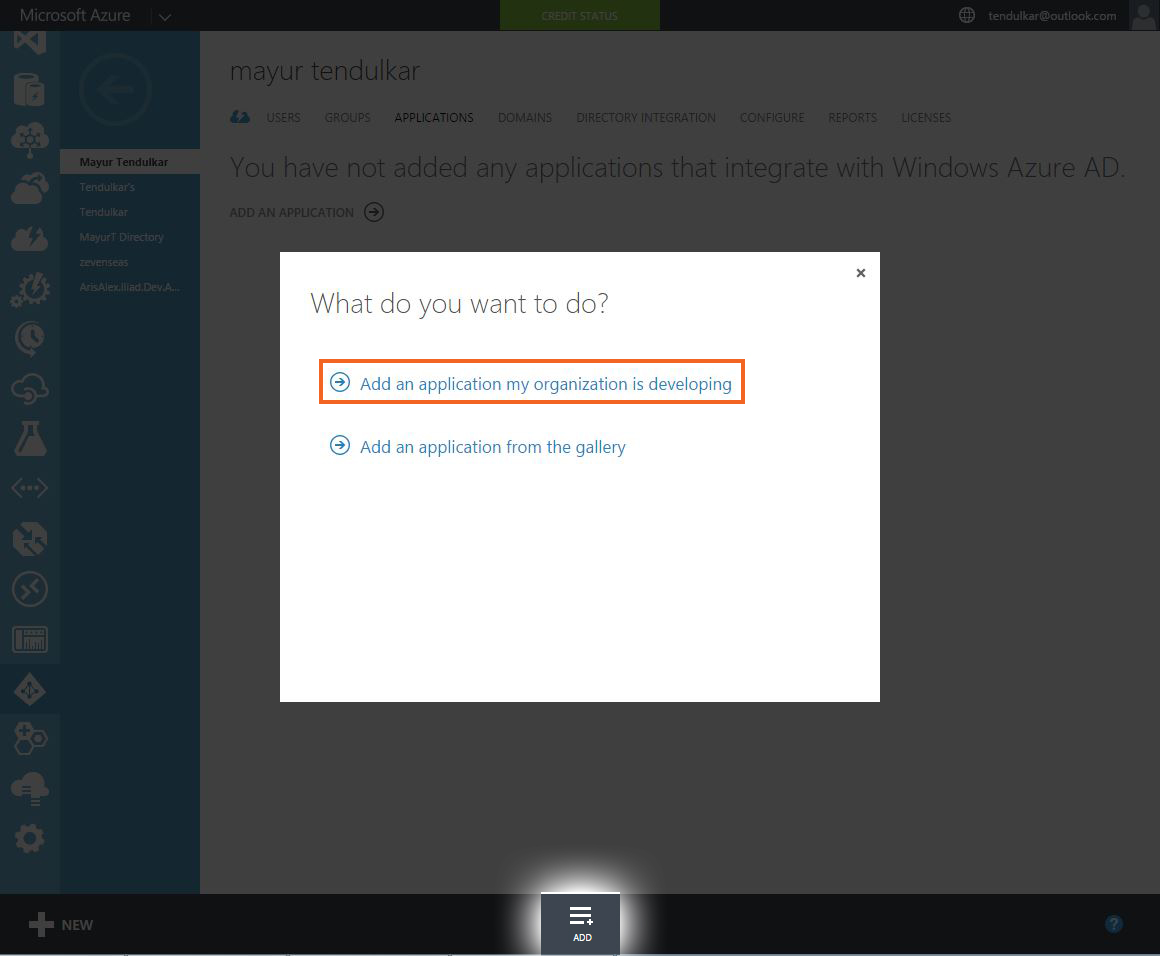
- After selecting the desired Active Directory, ‘Add‘ a new application by either clicking the link at front or at the bottom. Then select ‘Add an application my organization is developing‘

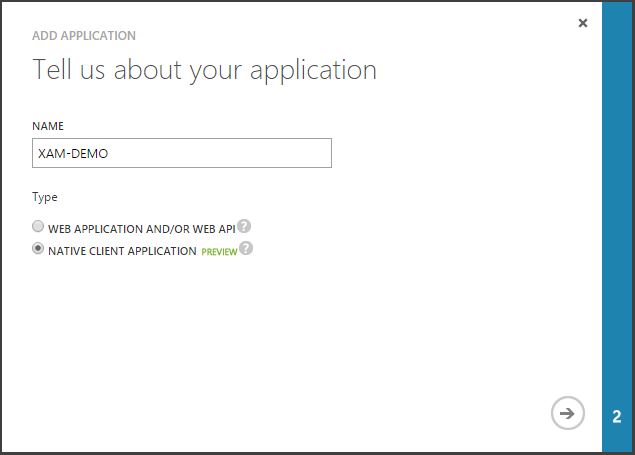
- On the next screen, give your app a name. In my case it is ‘XAM-DEMO‘. On this screen, make sure you select ‘Native Client Application‘ as the type of application.

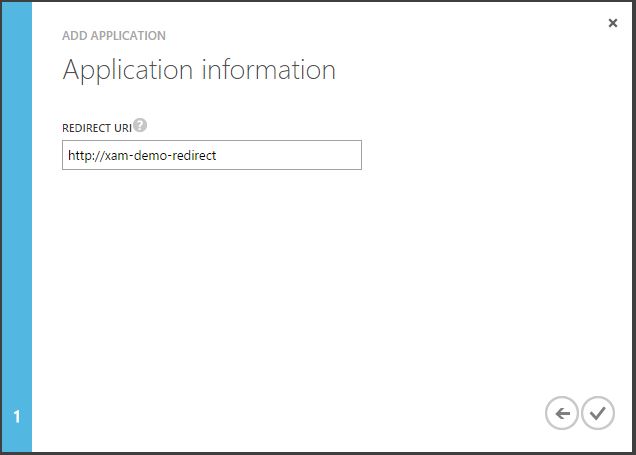
- On the final screen, provide a ‘Redirect URI‘, which is unique to your application as it will return to this URI when authentication is complete.

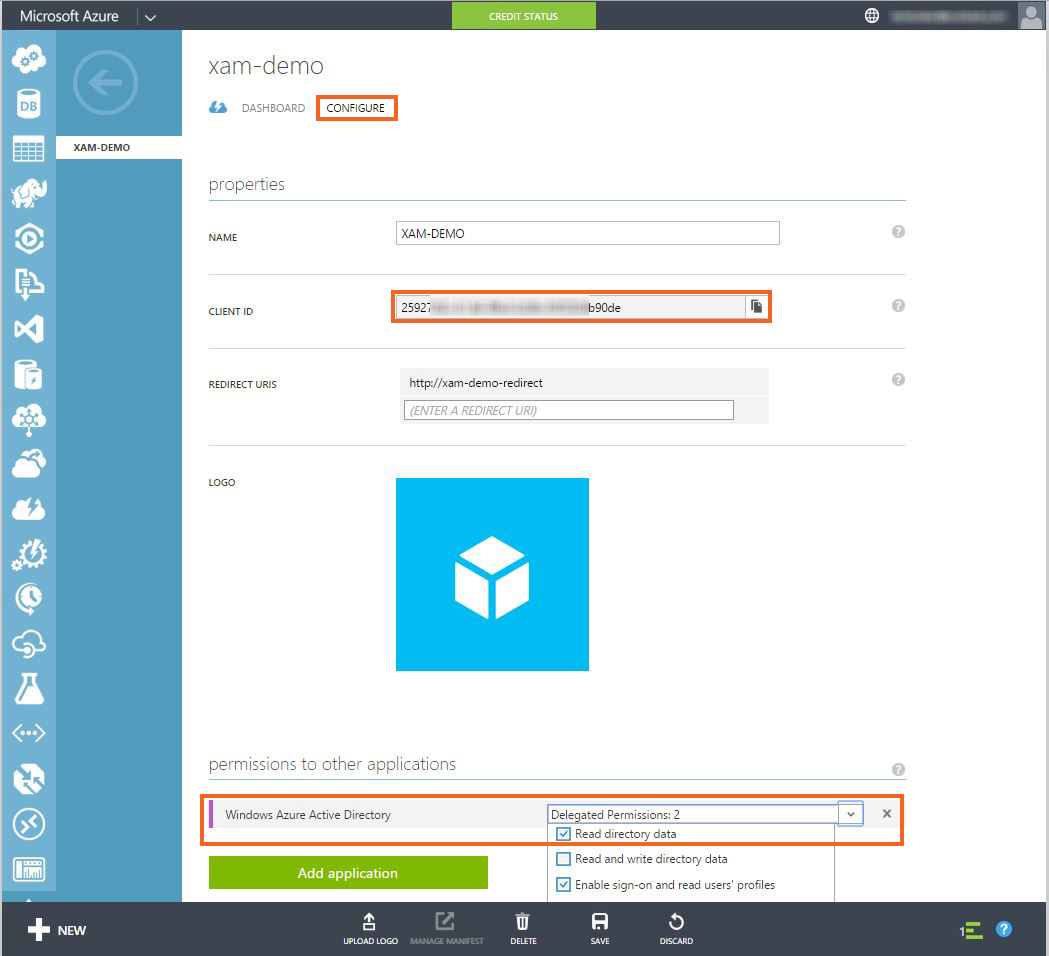
- Once the app is created, navigate to the ‘Configure‘ tab. Write down the ‘Client ID’, which we’ll use in our application later. Also, on this screen you can give your mobile application access to Active Directory or add another application like Web API, which can be used by mobile application once authentication is complete.


Step 2: Authenticating the application with Azure AD
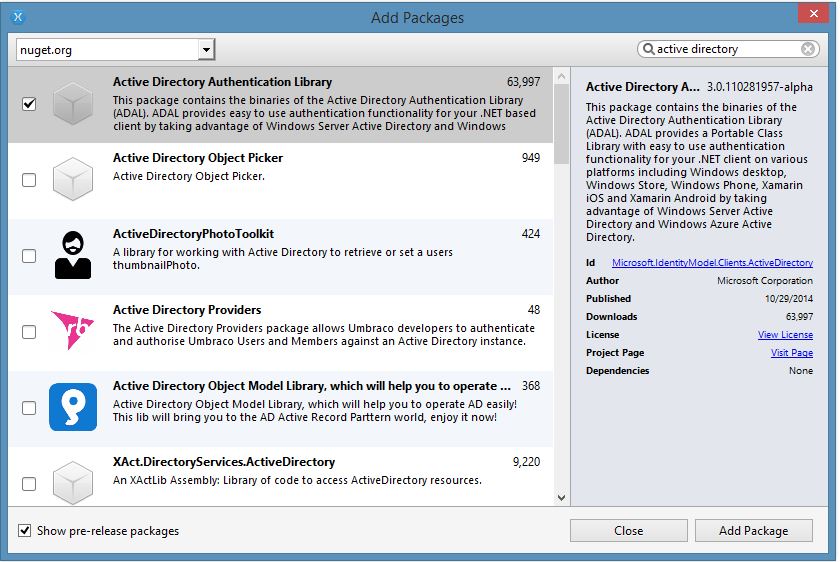
In your application, add a reference to Azure Active Directory Authentication Library (Azure ADAL) using the NuGet Package Manager in Visual Studio or Xamarin Studio. Make sure you select ‘Show pre-release packages’ to include this package, as it is still in preview.
Note: Azure ADAL 3.0 is currently a preview and there may be breaking changes before the final version is released. I have included references at the end of this post where you can find more information on Azure ADAL.
In your application, you will now need to add the following class level variables that are required for the authentication flow.
//Client ID from from step 1. point 6
public static string clientId = "25927d3c-.....-63f2304b90de";
public static string commonAuthority = "https://login.windows.net/common"
//Redirect URI from step 1. point 5<br />
public static Uri returnUri = new Uri("http://xam-demo-redirect");
//Graph URI if you've given permission to Azure Active Directory in step 1. point 6
const string graphResourceUri = "https://graph.windows.net";
public static string graphApiVersion = "2013-11-08";
//AuthenticationResult will hold the result after authentication completes
AuthenticationResult authResult = null;
One thing to note here is commonAuthority. When the authentication endpoint is ‘common’, your app becomes ‘multi-tenant’, which means any user can use login with his Active Directory credentials. After authentication, that user will work on the context of his own Active Directory – i.e. he will see details related to his Active Directory.
At this time, you can modify the default button.Click event from the default Android application (or create your own flow to start the authentication). This will start the authentication and upon completion assign the result in authResult
button.Click += async (sender, args) => {
  var authContext = new AuthenticationContext(commonAuthority);
  if (authContext.TokenCache.ReadItems().Count() > 0)
    authContext = new AuthenticationContext(authContext.TokenCache.ReadItems().First().Authority);

  authResult = await authContext.AcquireTokenAsync(graphResourceUri, clientId, returnUri, new AuthorizationParameters(this));
}
In the above code, the AuthenticationContext is responsible for the authentication with commonAuthority. It has an AcquireTokenAsync method, which take parameters as a resource which needs to be accessed, in this case graphResourceUri, client ID, return URI. The app will return to the returnUri when authentication completes. This code will remain the same for all platforms, however, the last parameter, AuthorizationParameters, will be different on different platforms and is responsible for governing the authentication flow.
In the case of Android or iOS, we pass ‘this’ parameter to AuthorizationParameters(this) to share the context, whereas in the case of Windows, it is passed without any parameter as new AuthorizationParameters().
Along with it, we also need to override the OnActivityResult method in Android to resume the application.
protected override void OnActivityResult(int requestCode, Result resultCode, Intent data)
{
  base.OnActivityResult(requestCode, resultCode, data);<br />
  AuthenticationAgentContinuationHelper.SetAuthenticationAgentContinuationEventArgs(requestCode, resultCode, data);<br />
}
For Windows Phone, modify the OnActivated method in the app.xaml.cs file with the below code:
protected override void OnActivated(IActivatedEventArgs args)
{
#if WINDOWS_PHONE_APP
  if (args is IWebAuthenticationBrokerContinuationEventArgs)
  {
     WebAuthenticationBrokerContinuationHelper.SetWebAuthenticationBrokerContinuationEventArgs(args as IWebAuthenticationBrokerContinuationEventArgs);
  }
#endif

  base.OnActivated(args);
}
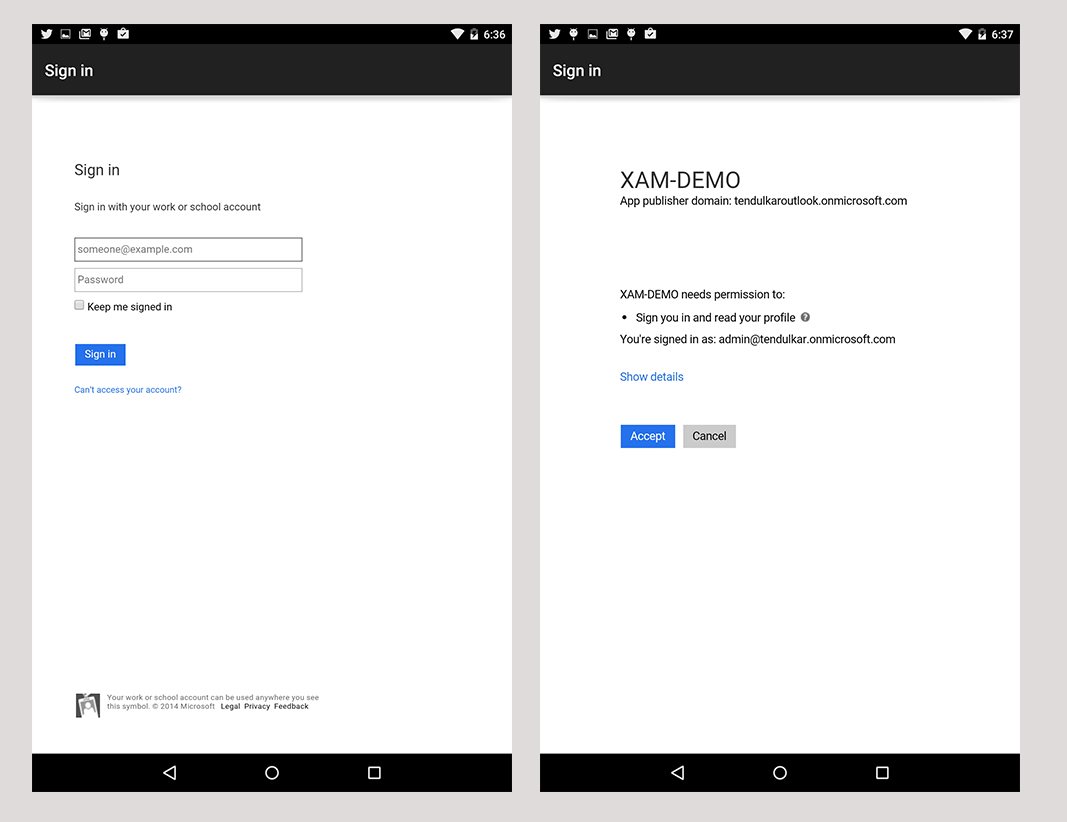
Now if you run the application, you should see an authentication dialog. Upon successful authentication, it will ask your permissions to access the resources (in our case Graph API).
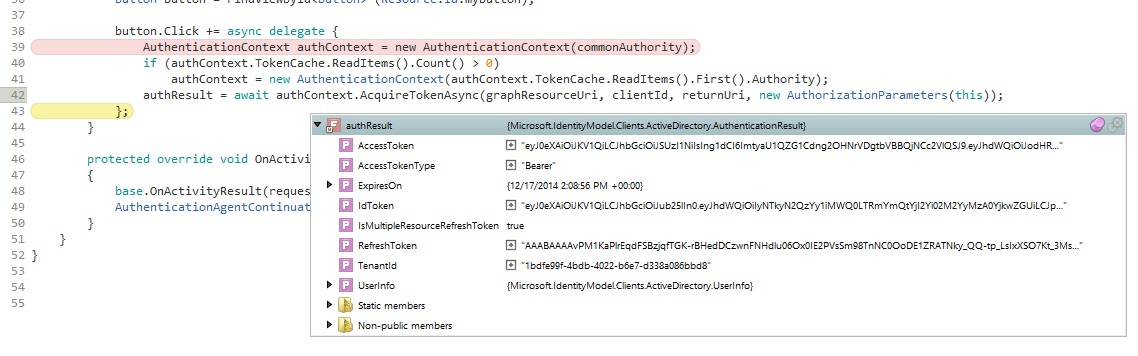
 If authentication is successful and you’ve authorized the app to access the resources, you should get an
 AccessToken and RefreshToken combo in authResult. These tokens are required for further API calls and for authorization with Azure AD behind the scenes.
For example, the code below allows you to get a user list from Active Directory. You can replace the Web API URL with your Web API which is protected by Azure AD.
var client = new HttpClient();
var request = new HttpRequestMessage(HttpMethod.Get, "https://graph.windows.net/tendulkar.onmicrosoft.com/users?api-version=2013-04-05");
request.Headers.Authorization = new AuthenticationHeaderValue("Bearer", authResult.AccessToken);
var response = await client.SendAsync(request);

var content = await response.Content.ReadAsStringAsync();
This way you can authenticate your mobile apps against Microsoft Azure Active Directory. ADAL makes it much easier with fewer lines of code, while keeping most of the code the same and thus making it shareable across platforms.
Learn More:
- Azure ADAL is in preview. So, there can and most likely will be changes before the final release. Follow Vittorio Bertocci’s blog for more details and changes to the library.
- The Azure Team has shared a complete example with Azure ADAL for each platform. Download it from here.