Enterprise applications often need to hook into existing infrastructure in mobile apps and many depend on Active Directory for authentication. Microsoft Azure Active Directory, which is a cloud based active directory, provides identity for such mobile apps. In a previous blog post, we used Active Directory Authentication Library (ADAL) to authenticate mobile apps with AD.
Microsoft recently released a successor to this library named Microsoft Authentication Library (MSAL), which simplifies the registration of mobile apps with AD as well as streamlining authentication by handling Microsoft accounts, Azure AD accounts, and Azure AD B2C users with a single programming model. In this blog post, let’s dive into using MSAL for authenticating a Xamarin.Forms app with AD.
Step 1: Register Your Mobile App
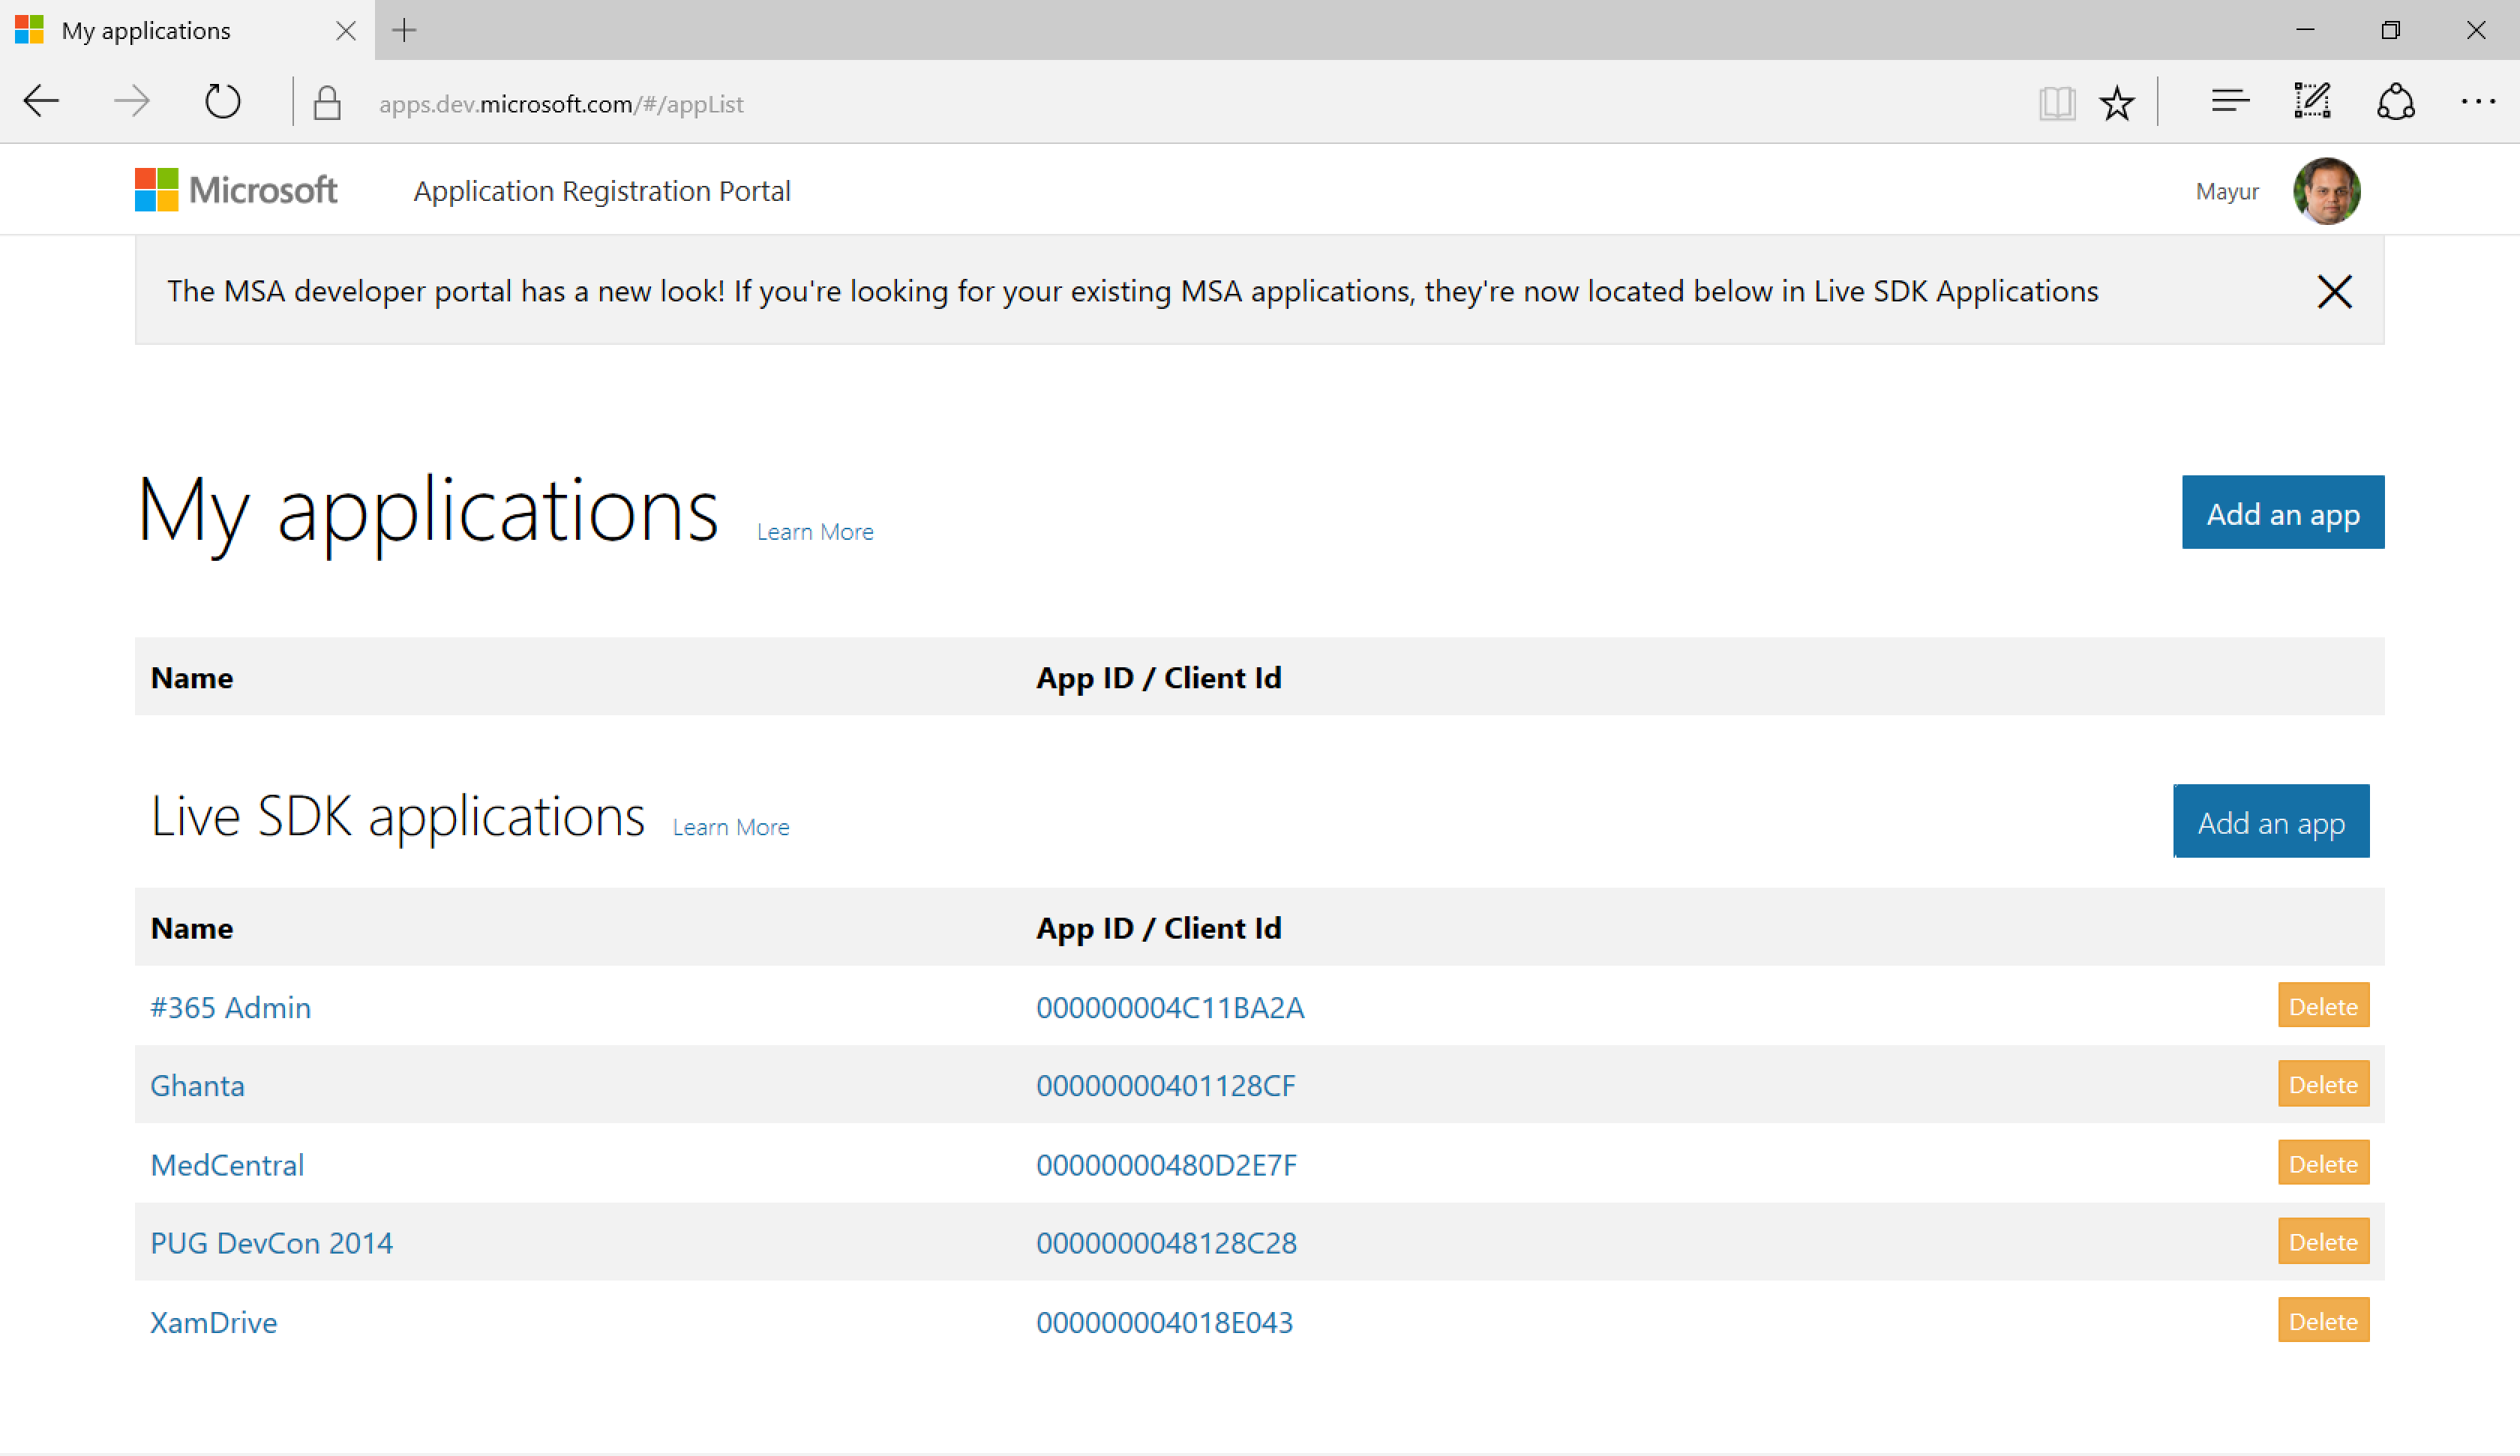
The first thing necessary to secure a mobile app with AD is to register it to use AD as an Identity Provider. To register, visit: https://apps.dev.microsoft.com. There, you’ll see current applications using AD, as well as the ability to register new applications.

On this page, click on the ‘Add an app’ button to register a new application.

Enter a name and click the ‘Create application’ button. This will take you to the next page.
On this page, make a note of the Application Id and click on ‘Add Platform’ button and select ‘Mobile application’ as a platform. You can then add a company or app logo or other details before saving the application.
Step 2: Set Up the Application
MSAL is supported in Xamarin applications. Create a new Xamarin.Forms application and add the MSAL NuGet package. If you’re using Visual Studio to create a Xamarin.Forms applications, a Windows Phone 8.1 project is added automatically, which is not supported by MSAL. This tutorial focuses on using Xamarin.Forms to create iOS, Android, and UWP apps. To correct this, we need to retarget the PCL by editing the .csproj file of the PCL and change the TargetFrameworkProfile to Profile7:
Profile7
Note: MSAL, as used in this blog post, is still in preview. The code and/or APIs may change by the time the MSAL NuGet is promoted from prerelease.
Step 3: Create a Login Page
Add a Login Page in the PCL project. We’ll be using a PageRenderer to create a platform-specific login user interface.
To get started, declare a few static variables in App.cs (or App.xaml.cs if you’re using a XAML Application class) and initialize them for our application to use:
public static PublicClientApplication ClientApplication { get; set; }
public static string[] Scopes = { "User.Read" };
public App()
{
   ClientApplication = new PublicClientApplication("your-app-id");
   var content = new Login();
   MainPage = new NavigationPage(content);
}
Add a label (WelcomeText) and a button (LoginButton) to the Login Page. Create an IPlatformParameters object to hold platform specific parameters and add an event handler for LoginButton. The codebehind for the Login Page should look something like this:
public IPlatformParameters PlatformParameters { get; set; }
public Login()
{
   InitializeComponent();
   LoginButton.Clicked += LoginButton_Clicked;
}
protected override void OnAppearing()
{
   App.ClientApplication.PlatformParameters = PlatformParameters;
   base.OnAppearing();
}
private async void LoginButton_Clicked(object sender, EventArgs e)
{
   try
   {
      AuthenticationResult ar = await App.ClientApplication.AcquireTokenAsync(App.Scopes);
      WelcomeText.Text = $"Welcome {ar.User.Name}";
   }
   catch (MsalException ex)
   {
      WelcomeText.Text = ex.Message;
   }
}
The AuthenticationResult object contains the AccessToken, which can later be used for calling any API secured by AD. Next, add a LoginPageRenderer to the Android and iOS projects to help the library properly authenticate users.
[assembly: ExportRenderer(typeof(Login), typeof(LoginPageRenderer))]
namespace MSALForForms.Droid
{
   public class LoginPageRenderer : PageRenderer
   {
      private Login _page;
      protected override void OnElementChanged(ElementChangedEventArgs<Page> e)
      {
         base.OnElementChanged(e);
         _page = e.NewElement as Login;
         var activity = this.Context as Activity;
         _page.PlatformParameters = new PlatformParameters(activity);
      }
    }
}
//Login Page Renderer for iOS
[assembly: ExportRenderer(typeof(Login), typeof(LoginPageRenderer))]
namespace MSALForForms.iOS
{
   class LoginPageRenderer : PageRenderer
   {
      Login _page;
      protected override void OnElementChanged(VisualElementChangedEventArgs e)
      {
          base.OnElementChanged(e);
          _page = e.NewElement as Login;
      }
      public override void ViewDidLoad()
      {
          base.ViewDidLoad();
          _page.PlatformParameters = new PlatformParameters(this);
      }
   }
}
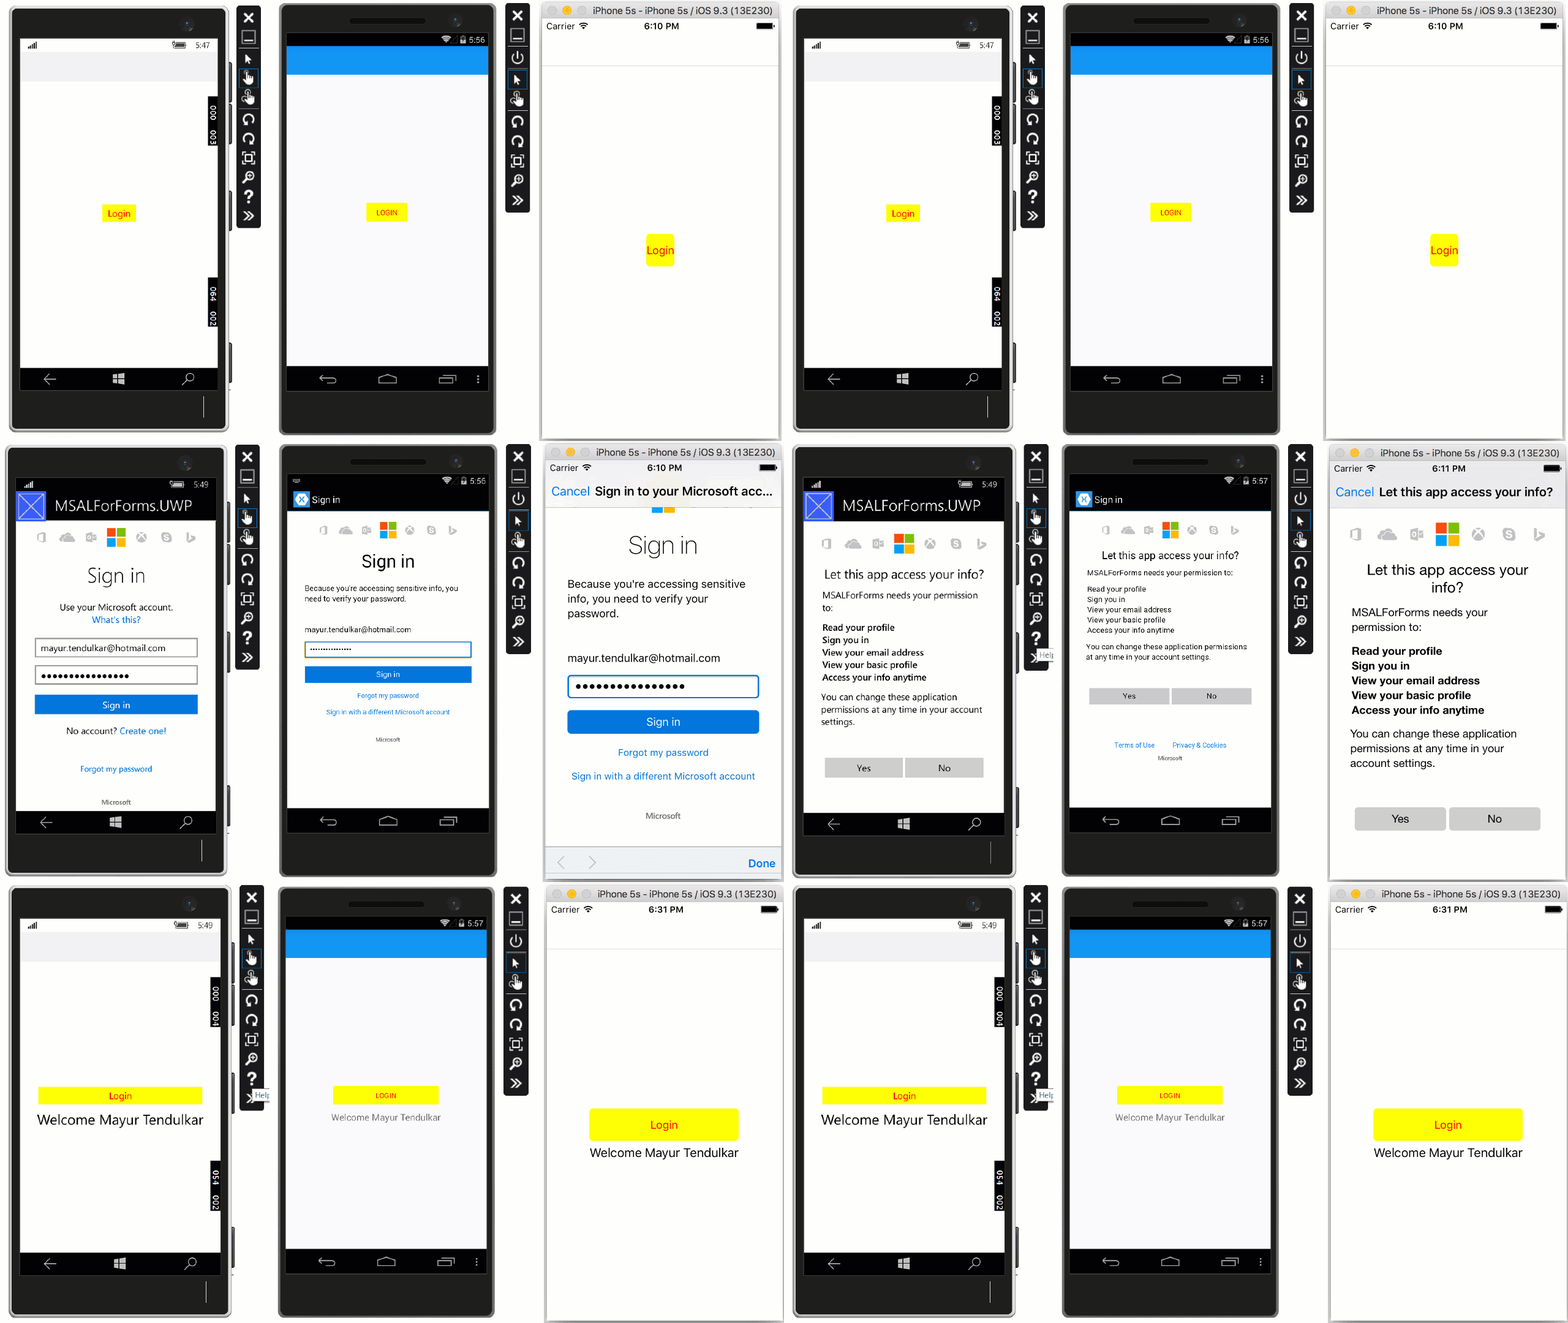
At this stage, run the app on a device or simulator to see the results.

Wrapping Up
Now that your application user is authenticated with MSAL, you can build apps that consume the Microsoft Graph API, Office 365 APIs, or even ASP.NET WebAPIs—any endpoint that is secured by AD can now be easily accessed without prompting the user to re-authenticate. For more information on MSAL, read the Build 2016 announcement for MSAL from the Microsoft Identity team, or download the sample used in this blog post to kickstart your next app using AD for user authentication.

0 comments