
Camera apps today can do so much more than just take perfect photos. Whether it's adding filters to your image or letting you adjust focus and exposures manually, apps can essentially transform you into a professional photographer. While numerous apps in the app store let you do many things with the camera, there are others that do clever manipulation of your images in real time, such as adding a custom mask to your face, manipulating your face to look older or younger, and more. Social media apps today have this intelligence baked in, so you don't have to open another app to make your selfies look extraordinary before you share them with friends and family.
Whether you’re building a consumer app that provides fun filters or an enterprise app that recognizes receipts, adding intelligent tires like these gives you an edge over others. With services like the Microsoft Cognitive Services API, you can quickly analyze and process your photos by adding just few lines of code.
In this post, you’ll learn how to display a camera within the Android app, add face tracking using Google’s Mobile Vision APIs and recognize the person in front of the camera using Microsoft Cognitive Services’ Face API.

Adding Face Tracking to Your App
Google’s Mobile Vision provides a set of APIs for “Detecting Face”, “Recognizing Text”, and “Scanning Barcodes”. For this example, I’ll be using the Face APIs to detect human faces from the live camera stream within the app.
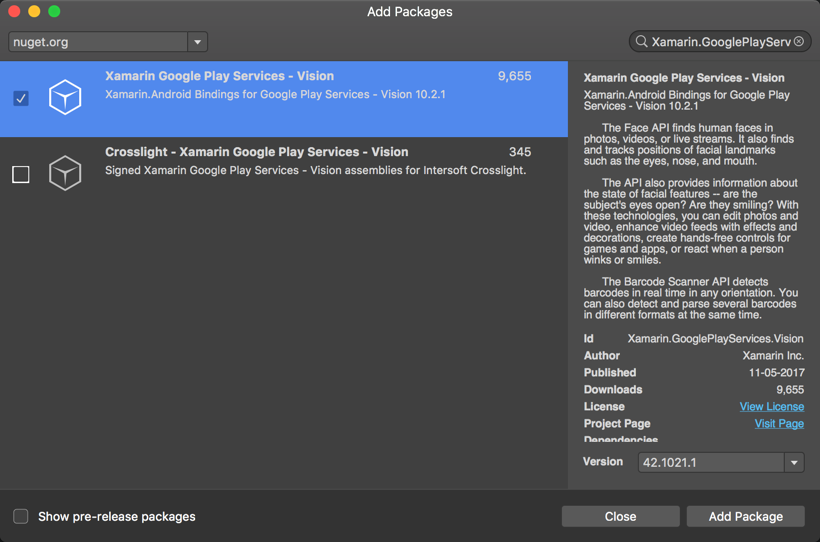
To get started, add the Xamarin.GooglePlayServices.Vision NuGet package.
To access the camera on Android, you need to request the user’s permission and add the camera feature to your Android manifest:
if (ActivityCompat.CheckSelfPermission(this, Manifest.Permission.Camera) == Permission.Granted)
{
    CreateCameraSource();
    //...
}
else
{
Log.Warn(TAG, "Camera permission is not granted. Requesting permission");

var permissions = new string[] { Manifest.Permission.Camera };

if (!ActivityCompat.ShouldShowRequestPermissionRationale(this,
        Manifest.Permission.Camera))
{
    ActivityCompat.RequestPermissions(this, permissions, RC_HANDLE_CAMERA_PERM);
    return;
}

Snackbar.Make(mGraphicOverlay, Resource.String.permission_camera_rationale,
        Snackbar.LengthIndefinite)
        .SetAction(Resource.String.ok, (o) => { ActivityCompat.RequestPermissions(this, permissions, RC_HANDLE_CAMERA_PERM); })
        .Show();
}
Create Camera Source
The FaceDetector.Builder instantiates the FaceDetector with the specified properties. In this example, we use the default face detector settings and associate a processor to it.
private void CreateCameraSource()
{

    var context = Application.Context;
    FaceDetector detector = new FaceDetector.Builder(context)
            .SetClassificationType(ClassificationType.All)
            .Build();

    detector.SetProcessor(
            new MultiProcessor.Builder(this)
                    .Build());

    if (!detector.IsOperational)
    {
        // Note: The first time that an app using face API is installed on a device, GMS will
        // download a native library to the device in order to do detection.  Usually this
        // completes before the app is run for the first time.  But if that download has not yet
        // completed, then the above call will not detect any faces.
        //
        // isOperational() can be used to check if the required native library is currently
        // available.  The detector will automatically become operational once the library
        // download completes on the device.
        Log.Warn(TAG, "Face detector dependencies are not yet available.");
    }

    mCameraSource = new CameraSource.Builder(context, detector)
            .SetRequestedPreviewSize(640, 480)
            .SetFacing(CameraFacing.Front)
            .SetRequestedFps(30.0f)
            .Build();


}
In the above code, a MultiProcessor is used to receive detection results and CameraSource.Builder instantiates a camera source with a specified Preview Size, Camera Facing, and required fps.
Show a Live Stream from the Camera
Now that we have access to the camera and the CameraSource is already built, we can start the preview on a custom SurfaceView; in this case CameraSourcePreview.
GraphicOverlay instance is also passed in so that the face border can be drawn at the time detection.
private void StartCameraSource()
{

    // check that the device has play services available.
    int code = GoogleApiAvailability.Instance.IsGooglePlayServicesAvailable(
            this.ApplicationContext);
    if (code != ConnectionResult.Success)
    {
        var dlg =
                GoogleApiAvailability.Instance.GetErrorDialog(this, code, RC_HANDLE_GMS);
        dlg.Show();
    }

    if (mCameraSource != null)
    {
        try
        {
            mPreview.Start(mCameraSource, mGraphicOverlay);
        }
        catch (System.Exception e)
        {
            Log.Error(TAG, "Unable to start camera source.", e);
            mCameraSource.Release();
            mCameraSource = null;
        }
    }
}
The ideal place to call the StartCameraSource() is in the OnResume() of the Activity, while the OnPause() should stop the preview. It will ensure the camera resources are used only when the user is using the app.
Detect Faces
Every image frame received from the camera source may contain multiple faces, and each face corresponds to a distinct face identity which is represented by the Tracker created by the multiprocessor.
Implement IFactory to capture each Face
MultiProcessor requires an implementation of IFactory to callback when a human Face is detected in the camera. In this example, IFactory is implemented within the MainActivity, that has the Create():
public Tracker Create(Java.Lang.Object item)
{
    return new GraphicFaceTracker(mGraphicOverlay, mCameraSource);
}
In the above code, a new instance of GraphicFaceTracker is created for every detected face, and each of it builds a face box graphic object over the video stream using the GraphicOverlay view passed in the constructor.
Below is the implementation of the GraphicFaceTracker
class GraphicFaceTracker : Tracker
{
    private GraphicOverlay mOverlay;
    private FaceGraphic mFaceGraphic;

    public GraphicFaceTracker(GraphicOverlay overlay)
    {
        mOverlay = overlay;
        mFaceGraphic = new FaceGraphic(overlay);
    }

    public override void OnNewItem(int id, Java.Lang.Object item)
    {
        mFaceGraphic.SetId(id);
    }

    public override void OnUpdate(Detector.Detections detections, Java.Lang.Object item)
    {
        var face = item as Face;
        mOverlay.Add(mFaceGraphic);
        mFaceGraphic.UpdateFace(face);
    }

    public override void OnMissing(Detector.Detections detections)
    {
        mOverlay.Remove(mFaceGraphic);
    }

    public override void OnDone()
    {
        mOverlay.Remove(mFaceGraphic);
    }
}
The FaceGraphic instance is created when a Face is detected the first time, updated as the face changes, and hidden when the face goes out of the frame.
That’s it; we successfully created face tracking on a custom camera surface within your app! Next, we’ll recognize the person within the frame.
Recognize a Face from the Live Stream
To recognize the face within the live video frame, we capture the image whenever a new face is detected and send it to Microsoft Cognitive Services APIs to identify the person. Face Recognition requires artificial intelligence and highly efficient machine learning algorithms, which are provided to you as a service and free to get started. If you’re new to Cognitive Services, I highly recommend reading the blog post Adding Facial Recognition to Your Mobile Apps.
Capture the Detected Face
To capture the newly detected Face, modify the GraphicFaceTracker to implement the CameraSource.IPictureCallback first.
class GraphicFaceTracker : Tracker, CameraSource.IPictureCallback
{
    //...
}
And modify the OnNewItem() to capture the image frame with the Face
public override void OnNewItem(int id, Java.Lang.Object item)
{
    mFaceGraphic.SetId(id);
    if (mCameraSource != null && !isProcessing)
        mCameraSource.TakePicture(null, this);
}
Identify the Person in the Captured Frame
Finally, using the Helper Classes ImageAnalyzer and LiveCamHelper (that abstracts the COGs API call), we successfully identify the person in the video stream.
public void OnPictureTaken(byte[] data)
{
    Task.Run(async () =>
    {
        try
        {
            isProcessing = true;

            Console.WriteLine("face detected: ");

            var imageAnalyzer = new ImageAnalyzer(data);
            await LiveCamHelper.ProcessCameraCapture(imageAnalyzer);
        }

        finally
        {
            isProcessing = false;
        }
    });
}
Wrapping Up
Face recognition is widely used in many scenarios, including security, natural user interface, robotics, and more. By using a combination of these services and platform APIs, you can build unmatchable mobile apps that are intelligent and provide five-star user experiences. In this blog post, we used Google Mobile Vision APIs to detect human faces from the Video Live Stream and Microsoft Cognitive Services to recognize the person within the frame. For building the same sample on iOS, read How To Display Camera in Your iOS apps and Adding Facial Recognition to Your Mobile Apps.
The sample built and explained in this post was inspired by the Google Developer documentation on Face Tracker.
Download the samples for both iOS and Android from my GitHub repo. Note: For this demo, I’ve written the code to recognize a single face in the frame. However, feel free to modify and make it better.