Most mobile application ship with read-only assets: images, sounds, videos, documents, databases. Assets, both in numbers and in size, tend to grow over time. Large assets that take many seconds or even minutes to transfer to the device can really slow down your development. Copying the same static assets each time you deploy your application is wasted time. Surely we can do better. On iOS there’s a little-known solution to this situation. The trick is to: 1. Enable iTunes sharing on your application. That’s basically adding <a href="http://developer.apple.com/library/ios/documentation/general/Reference/InfoPlistKeyReference/Articles/iPhoneOSKeys.html#//apple_ref/doc/uid/TP40009252-SW20">UIFileSharingEnabled</a> to your application’s Info.plist file; 2. Use iTunes to copy your assets into your device(s); 3. Adjust your application to load the assets from the /Documents directory; This last step can be done by changing your paths from using NSBundle.MainBundle.BundlePath to Environment.GetFolderPath(Environment.SpecialFolder.Personal). Adding those few changes can save you quite a bit of time. However they require modifications to your application and project files that might cause you other issues later. E.g.
* Enabling iTunes sharing is useful for some applications, i.e. you might want to keep this option in your released applications. However it does not make sense for many applications so you’ll likely want to disable it for non-debug builds. Apple has been known to reject applications enabling this settings without a useful purpose;
* You must remove the asset references from your project, or they will still be uploaded to the device. This will break your non-debug builds. Here is a safer, step-by-step way to do this for
Debug builds, while keeping your other build configurations unmodified. 1. Let’s create an empty MonoTouch application called LargeAssets. Replace the AppDelegate.cs source with this:
using System;
using System.Diagnostics;
using System.IO;
using System.Threading;

using MonoTouch.Foundation;
using MonoTouch.UIKit;

namespace LargeAssets {

    [Register ("AppDelegate")]
    public partial class AppDelegate : UIApplicationDelegate {

        UIWindow window;
        UIAlertView alert;
        const string dbname = "LargeDatabase.sqlite";

        public override bool FinishedLaunching (UIApplication app, NSDictionary options)
        {
            window = new UIWindow (UIScreen.MainScreen.Bounds);

            ThreadPool.QueueUserWorkItem (delegate {
                // for NSBundle.MainBundle.BundlePath for "BuildAction == Content"
                string database = Path.Combine (NSBundle.MainBundle.BundlePath, dbname);

                FileInfo asset = new FileInfo (database);
                InvokeOnMainThread (delegate {
                    string message = String.Format ("Size: {0} bytes", asset.Length);
                    alert = new UIAlertView ("Asset Status", message, null, null, "Ok");
                    alert.Show ();
                });
            });

            window.RootViewController = new UIViewController ();
            window.MakeKeyAndVisible ();
            return true;
        }
    }
}
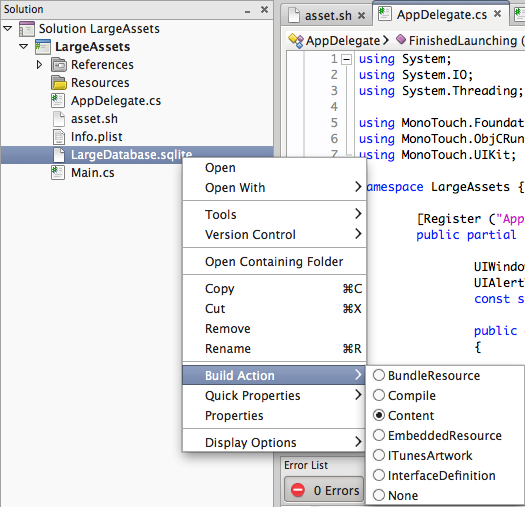
- Add a large asset, e.g. a 80MB sqlite database, to your application and make sure its
Build Action is set to Content.  3. Build and then deploy to your device. For reference note how much time is needed to deploy the application to your device. For the 80MB test case deploying on an iPad 3 takes 19015 ms for a Debug build and 17910 ms on a Release build. The last being a bit faster since binaries are smaller (smaller AOT’ed executable, IL stripped assemblies) and no debugging symbols files are present. Now that we have our baseline let’s optimize it – starting by the creation of two files for each existing asset. From a Terminal windows inside your project directory do the following:
% ls -l *.sqlite
-rw-r--r-- 1 me staff 80734208 14 Dec 16:33 LargeDatabase.sqlite

% cp LargeDatabase.sqlite LargeDatabase.sqlite.Release
% touch LargeDatabase.sqlite.Debug

% ls -l *.sqlite*
-rw-r--r-- 1 me staff 80734208 14 Dec 16:33 LargeDatabase.sqlite
-rw-r--r-- 1 me staff 0 14 Dec 16:33 LargeDatabase.sqlite.Debug
-rw-r--r-- 1 me staff 80734208 14 Dec 16:33 LargeDatabase.sqlite.Release
Keep your
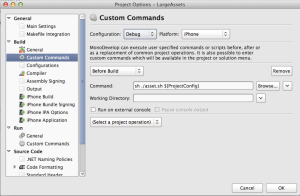
LargeAssets.csproj unchanged, i.e. referencing LargeDatabase.sqlite. Note: If you keep your assets under source control then make sure you keep only one huge asset (and two empty versions). Next we need to add a Custom Command to your project – for all Configurations (e.g. Debug, Release, Ad Hoc and AppStore). The Command to invoke, Before Build, is:
sh ./asset.sh ${ProjectConfig}
 The shell script itself, below, can be added inside your project.
#! /bin/sh
if [ "$1" = "Debug.iPhone" ] ; then
    /usr/libexec/PlistBuddy -c "Add :UIFileSharingEnabled bool true" Info.plist
    for file in *.Debug ; do
        cp "$file" "${file/.Debug/}"
    done
else
    /usr/libexec/PlistBuddy -c "Delete :UIFileSharingEnabled" Info.plist
    for file in *.Release ; do
        cp "$file" "${file/.Release/}"
    done
fi
That will ensure the
asset.sh script is being called before starting a new build. In turn the script will do two actions for your project:
1. It will use PlistBuddy to add the UIFileSharingEnabled value on Debug build. It will also remove this key from all other build configurations;
2. It will copy either the *.Debug or *.Release assets to their original asset name (note: only in the main project directory, you’ll need to adapt the script if you have several directories or different requirements). This ensure that:
* all assets will be empty for Debug builds, giving your faster device deployment times;
* all assets will be just like before for non-Debug builds;
* your .csproj files are kept unmodified. Next you need to adjust your application to load the assets from the “right” location. For our example replace the earlier
AppDelegate.cs source code with this one:
using System;
using System.IO;
using System.Threading;

using MonoTouch.Foundation;
using MonoTouch.ObjCRuntime;
using MonoTouch.UIKit;

namespace LargeAssets {

    [Register ("AppDelegate")]
    public partial class AppDelegate : UIApplicationDelegate {

        UIWindow window;
        UIAlertView alert;
        const string dbname = "LargeDatabase.sqlite";

        public override bool FinishedLaunching (UIApplication app, NSDictionary options)
        {
            window = new UIWindow (UIScreen.MainScreen.Bounds);

            ThreadPool.QueueUserWorkItem (delegate {
#if DEBUG
                // In Debug mode we can cheat and avoid deploying *every* time large,
                // read-only assets to device. We simply deploy it once using iTunes
                // and load it from the app/Document directory
                string path = Environment.GetFolderPath (Environment.SpecialFolder.Personal);
                string database = Path.Combine (path, dbname);
                if (!File.Exists (database)) {
                    if (Runtime.Arch == Arch.SIMULATOR) {
                        // we can even cheat further by copying the database into the simulator directory
                        // e.g. if it does not exists or if a newer version is available...
                        File.Copy ("/Users/me/path/to/your/LargeDatabase.sqlite", database);
                    } else {
                        // oops, forgot to copy assets on a new device ?
                        InvokeOnMainThread (delegate {
                            alert = new UIAlertView ("DEBUG : Missing assets",
                                "Use iTunes to copy assets files into your application",
                                null, null, "Ok");
                            alert.Show ();
                        });
                        return;
                    }
                }
#else
                // In Release mode we need to copy/deploy the real assets in the correct location
                // for NSBundle.MainBundle.BundlePath for "BuildAction == Content"
                string database = Path.Combine (NSBundle.MainBundle.BundlePath, dbname);
#endif
                FileInfo asset = new FileInfo (database);
                InvokeOnMainThread (delegate {
                    string message = String.Format ("Size: {0} bytes", asset.Exists ?
                        asset.Length : -1);
                    alert = new UIAlertView ("Asset Status", message, null, null, "Ok");
                    alert.Show ();
                });
            });

            window.RootViewController = new UIViewController ();
            window.MakeKeyAndVisible ();
            return true;
        }
    }
}
Finally try building/deploying the application again for both
Debug and Release builds and compare the required time with the original version. With our 80MB database we now get 4801 ms for a Debug build (only 25% of the original time) and 17567 ms for the Release build (98%) which not a surprise since it’s almost identical to the original code and .app size. Exactly how much time you can save depends on your assets size and how often you update them, i.e. need to use iTunes to copy them. Discuss this post on the Xamarin forums
