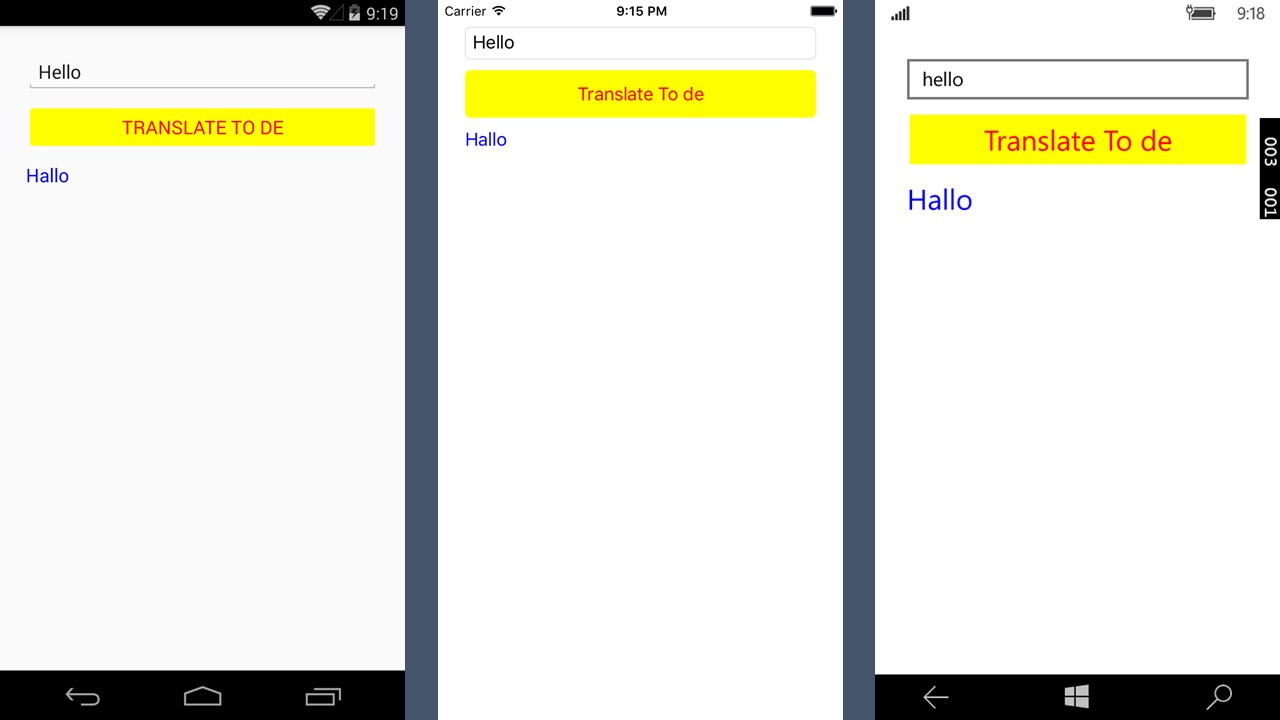
Many of us love to travel, but often encounter a language barrier when we do. For many years, translation was tedious and potentially expensive, requiring either manual translation with a paper dictionary or a translator. Today, with the combined power of the cloud and mobile, translation can occur in only a few lines of code. As mobile developers, there are many opportunities for us to take advantage of translation in our apps. In this blog post, we’ll use the Microsoft Translator Service offered by the Microsoft Azure DataMarket to translate text from one language to another.
Step 1: Register the App
To translate text into different languages, first, subscribe to ‘Microsoft Translator’ service. There are various packages, so you can select the one that suits your requirements. For this sample, we can subscribe to the generous free tier, which translates 2,000,000 characters per month for free.
Once you’re subscribed to the plan, visit the ‘My Account’ page and register a new app by navigating to Developer->Register. Enter the information about your app and be sure to copy your Client ID and Client Secret for later.

Step 2: Create a Translation Service
Let’s add TranslatorService.cs to our Xamarin.Forms project, which will authenticate the app and allow the user to call the service by providing necessary details. To authenticate, we’ll use the Client ID and Client Secret noted in the previous step and send it as encoded body for the request. We then parse the response and extract an AccessToken from it, which we can use to authenticate calls to the Microsoft Translator service.
var properties = new Dictionary<string, string>
{
  { "grant_type", "client_credentials" },
  { "client_id",  _clientId},
  { "client_secret", _clientSecret },
  { "scope", "http://api.microsofttranslator.com" }
};
var authentication = new FormUrlEncodedContent(properties);
var dataMarketResponse = await _client.PostAsync(_dataMarketUri, authentication);
string response;
if (!dataMarketResponse.IsSuccessStatusCode)
{
   response = await dataMarketResponse.Content.ReadAsStringAsync();
   var error = JsonConvert.DeserializeObject<JToken>(response);
   var err = error.Value<string>("error");
   var msg = error.Value<string>("error_description");
   throw new HttpRequestException($"Azure market place request failed: {err} {msg}");
}
response = await dataMarketResponse.Content.ReadAsStringAsync();
var accessToken = Newtonsoft.Json.JsonConvert.DeserializeObject<DataMarketAccessToken>(response);
return accessToken.access_token;
As complicated as translation is, it’s surprisingly easy to use Microsoft Translator to translate text. We can call the APIs in just a few lines of code and parse the XML response which contains the translated string.
string auth = await GetAzureDataMarketToken();
_client.DefaultRequestHeaders.Authorization = new AuthenticationHeaderValue("Bearer", auth);
var requestUri = "http://api.microsofttranslator.com/v2/Http.svc/Translate?text=" +
                                System.Net.WebUtility.UrlEncode(strSource) +
                                "&to=" + language;
string strTransText = string.Empty;
try
{
   var strTranslated = await _client.GetStringAsync(requestUri);
   var xTranslation = XDocument.Parse(strTranslated);
   strTransText = xTranslation.Root?.FirstNode.ToString();
   if (strTransText == strSource)
                    return "";
   else
                    return strTransText;
}
catch (Exception ex)
{
              //
}
return strTransText;
Step 3: Call the Translation Service
After we create the translation service, all that’s needed is to create a user interface and call the service.

Wrapping Up
With services like Microsoft Translator, you can now build your own translator app capable of detecting the input language and translating it to another chosen language. You can find more information about these APIs and the languages supported here. You can also download this sample from GitHub.


0 comments