One of the coolest features of Visual Studio 2010 is the ability to customize the new WPF based Start Page. We have released a project template for creating pages, using the Visual Studio 2010 default page as a starting point.
In the next two posts I’m going to walk through the process of creating a new page, testing the page using the VS Experimental Instance and finally uploading it to the Visual Studio Gallery where others can download your work. We will cover the following topics:
Part 1:
| · Installing and using the Start Page project template
· Editing Start Page XAML · Testing your custom Start Page in the VS experimental instance · Making your custom Start Page the default · Adding a code-behind to a Start Page · Persisting user settings in a Start Page · Sharing a Start Page on the Visual Studio Gallery |
![clip_image002[4]_thumb[1] clip_image002[4]_thumb[1]](https://devblogs.microsoft.com/visualstudio/wp-content/uploads/sites/4/2010/07/8424.clip_image0024_thumb_14D30591.jpg) |
Installing and Using the Start Page Project template
1. First make sure to download and install the Visual Studio SDK
2. Download and install the Start Page project template.
Now you have installed the SDK and the Start Page template, the next few steps will go through loading the template and setting up project ready for editing.
Editing the Start Page XAML
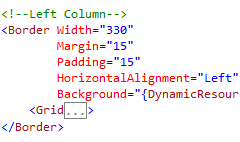
Now that we have a clearer idea of the overall structure of the page, we are going to be making edits inside the “LayoutRoot” Grid. These next two steps describe removing the unwanted existing Start Page content and setting a new background image for the page. Even though the Start Page project template includes an example UserControl in the StartPageControl project, we won’t be using this control during this walk-through. Don’t delete this project as in my second post, we’ll make use of this control.
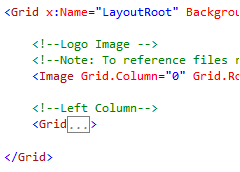
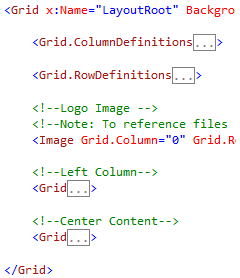
| 1. | Delete the Grid.ColumnDefinitions and Grid.RowDefinitions sections along with the Grid commented as :
‘<!—Center Content–>.’ The end result should look like this: |
 |
| 2. | Delete the Width and Grid properties from the image since we will not need these and change the “Source” attribute of the <Image> tag to point to a file on disk. For this example, I’ve chosen a colorful picture that’s included in Windows 7 installations.
Add the Stretch attribute to the Image and set it to “UniformToFill”, this will ensure the Image fills the space. <Image Source=”C:WindowsWebWallpaperCharactersimg21.jpg” Stretch=”UniformToFill”/> For more information on the Stretch Property, check out the MSDN article: http://msdn.microsoft.com/en-us/library/system.windows.controls.image.stretch(v=VS.100).aspx |
Now the Start Page consists of a background image and the Recent Projects area. The Recent Projects area has a transparent background and may become harder to read (depending on your chosen background image) so we are going to add a semi-opaque background color.
Testing the template in the Visual Studio Experimental instance
Now the page is ready for testing. Pressing F5 will launch an Experimental instance of Visual Studio and add the Start Page to the list of installed Extensions. Although the Experimental instance has been launched and the custom Start Page Extension has been installed, we still need to set the current Start Page to be the one we are working on.
Deploying a Start Page
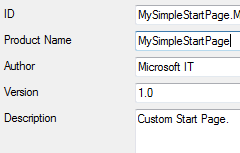
Now the custom Start Page Extension is completed and tested, it’s time to install it to your main Visual Studio instance. These next steps detail how to change the name of the Extension and locate the generated VSIX file to install it.
Now the Start Page is installed, you need to set it as the active Start Page, as described earlier in the post. Open the Tools->Options->Startup settings, and select ‘[Installed Extension] Simple Start Page’ from the list.
There is plenty of room to expand on this sample. So far I have just shown how to modify the declarative Start Page XAML. In the next post I will describe how to use code behind to dynamically change the Start Page image.
Thanks for your time,
Adrian Collier

![clip_image004[4] clip_image004[4]](https://devblogs.microsoft.com/visualstudio/wp-content/uploads/sites/4/2010/07/8037.clip_image0044_thumb_660D4CEE.jpg)

![clip_image009[4] clip_image009[4]](https://devblogs.microsoft.com/visualstudio/wp-content/uploads/sites/4/2010/07/3247.clip_image0094_thumb_63841B30.jpg)



![clip_image027[4] clip_image027[4]](https://devblogs.microsoft.com/visualstudio/wp-content/uploads/sites/4/2010/07/8424.clip_image0274_thumb_69BACBF1.jpg)

![clip_image033[4] clip_image033[4]](https://devblogs.microsoft.com/visualstudio/wp-content/uploads/sites/4/2010/07/8037.clip_image0334_thumb_06744107.jpg)
0 comments