
Making UI is easy. Making GREAT UI can be a bit trickier. Visual Studio wants to be the best in class tool for designing good user experiences. We have been spending a lot of our time looking at the challenges you face, learning from them, and being inspired by watching you try to solve UI problems. As a result, we have made some improvements to Visual Studio tools in both Visual Studio 2015 Update 2 and Visual Studio “15” Preview, and we are excited to see what you think of them.
XAML Edit & Continue
The biggest improvement for runtime debugging is Edit & Continue for XAML apps. This feature now lets you change your XAML while an app is running and get immediate feedback. On its own, Edit & Continue is amazingly powerful. When combined with the UI Debugging tools, developers can fix problems faster than ever before.
Take a look at this app:
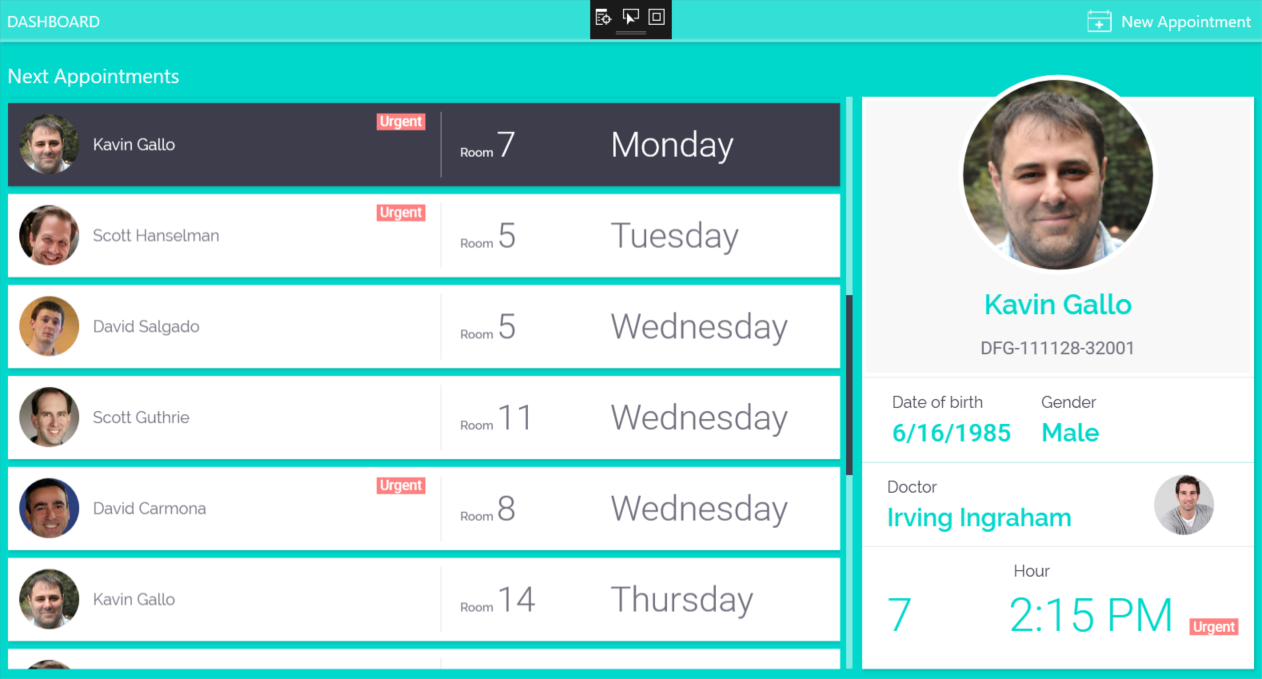
You’ll see that I’ve got a little text box that says “Urgent”, but that color looks more like a Warm and Fuzzy pink instead of a deep Red that conveys urgency. I need to fix that. Well, in reality, that color is a resource that’s being consumed by a TextBlock that’s defined in the datatemplate for the Listbox. If I weren’t already familiar with this code, figuring that whole chain out can be a bit daunting. But, with the UI Debugging tools, it’s easy.
- I need to enable In-App selection. At the top of my app, there’s a new In-App tool menu that lets me turn In-App selection on. I could do it from VS too, but this is quicker. Once it’s on, I can simply click on the Urgent element in my running app.

- Click the Go To Live Visual Tree button in the Runtime tools, Visual Studio jumps to the foreground and I can see my element. The small icon next to the element says that I have source for that particular element and I can click it to go to that element.
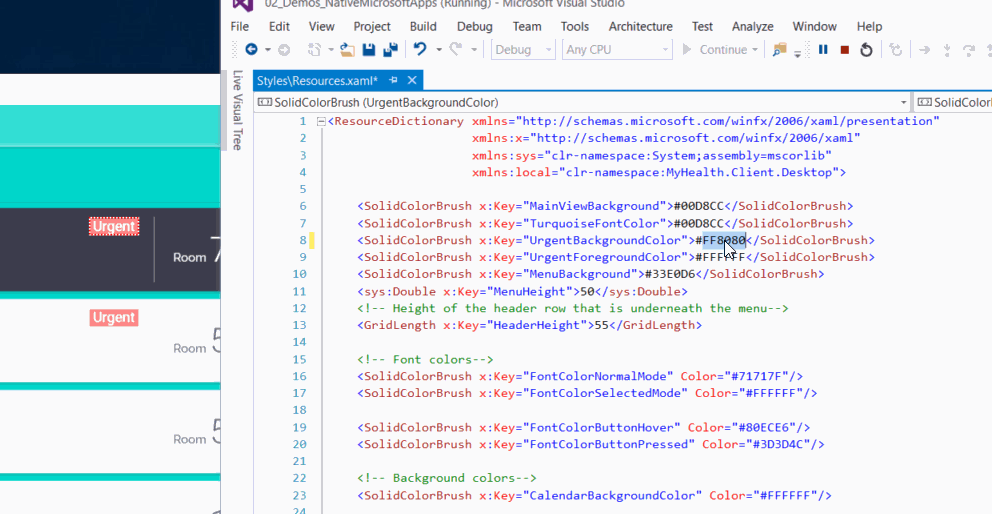
- When I go to source, you can see that this particular element is in a control template. That’s not a problem for Edit & Continue. I just slide over and see that I’ve got a Style defined here. I just click that and hit F12 to jump into my Style.
- Well, it looks like this style is using a resource, so I can dive into that too. I can put the cursor into the string that says “UrgentBackgroundColor” and hit F12 again. Finally, this finds the value. You can imagine how finding this manually might be tricky, but F12 makes it really easy.
- Now I can just change the value of the resource and the change is immediately reflected in the running app.

XAML Edit & Continue is available for both WPF projects as well as apps that target the Universal Windows Platform. If you want to work with Universal Windows Platform apps, you’ll need to have the latest insider build (version 14295 or later) installed and make sure you’ve got the latest SDK (also version 14295). Additionally, you can make more kinds of edits in a WPF project today, but we’re committed to making sure that Universal Windows app developers will have the same great experience.
Solving Accessibility Bugs
If you’re like most developers, when you start developing the UX of your app, you look at your elements in a visual way. You ask yourself how to make a visually understandable app that has flow and cues that help your users interact. But if you want to make a truly great app, you need to be accessible to users who interact with your app from a different perspective. This means that you need to be able to work with AutomationPeers. Unfortunately, AutomationPeers are runtime concepts and working with them can be difficult. For more details on AutomationPeers, take a look at http://microsoft.com/enable.
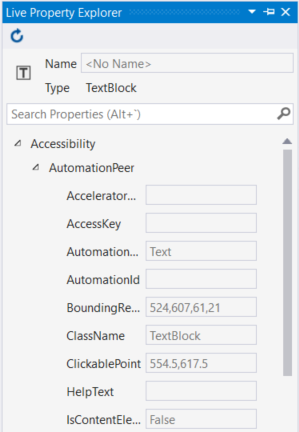 |
We recognize the challenge here and with Visual Studio 2015 Update 2, the Live Property Explorer now exposes the AutomationPeers on your UIElements. In a new scope at the top, the patterns declared by your controls as well as the properties exposed by the AutomationPeers are displayed. These are the properties and behaviors that your controls expose to assistive technologies like Narrator and represent the view that everyone has access to.
The properties in your AutomationPeers are databound to properties in your elements. This means that if you want the AutomationPeer to expose the correct value, in most cases, you need to make sure the AutomationProperties attached DependencyProperty has the right value. For instance, HelpText is a property that’s exposed by the AutomationPeer to give additional information about your control to the user. When that property is queried from Narrator, UWP will check the AutomationProperties.HelpText DependencyProperty and pass its value back to Narrator. So, if you don’t like the HelpText that’s showing in the LivePropertyExplorer, you can fix it by setting AutomationProperties.HelpText on the element. |
Summary
We’re very proud of the UI Debugging tools that we delivered in Visual Studio 2015, and with these changes, we feel like we’re making big strides toward the best UI debugging workflow on any platform. If you’d like to see these features in action, check out my Channel 9 video I recorded for the //build conference that gives a good overview of what you can do.
These improvements have come from your feedback, so please keep sending them. If you’ve got something you want us to hear, we’re constantly watching UserVoice and the Report a Problem option in Visual Studio.

Dante was one of the first testers for Expression Blend and his love of XAML has never faded. When he’s not playing board games or walking in the sunshine, he’s designing features in Visual Studio. His passion lies in diagnostics, accessibility, and localization with an eye toward UX design and polishing. |
0 comments