Microsoft’s teams have been working over the last few years to bring Python developer tools to the Azure cloud and our most popular developer tools: Visual Studio Code and Visual Studio. Python is one of the fastest growing languages, with both beginner and expert developers taking to it. What makes it attractive is its easy-to-learn semantics with powerful capabilities for a wide variety of applications from writing scripts, to building web services, to building machine learning models. In this post we’ll take a tour of Python Developer tools in Visual Studio, Visual Studio Code, Azure, and more. For more information and the latest news on everything Python at Microsoft, check out our Python at Microsoft blog.
Visual Studio Code
The Python Extension for Visual Studio Code is fully open source and integrates other open source Python packages for developers to provide rich editing, debugging, and testing capabilities. Python is the fastest growing language in Visual Studio Code, and the Microsoft Python Extension for Visual Studio Code is one of the most popular extensions on the Visual Studio Code marketplace!
To get started, first download Visual Studio Code and then from there you can follow our Getting Started with Python tutorial to install the extension and get the basic features working. Let’s take a quick look at some of the feature highlights.
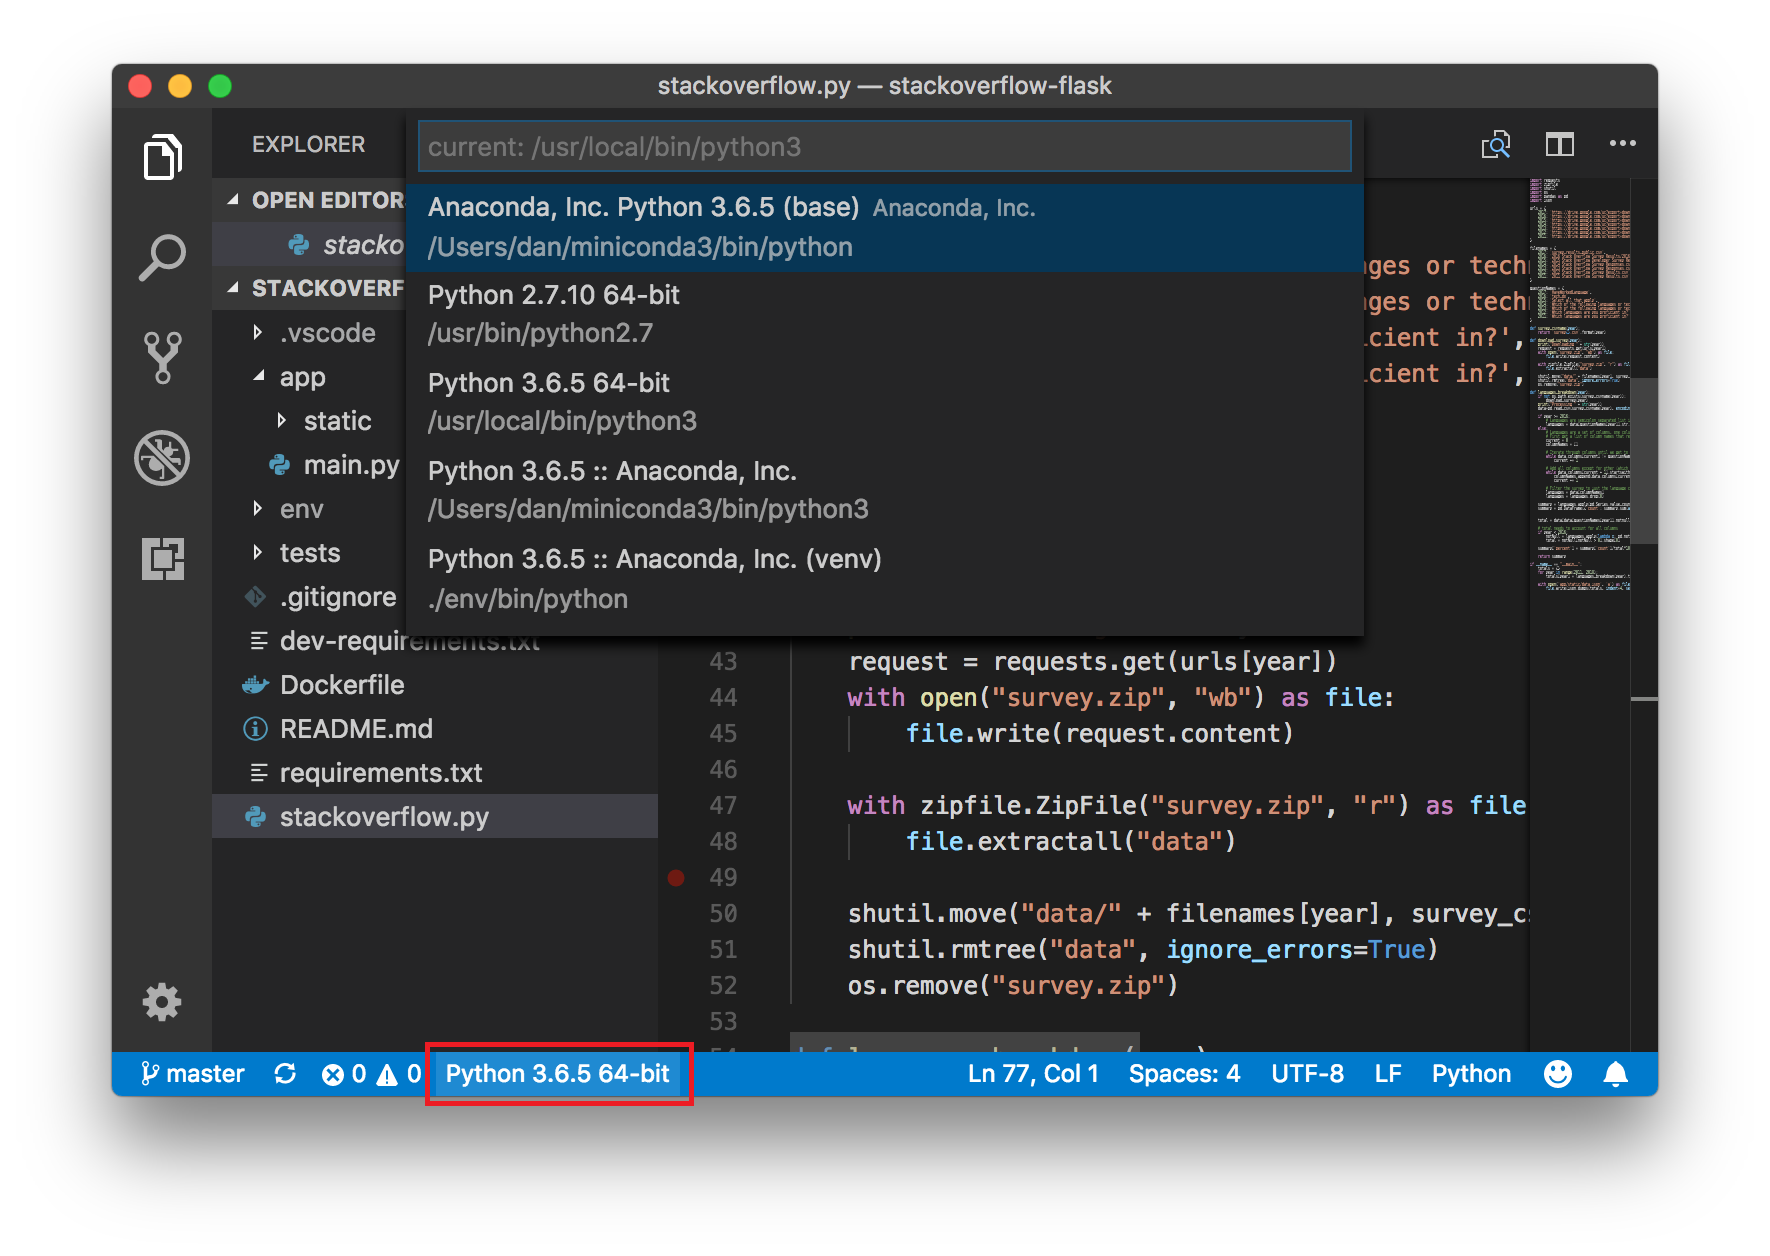
The first thing you’ll want to do is make sure that Visual Studio Code is using the desired Python interpreter. You can easily select and switch between different Python interpreters by clicking on the Python version in the status bar:
The selector supports many different interpreters and Python environments: Python 2, 3, virtualenv, Anaconda, Pipenv and pyenv environments. Once you have picked your interpreter, the extension will use it for IntelliSense, refactoring, linting, running code, and debugging.
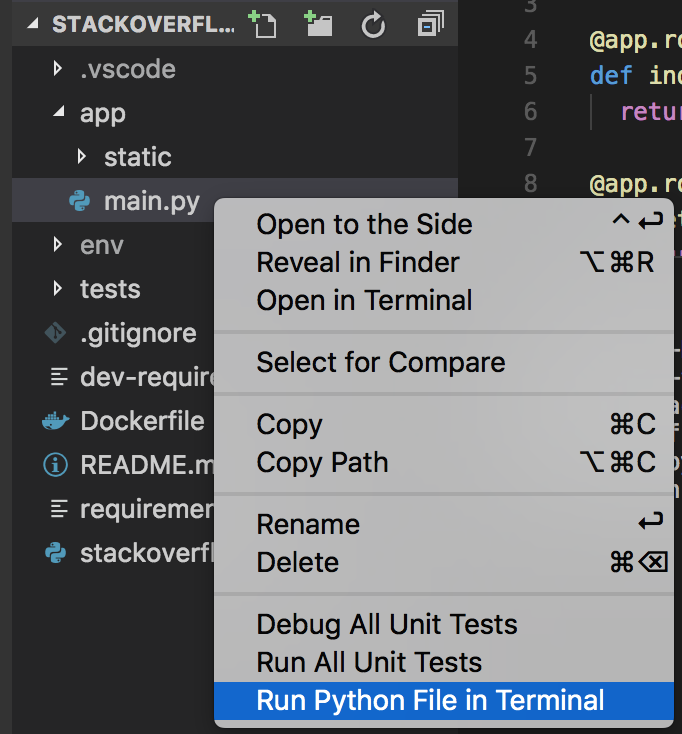
To run a Python script locally, you can use the “Python: Create Terminal” command (CTRL + Shift + P to open the command box, or CMD + Shift + P on a Mac) to create a terminal with the environment activated. Or, if you want to run a Python file you simply can right-click on it and select “Run Python File in Terminal”:
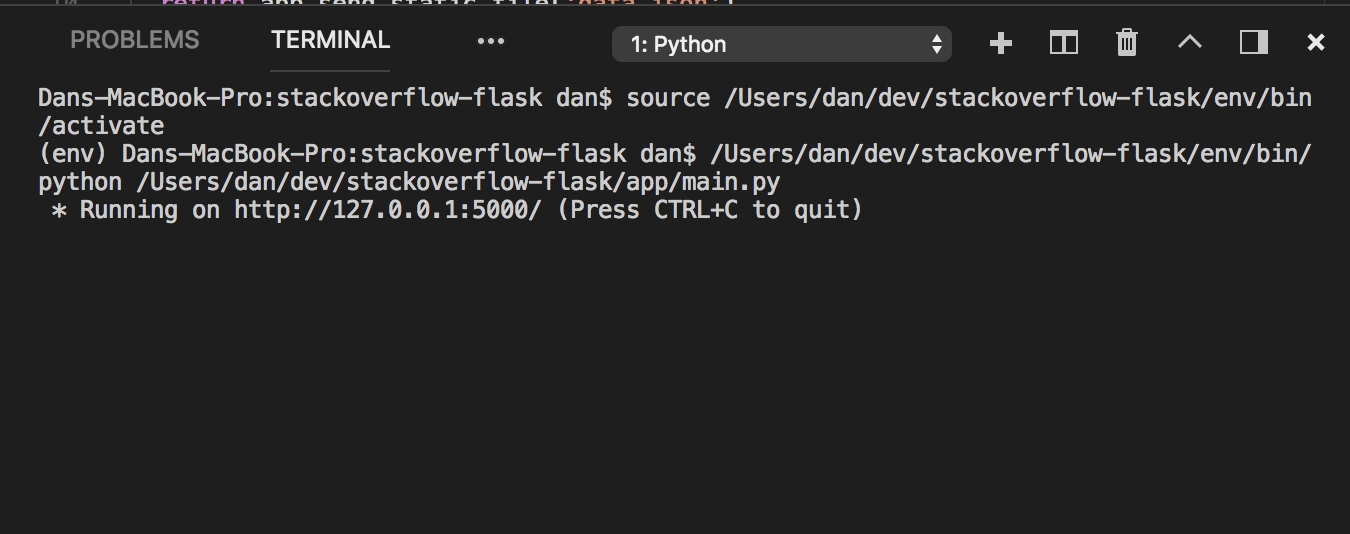
Which will then run the file using the selected Python interpreter, in this case a Python 3.6 virtual environment:
The Python extension also includes debugging templates for many popular application types. You can head over to the debug tab, and select “Add Configuration…” from the debug configuration dropdown:
You will then see preset configurations for debugging the current file, attaching to a remote debug server, or debugging Flask, Django, Pyramid, PySpark or Scrapy apps. You can then select your debug configuration and press the green Play button (or F5 on your keyboard, FN + F5 on a Mac) to start debugging.
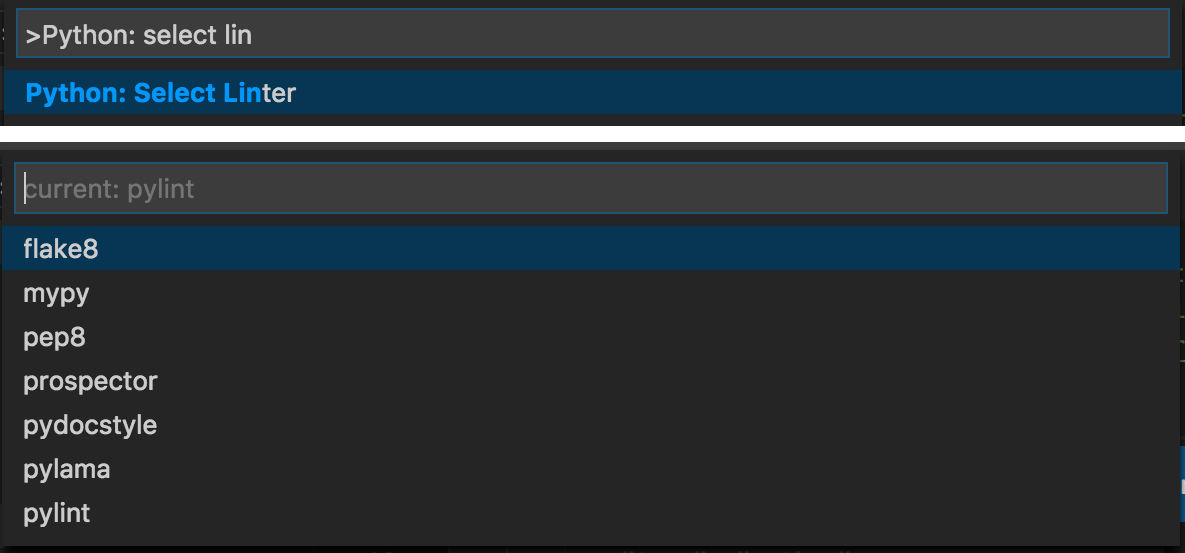
The Python extension has support for various code linters that can be configured to run when you save your Python file. By default, PyLint is enabled and you can select your linter of choice by using the “Python: Select Linter” command:
That’s not all as there’s also support for unit testing with unittest, pytest and nose; refactoring; and you can use Visual Studio Live Share to remotely collaborate on Python code with other developers!
Python in Visual Studio
Visual Studio provides most of the functionality of Visual Studio Code, with additional powerful IDE capabilities that allow you to do more without having to drop to the command line. Visual Studio also provides unparalleled capabilities when mixing Python projects with C# or C++ projects.
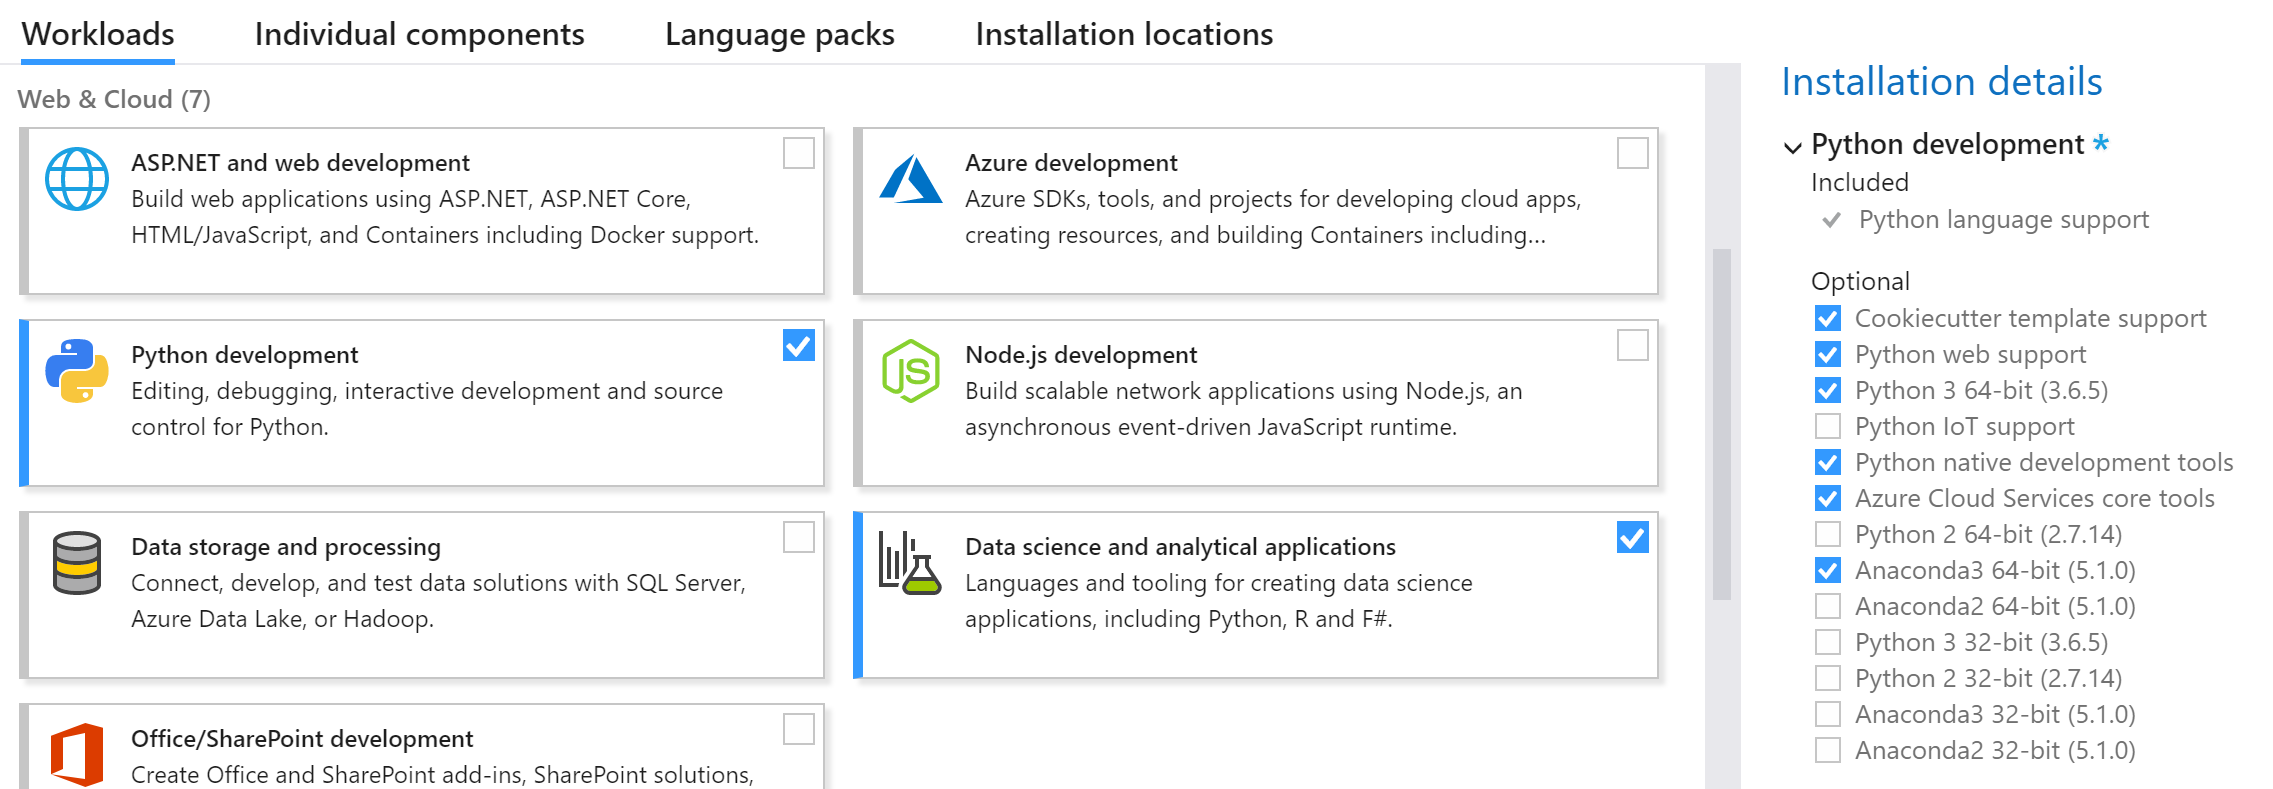
You can Install Python support in Visual Studio on Windows by selecting either the Python Development workload and/or the Data science and analytical applications workload in the Visual Studio installer:
You can choose to install various versions of Python and Anaconda by selecting optional components (on the right-hand side in the screenshot above).
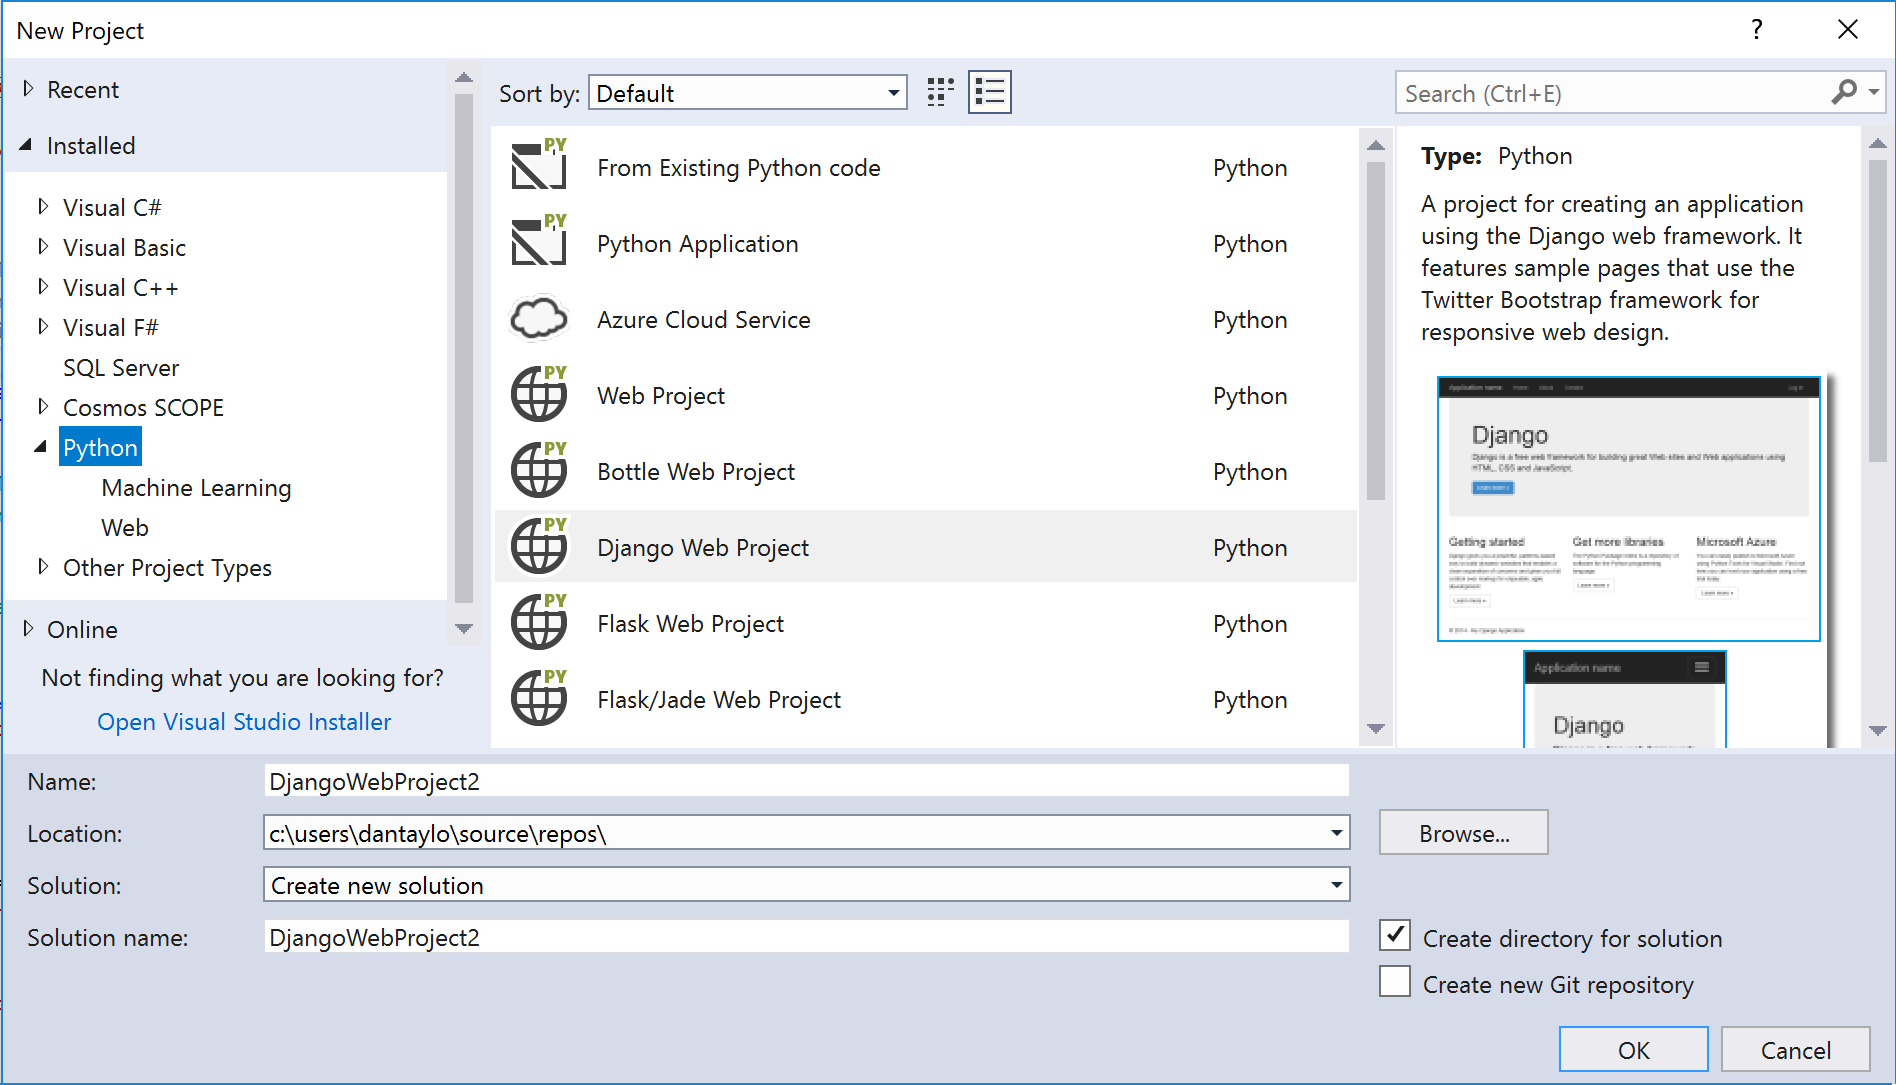
After installing the Python workload, you can start working with Python by creating a Python project in File -> New Project and selecting Python in the installed list:
To start from a blank application, you can start with the Python Application template and start writing Python code. You can also create a project from existing Python code, or you can use web templates for Flask, Django, and Bottle. Be sure to check out our Flask Tutorial and Django Tutorial for an in-depth tour of developing web apps using these frameworks with Visual Studio.
If you have the data science workload installed, there are also templates for machine learning projects with Tensorflow and CNTK.
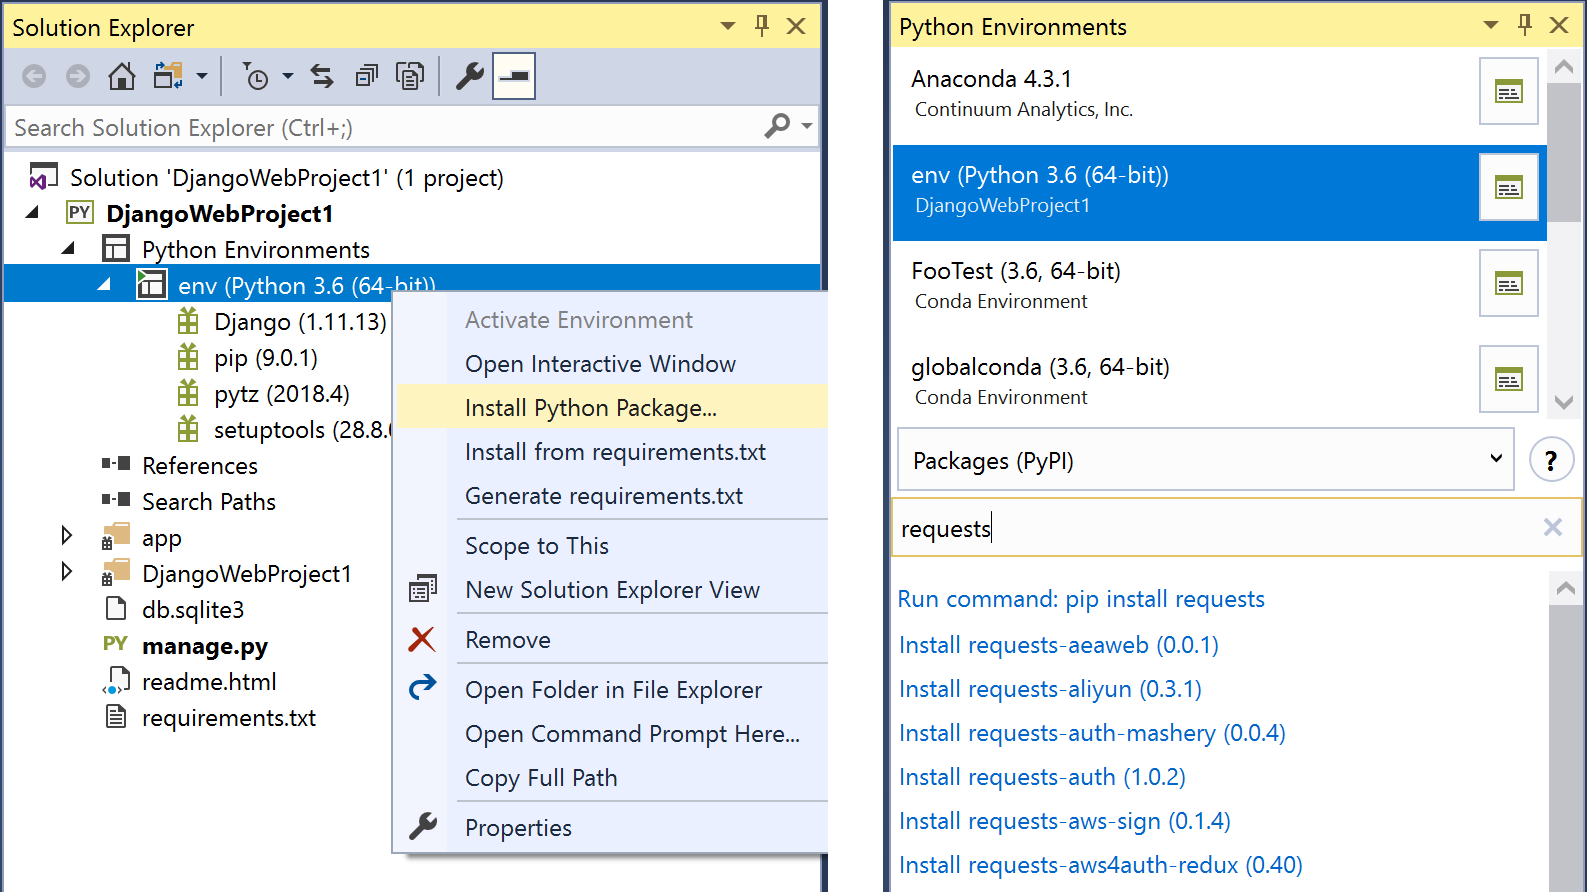
After you have created a project, you can manage your virtual environments and conda environments using the “Python Environments” node in solution explorer and the Python Environments window. You can right->click on the active Python environment and install additional packages:
The real power of Visual Studio shines when you mix Python with other languages. You can have a solution with both Python and C++ projects, or even embed .py files in your C++ or C# projects!
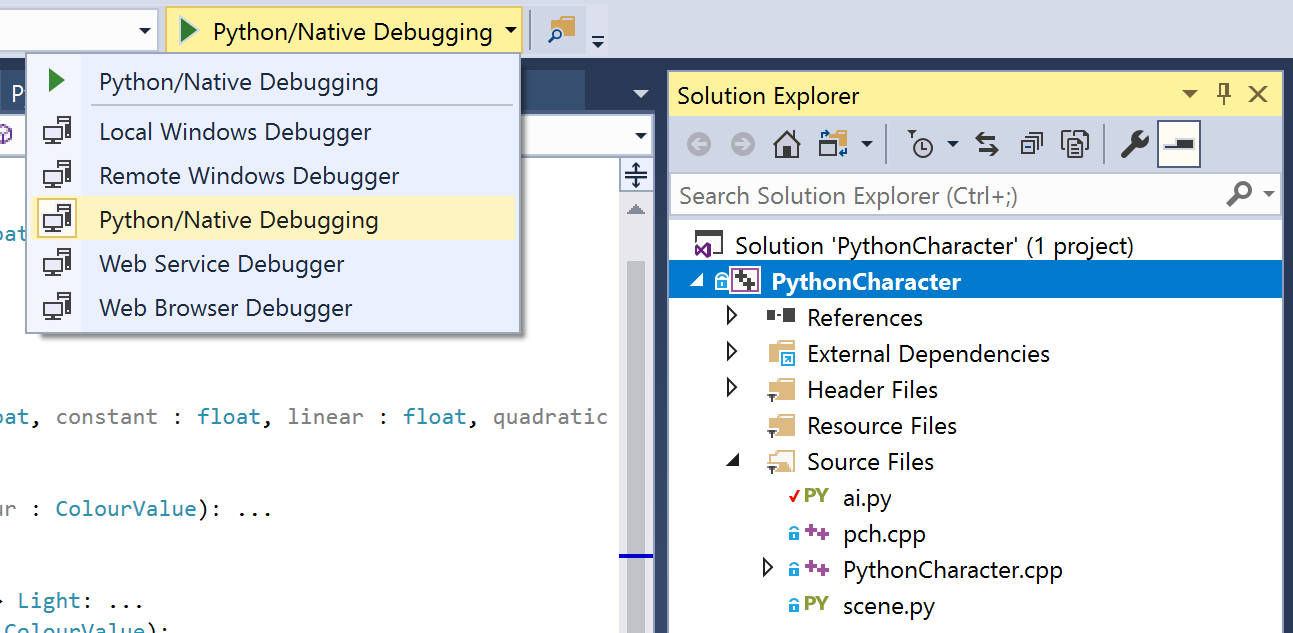
You can even debug both languages in the same debug session, for example with C++ you can change the debug type to Python/Native debugging:
For a detailed walkthrough of embedding Python in a C++ application, be sure to check out Embedding Python in a C++ Project on the Python blog to learn more.
Finally, also worth mentioning that Visual Studio includes a Python profiler and supports Python unit tests in the Test Explorer.
Python in Azure
You can use Python to create, manage and interact with services in Azure using the Python Azure SDK. In fact, the Azure CLI itself is written in Python, which means almost all things you can do with the CLI you can do programmatically using the Python SDK.
You can install individual libraries, for example to install the SDK to interact with Azure Storage:
pip install azure-storage
It’s recommended that you only install the packages you need, but for convenience you can install the entire azure SDK by running:
pip install azure
Once you have the SDK installed there are many great services you can use, from using Machine Learning APIs with Azure Cognitive Services to hosting globally distributed data with Azure Cosmos DB.
If you’re building web applications, you can deploy them to Azure Web App for Containers: be sure to check out From Zero to Azure with Python and Visual Studio Code for an end-to-end video tutorial deploying a Flask application using Visual Studio Code, or the quick-start tutorial on deploying a Flask application using the command line.
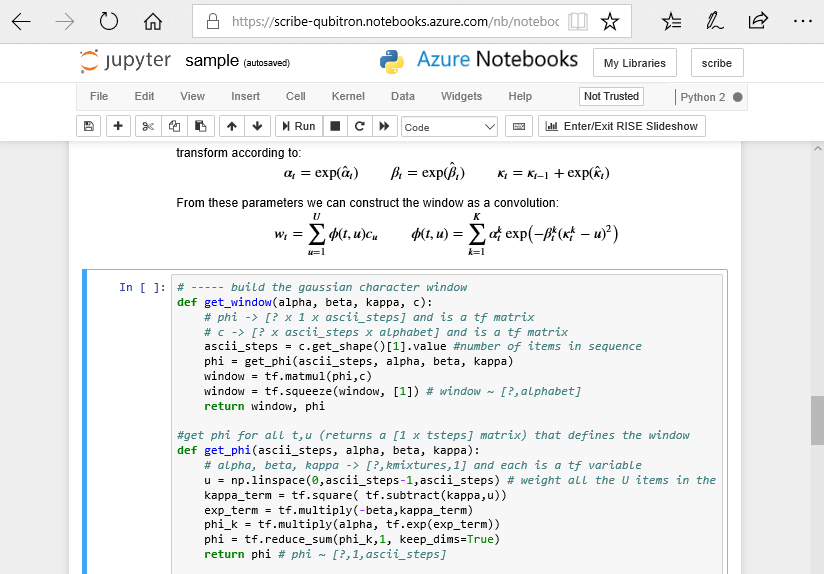
You can also run freely hosted Jupyter notebooks on Azure, so that you don’t need to install Jupyter locally. You can optionally share notebooks publicly, for example you can view a preview of this publicly shared notebook that generates handwriting using machine learning:
You can sign-in to clone and run notebooks, so head on over to notebooks.azure.com and sign-in to try it out!
Other Links and Information
Visual Studio Team Services is now able to build cross-platform Python builds using the hosted build agents and the Use Python Version tool tasks. Microsoft has also donated build time to enable CI Builds of the CPython project running on VSTS.
Something else you may not be aware of: SQL Server Machine Learning Services allows you to run Python code within a SQL Server to deliver advanced analytics at scale and avoid having to pull data across the network.
Finally, be sure to check out Microsoft on PyPI for all our Python packages we produce, and check out our Python at Microsoft blog for the latest news on everything Python at Microsoft.



0 comments