We recently announced updates to the Teams Toolkit – a streamlined way to create, debug, and deploy apps to Microsoft Teams. In this post, we’re taking a closer look at how to get started developing a new Microsoft Teams app with .NET and Blazor using the Teams Toolkit extension for Visual Studio 2019 that’s in early Preview.
What are Teams apps?
Microsoft Teams apps extend the functionality of Teams to fit your team’s needs in an integrated and connected way. Your app could be simple and send notifications or get more complex and provide integration with your CRM to add, lookup, and review customer data.
Download and install the Teams Toolkit extension
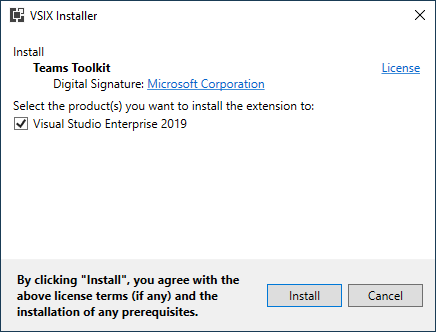
To get started building Teams apps, visit the Teams Toolkit in the Visual Studio Marketplace and click the Download button. Once downloaded, click the Microsoft.VisualStudio.TeamsToolkit.vsix file to begin the installation process. Click Install to add the extension to Visual Studio 2019.
Getting started using project templates
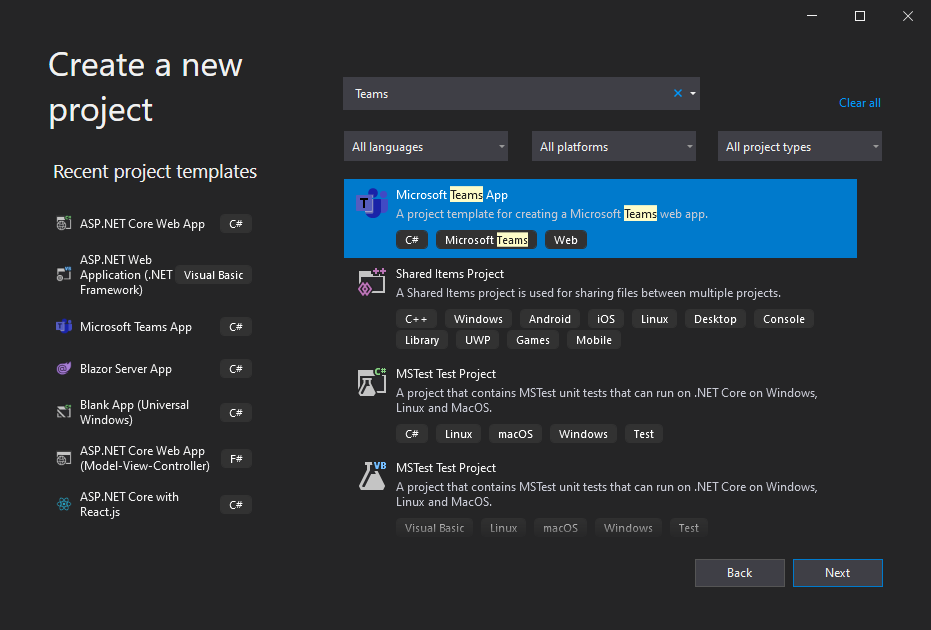
You’re now ready to create your first Microsoft Teams app. One of the features included is a new project template. Currently, the template creates a Blazor Server application that is setup to work with Teams and includes all the dependencies you’ll want to get started. To begin, launch Visual Studio 2019 and click Create a new project. In the dialog, search for Teams to find the new Microsoft Teams App project template. Once selected, click Next.
Configure your project details on the screens that follow. The dialog gives you an opportunity to provide a name for your Teams app, but it can be changed or configured later too. Finally, clicking Create will complete the process and open your new solution in Visual Studio 2019.
Configure identity with one click
One of our focuses with the Teams Toolkit is to help developers create apps that integrate with Teams with as close to zero-configuration as possible. We’ve also listened to feedback on some of the challenges of creating Teams apps today and focused on making identity and single sign-on (SSO) simpler to setup.
Before you start debugging, navigate to the Project > TeamsFx menu and click the Configure for SSO… menu option. Select an account with a Microsoft 365 tenant and all the required dependencies will be setup for your app. If you don’t have M365, sign up for the Microsoft Developer Program first, which allows you to have a testing tenant with preconfigured permissions.
Start debugging your app in Teams
That’s all the setup that is needed to get started, so the next step is run your app. It’s as easy as clicking the Start Debugging button in the toolbar or using the Debug > Start Debugging menu option. Visual Studio will launch Teams in a browser and offer to add your app. Click the Add button to see your application running in Teams.
The project template includes sample code to demonstrate the basics of getting information about the authenticated user. Clicking the Authorize button will prompt the user to accept the additional permissions required to use Microsoft Graph.
Exploring the project template
The project template includes a few dependencies and project setup criteria to make developing Teams app simpler.
Microsoft.TeamsFx.SimpleAuth
Included as a package reference and available on GitHub is the Microsoft.TeamsFx.SimpleAuth library which helps with token acquisition for single sign-on. This is configured in the project as middleware with a single line of code in the ConfigureServices method of the Startup class.
services.AddTeamsFxSimpleAuth(Configuration);
Microsoft.Fast.Components.FluentUI
To help build applications that look and feel at home inside Teams, we’ve included a new package that provides a set of lightweight Blazor component wrappers around Fluent UI web components. These are optional for your application, but are provided by default to make it easy to build the UI of your app. This project is available on GitHub and we’d love your feedback!
Teams app manifest
All the details and configuration for a Teams app are controlled with a Teams app manifest. Inside the Properties folder of the project you’ll find the manifest.json file. Use the manifest to configure the name of your Teams app, endpoints of the hosted web app, and which capabilities are provided. Visit the documentation to learn more about the manifest file.
"developer": {
"name": "My Company",
"websiteUrl": "https://localhost:44357",
"privacyUrl": "https://localhost:44357/privacy",
"termsOfUseUrl": "https://localhost:44357/termsofuse"
},
After making changes to the manifest file, you can use the Project > TeamsFx > Update Teams Manifest menu to update your application in the Teams Developer Portal.
Share your feedback and explore Teams apps
The Teams Toolkit extension for Visual Studio 2019 is currently in Preview and during this time we’re encouraging developers to try it out and share their feedback with us. We appreciated all the feedback we receive and it helps us deliver experiences that truly matter to you. To share your feedback, use the Help > Submit Feedback menu in Visual Studio. Also, be sure to visit the documentation and learn more about developing applications for Microsoft Teams!


@John, while configuring the SSO, it took my ms account. what needs to be done to change it to configure to another demo tenant? Configuring again it shown Application has already been registered for SSO support.
Sounds promising, but a few thoughts on this as I haven't yet got it working:
- It would be good if the default debug profile were kestrel instead of IIS Express. IIS Express didn't work for me (could be that I don't have it installed)
- When I switched to kestrel, it then couldn't bind the ports because they were in a reserved list (which I found by running `netsh interface ipv4 show excludedportrange protocol=tcp`)
-...