Microsoft WebMatrix is an exciting new product that makes the creation of custom ASP.NET Web sites possible without all the complexity of the full Visual Studio environment. WebMatrix supports web site development in both C# and Visual Basic. In this blog post, I will demonstrate how to create VB websites using Webmatrix.
Before you begin, you need to have the following settings configured on your machine:
- Ensure that you are running a Windows XP SP3 or a later version of operating system.
- Ensure that you have the administrator rights for the machine, as in this walkthrough you will be required to make changes to the “C:Program FilesMicrosoft WebMatrixtemplates” folder.
- You need to have the WebMatrix application installed. For more information about how to install WebMatrix, see Microsoft Web Platform Installer.
- Download the code containing the VB templates.
- You need to configure the Visual Basic templates in WebMatrix, because by default WebMatrix only has the C# templates configured. For more information about how to configure the Visual Basic templates, see Surfacing the Visual Basic Templates in WebMatrix.
You can create the Visual Basic websites using WebMatrix in the four simple steps as follows:
Step 1: Select a Template
Step 2: Create a Website using the Calendar Visual Basic Template
Step 3: Edit and Modify the Website
Step 4: Understand and Customize the Code
Step 1: Select a Template
You can create a website using any of the templates that are available in WebMatrix, as per your preference. In this step, we will see which all different templates are available that can be used to create a new website.
- Launch the WebMatrix application. The Quick Start – Microsoft WebMatrix dialog box is displayed.
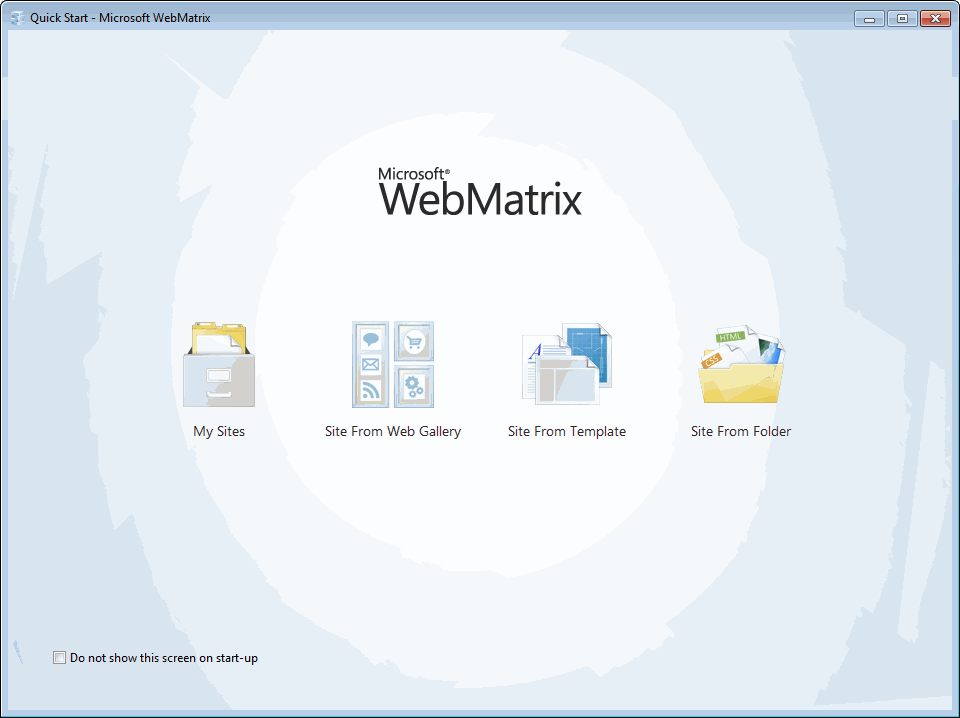
- Select the “Site From Template” option. The Site from Template page is displayed.
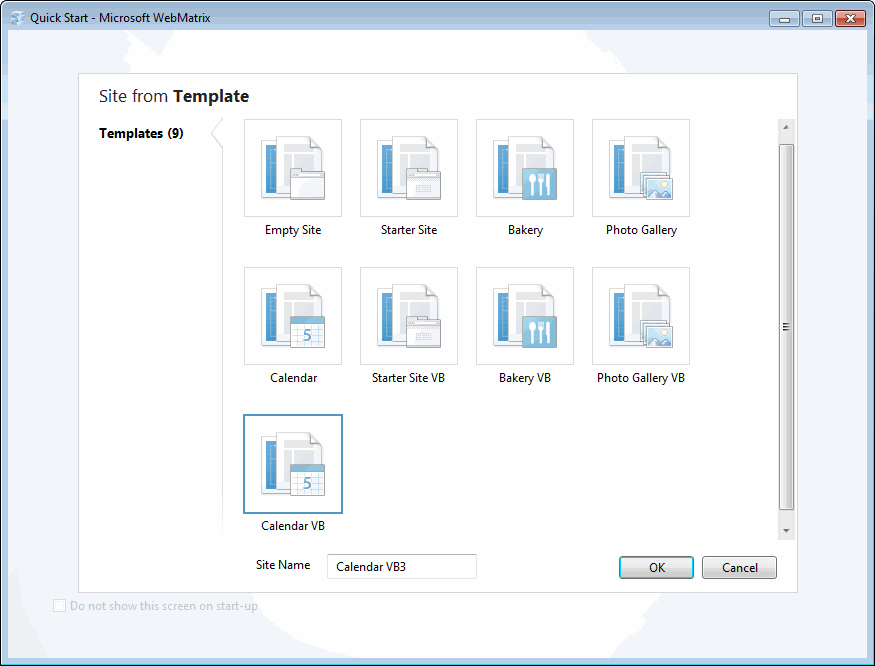
- The Site from Template page should display the following templates. These templates include pre-built pages, which you can modify and customize to create your own website. You can select any of the following templates to create your site:
- Empty Site. This template creates a new empty site. Use this template if none of the other templates suit your needs, if you want to import files from an existing site, or if you want to build your site’s functionality from scratch.
- Starter Site. This is a C# site template. This template gives you a site with a professionally designed layout and a user login system.
- Bakery. This is a C# site template. This template creates a site that includes a database of your products and ways to display them. It also includes an order-processing system.
- Photo Gallery. This is a C# site template. Use this template to create a site where you can upload and display images. The site includes a user login system.
- Calendar. This is a C# site template. This template creates a website where users can create and share personal calendars. If they want to share a calendar, they can choose which users they want to share the calendar with.
- Starter Site VB. This is a VB site template. This template has the same features as that of Starter Site template.
- Bakery VB. This is a VB site template. This template has the same features as that of Bakery template.
- Photo Gallery VB. This is a VB site template. This template has the same features as that of Photo Gallery template.
- Calendar VB. This is a VB site template. This template has the same features as that of Calendar template.
If the page does not display the VB templates, then refer to Surfacing the Visual Basic Templates in WebMatrix, to learn more about how to configure the VB templates.
- Select the “Calendar VB” template, and click “OK”.
Step 2: Create a Website Using the Calendar Visual Basic Template
In this step, we will see how to create a website from the selected Visual Basic template. Once the Calendar VB template is selected, a default website is created based on the Calendar VB template. WebMatrix displays it in the Site workspace.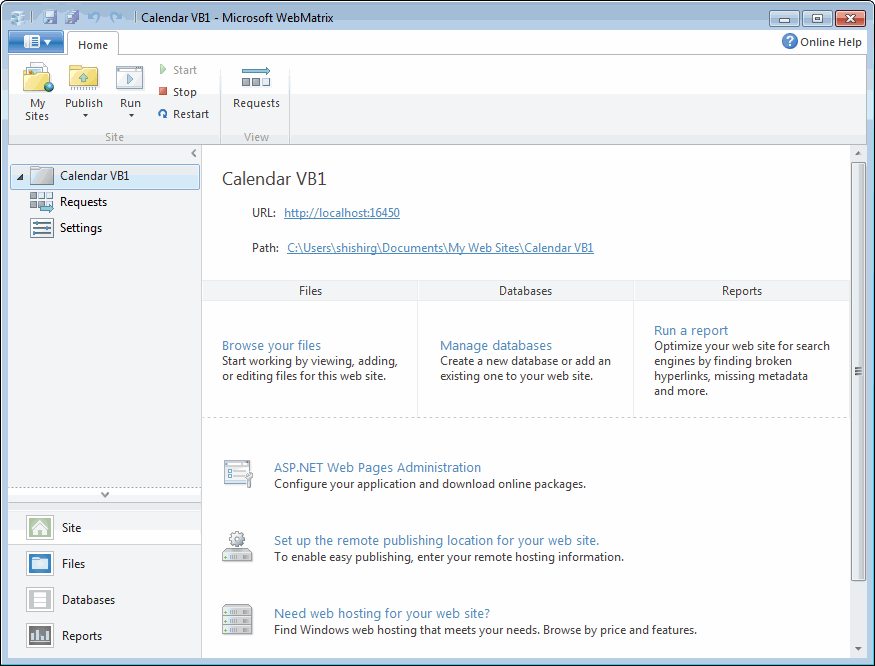
To view how your website will look on the Internet, click “Run”. The website opens in the default browser.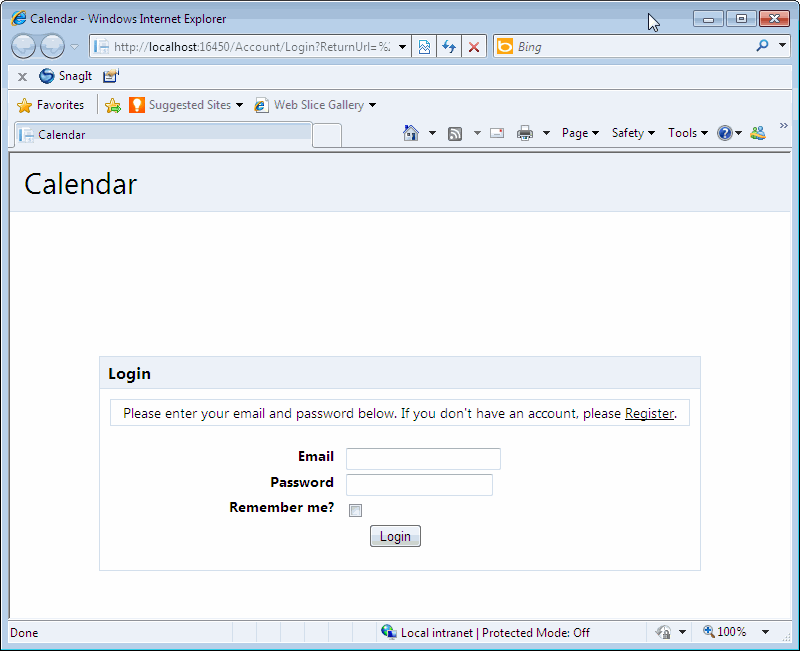
Step 3: Edit and Modify the Website
You have created the website using the VB template. Now you can, modify and customize the site as per your preference. In this step, we will see how to modify the website.
- To register to the website, click “Register”. The Account Creation page is displayed.
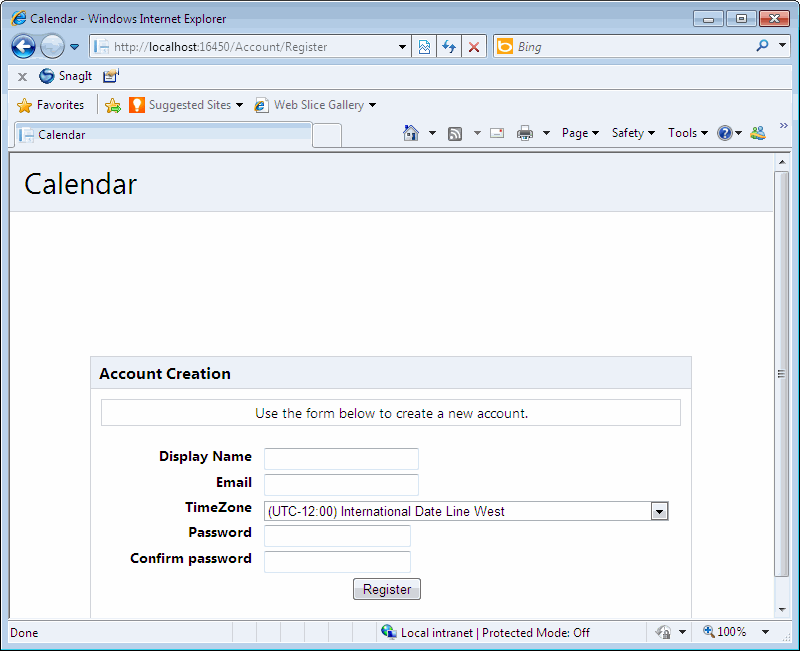
- Enter a Display Name for your account.
- Specify an Email id that you will use to login to the website.
- Select a time zone for your account.
- Enter a Password that you will use to login to the website.
- Re-enter the password in the Confirm password box, and click “Register”. You will be logged into the website, and your personal calendar will be displayed.
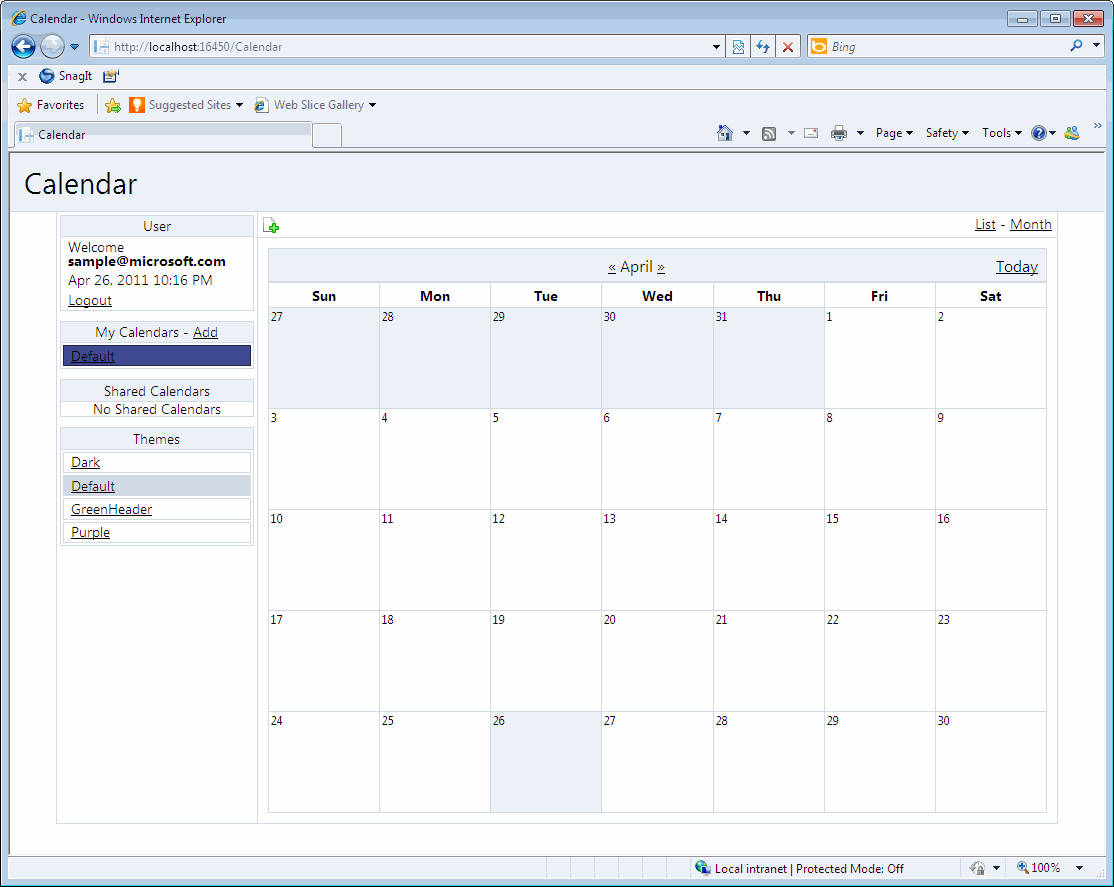
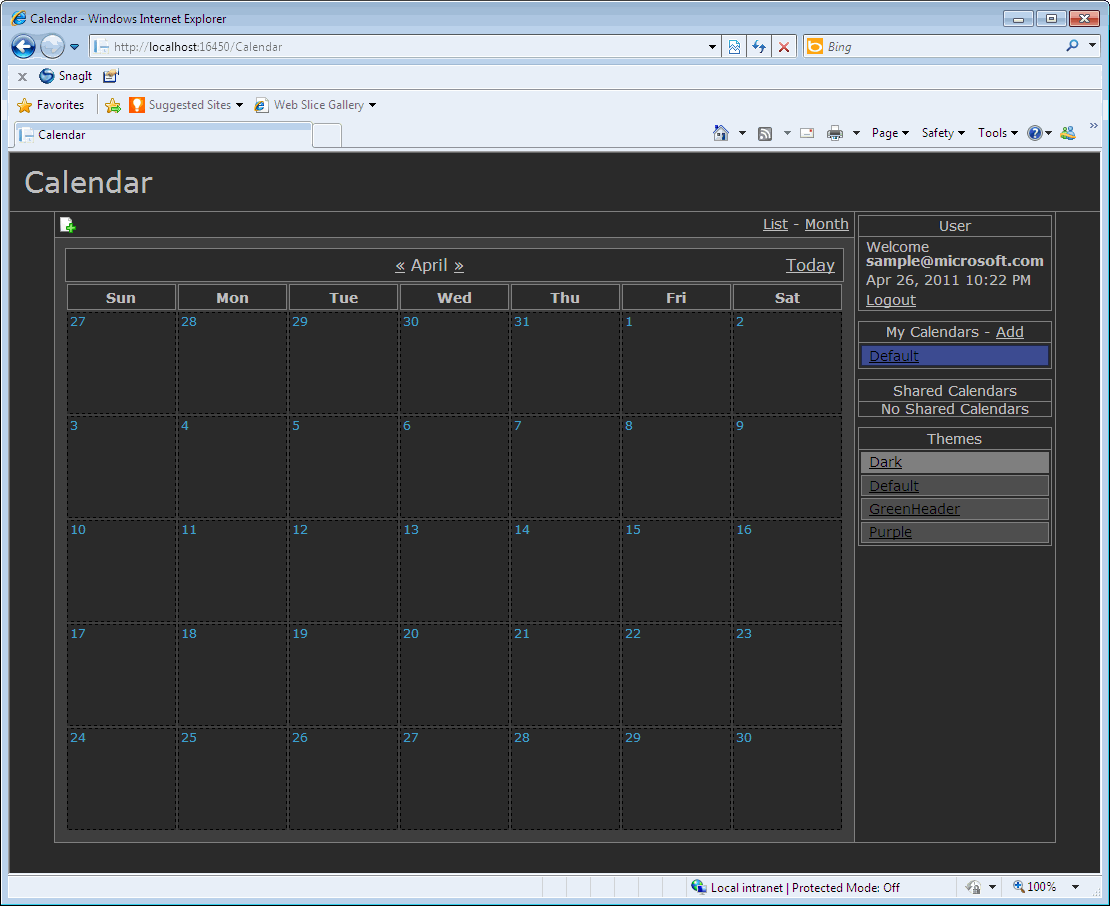
- To change the theme of the website, select either of the “Dark”, “GreenHeader”, or Purple options. If you select the “Dark” option, the theme of the website will change as the following:
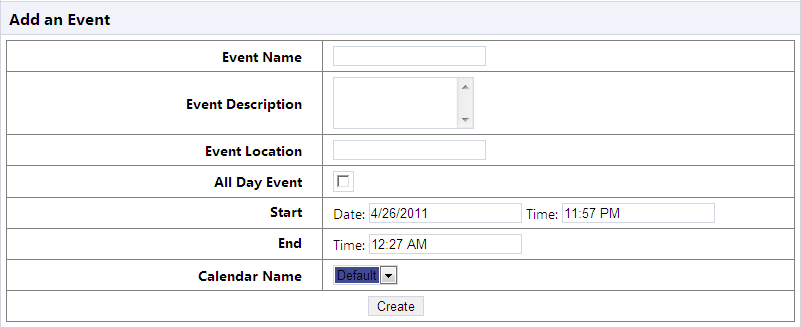
- To add an event, click the add event icon.

- The Add an event page is displayed. Enter the details of the event, and click “Create”. The event will get added to the calendar.

- To add a calendar to share it with other users, click “My Calendar – Add”. The Add a Calendar page is displayed.

- Enter the details of the calendar, and click Create. The calendar gets added to the list.
- To share the newly added calendar, click on the new calendar in the list. The Calendar page is displayed.

- To share the calendar, click “Share”. The Manage Sharing for page is displayed.

- Enter the name of user you want to share the calendar with, select the permission level, and click “Add”. The calendar will be shared with the selected user.
Step 4: Understand and Customize the Code
In this step, we will see how to modify and customize some part of the code in order to add a couple of validations.
Validate whether a color is already used by the logged in user
By default, when we try to create a calendar with a color that has already been used, the template still allows us to create the new calendar for the used color. To avoid this let us modify the code to allow validation of the calendar color before creating a new calendar.
- Go to the WebMatrix application.
- Select “Files” from the left pane.
- Open the ColorHelper.vb page in the App-Code folder. The ColorHelper.vb page is displayed.
- To create a method that searches the database for the occurrence of the color, add the following code:
The color to check
”’ whether color found or not
Public Shared Function IsColorAvailable(ByVal userId As Integer, ByVal Color As String) As Object
Dim db = UserHelper.DatabaseInstance
Return db.QuerySingle(“SELECT * from CalendarsUsers ” &
“WHERE UserId = @0 ” &
“AND color = @1 “,
userId, Color)
End FunctionNote: This method takes the user id and the color as inputs to search in the database table containing the details of the calendars of different users. It checks for the occurrence of the color specified by the logged in user, and returns whether the color has been used for the given user earlier or not. This method is also called when the calendar details are being edited. It does not allow the user to change the color of existing calendar to another color which has been used earlier by the user. However, the color can be changed to a color that has not been used earlier.
- Let’s use this method now to validate the color, while the user is adding or editing the calendar. Open the CalendarForm.vbhtml page from the “ThemesDefaultPartials” folder. The CalendarForm.vbhtml page is displayed.
- To create a validation of the color, and show an error if the validation fails, add the following code:
If NOT ColorHelper.IsColorAvailable(WebSecurity.CurrentUserId, _color) Is Nothing Then
ModelState.AddError(“color”, “This color is already in use.”)
End IfNote: This method validates the occurrence of the color by calling the method you had created in the previous step. If the validation fails then the “This color is already in use” error is displayed.
Validate the Start time and End time details while entering the details to create a new Calendar Event.
By default, when we try to create a calendar event, the template allows us to select an end time of calendar event smaller than the start time, which is logically incorrect. To remove this let us modify the code to allow validation of the event start time and end time before creating a new calendar event.
- Open the EventForm.vbhtml page from the “ThemesDefaultPartials” folder. The EventForm.vbhtml page is displayed.
- Search through the code to locate the section where the start and end date/time is getting validated.
‘ Validate the start and end date/times.
If (Not Date.TryParse(Page.StartDate & ” ” & Page.StartTime, start)) OrElse
(Not Date.TryParse(Page.StartDate & ” ” & Page.EndTime, [end])) Then
ModelState.AddFormError(“One of the date / time strings were unreadable.”)
End If - To create the validation that will check whether the end time of the calendar event is greater than the start time, add the following code:
If start > [end] Then
ModelState.AddFormError(“End Time should be later than Start Time”)
End IfNote: This method checks whether the Start time of the calendar event is greater than the end time. If this condition holds true, the “End Time should be later than the Start Time” error is displayed.
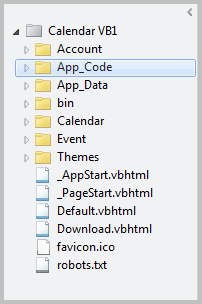
- Similarly, you can modify and customize the other parts of the code as well. The folder structure of the template looks like the following:

Understand the Calendar Class
The “Calendar” folder contains a set of pages that are used to perform various functionalities such as adding a calendar, changing the theme of a calendar, changing the view of the calendar, deleting and editing the calendar, and to display the information of the calendar. The following methods are created in the Calendar class of the Calendar.vb page in the “App_Code” folder. Review the following code for different methods:
- Update Calendar Color method: This method takes the user id, calendar id, and color as inputs to search for the relevant calendar and then allows the user to update the color of the calendar.
Public Shared Sub UpdateCalendarColor(ByVal userId As Integer,
ByVal calendarId As Integer,
ByVal color As String)
Dim db = UserHelper.DatabaseInstance
db.Execute(“UPDATE CalendarsUsers SET Color = @0 WHERE CalendarId = @1 AND UserId = @2”, color, calendarId, userId)
End Sub - Update Calendar method: This method takes the user id and calendar id as inputs to search for the relevant calendar and then allows the user to update the calendar. This method allows the user to change the Name and Id of the calendar.
Public Shared Sub UpdateCalendar(ByVal userId As Integer,
ByVal calendarId As Integer,
Optional ByVal calendarName As String = Nothing,
Optional ByVal color As String = Nothing)
Dim db = UserHelper.DatabaseInstance
color = If(color, ColorHelper.GetRandomColor())
calendarName = If(calendarName, “Default”)‘ We are editing a calendar
db.Execute(“UPDATE Calendars SET Name = @0 WHERE Id = @1”, calendarName, calendarId)
UpdateCalendarColor(userId, calendarId, color)
End Sub - Create Calendar method: This method takes the user id, calendar id, and color as inputs to create a new calendar. This method creates a new calendar and then adds the calendar id to the logged in user.
Public Shared Function CreateCalendar(ByVal userId As Integer,
Optional ByVal calendarName As String = Nothing,
Optional ByVal color As String = Nothing) As Integer
Dim db = UserHelper.DatabaseInstance
color = If(color, ColorHelper.GetRandomColor())
calendarName = If(calendarName, “Default”)‘ Create a new calendar
db.Execute(“INSERT INTO Calendars (Name, Creator, Guid) Values (@0, @1, @2)”,
calendarName,
userId,
GenerateUniqueId())
Dim calendarId = Convert.ToInt32(db.GetLastInsertId())‘ Add the calendar id to CalendarUsers
db.Execute(“INSERT INTO CalendarsUsers (CalendarId, UserId, Permissions, Color) VALUES (@0, @1, @2, @3)”,
calendarId,
userId,
Permission.Own,
color)
Return calendarId
End Function - Delete Calendar method: This method takes calendar id as input to search for the relevant calendar and then deletes it.
Public Shared Sub DeleteCalendar(ByVal calendarId As Integer)
Dim db = UserHelper.DatabaseInstance
db.Execute(“DELETE FROM Events WHERE CalendarId = @0”, calendarId)
db.Execute(“DELETE FROM CalendarsUsers WHERE CalendarId = @0”, calendarId)
db.Execute(“DELETE FROM Calendars WHERE Id = @0”, calendarId)
End Sub - Get User Calendar method: This method gets the calendar information using the calendar user pair to search for the relevant information. It takes the user id and the calendar id as inputs and returns the relevant calendar. This method returns a null value if no calendar exists for the given details.
Public Shared Function GetUserCalendar(ByVal userId As Integer, ByVal calendarId As Integer) As Object
Dim db = UserHelper.DatabaseInstance
Return db.QuerySingle(“SELECT c.Name, c.Creator, c.Guid, cu.* ” &
“FROM Calendars AS c ” &
“JOIN CalendarsUsers AS cu ON c.Id = cu.CalendarId ” &
“WHERE cu.UserId = @0 ” &
“AND cu.CalendarId = @1 “,
userId,
calendarId)
End FunctionPublic Shared Function GetCalendarGroups(ByVal userId As Integer) As Object
‘ I should maintain a cache of all of the calendars loaded on the page
‘ to reduce calendar queries / joins
Dim calendars = Calendar.GetUserCalendars(userId)
Dim calendarGroups = ( From c In CType(calendars, IEnumerable(Of Object))
Group c By GroupKey = c.Permissions >= CInt(Permission.Own) Into g = Group Order By GroupKey
Select New With { Key .Own = If(GroupKey, “Mine”, “Shared”),
Key .Calendars = g.OrderBy(Function(c) c.Name)}).ToDictionary(Function(g) g.Own, Function(g) g.Calendars)
Return calendarGroups
End FunctionPublic Shared Function GetCalendar(ByVal calendarId As Integer) As Object
Dim db = UserHelper.DatabaseInstance
Return db.QuerySingle(“SELECT * FROM Calendars WHERE Id = @0”, calendarId)
End FunctionPublic Shared Function GetCalendarByHash(ByVal calendarId As Integer,
ByVal hash As String) As Object
Dim db = UserHelper.DatabaseInstance
Return db.QuerySingle(“SELECT * FROM Calendars WHERE Id = @0 AND Guid = @1”,
calendarId,
hash)
End Function
Understand the Event Class
The “Event” folder contains various pages that are used to perform various functionalities such as adding a calendar event, deleting a calendar event, downloading the calendar event in “.ics” format, editing a calendar event, and to display the information of a calendar event. The following methods are created in the Event class of the Event.vb page in the “App_Code” folder. Review the following code for different methods:
- Add Event method: This method takes the user id, calendar id, event name, event description, event location, start date, and end date as inputs to create a new calendar event. This method can create an event only if it starts and ends on the same day.
Public Shared Function AddEvent(ByVal userId As Integer,
ByVal calendarId As Integer,
ByVal name As String,
ByVal description As String,
ByVal location As String,
ByVal utcStart As Date,
ByVal utcEnd As Date,
Optional ByVal allDay As Boolean = False) As Integer
Dim db = UserHelper.DatabaseInstance
db.Query(“INSERT INTO Events ” &
“(OrganizerId, CalendarId, Name, Description, Location, AllDay, Start, [End]) ” &
“Values (@0, @1, @2, @3, @4, @5, @6, @7) “,
userId,
calendarId,
name,
description,
location,
allDay,
utcStart,
utcEnd)
Return Convert.ToInt32(db.GetLastInsertId())
End Function - Delete Event method: This method takes user id and event id as inputs to search for the relevant calendar event and then deletes it.
Public Shared Sub DeleteEvent(ByVal eventId As Integer)
Dim db = UserHelper.DatabaseInstance
db.Execute(“DELETE FROM EVENTS WHERE Id = @0”, eventId)
End Sub - Get Information of User – Event method: This method gets the calendar event and calendar information using the user – event pair to search for the relevant information. It takes the user id and the event id as inputs and returns the relevant calendar events. This method returns a null value if no event exists for the given details.
Public Shared Function GetUserEvent(ByVal userId As Integer,
ByVal eventId As Integer) As Object
Dim db = UserHelper.DatabaseInstance
Return db.QuerySingle( “SELECT e.*, c.Name AS CalendarName, c.Id AS CalendarId, cu.Color, cu.Permissions ” &
“FROM EVENTS AS e ” &
“JOIN Calendars AS c ON e.CalendarID = c.Id ” &
“JOIN CalendarsUsers AS cu ON c.Id = cu.CalendarId ” &
“WHERE cu.UserId = @0 AND e.Id = @1 “,
userId,
eventId)
End FunctionPublic Shared Function GetCalendarEvents(ByVal calendarId As Integer) As Object
Dim db = UserHelper.DatabaseInstance
Return db.Query(“SELECT * FROM Events WHERE CalendarId = @0”, calendarId)
End Function
Understand the Themes folder
The “Themes” folder contains various default templates themes for the calendar. These template themes contain different predefined layouts, sections, and styles. The user can select any of the following themes to be applied it to their calendars:
- Dark
- Default
- Green Header
- Purple
Summary
That’s it! You have now successfully created your first website based on the Visual Basic templates using Microsoft WebMatrix. In our next post, we will see how to publish the website for the others to see.



0 comments
Be the first to start the discussion.