


A key component of leveraging machine learning large languages models (LLM) for natural language processing (NLP) in applications for chat search like ChatGPT, ranking and recommendation engines, anomaly detection, and semantic search is the ability to leverage massive amounts of unstructured data for search.
But where would we save and retrieve all the unstructured data that powers these applications?
This is where vector databases enters the AI room. In order to efficiently and effectively, search, index, and store this unstructured data stored as embeddings, vector databases have risen to the challenge.
Combining a vector database, the cloud, and a framework like Semantic Kernel becomes a powerful combination in building Generative AI applications. So, let’s take a journey on how to use the semantic search and vector database, Qdrant, running on Azure cloud and integrated with Semantic Kernel to enable a generative AI solution.
Like any journey, preparation is key. Therefore, before starting we need to review our checklist to ensure that all the bases are covered:
- Is there a valid Azure Subscription that can be used? No worries if there is not an Azure subscription at your disposable, a free Azure subscription can be created by going to Create Your Azure Free Account Today | Microsoft Azure
- Am I successfully logged into the Azure Subscription that will be used?
- Do I have permissions and scope set up in the Azure Subscription I have access to, to create a resource group and create resources like AKS? This is a big one, in working with customers we’ve found that the not having the correct permissions and scopes has been the biggest challenge when deploying solutions. In starting off this journey in the correct way, it’s essential to check if your account has the correct access.

Once you have navigated to the GitHub repo, the repo should be cloned using the method you are most comfortable with. I’m a command line type of person, so I do this by executing the following command in bash shell:
% git clone https://github.com/Azure-Samples/qdrant-azure.git
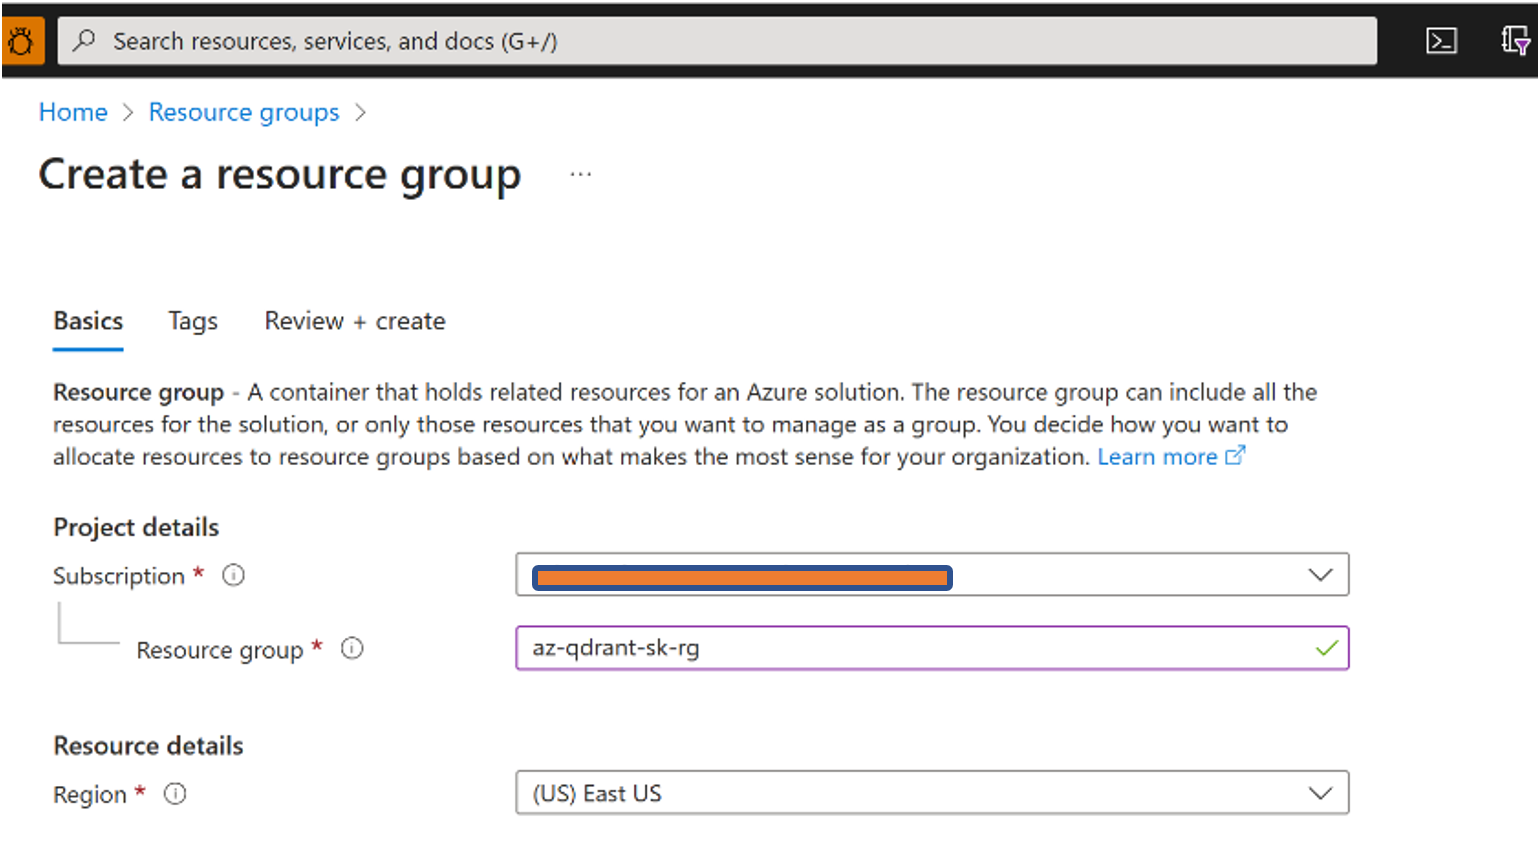
Now that the repo is cloned, let’s create a Azure resource group to put the resources to be created to run Qdrant in the Azure cloud. I do with the Azure CLI in bash by issuing command:
% az group create --name az-qdrant-sk-rg --location eastus
It will return a JSON snippet if successful:
{

"id": "/subscriptions/...

   ...

   "type": ...

}
Alternatively, an Azure resource group could be easily created in the Azure Portal as well.
Let’s also create an Azure SSHKey that we will need later for deployment. Create an Azure SSH key in the Resource group created in the previous step by executing the following command
% az sshkey create --name "qdrantSSHKey" --resource-group "<INSERT YOUR ResourceGroup>"
via the command line or via Azure Cloud Shell. Again, a JSON snippet will be returned of the form:
{

   "id": "/subscriptions/...

   ...

   "type": null

}
Congratulations! You’ve created an SSHKey in Azure within your Resource Group.
Looks like we’re off to the races …
Next stop, we will got back the Qdrant on Azure GitHub repo we pulled up in the browser. On the README in the repo, is an ARM (Azure Resource Manager) button.
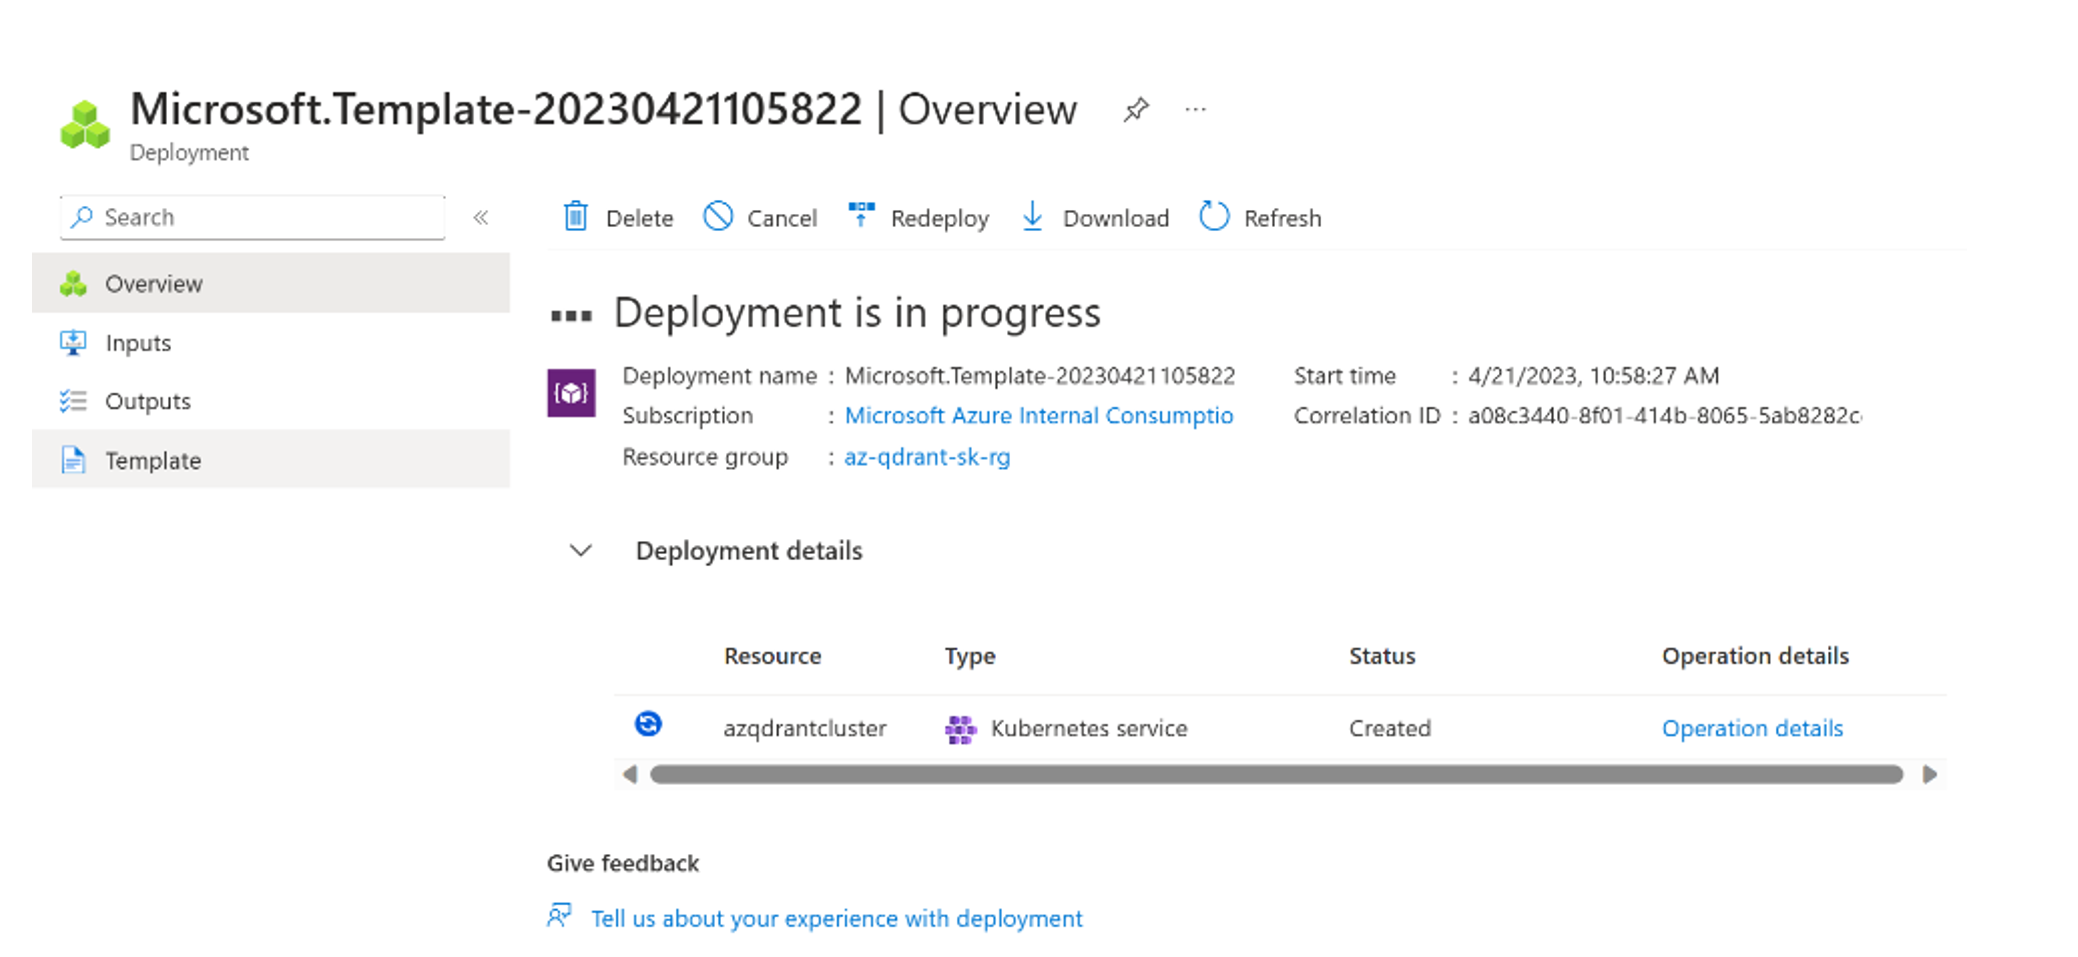
Click the ARM button, Deploy to Azure, to create an Kubernetes cluster in Azure to run Qdrant. Note: If you already have a AKS cluster set up or a K8s cluster running locally you can skip this step.
A Custom Deployment screen will open up in Azure Portal. Use the dropdown for Resource group to select the Azure Resource group we created previously. Add a value/name for DNS Prefix, and lastly under the SSH public key source option select the Use an existing key stored in Azure option. Select the Azure SSHKey that was created in the earlier in our journey.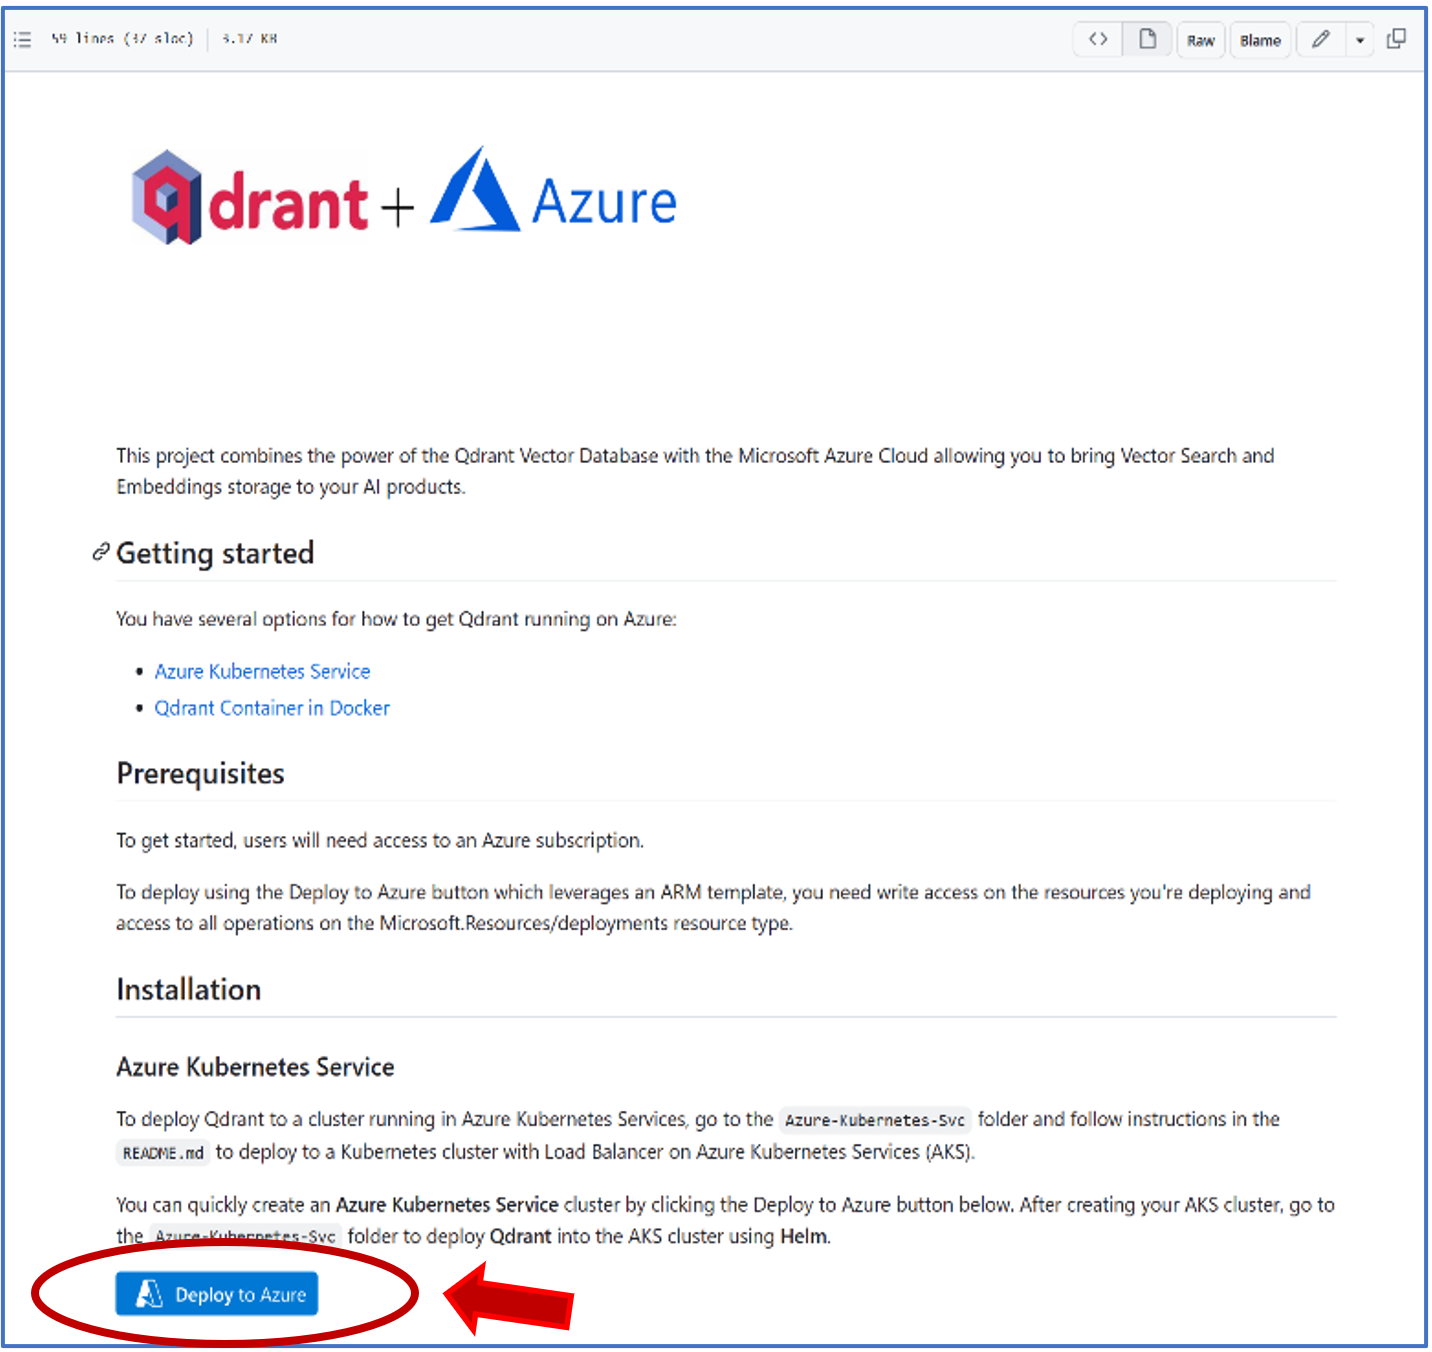
A Custom Deployment screen will open up in Azure Portal. Use the dropdown for Resource group to select the Azure Resource group we created previously. Add a value/name for DNS Prefix, and lastly under the SSH public key source option select the Use an existing key stored in Azure option. Select the Azure SSHKey that was created in the earlier in our journey in the Stored Keys dropdown.
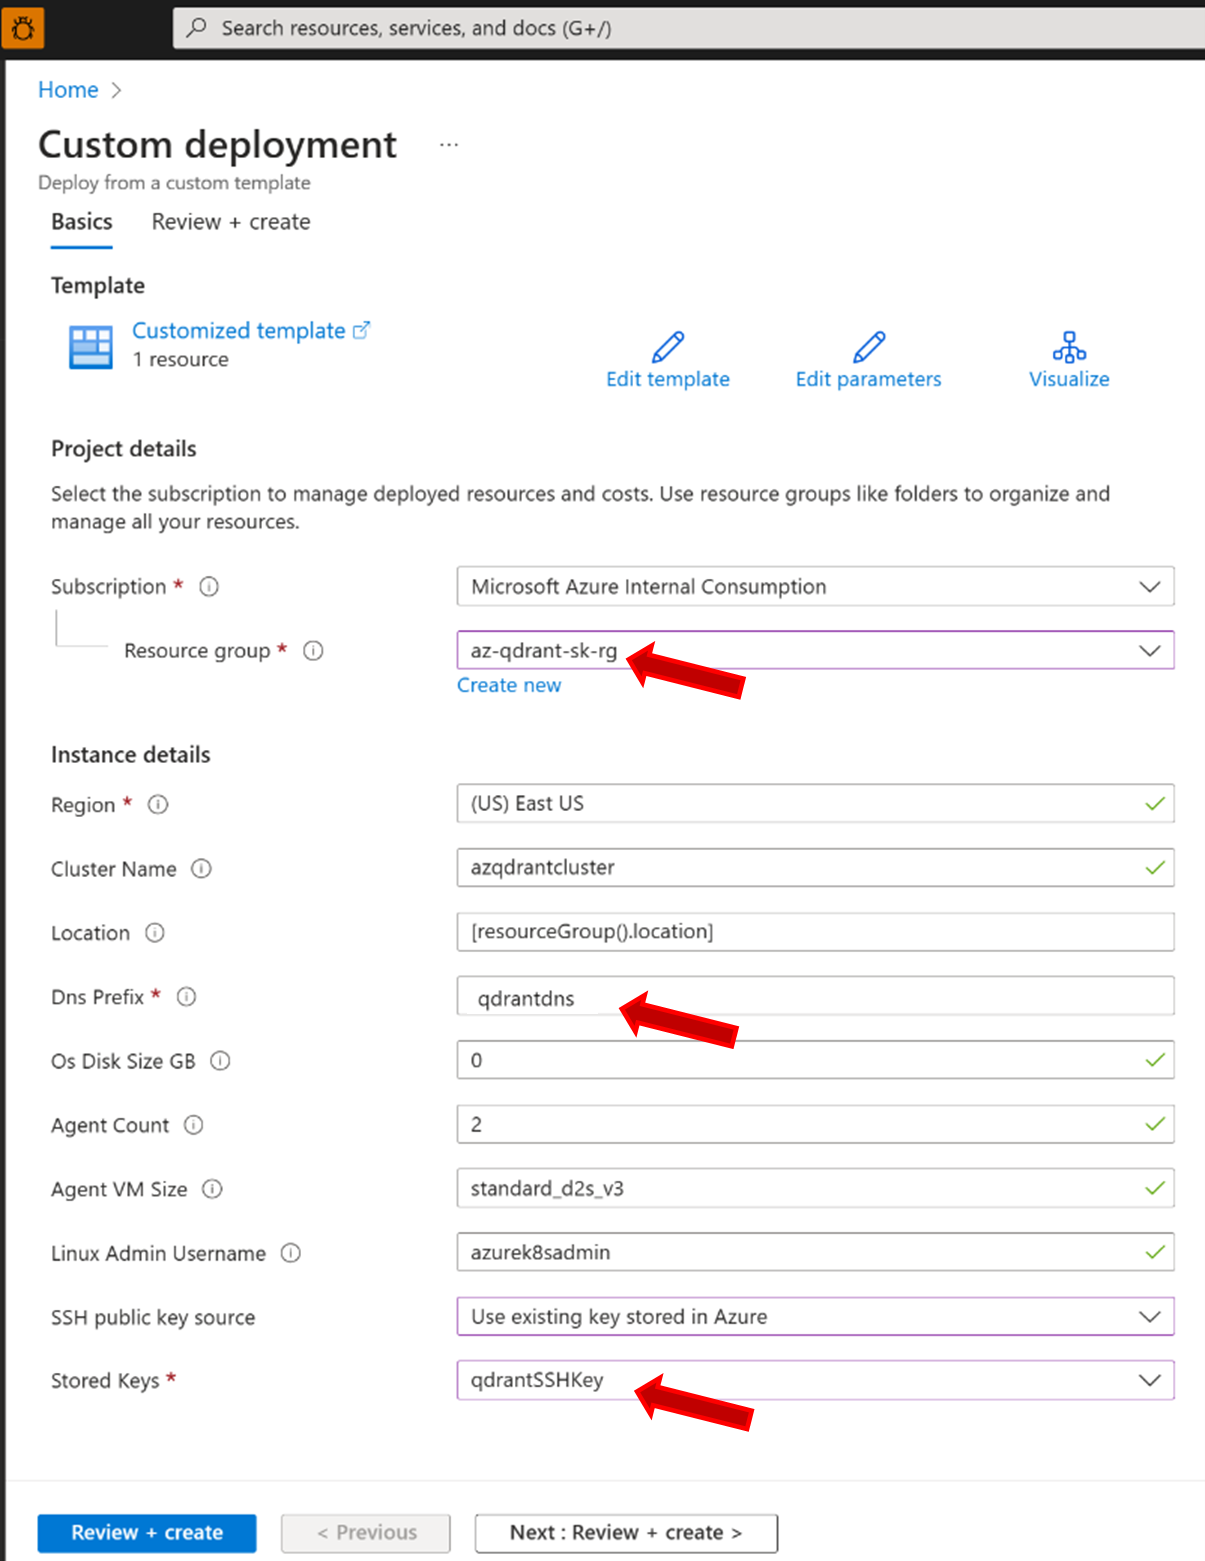
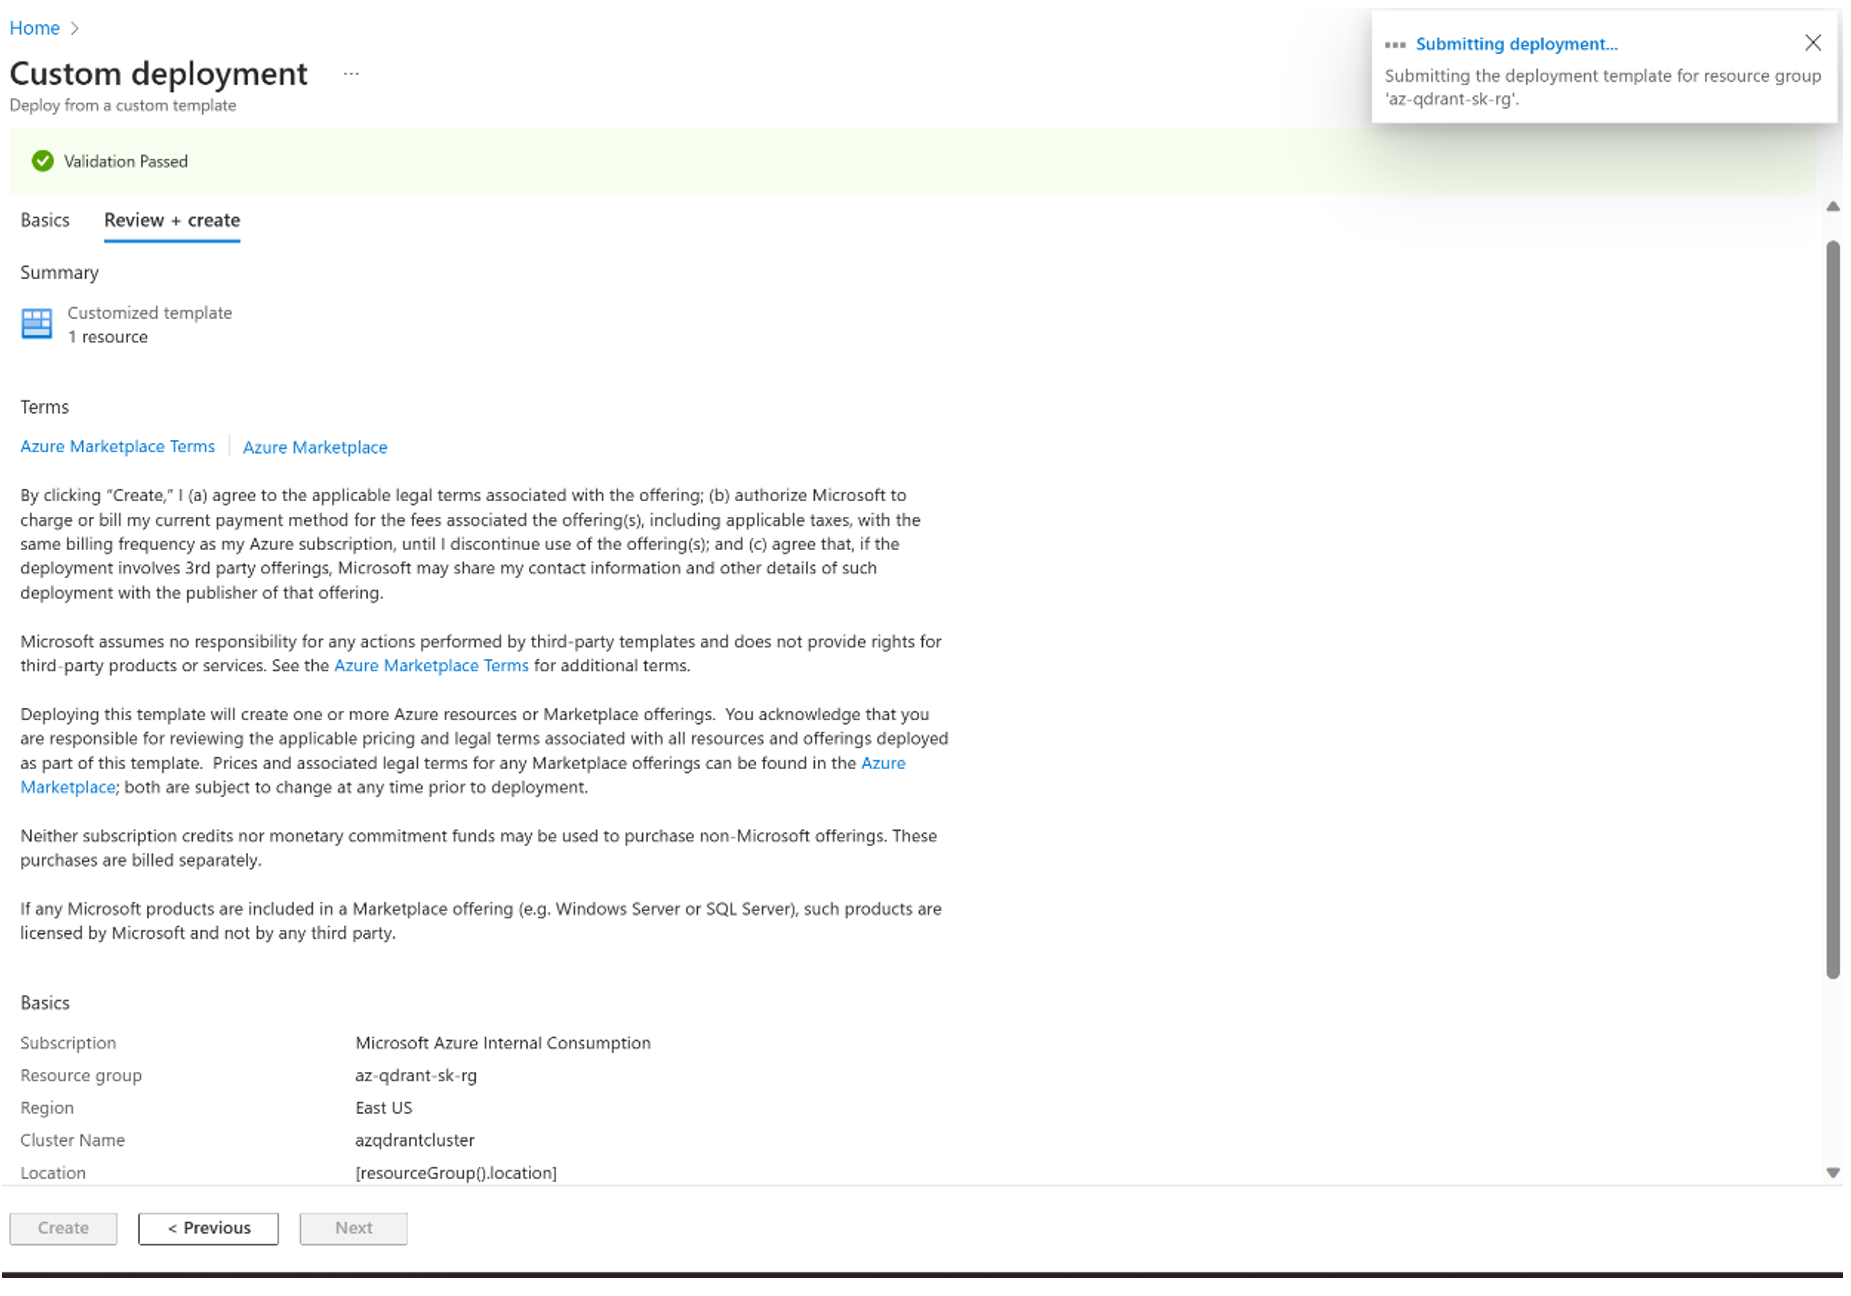
Select Review + Create button, to Validate your deployment and all that is left here is to select Create button deploy your AKS cluster for Qdrant.
We’re almost at the end of our journey, only 2 steps remain …
First is to ensure Qdrant is deployed to our AKS cluster by running the Helm chart located in the Qdrant Azure Github repo we cloned earlier and the second is to tie Qdrant vector database to the Semantic Kernel.
To accomplish the first step, go to the location you cloned the repo. From the root directory of the repo, change to the directory Azure-Kubernetes-Svc. We’re going to run commands to get the AKS credentials stored locally and to execute the Helm chart. Don’t worry, if those words are foreign to you; there are scripts that will do all the heavy lifting for you.
To get the tools, Kubectl and Helm, needed to get your Qdrant instance running correctly, follow the instructions provided in repo here: https://github.com/Azure-Samples/qdrant-azure/tree/main/Azure-Kubernetes-Svc#prerequisites
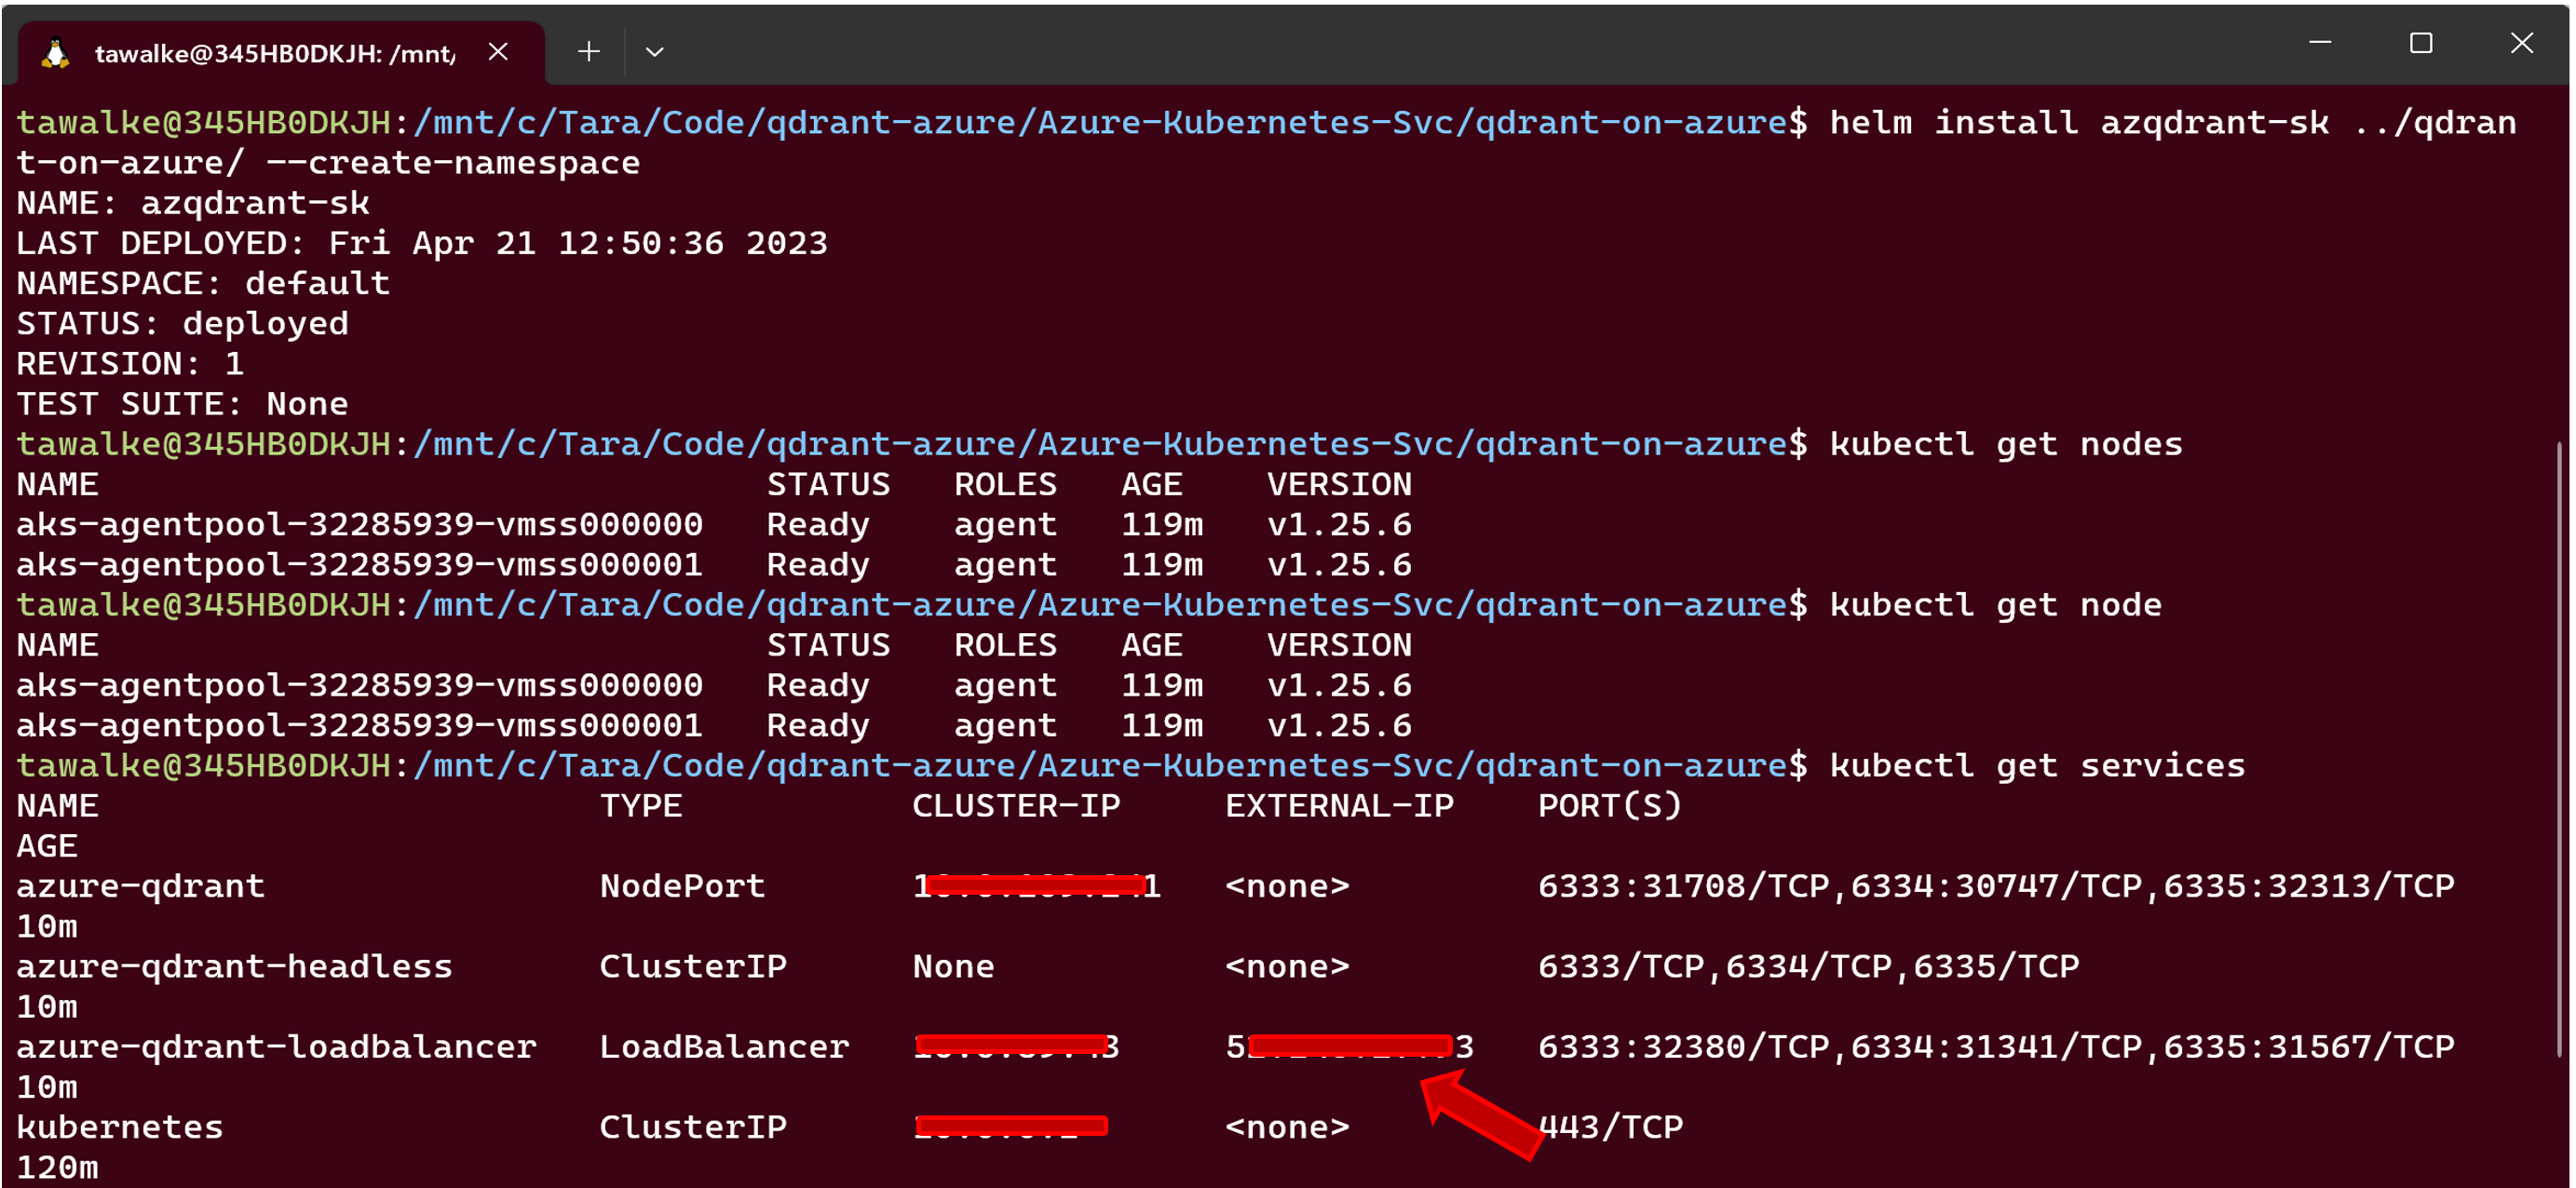
Now, that we’ve got the tools and ready to rock and roll, let’s start deploying Qdrant to our AKS cluster. Issue the following command on the command line using Azure CLI:
% az aks get-credentials --resource-group <your-resource-group-name> --name azqdrantcluster
**if you used the template, azqdrantcluster will be the name of your AKS cluster**
Then execute the following Kubectl command on the command line:
% kubectl get nodes
This will verify that you can access your cluster and it’s running successfully.
Finally, let’s get Qdrant humming on your cluster. Navigate to the qdrant-on-azure folder and run the following command.
% helm install azqdrant-sk ../qdrant-on-azure/ --create-namespace
or for a custom namespace you can run
% helm install azqdrant-sk ../qdrant-on-azure --namespace test-namespace --create-namespace
And voilà we have Qdrant running on Azure.
Let’s get the IP address that will be used for Qdrant API calls by running: kubectl get services. Make sure to copy the External-IP of the azure-qdrant-loadbalancer as this will be needed in our final step in using Qdrant with the Semantic Kernel. See screenshots below for an example.
default namespace
with custom namespace

I was always taught that it’s better to be safe than sorry in both engineering and in life. Therefore, let’s make sure that the Qdrant instance is functional and running as desired by creating a test collection. To test that Qdrant is running successfully, run the following command on the command line:
% curl -X PUT 'http://<your QDRANT-LOADBALANCER-EXTERNALIP-ADDRESS>:6333/collections/test_collection' \ -H 'Content-Type: application/json' \ --data-raw '{ "vectors": { "size": 4, "distance": "Dot" } }'
If this executes correctly you should see a json payload that shows something similar to: {"result":true,"status":"ok","time":0.407534142}
See screenshot below for an example of the successful creation of your test Qdrant collection.
testing of Qdrant creation of collection

Wow, we’re at the final leg of our journey and we’ve found our way to the Semantic Kernel with our Qdrant IP address in hand …
Go to the GitHub repo for the Semantic Kernel located here: https://github.com/microsoft/semantic-kernel. Clone the repo using your method of choice for Git. Follow the steps noted in the readme to setup the semantic kernel.
Now that we’re all setup, we can run the sample for using Qdrant Memory with the Semantic Kernel. Go the folder named kernel-syntax-examples by navigating to: semantic-kernel/samples/dotnet/kernel-syntax-examples/ from the location/directory you cloned the Semantic Kernel repo. Under that folder should see a C# project files and a list of code files with the heading Examples.
Open up the KernelSyntaxExamples.csproj project in an IDE like Visual Studio Code and look for Example19_Qdrant.cs. This is the sample that will be run with the Qdrant instance we created.
To set up the environment variables needed to run the sample, grab your OpenAI API key from your OpenAI account from https://platform.openai.com/account/api-keys or from your Azure subscription’s Azure OpenAI Service. Also have in hand, the Qdrant External IP address we obtained earlier from Qdrant instance. Run the following commands on the command line:
% dotnet user-secrets set "OPENAI_API_KEY" "<Insert your OpenAI API Key>”
% dotnet user-secrets set "QDRANT_ENDPOINT" "http://<Insert your Qdrant External-IP address>"
% dotnet user-secrets set "QDRANT_PORT" "6333"
In your open project, go to the Program.cs file to the Program class, you will see a list of the examples available. Comment out (or remove) all the samples except for the command for the Example19_Qdrant.cs sample which is the code line await Example19_Qdrant.RunAsync(); in the Program class.
See screenshots as a visual of what this will look like in Visual Studio Code.

Build/Compile the code and run the sample. You have now successfully implemented Qdrant with the Semantic Kernel.
Thanks for taking the ride with me.
 |
Tara E. Walker, Principal Software Engineer @Microsoft
Tara is a Principal Software Engineer in the Office of the CTO (OCTO) developing solutions using the latest AI/ML workloads and cutting edge technologies at scale including Cloud Computing/Cloud Native and Robotics. Prior to Microsoft she was at AWS and Turner Broadcasting/Time Warner. |

0 comments