Use PowerShell to Create a Permanent WMI Event to Launch a VBScript
Summary: Microsoft Scripting Guy, Ed Wilson, discusses creating a permanent WMI event registration to monitor for new files and clean up the file names.
Microsoft Scripting Guy, Ed Wilson, is here. I just booked the room for the Atlanta (Alpharetta) PowerShell Saturday. This will be PowerShell Saturday event #003, and it will be held on Saturday (of course) on October 27 at the Microsoft Office in Alpharetta, Georgia in the United States. The event is not even up on the PowerShell Saturday page yet, but I thought you might like to get it on your calendars. Of course, the PowerShell Saturday event in Charlotte, North Carolina page is up, as are the abstracts for the sponsors, the speakers, and presentations. Keep your eyes and ears open because the registration site will go live soon, and there are only 200 tickets available. PowerShell Saturday in Columbus Ohio sold out in 13 days, so you will need to be quick if you want to attend this high-profile event.
Creating a permanent WMI event to launch a VBScript…
…that launches a Windows PowerShell script…
…that cleans up a folder of file names with leading spaces upon their arrival…
Note This is the fourth blog in a five part series about monitoring a folder for the creation of files that have leading spaces in the file names. On Monday, I wrote Use PowerShell to Detect and Fix Files with Leading Spaces, the scripts from that blog will be used today and again on Friday. On Tuesday, I wrote Use PowerShell to Monitor for the Creation of New Files. This blog talks about creating a temporary WMI event to monitor for the creation of files in a particular folder (a query that is crucial to Friday’s blog). On Wednesday, I wrote about using a VBScript script to launch a Windows PowerShell script in How to Use VBScript to Run a PowerShell Script. The reason for this blog is that the WMI class that is used for the permanent event consumer uses a VBScript script and not a Windows PowerShell script.
On Thursday, I took a step back and installed the WMI Administrative Tools, and I examined the parts of a permanent WMI event registration. The blog Using the WMI Admin Tools to Check on Permanent Events is a great tutorial. From a reference perspective, you should check out the An Insider’s Guide to Using WMI Events and PowerShell. This guide is a great reference, and it provides great assistance for understanding this powerful technology.
One thing you should monitor, if you will pardon the pun, when designing and implementing permanent WMI event registrations is the fact that they have a lot of moving parts, and they can be rather complicated. You must test your design and your implementation in a lab environment that closely emulates your actual production systems before implanting any of these techniques.
When I was creating the Windows PowerShell script for today’s blog, I actually ended up writing five separate scripts. The scripts are listed here. For ease of access, all five scripts are uploaded to the Script Center Script Repository.
- The first script is one that removes the permanent event registrations.
- The second script is a stripped down script to create my test files.
- The third script is the VBScript that is called by the permanent event registration.
- The fourth script is the Windows PowerShell script that is launched to clean up the files.
- The fifth script (the most complicated of all) is the one that does the actual WMI permanent event registration.
Avoid setting a short within value
When creating your WMI event query, make sure that you do not set a value of less than 30 (seconds) when going into production. It is common in testing, to set this value to 5 (seconds); but for production, never go less than 30 (seconds). Here is the WMI query that is used in the Create Permanent Event Consumer script.
$query = @”
Select * from __InstanceCreationEvent within 30
where targetInstance isa ‘Cim_DirectoryContainsFile’
and targetInstance.GroupComponent = ‘Win32_Directory.Name=”c:\\\\test”‘
“@
Note I discussed this query and the use of the Here-String for formatting the query in Use PowerShell to Monitor for the Creation of New Files.
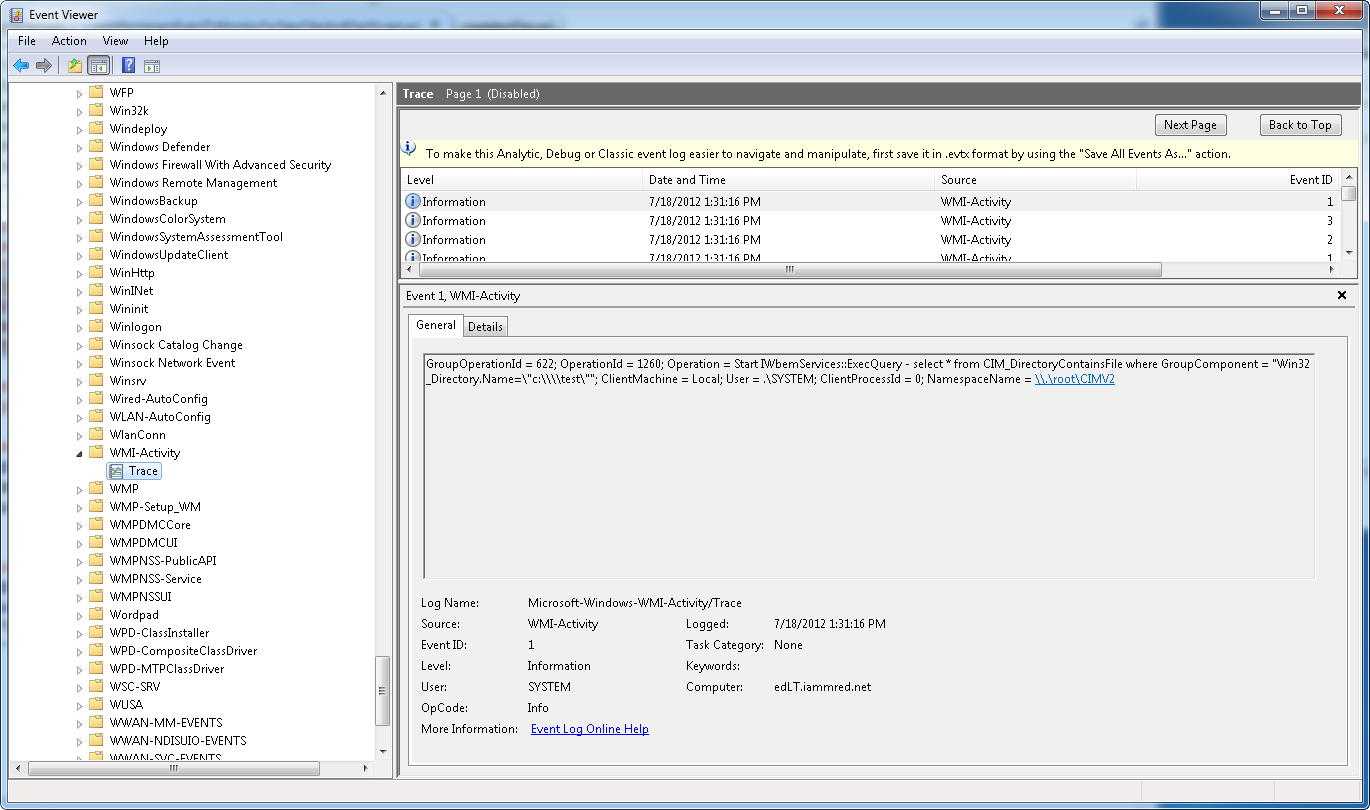
What happens if you use within 5 in your query? Well, for one thing, Windows PowerShell polls every five seconds to see if there is a change. To see this behavior, I enabled the WMI-Activity trace log in the Event Viewer. One of the events is shown here.
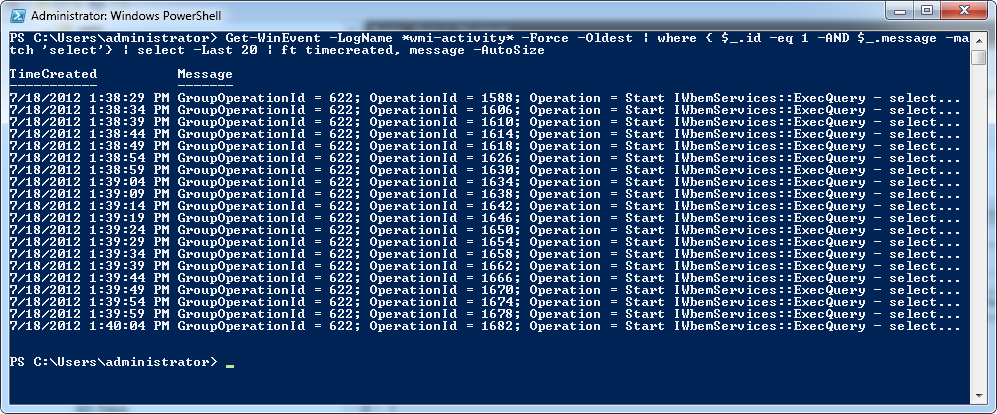
To see the impact, of this, I used the following Windows PowerShell query to review these events.
Get-WinEvent -LogName *wmi-activity* -Force -Oldest | where { $_.id -eq 1 -AND $_.message -match ‘select’} | select -Last 20 | ft timecreated, message –AutoSize
By using Windows PowerShell, I can easily see that the WMI query is executing every 5 seconds. (This is NOT the sort of thing you want to do on a heavily loaded production server.) The query and the results from the query are shown here.
Creating the three essential parts to the script
There are three essential parts to a permanent WMI event registration. These were discussed in yesterday’s Hey, Scripting Guy! Blog, Using the WMI Admin Tools to Check on Permanent Events. The first item required is the __EventFilter. The following code does this. (Keep in mind that the new instance of the __EventFilter is created in the root\subscription WMI namespace. But the arguments to this state that the EventNameSpace is in root\cimv2. The reason is that the class being used, Cim_DirectoryContainsFile, resides in root\cimv2.)
$filterPath = Set-WmiInstance -Class __EventFilter `
-ComputerName $computer -Namespace $wmiNS -Arguments `
@{name=$filterName; EventNameSpace=$filterNS; QueryLanguage=”WQL”;
Query=$query}
The second part is the ActiveScriptEventConsumer. This portion of the script fills out the properties of the ActiveScriptEventConsumer. The three essential portions are the name of the consumer, the script file, and the script engine. Note that the only engine supported is the VBScript scripting engine.
$consumerPath = Set-WmiInstance -Class ActiveScriptEventConsumer `
-ComputerName $computer -Namespace $wmiNS `
-Arguments @{name=”CleanupFileNames”; ScriptFileName=$scriptFileName;
ScriptingEngine=”VBScript”}
Finally, the last part is the __FilterToConsumerBinding. When this part is configured properly, the green check mark appears in the WMI Administrative Tools as shown yesterday. This portion of the script is really easy. All that is required is to bind the filter and the consumer together as shown here.
Set-WmiInstance -Class __FilterToConsumerBinding -ComputerName $computer `
-Namespace $wmiNS -arguments @{Filter=$filterPath; Consumer=$consumerPath} |
out-null
When the CreatePermenantEventToMonitorForNewFilesAndStartScript.ps1 script runs, no output appears. This is where using the WMI Administrative Tools comes in useful (see Using the WMI Admin Tools to Check on Permanent Events).
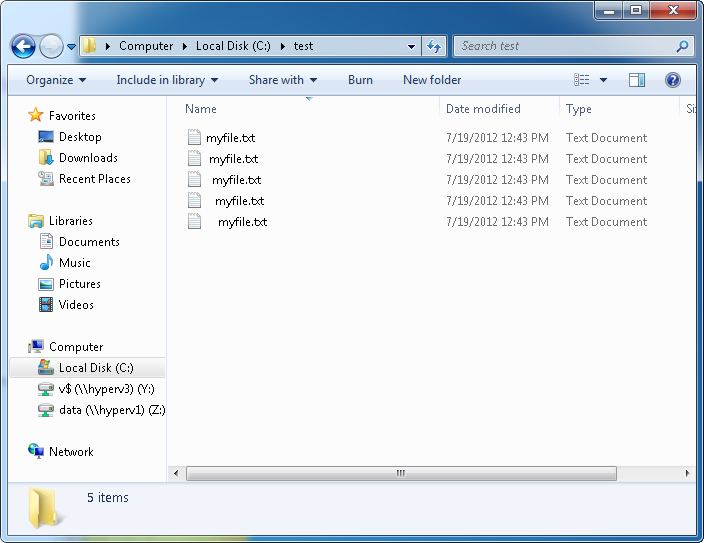
Now to test the script, I create some new files in my test folder by using the CreateTestFiles.ps1 script. The newly created files are shown here.
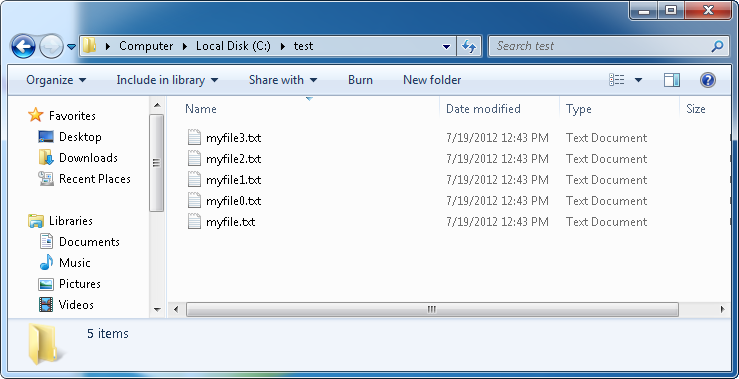
I have to move rather quickly, because I only have a maximum of 30 seconds before the event fires. Here is the cleaned up folder after the event fires.
Clean-up work
I have mentioned before, that when creating a script that makes changes to system state, it is always a good idea to also write a script to do the clean-up work. This is especially true when you are doing demos, or as an aid while you are composing the script. Here is my very simple clean-up script. The thing to keep in mind is that you MUST use a good filter to find your __EventFilter and your __FilterToConsumerBinding, or you will remove things your computer may very well need.
gwmi __eventFilter -namespace root\subscription -filter “name=’NewFile'”| Remove-WmiObject
gwmi activeScriptEventConsumer -Namespace root\subscription | Remove-WmiObject
gwmi __filtertoconsumerbinding -Namespace root\subscription -Filter “Filter = “”__eventfilter.name=’NewFile'””” | Remove-WmiObject
Logging
I was actually hoping that the WMI-Activity trace log would let me know each time the VBScript ran, but alas, that was not the case. So I added a log to my Windows PowerShell clean-up script that writes the date to a log file. This line is shown here.
“called cleanup script $((get-date).tostring())” >>c:\fso\mylogging.txt
By adding this line to the clean-up files in my Windows PowerShell script, an entry writes to the log file each time the Windows PowerShell script is called from the VBScript.
This ends our WMI Events Week. Join me tomorrow when I will look at the differences in performance between using a literal WMI filter and a WMI wildcard filter. It should be pretty cool.
I invite you to follow me on Twitter and Facebook. If you have any questions, send email to me at scripter@microsoft.com, or post your questions on the Official Scripting Guys Forum. See you tomorrow. Until then, peace.
Ed Wilson, Microsoft Scripting Guy


 Light
Light Dark
Dark
0 comments