
Premier Developer consultant Julien Oudot spotlights how VS Code can help to deploy Container images stored into Azure Container Registry (ACR) and explores kubectl explain integration.
In the last part: Why you should consider VS Code for your Kubernetes/Docker work, we have seen how Visual Studio Code facilitates your work with Docker containers and Kubernetes clusters. In this follow up article, we will cover how it can help to deploy Container images stored into Azure Container Registry (ACR). We will also cover the kubectl explain integration which is helpful to understand the structure of YAML files used to describe Kubernetes API objects.
To complete the steps described below, you will need an Azure subscription with an AKS cluster already deployed. In the following example, RBAC has been disabled in the cluster. The following VS Code extensions are also required:
Although the previous part was demonstrated in a Linux environment, the current article has been written in a Windows context. But remember, Visual Studio Code is a cross platform IDE, providing a consistent user experience on multiple platforms (Windows, Linux and Mac OS).
Creating Azure Container Registry
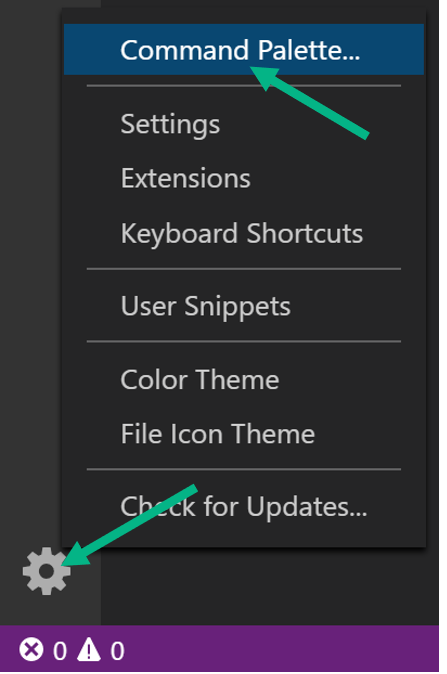
First open VS Code as Administrator and open the command palette as shown below.
Enter Azure sign in the text box and select Azure sign in. It will open a browser and walk you through the sign in experience to authenticate the IDE.

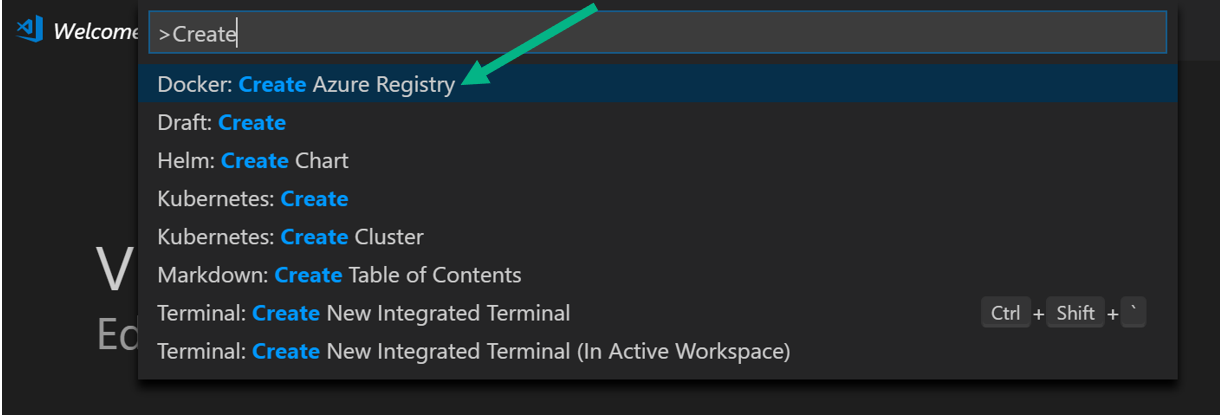
Open the command palette again and enter Create in the text box. Then select Docker: Create Azure Registry.
You will need to choose your subscription (for billing purpose). For the resource group, click on create new resource group and select the location closest to you.
Then, you will need to enter the Azure Container Registry name and location. At the end of these steps, you should see a notification saying that it has been successfully created (at the bottom right).

We have just deployed a private Docker Container registry in Azure from Visual Studio Code.
Connecting VS Code to ACR account and deploying to Kubernetes cluster
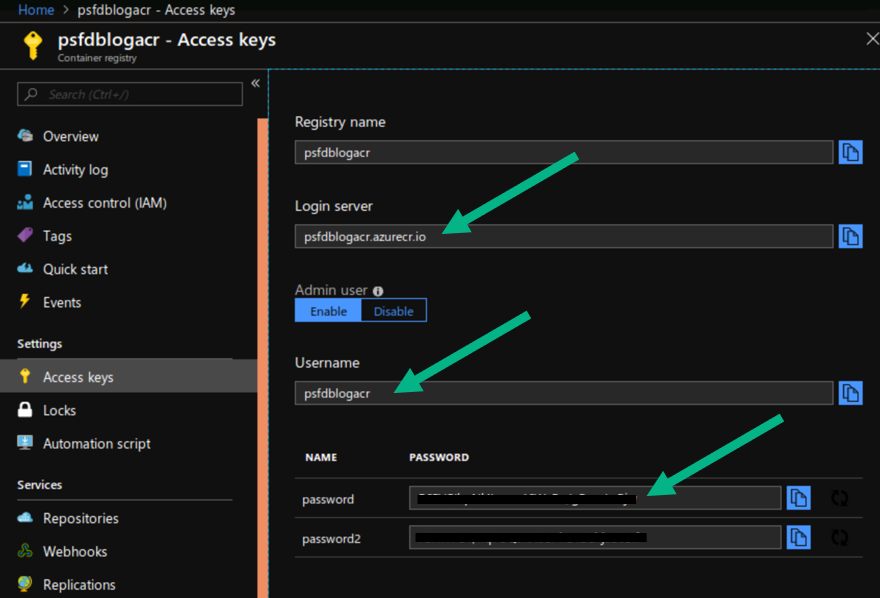
Similarly to the previous article, we need to authenticate VS Code to this private registry. To do this, we need to browse to our Container Registry environment in portal.azure.com and go to Access keys to find the credentials as shown below.
Make sure that Admin user is enabled, take note of the Login server, Username and Password.
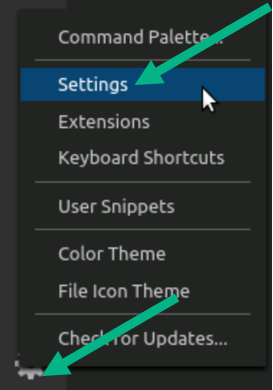
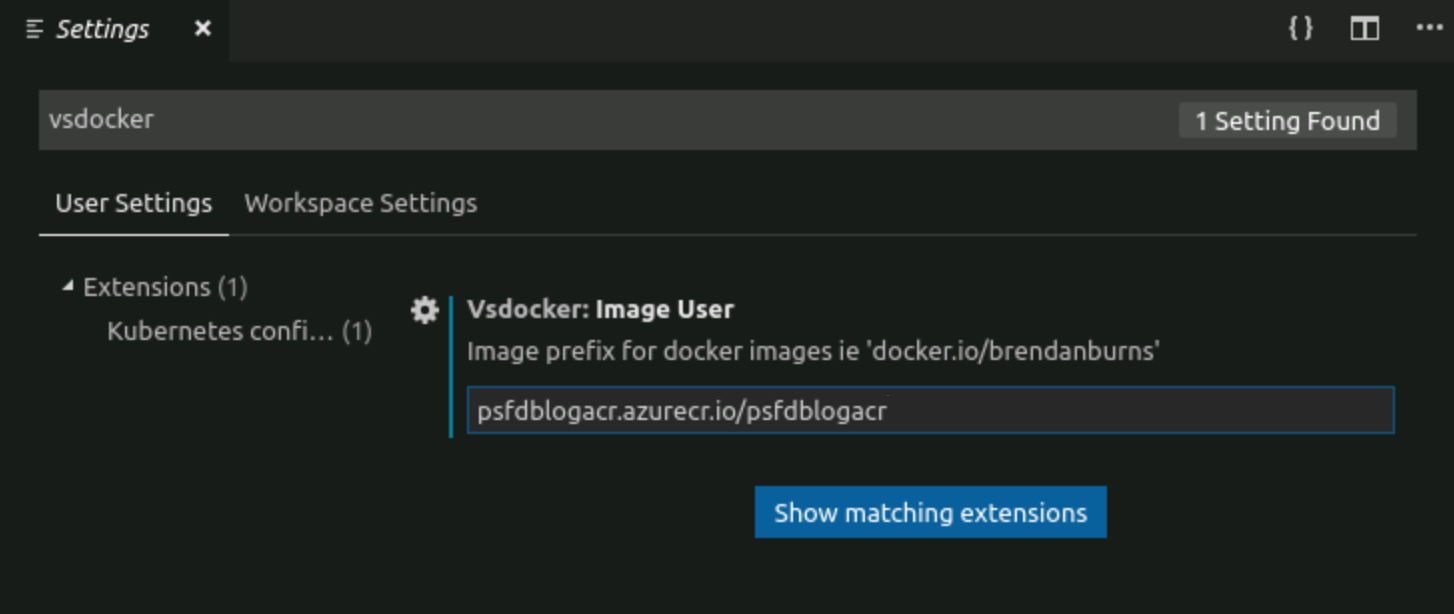
Open the Settings at the bottom left as shown below.
Search for vsdocker and override the Vsdocker: Image User with <login_server>/<user_name>.
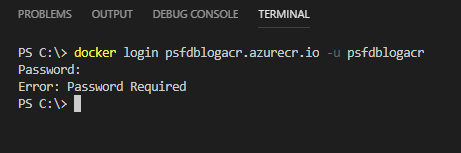
From the VS Code Terminal window, enter the command docker login <login_server> -u <user_name> as well as the password found above.
Open a simple nodejs project and deploy to an existing AKS cluster. For more information about how to do this, refer to the part 1 of this article. Note that you will need Docker for Windows in Linux mode if you are working from a Windows 10 machine.
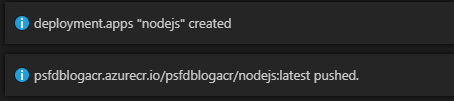
Once this is done, two notifications should be displayed at the bottom right.
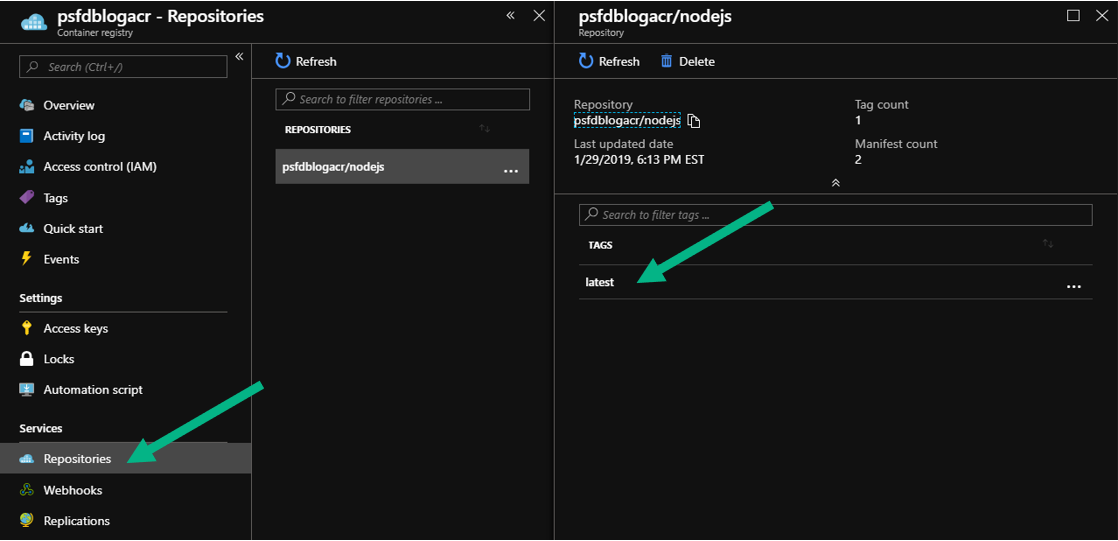
If we look at the ACR environment in Azure, we can see the nodejs image that has been pushed in our private repository.
Although the deployment looks successful looking at the notifications, we missed one step to allow the AKS cluster to pull image stored in the ACR.
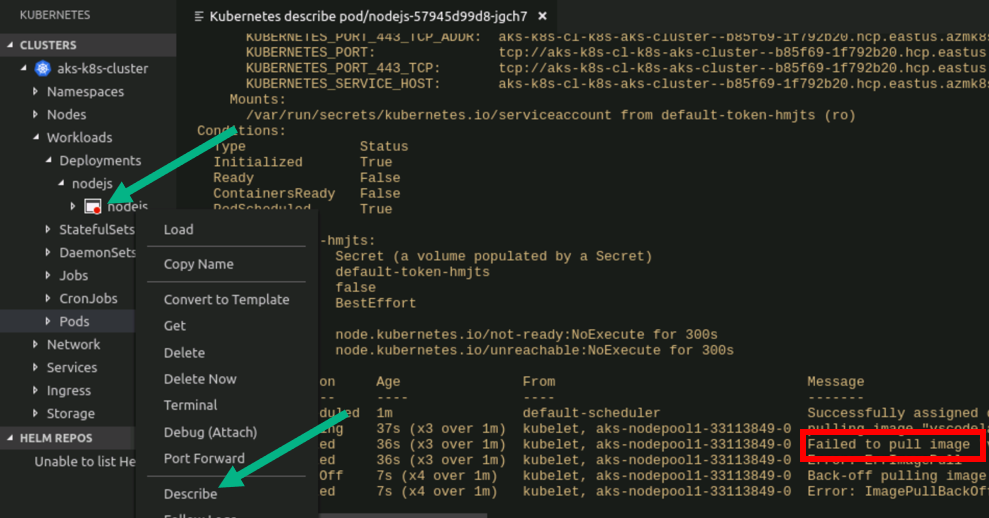
In VS Code, click on the Kubernetes extension, then expand the cluster and click Workloads – Deployments – nodejs. You will be able to see what is deployed in your cluster. When expanding nodejs, you can see a red dot meaning that things did not go as expected.
Right-click on the failing pod and click Describe. Scroll down and locate the message Failed to pull image … , as highlighted in red below. If you scroll to the right, you will see that the pull failed because the AKS cluster is unauthorized to pull the image stored in the Azure Container Registry. We need to create a secret.
To create a secret, open the VS Code Terminal and type the command
kubectl create secret docker-registry acr-auth –docker-server=https://<acr_login_server> –docker-username=<acr_user_name> –docker-password=<acr_password> –docker-email=<any_mail>
Note that the secret creation process might be different depending on the RBAC configuration of your cluster. See https://docs.microsoft.com/en-us/azure/container-registry/container-registry-auth-aks#access-with-kubernetes-secret for more details.
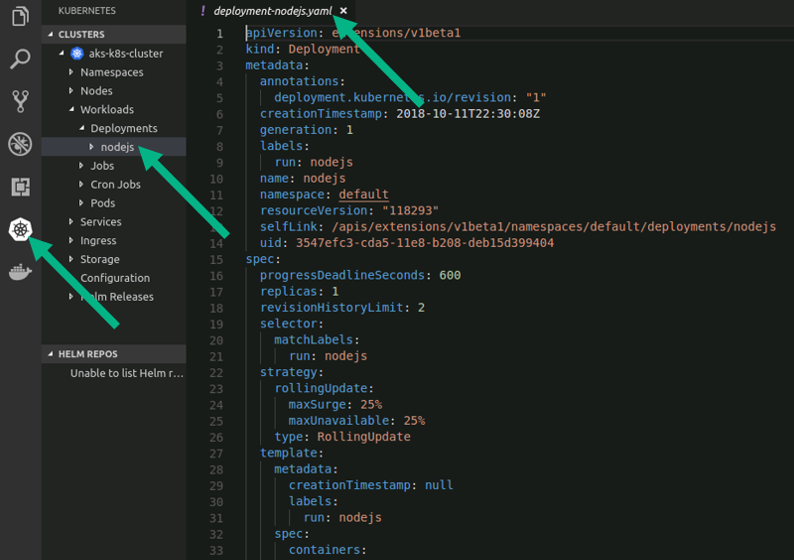
Although the secret is created, we need to make sure that its credentials will be used to download the image at deployment time. From the Kubernetes extension window, click on the nodejs deployment to see the YAML file describing the deployment.
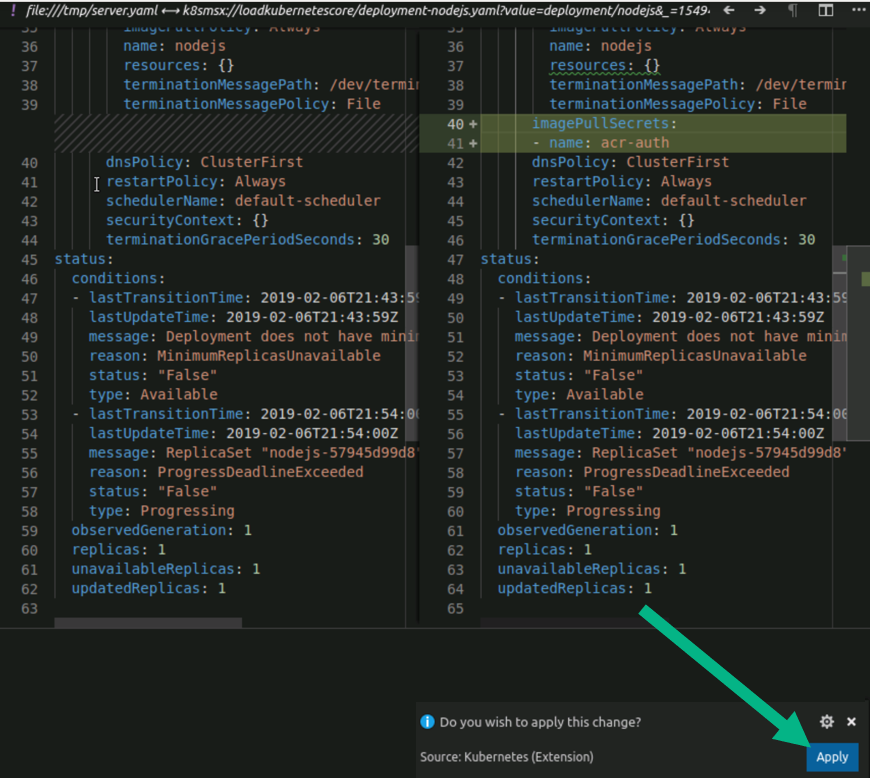
After the containers section, update the file to add:
imagePullSecrets:
name: acr-auth

Finally, to update the deployment, open the command palette (control-shift + p), search for Apply and select Kubernetes: Apply and click Apply.
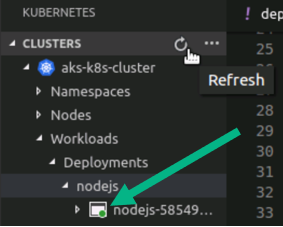
Now if you refresh the cluster’s view, the nodejs pod should be healthy once the pull is complete.
If you want to expose this deployment to see outside, we need to create a service. See the part 1 for instructions explaining how to do this.
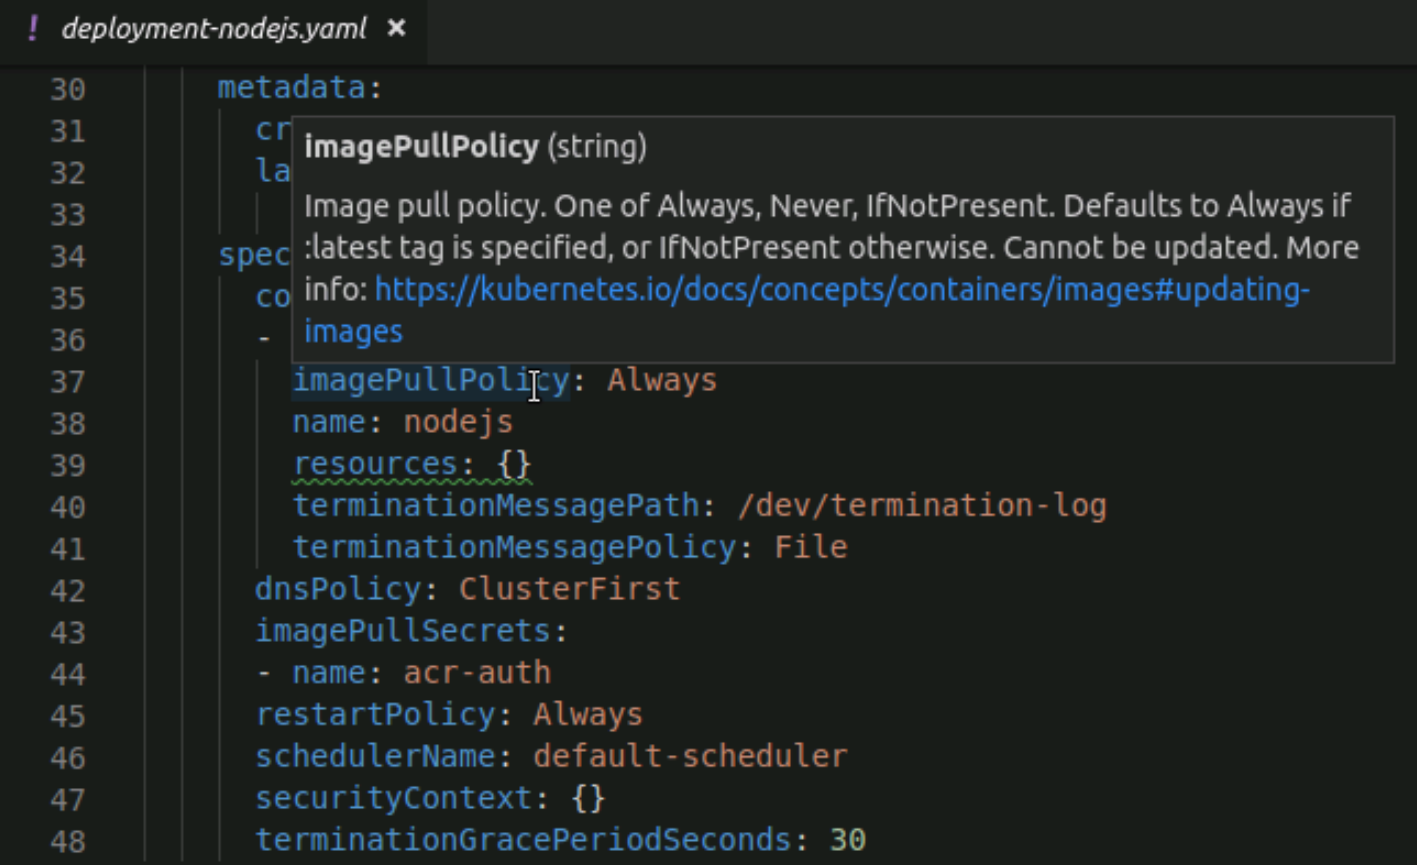
Using Kubernetes Explain to understand YAML files
Another convenient feature part of the Kubernetes extension is the integration of the kubectl explain command. Open the command palette and enter explain. Then select Kubernetes Explain.

Now, hover over any field in the YAML file to see some documentation and clickable links to learn more about the field.
To summarize the VS Code capabilities we have experimented, we have been able to deploy a private Azure Container Registry, deploy a Docker container to a managed Kubernetes cluster and learn more about the structure of the Kubernetes YAML files. We only had to leave the IDE to retrieve the ACR credentials from the Azure portal and verify that our container image was successfully pushed the private registry.
0 comments