

In this post I will walk you through the steps of publishing your React SPA application into Azure using Azure DevOps. One of my favorite quotes is from the Chinese philosopher Confucius where he says: “I hear and I forget. I see and I remember. I do and I understand.” So, feel free to follow along as I believe you will get some added benefit from it.
First of all, let me introduce myself. My name is Sidi Merzouk and I’m Dev Consultant at Microsoft. In my role here at Microsoft I focus on Open Source and ALM (application life cycle management). You may also know me from my previous blog post Using Azure DevOps Rest API with Nodejs to retrieve project permission.
Here a list of requirements if you’ve decided to follow along:
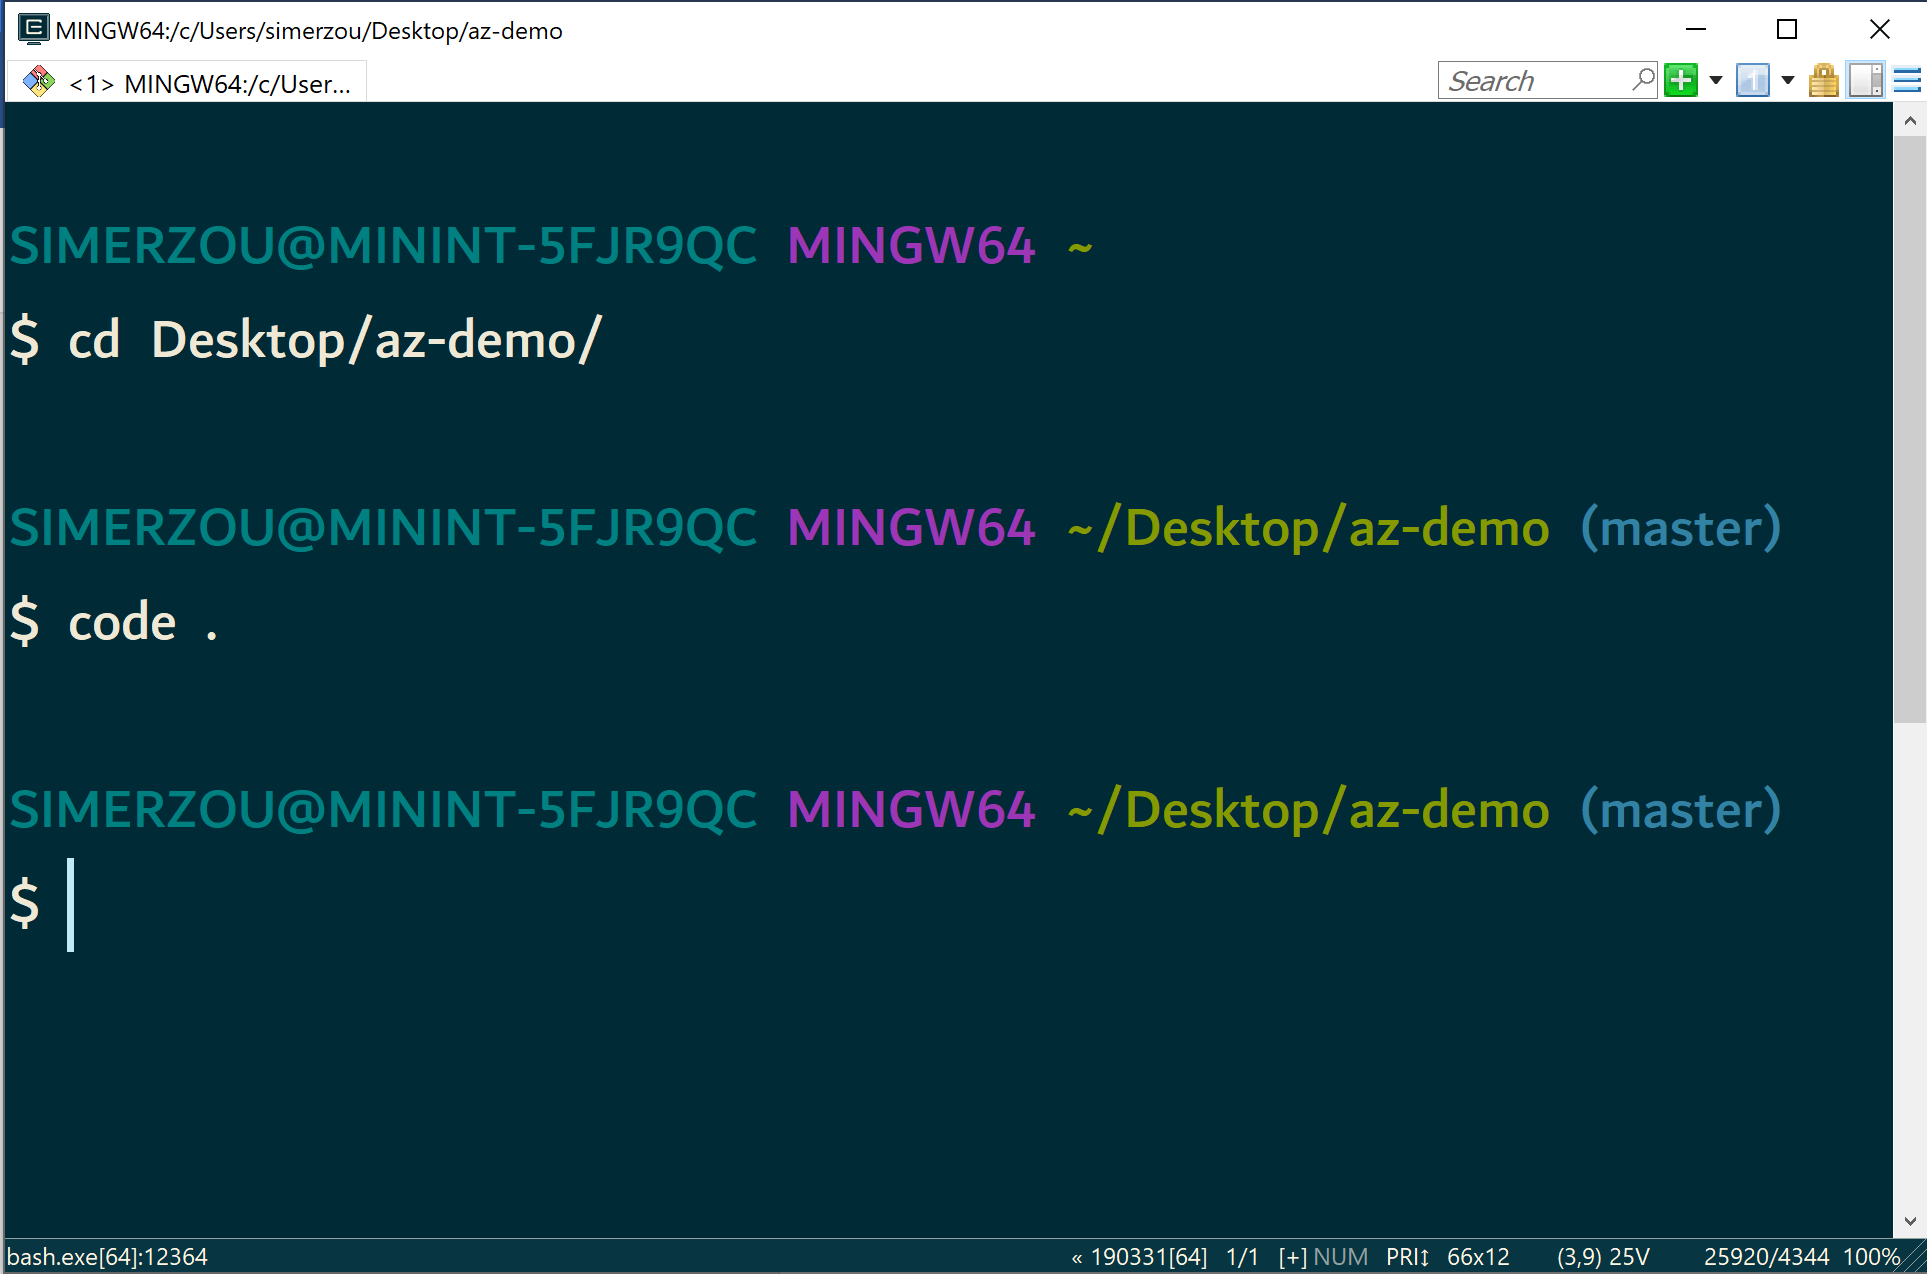
Lets get started by creating a new React project using the CLI (command line interface). From the command prompt (window terminal/terminal/shell…etc) you can navigate to a directory of your choice and run the following command: npx create-react-app az-demo
Once the project gets created, let’s navigate to the project from the command line and open it with Visual Studio Code.
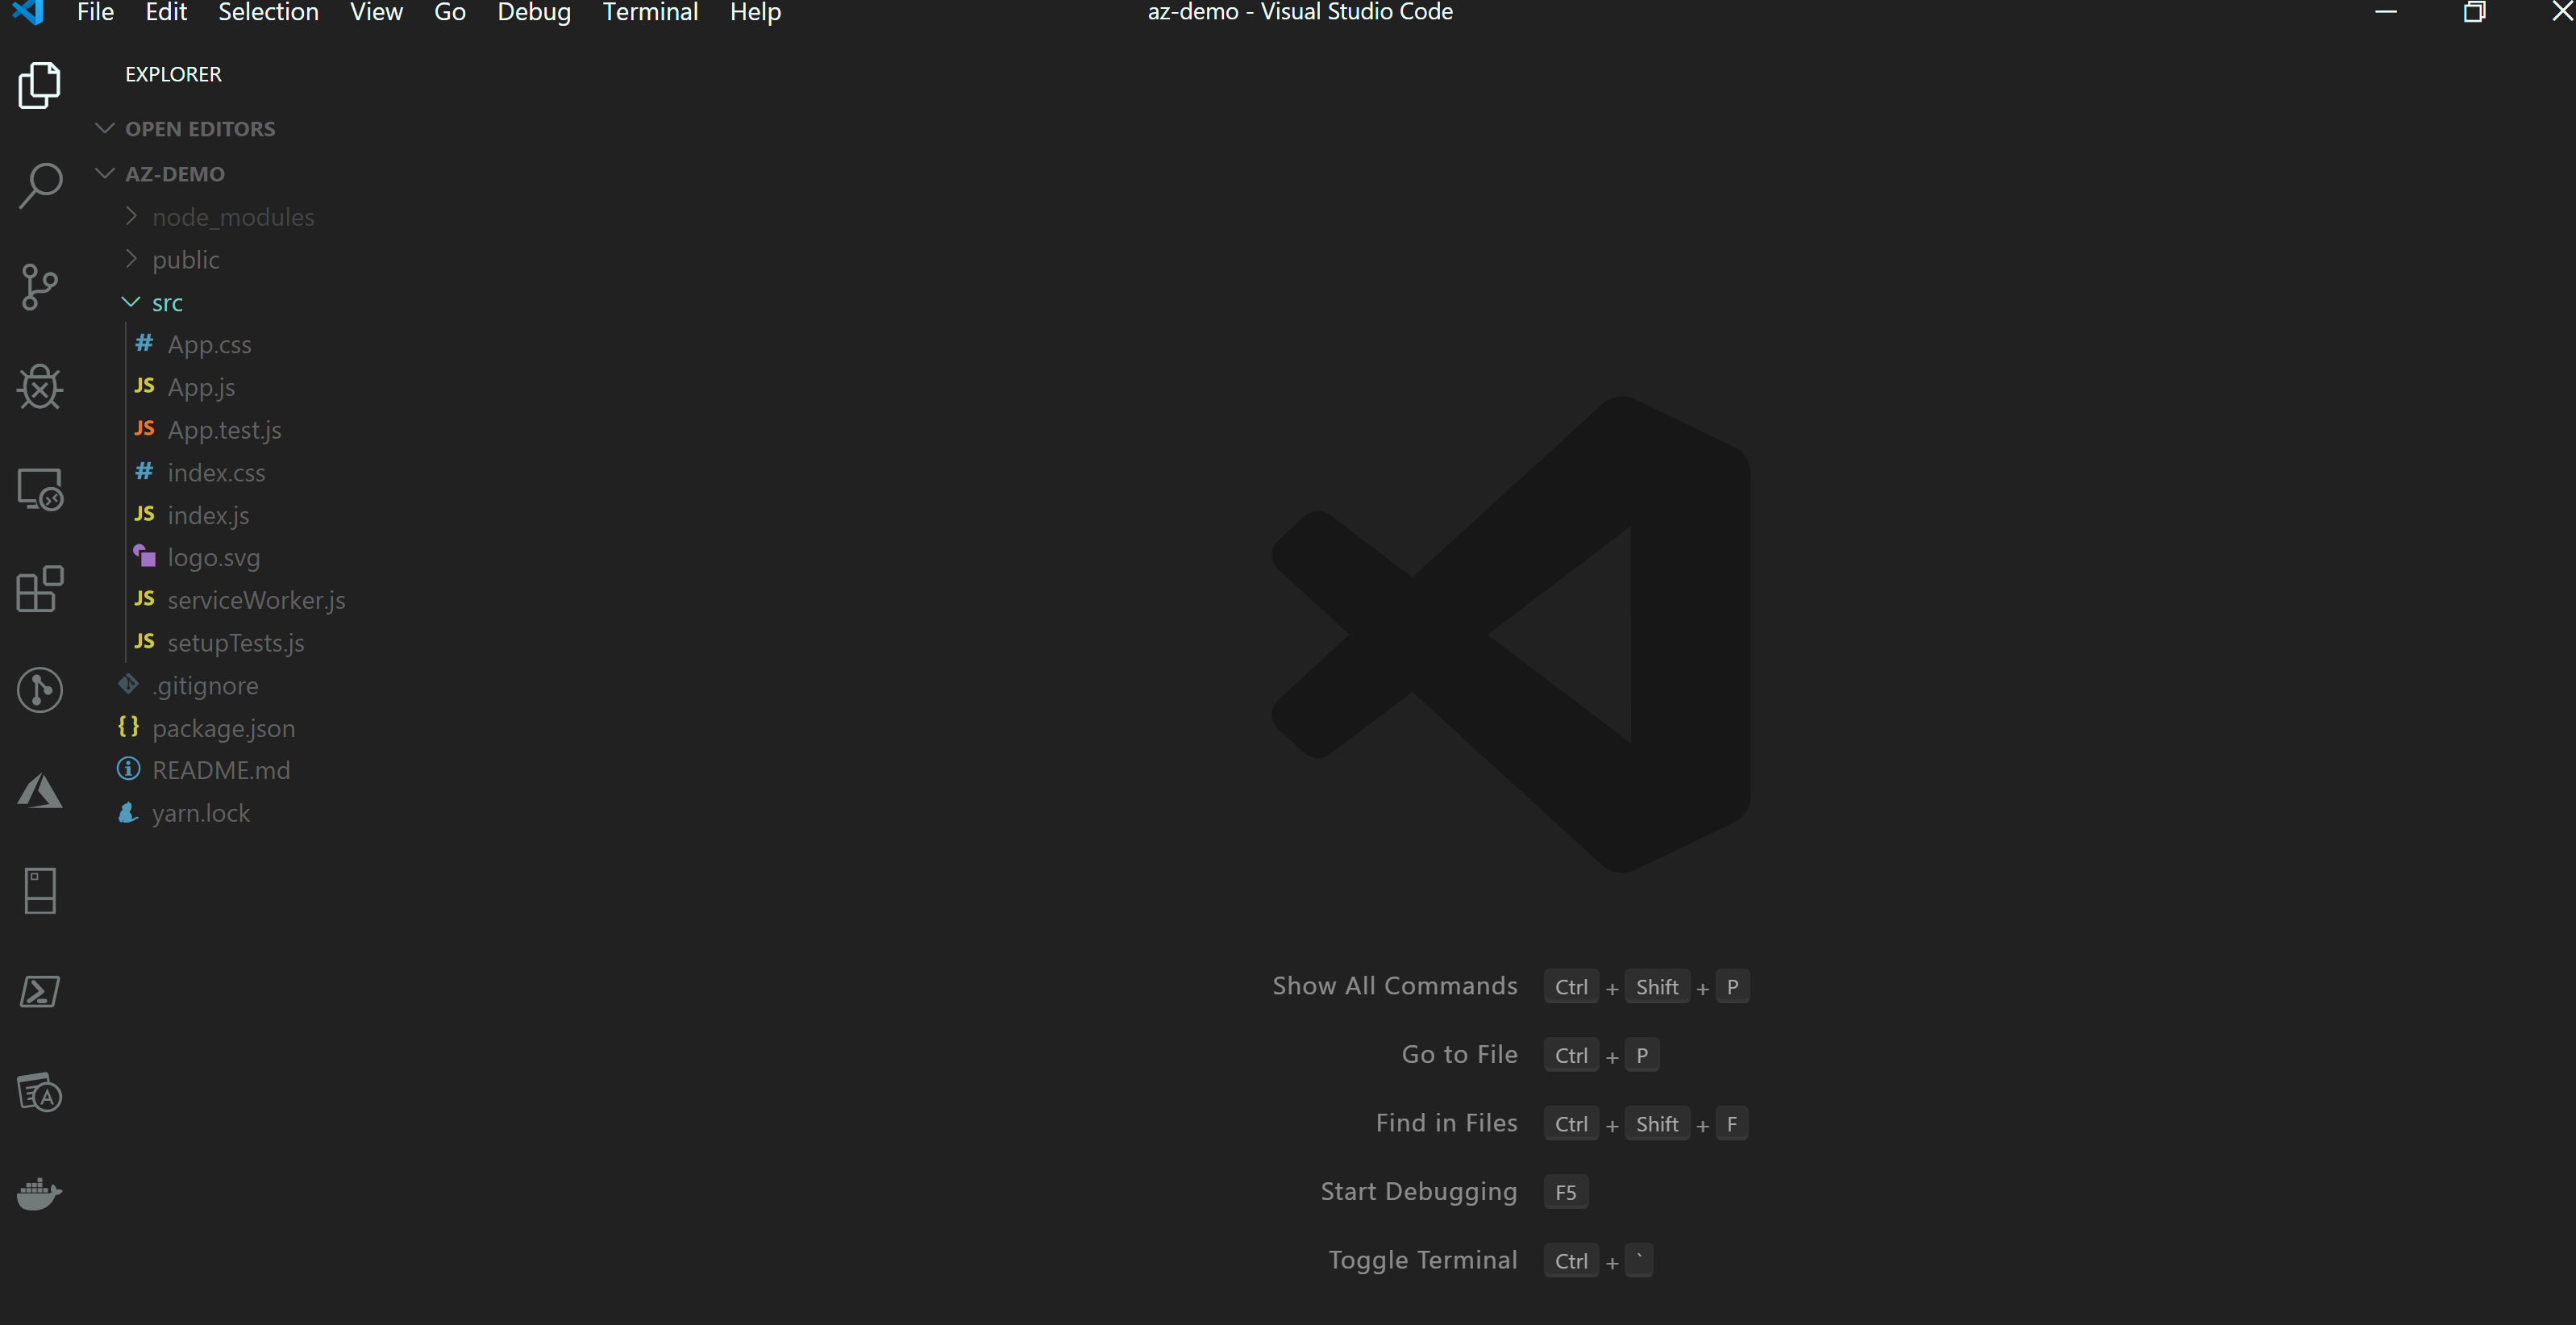
The structure of your project should look something like this:
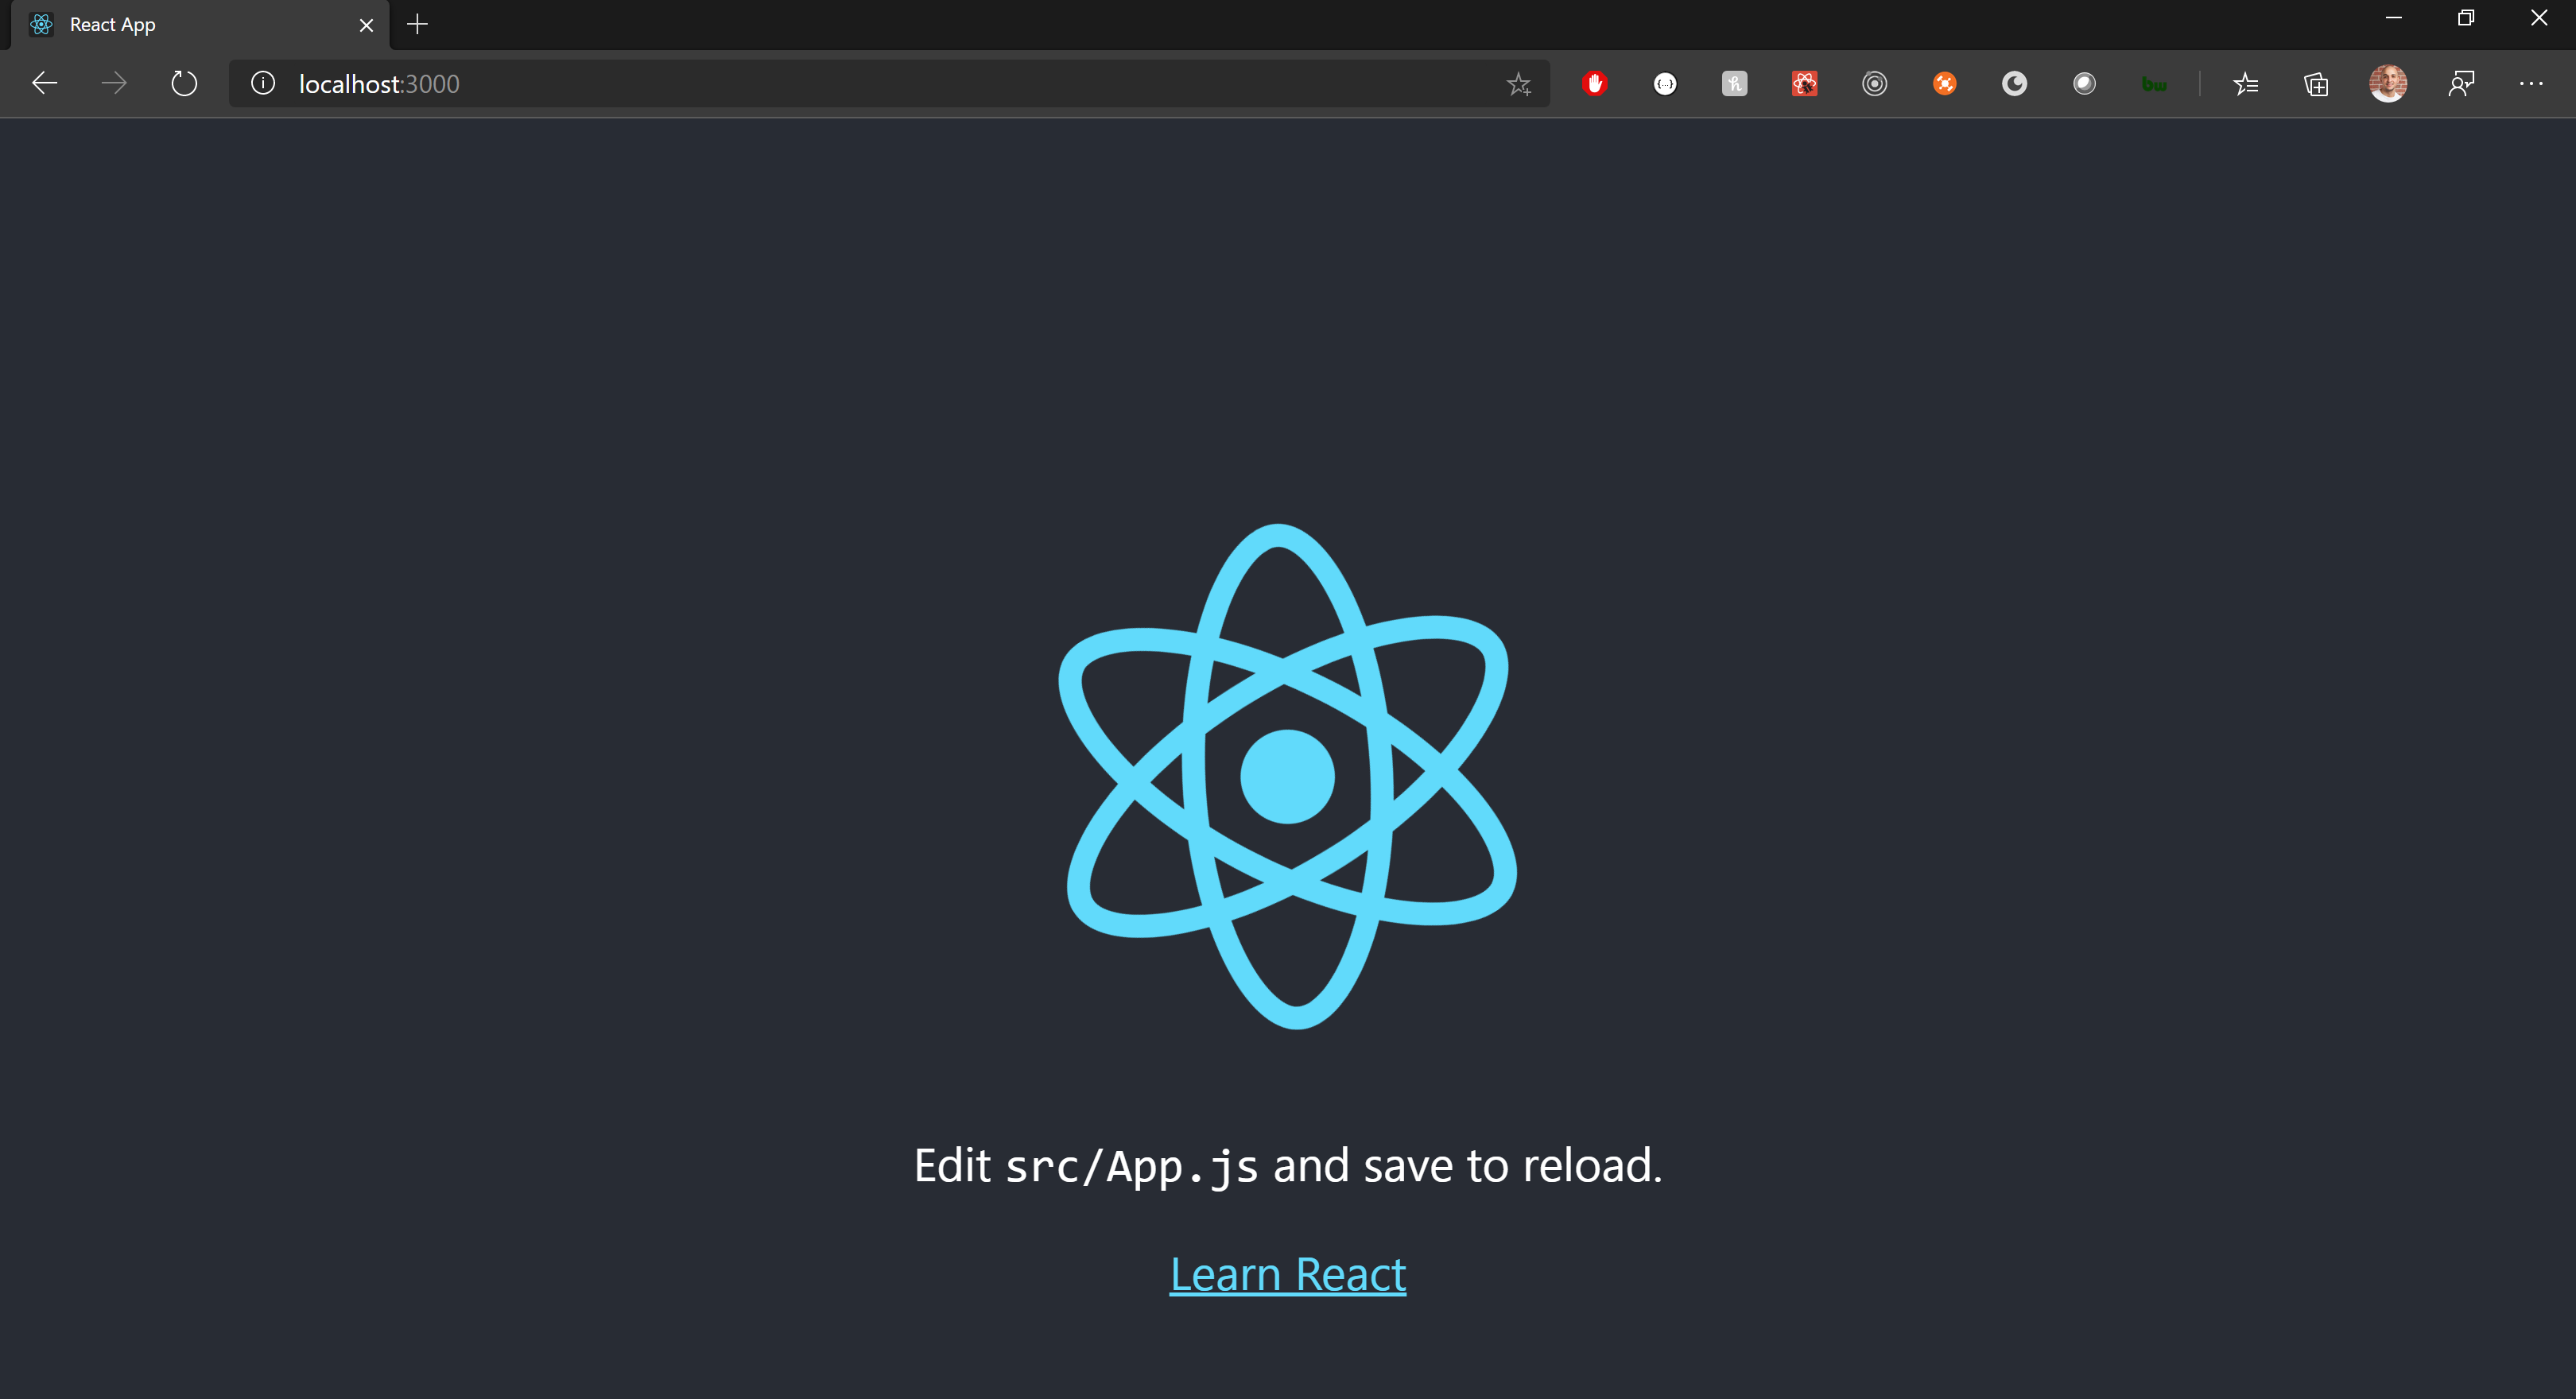
There is a starter script inside our package.json which will build and run our application. From the command line run the following command:
$ npm start
This should’ve run and automatically opened a browser for you with the out of the box react logo.
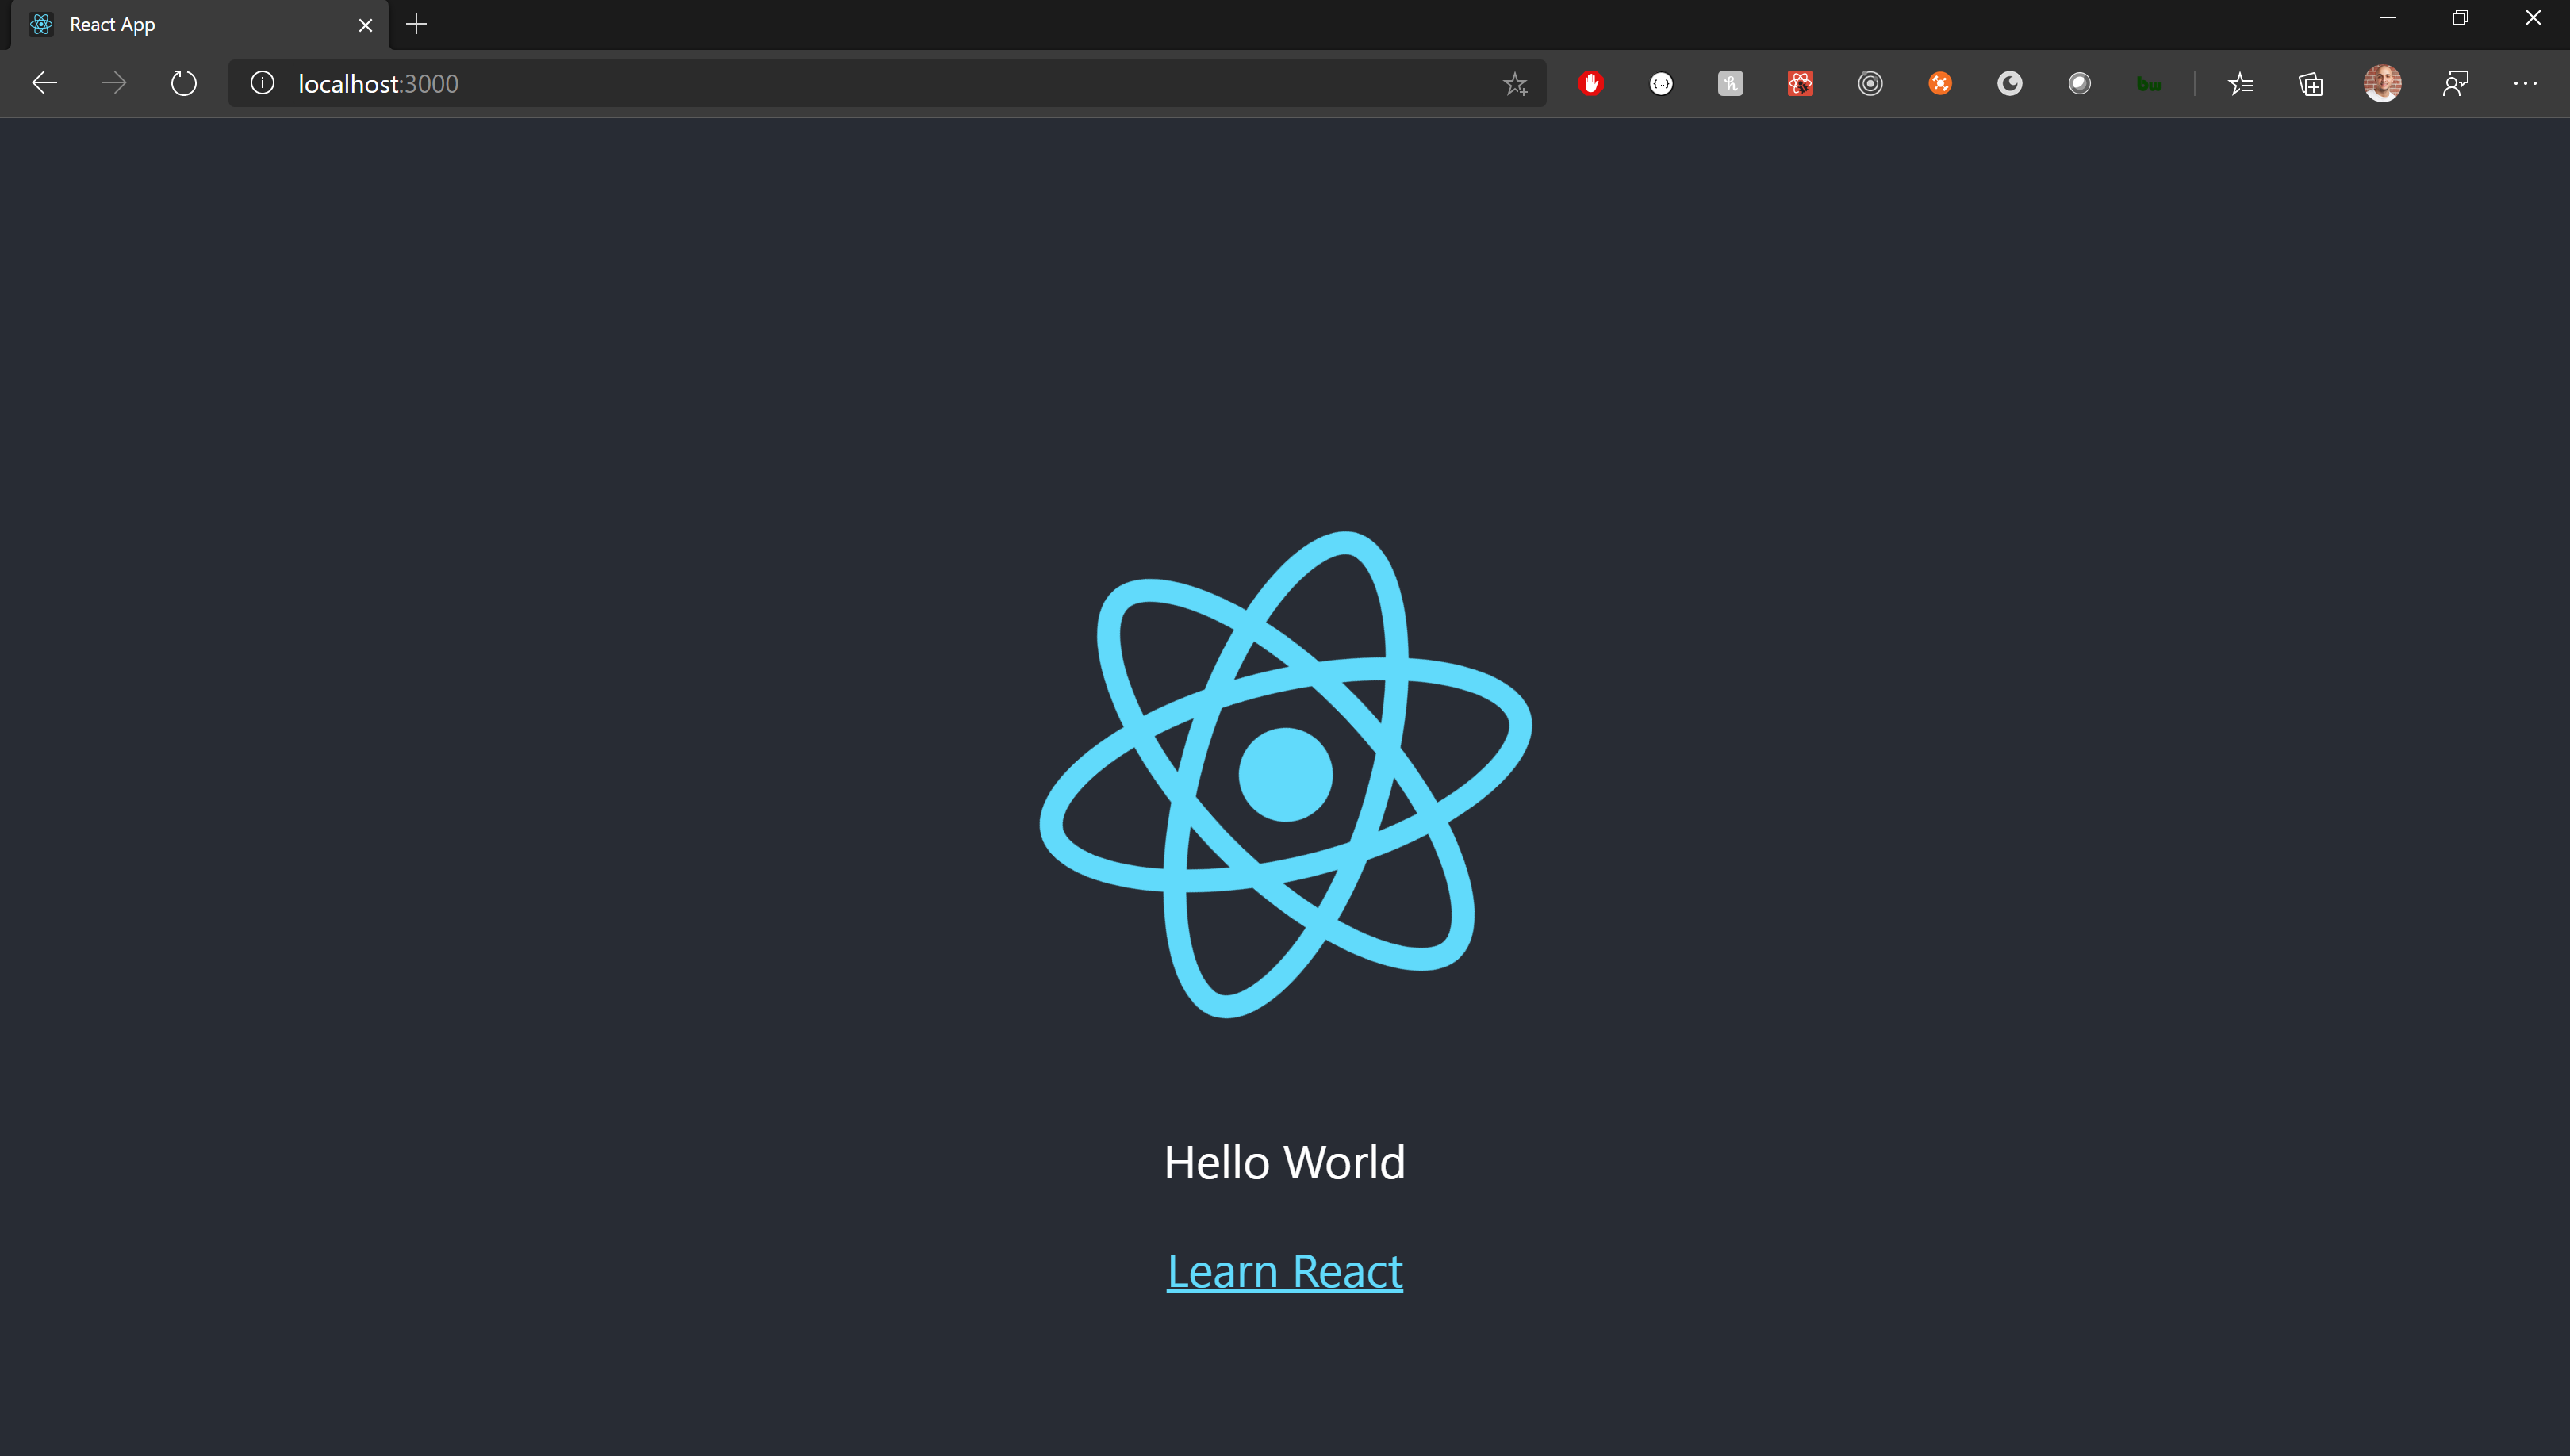
Let’s open App.js file and modify <p> tag to say “Hello World” instead “Edit src/App.js and save to reload.”
Step 2:
Create a project in your Azure DevOps organization. I named it “React Demo” 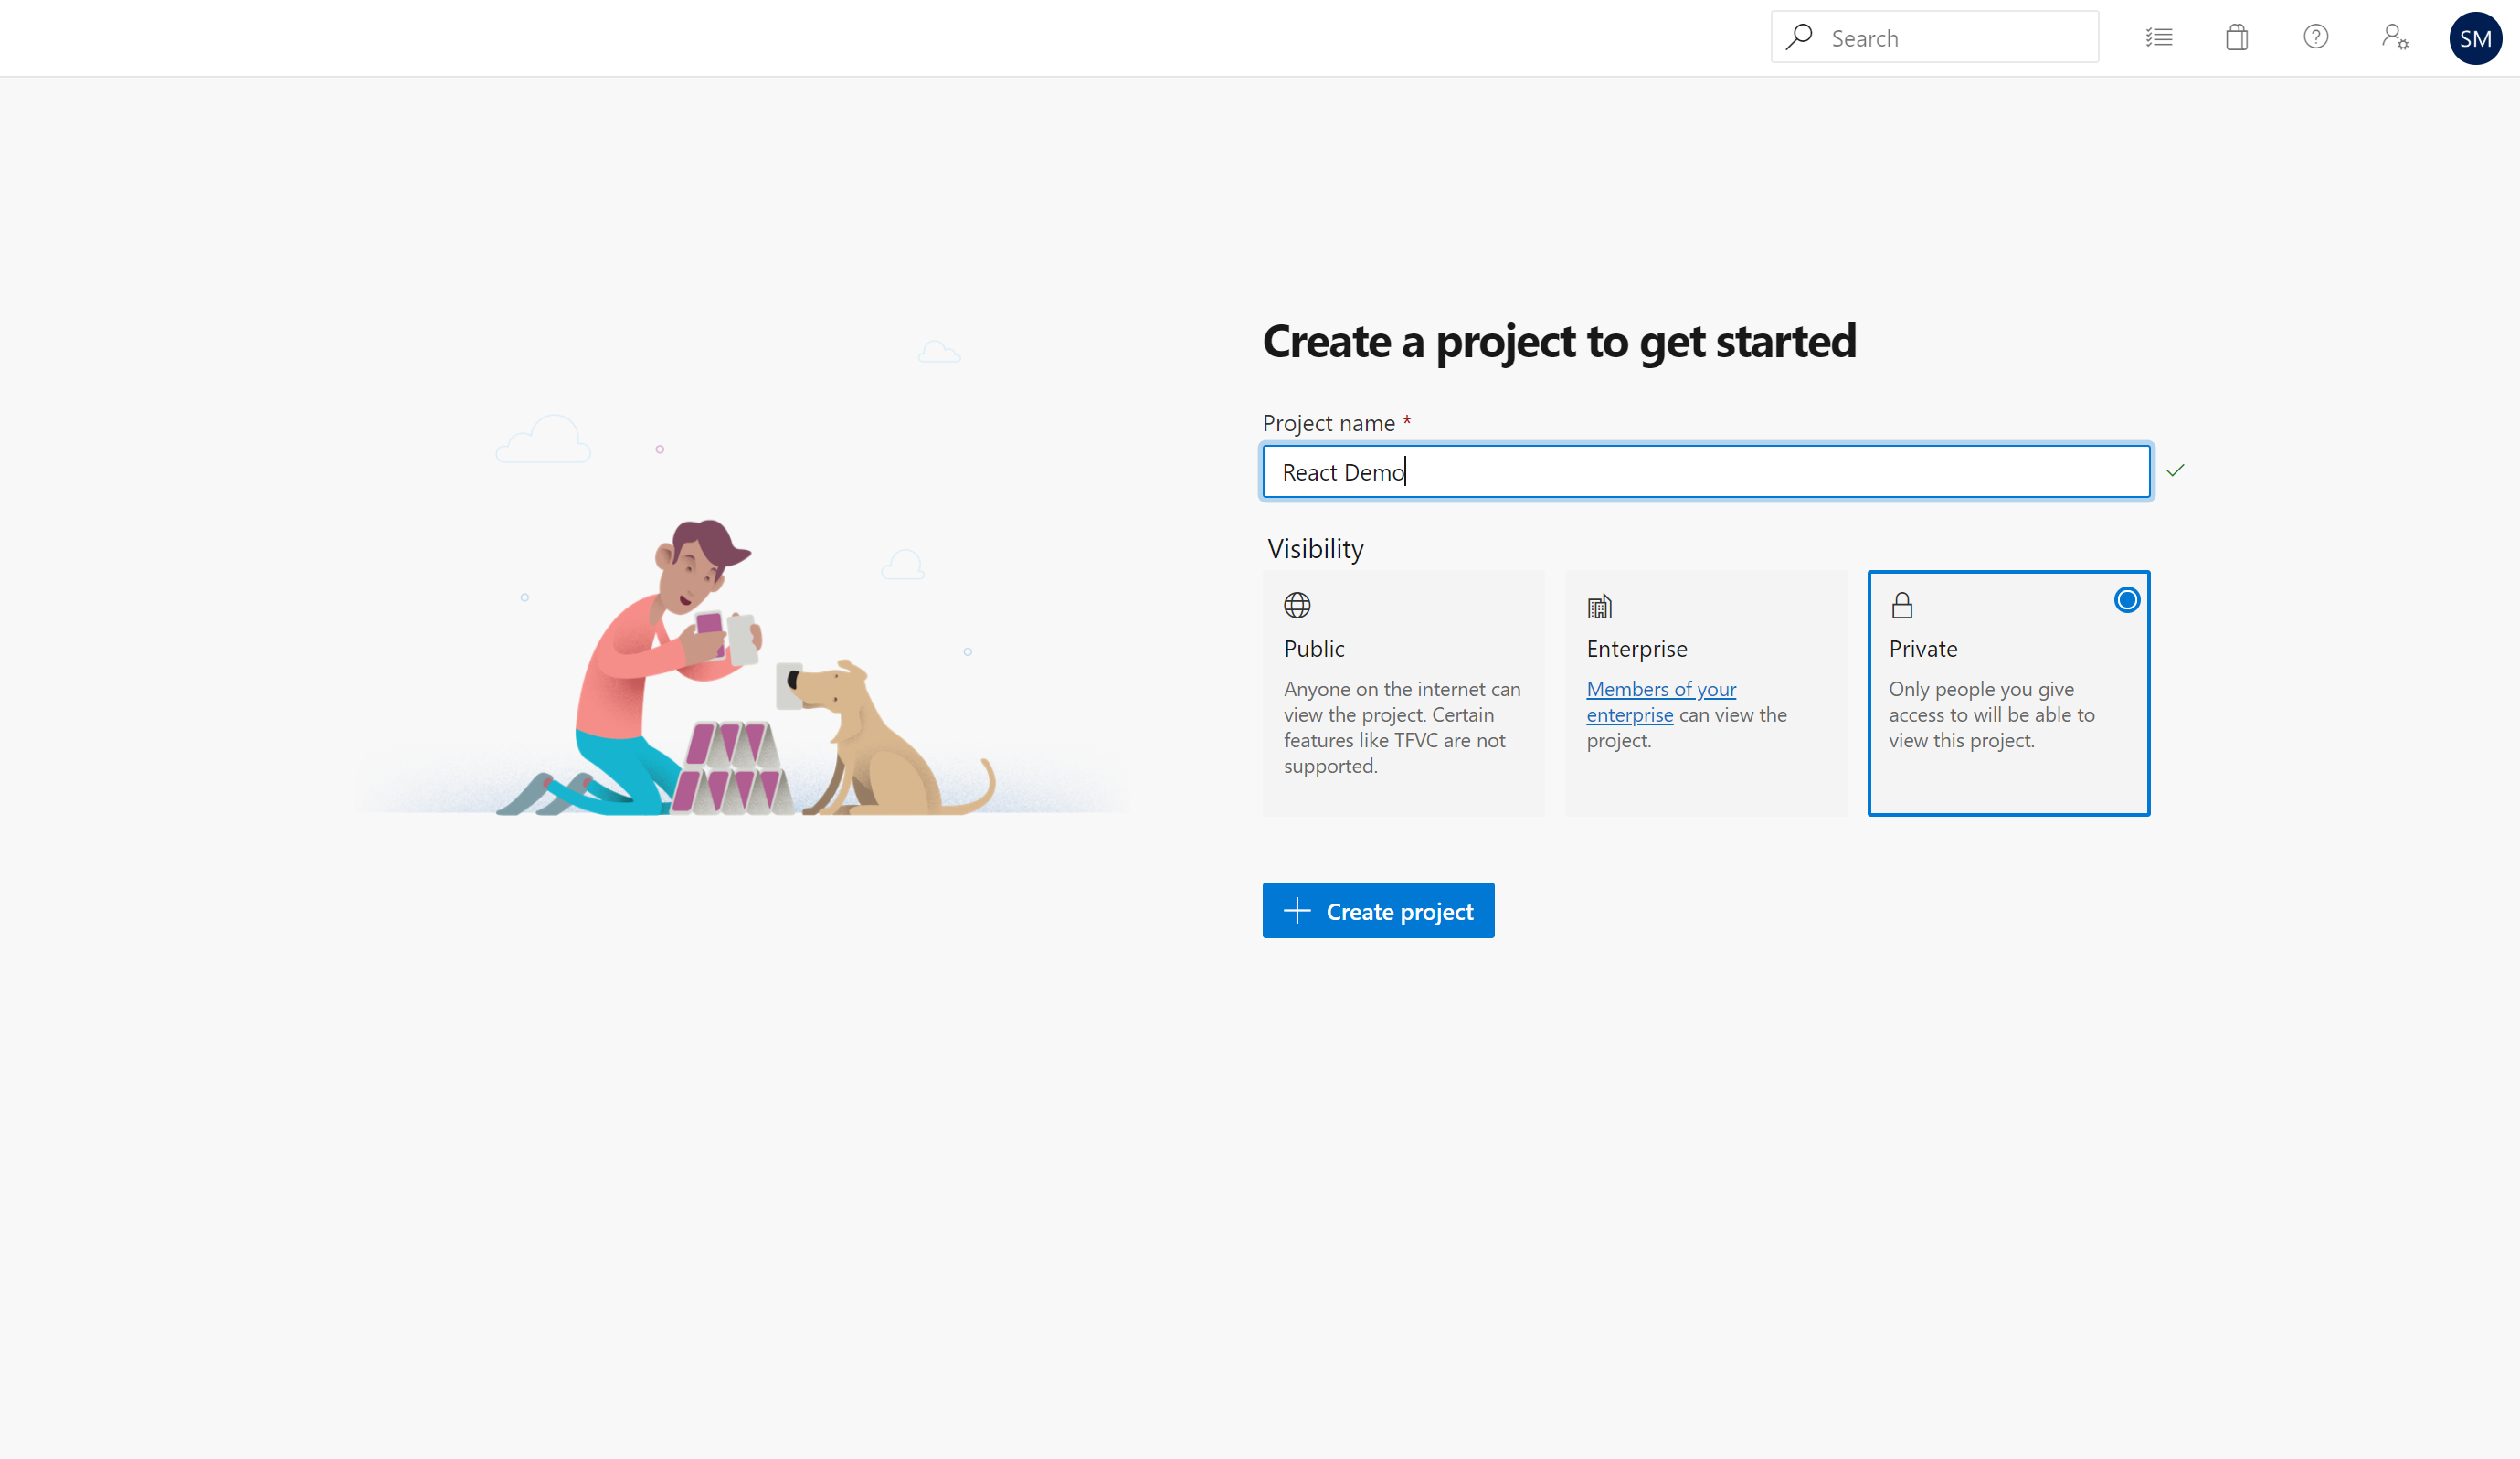
Press on the repo’s tab to navigate to the repo. Once there let’s use the link provided to push our react project.

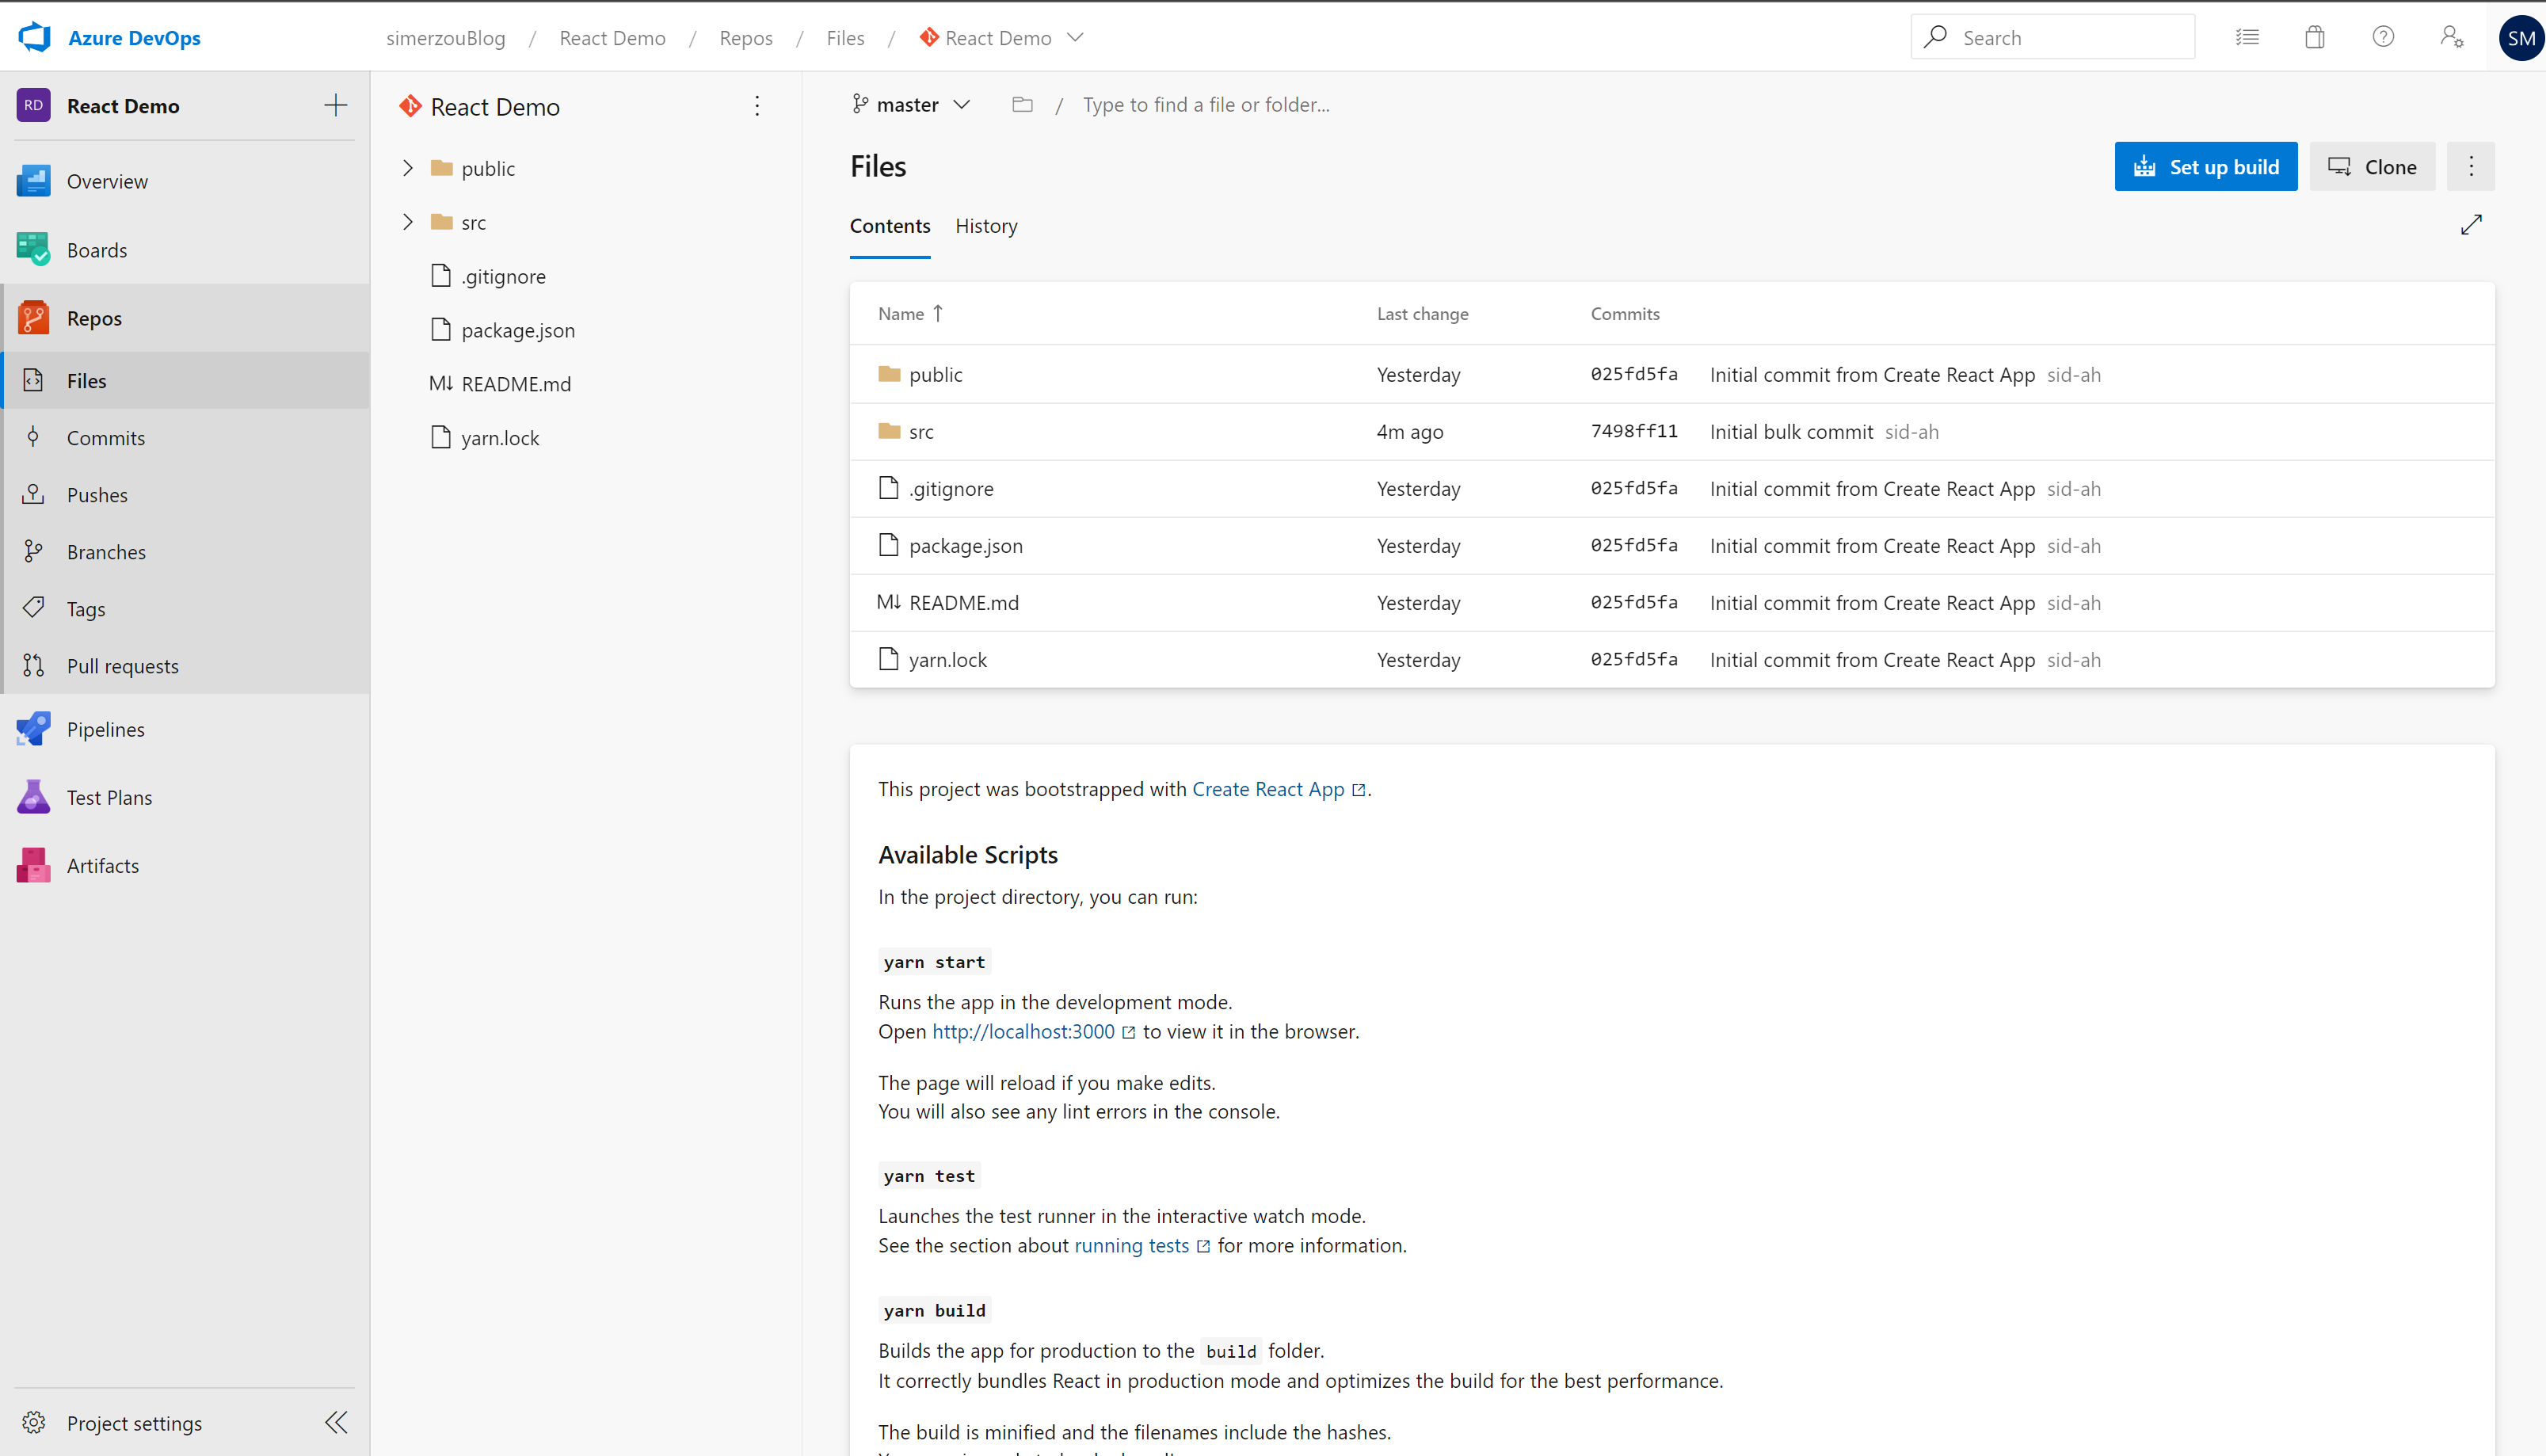
Your repo would look something like this:
Step 3:
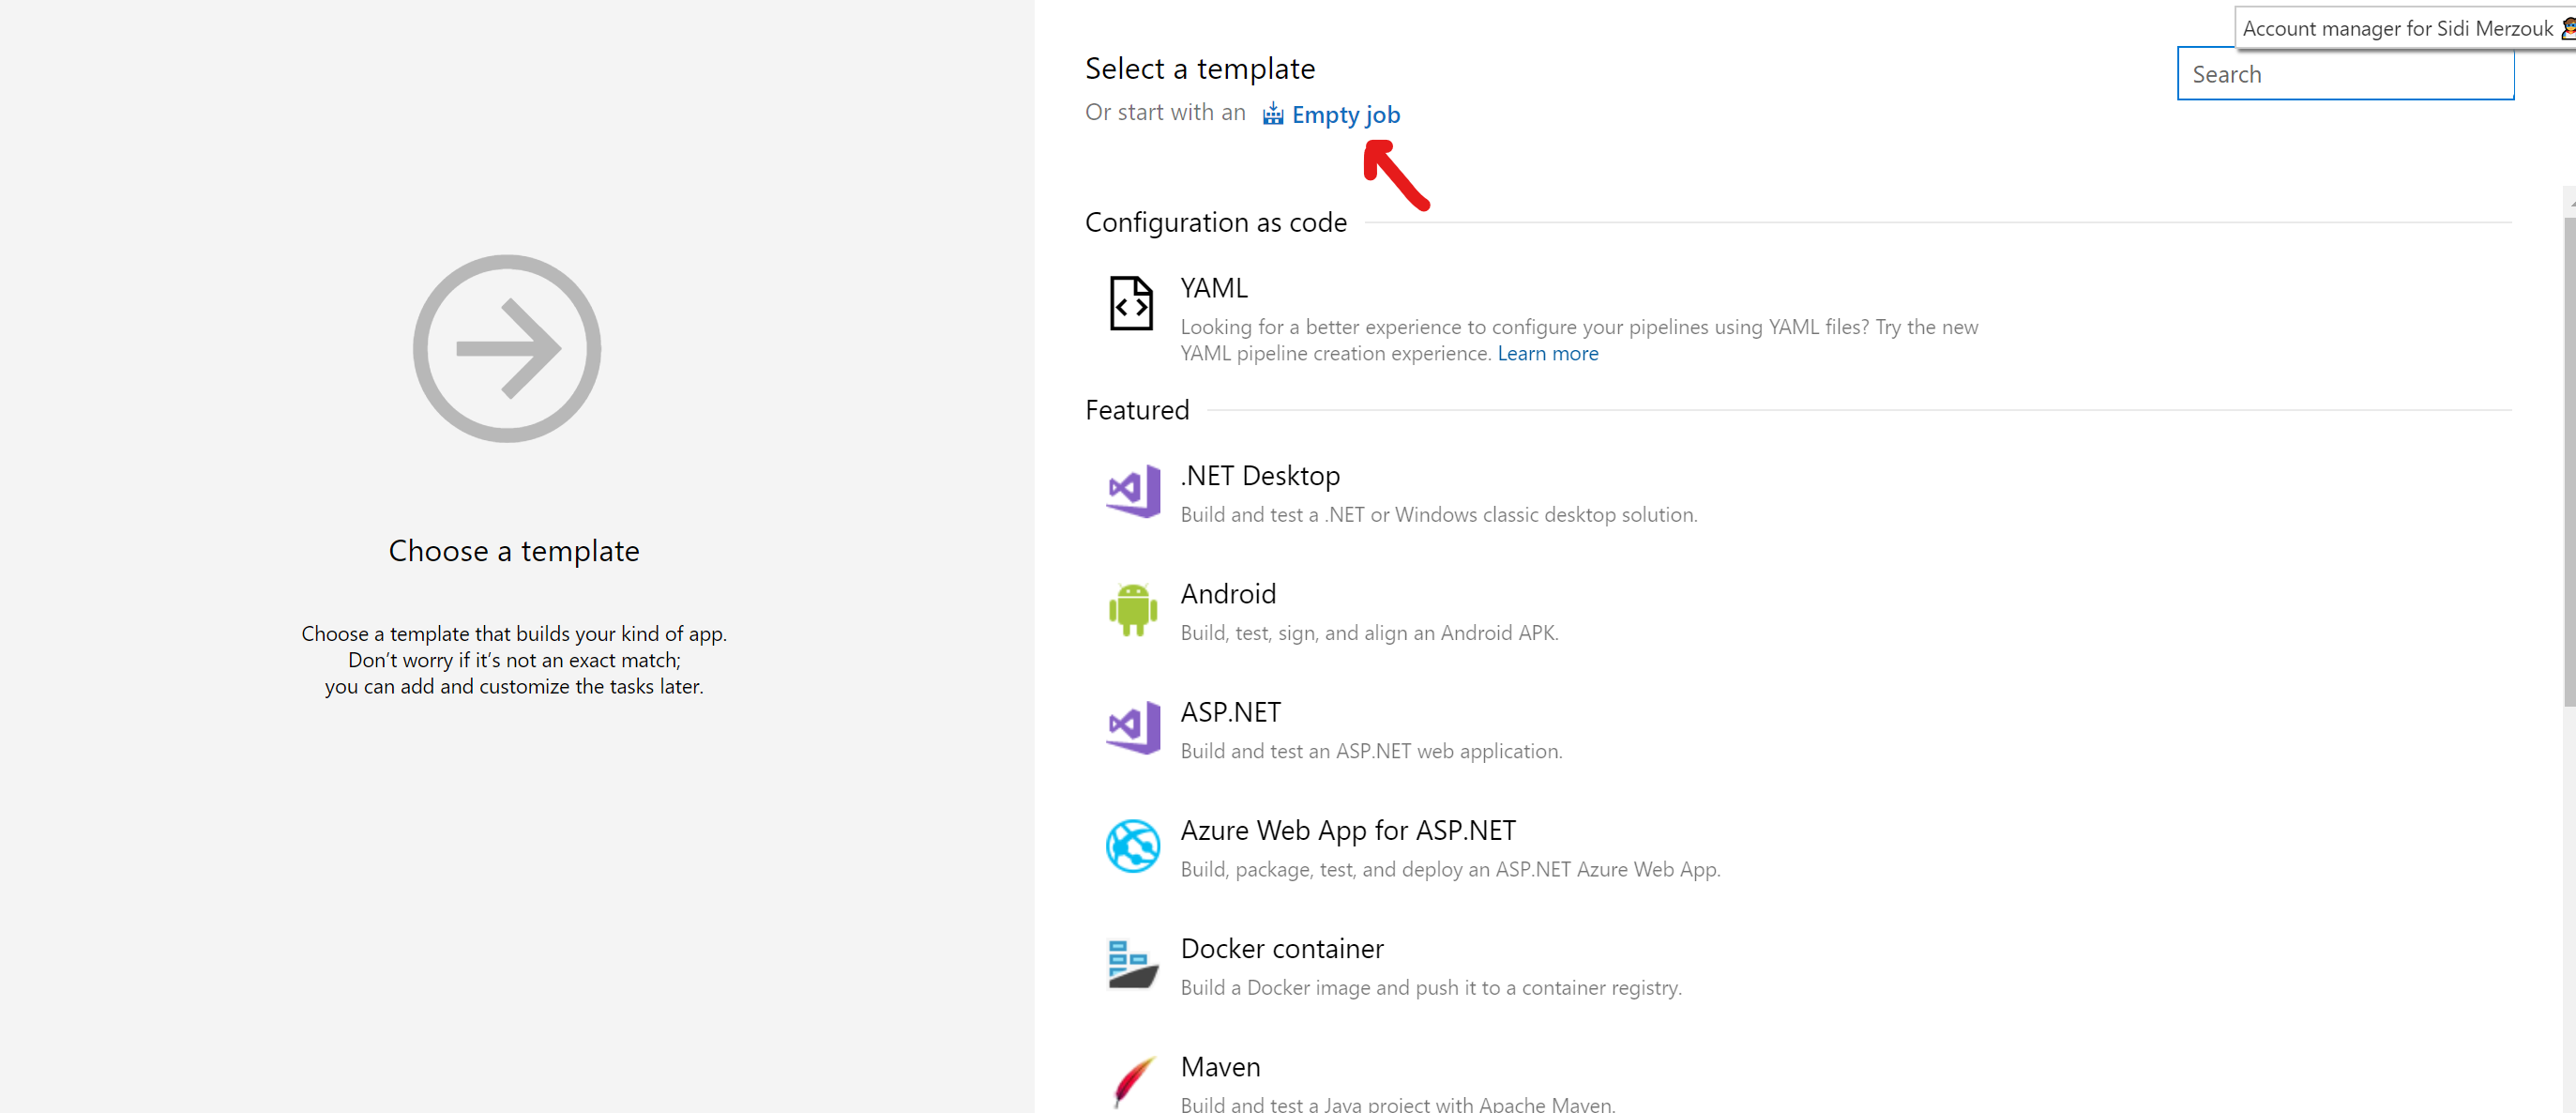
Let’s click on “create a pipeline” and choose “use the classic editor” and choose start with an “empty job”
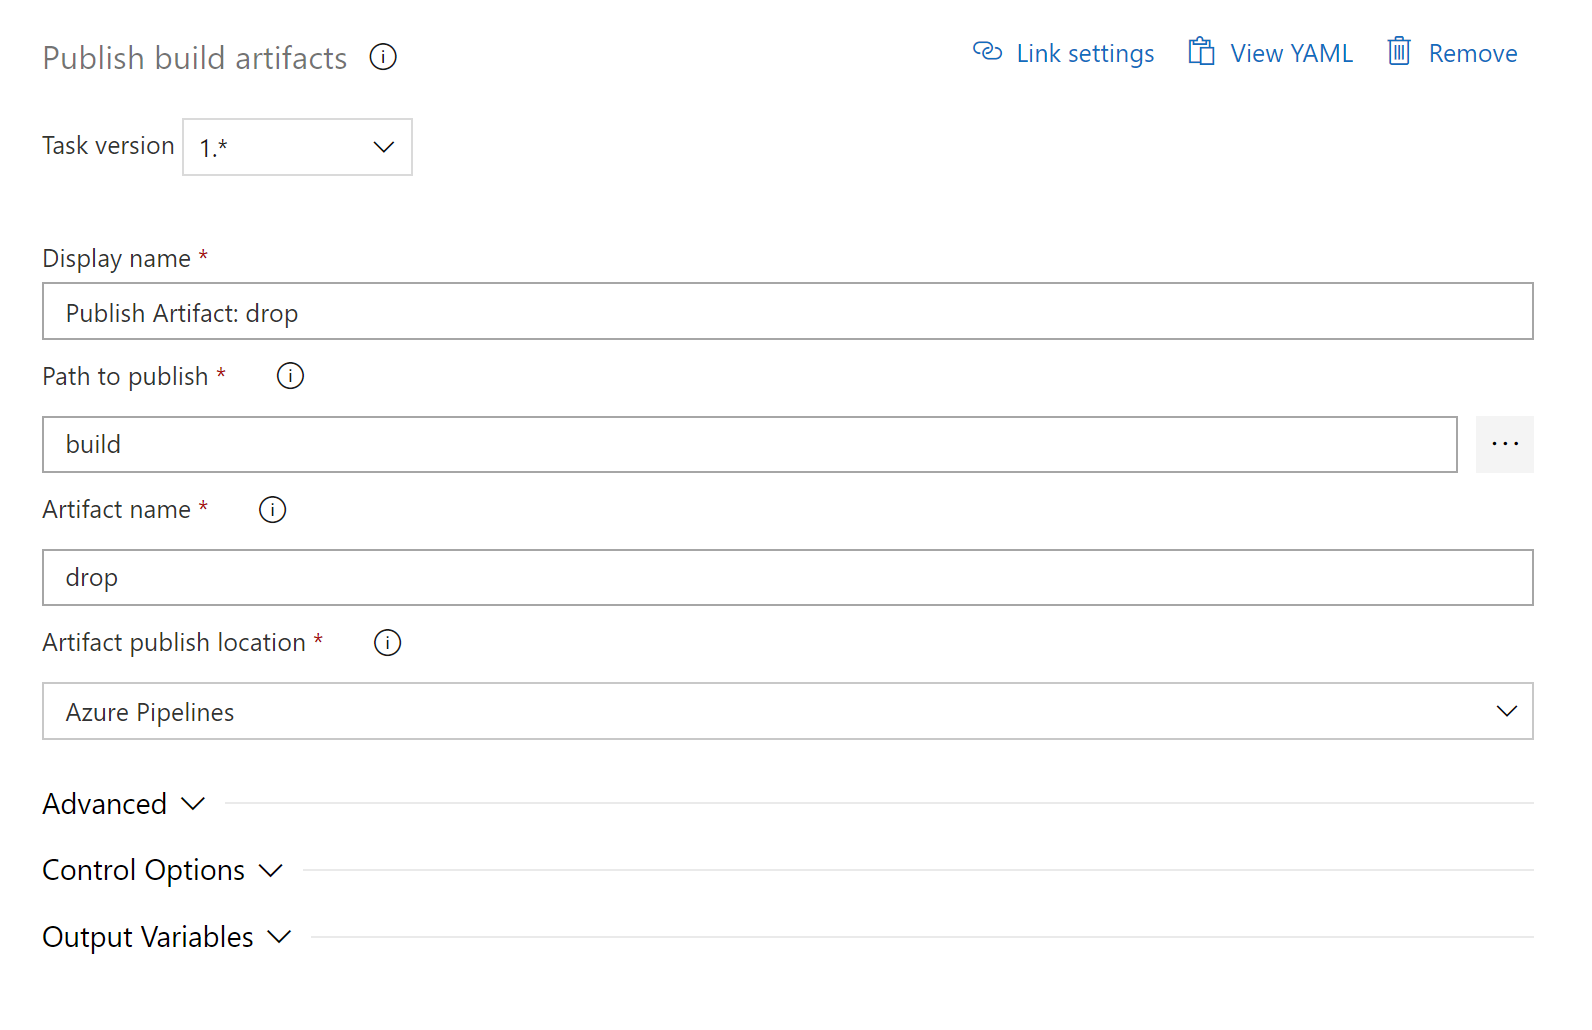
Press on the Agent job 1 and let’s add two npm tasks and publish artifacts task.
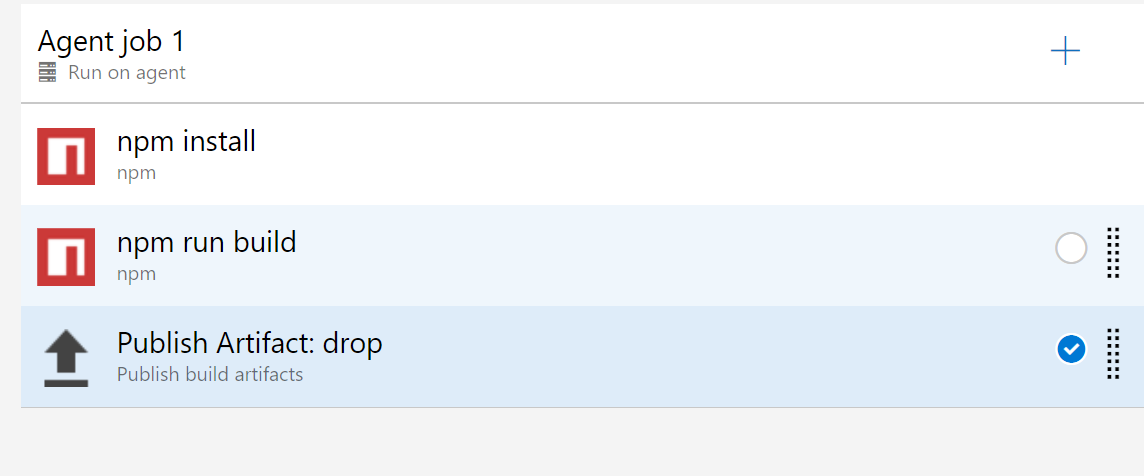
We can leave the npm install task as it is. For the second one let’s rename the task npm run build under command choose from the dropdown “custom” and for the “command and argument” enter “run build”
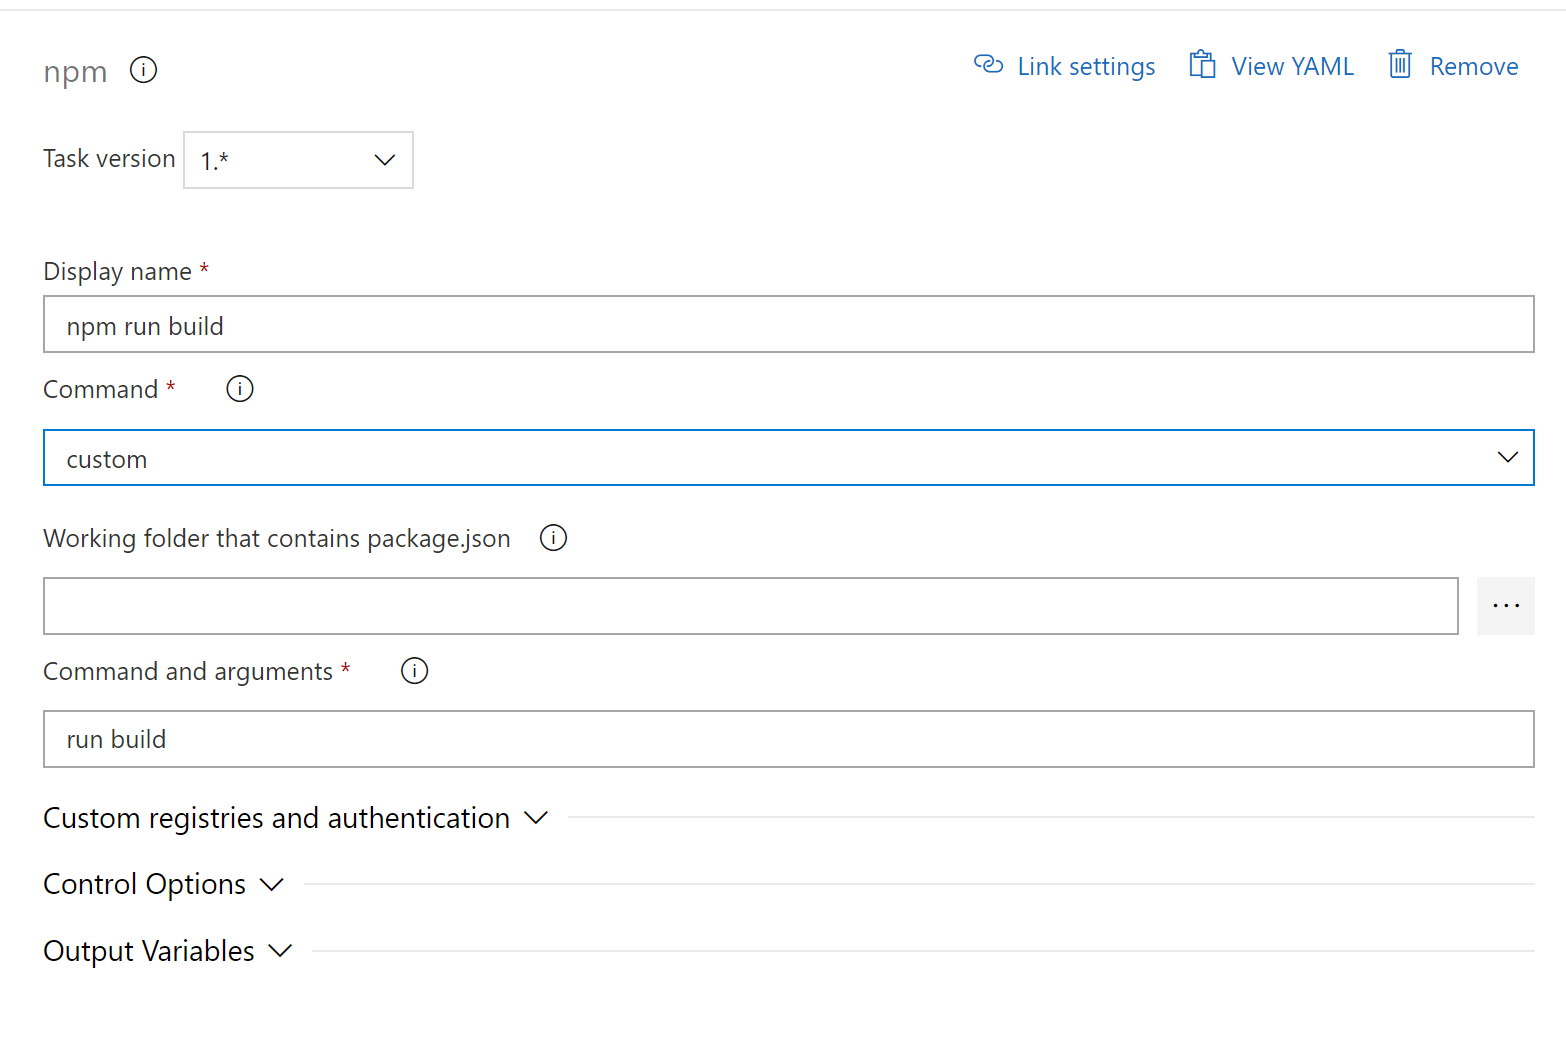
Npm install: will install all the react library (dependencies) it’s the equivalent of a dotnet restore to restore the nuget packages.
Npm run build: will create a build folder that we will then use to publish our application.
Click on the publish task and set the “path to publish” to build, so that our release pipeline we’ll have access to the generated build.
This is the moment of truth if everything worked as expected this should create a build archive at the end, so let’s save and queue to test it out.
Step 4:
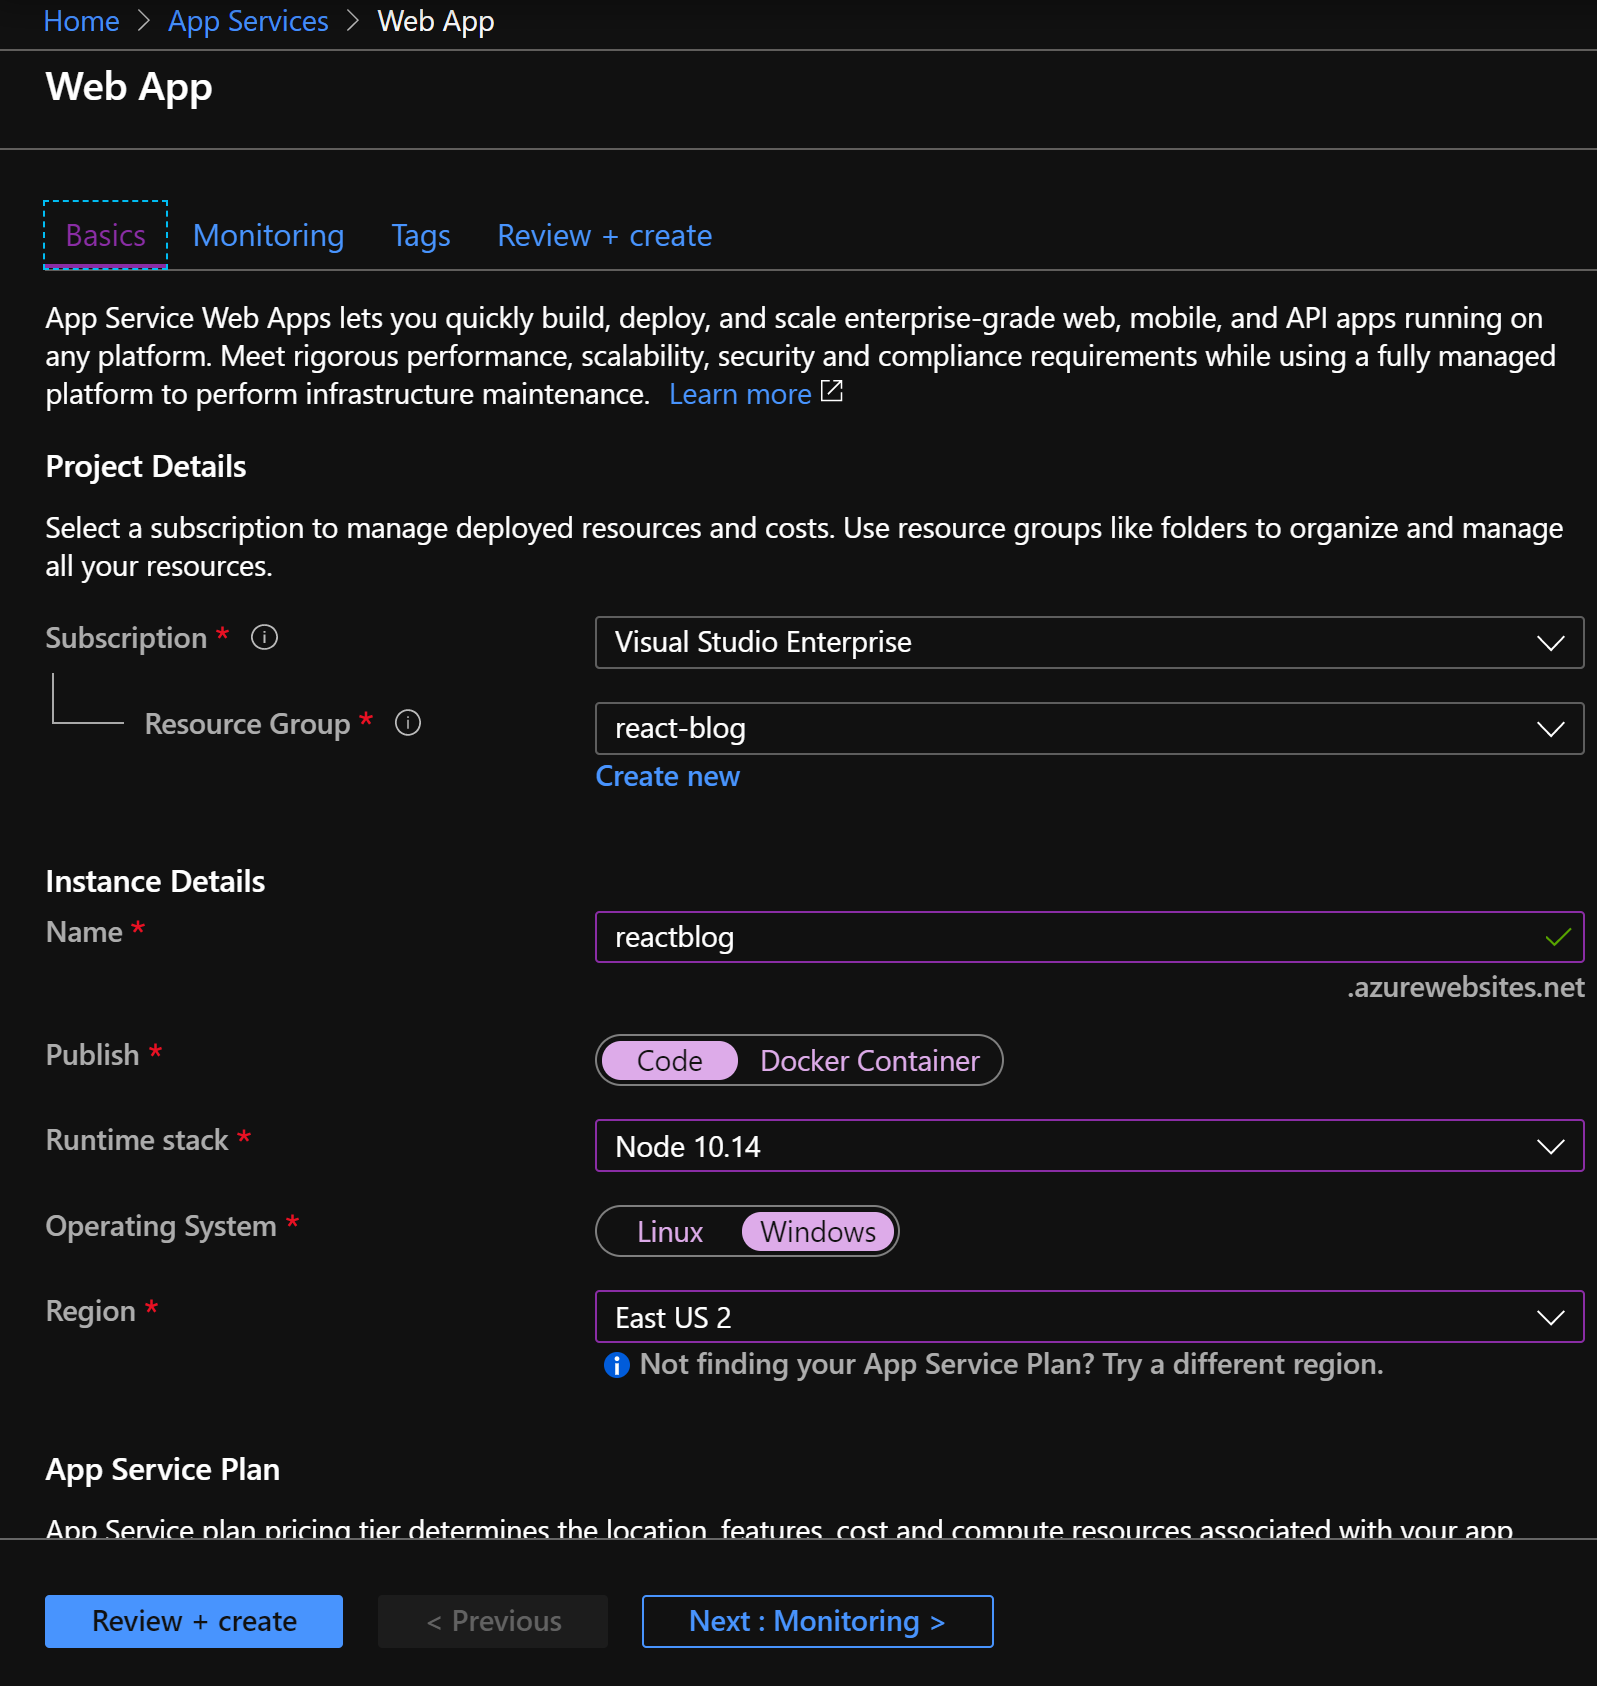
Let’s create an App service to deploy our application to, we can do that from the https://portal.azure.com and by choosing “Web Apps” -> “Create app service”:
- Choose your free subscription
- Create a new resource group (e.g: I named mine “react-blog”)
- Give a unique name for your application
- Choose publish as “Code”
- Choose runtime stack “Node 10.14”
- Choose “Windows” operating system
- Choose the closest region to you (e.g: EastUS2)
- Hit review and create to start provisioning
Step 5:
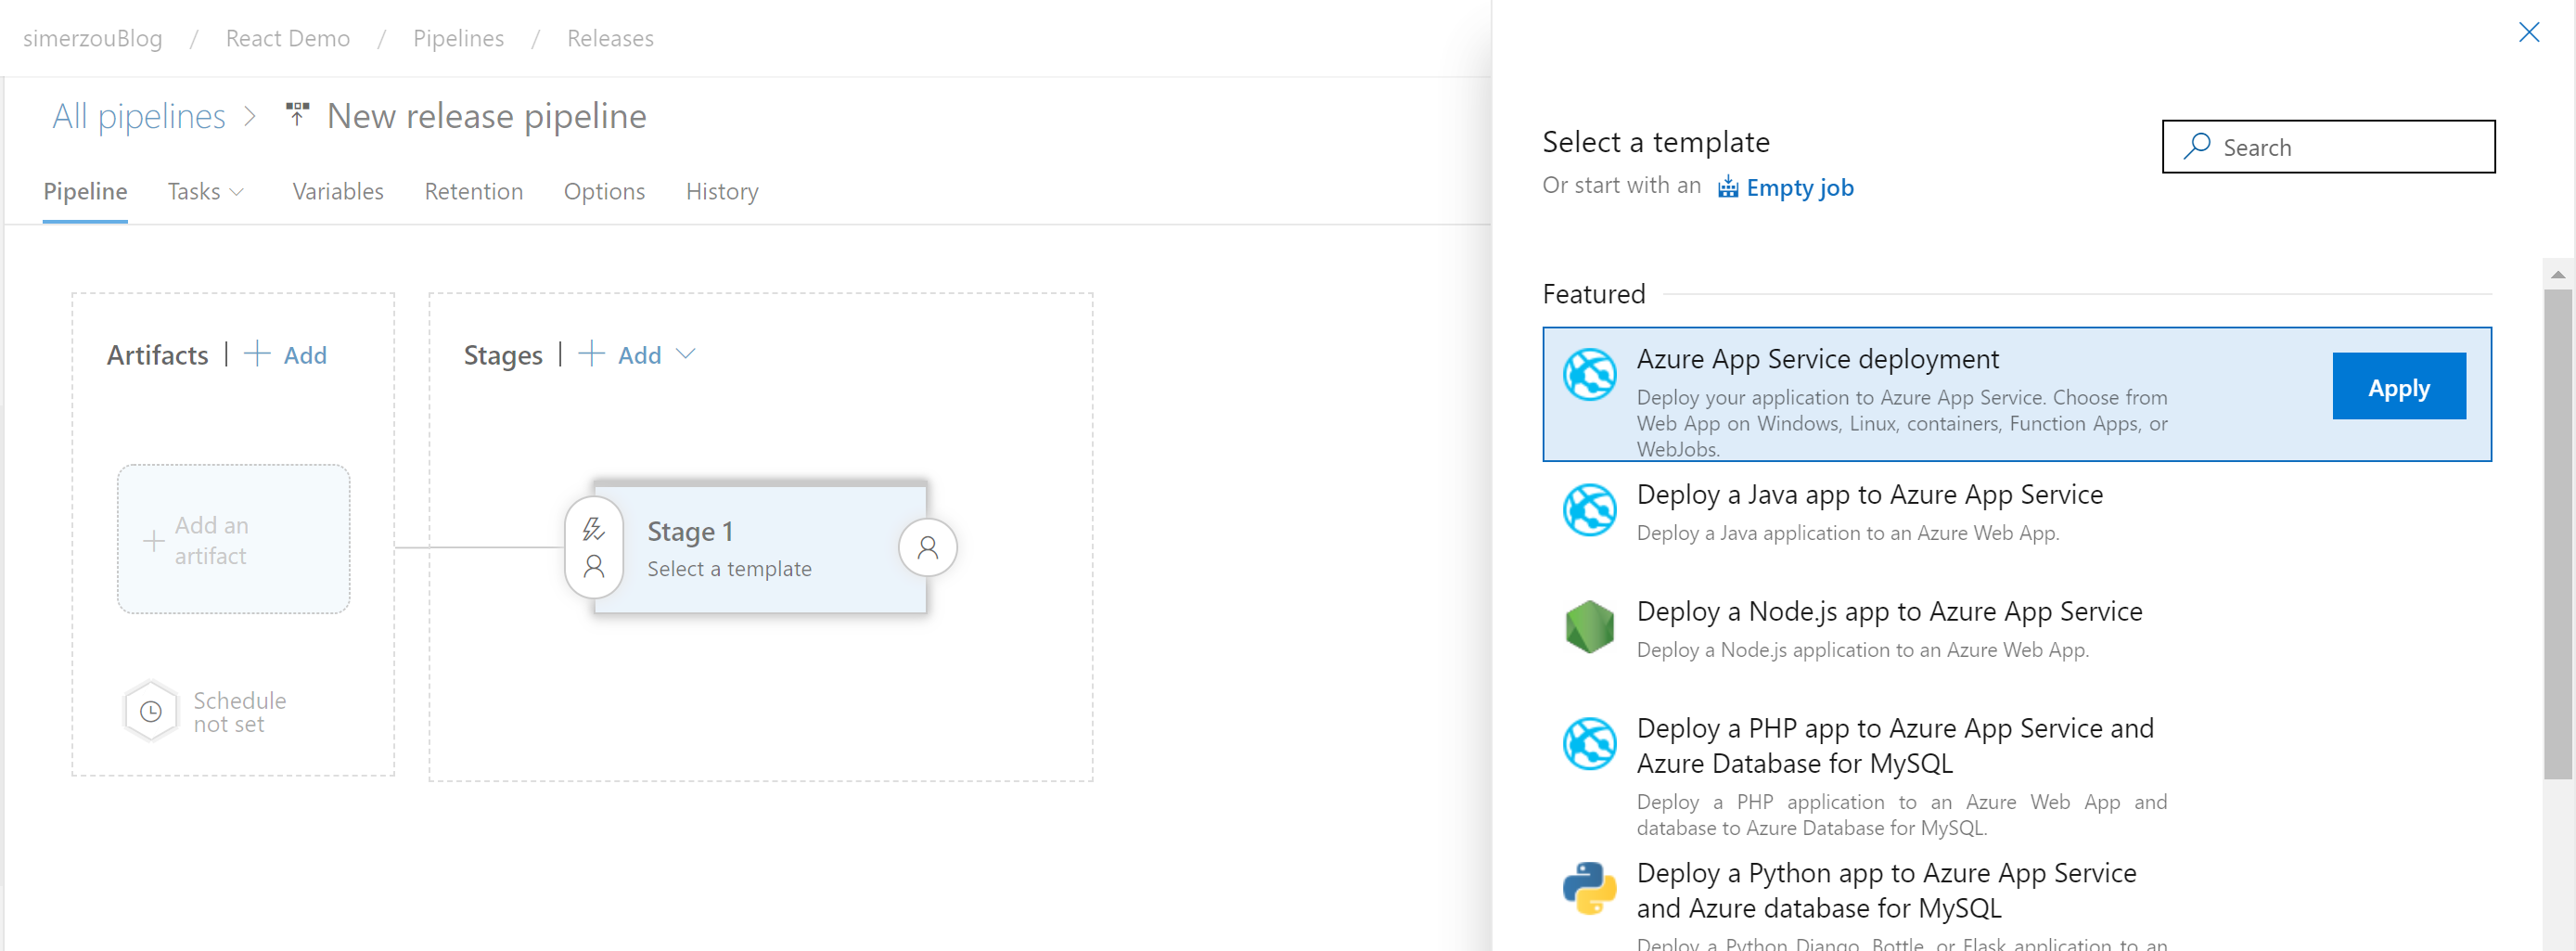
Let’s navigate back to Azure DevOps > Pipelines and create a new release. Once, there choose deploying choose “Azure App Service Deployment.”
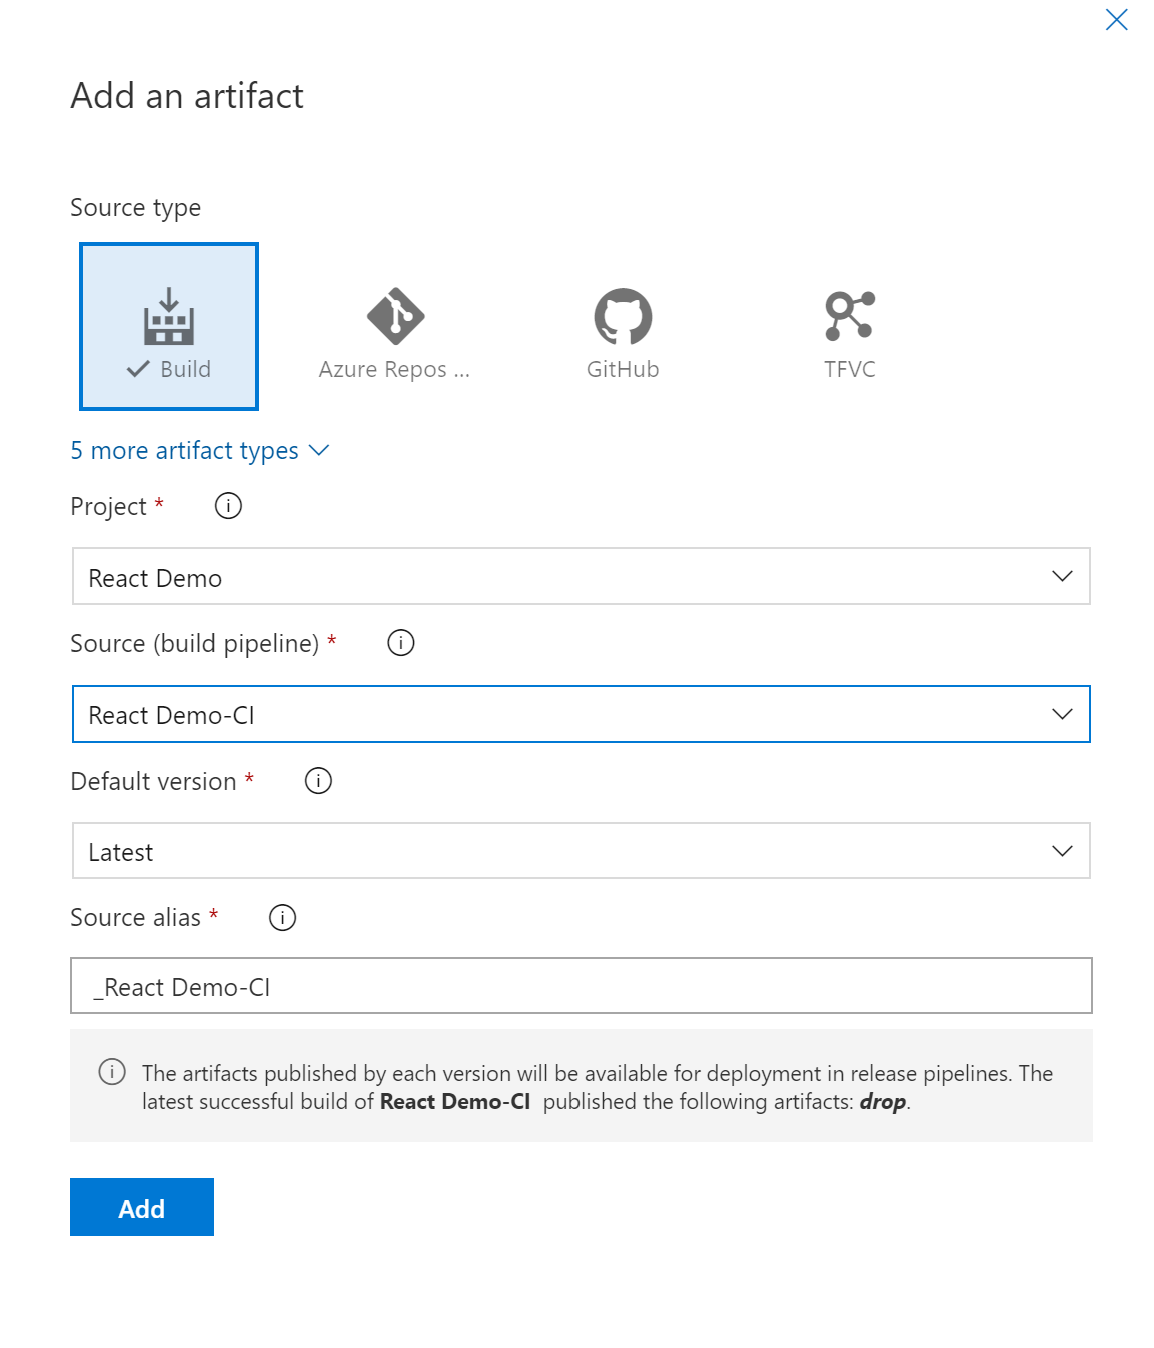
You can then give your stage a name. Mine I named it “Production” and let’s press on “add an artifact”, and choose your pipeline and the artifact that was generate when you ran the pipeline.
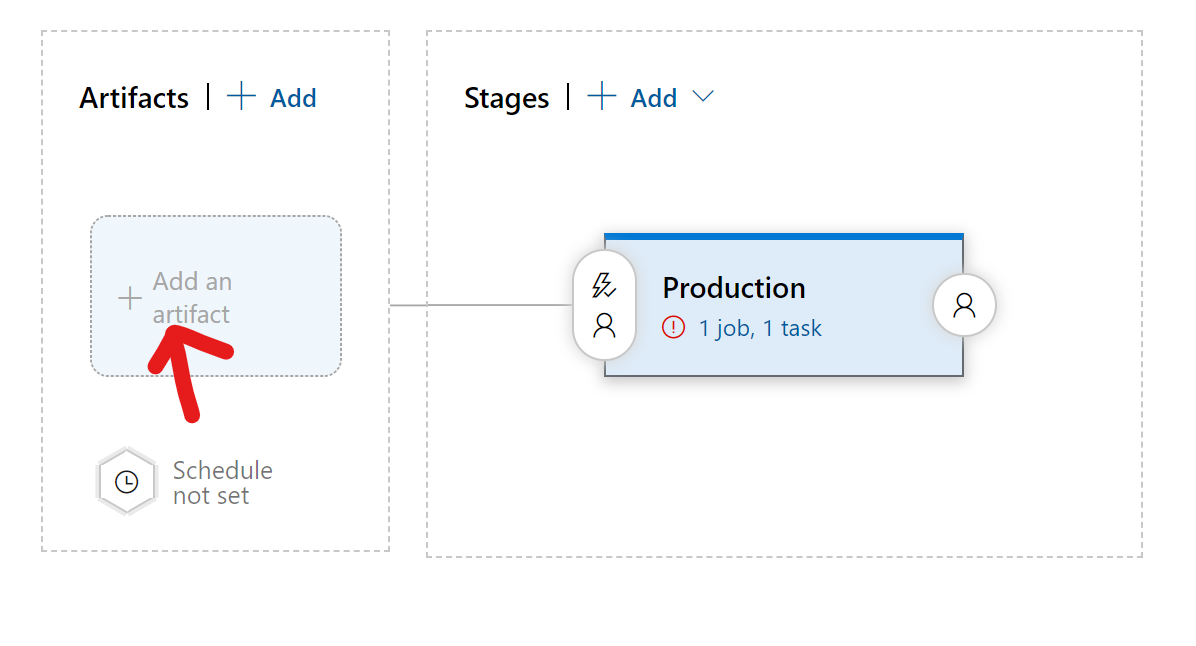
Once set you can press the button “Add” to add the artifact.
Now, click on the “1 job, 1 task” under your stage and select the “Deploy Azure App Service” task. You will see some red underline saying setting is required that’s because we need to setup our service connection. So, let’s go ahead and press on manage which will open up a new tab for us. 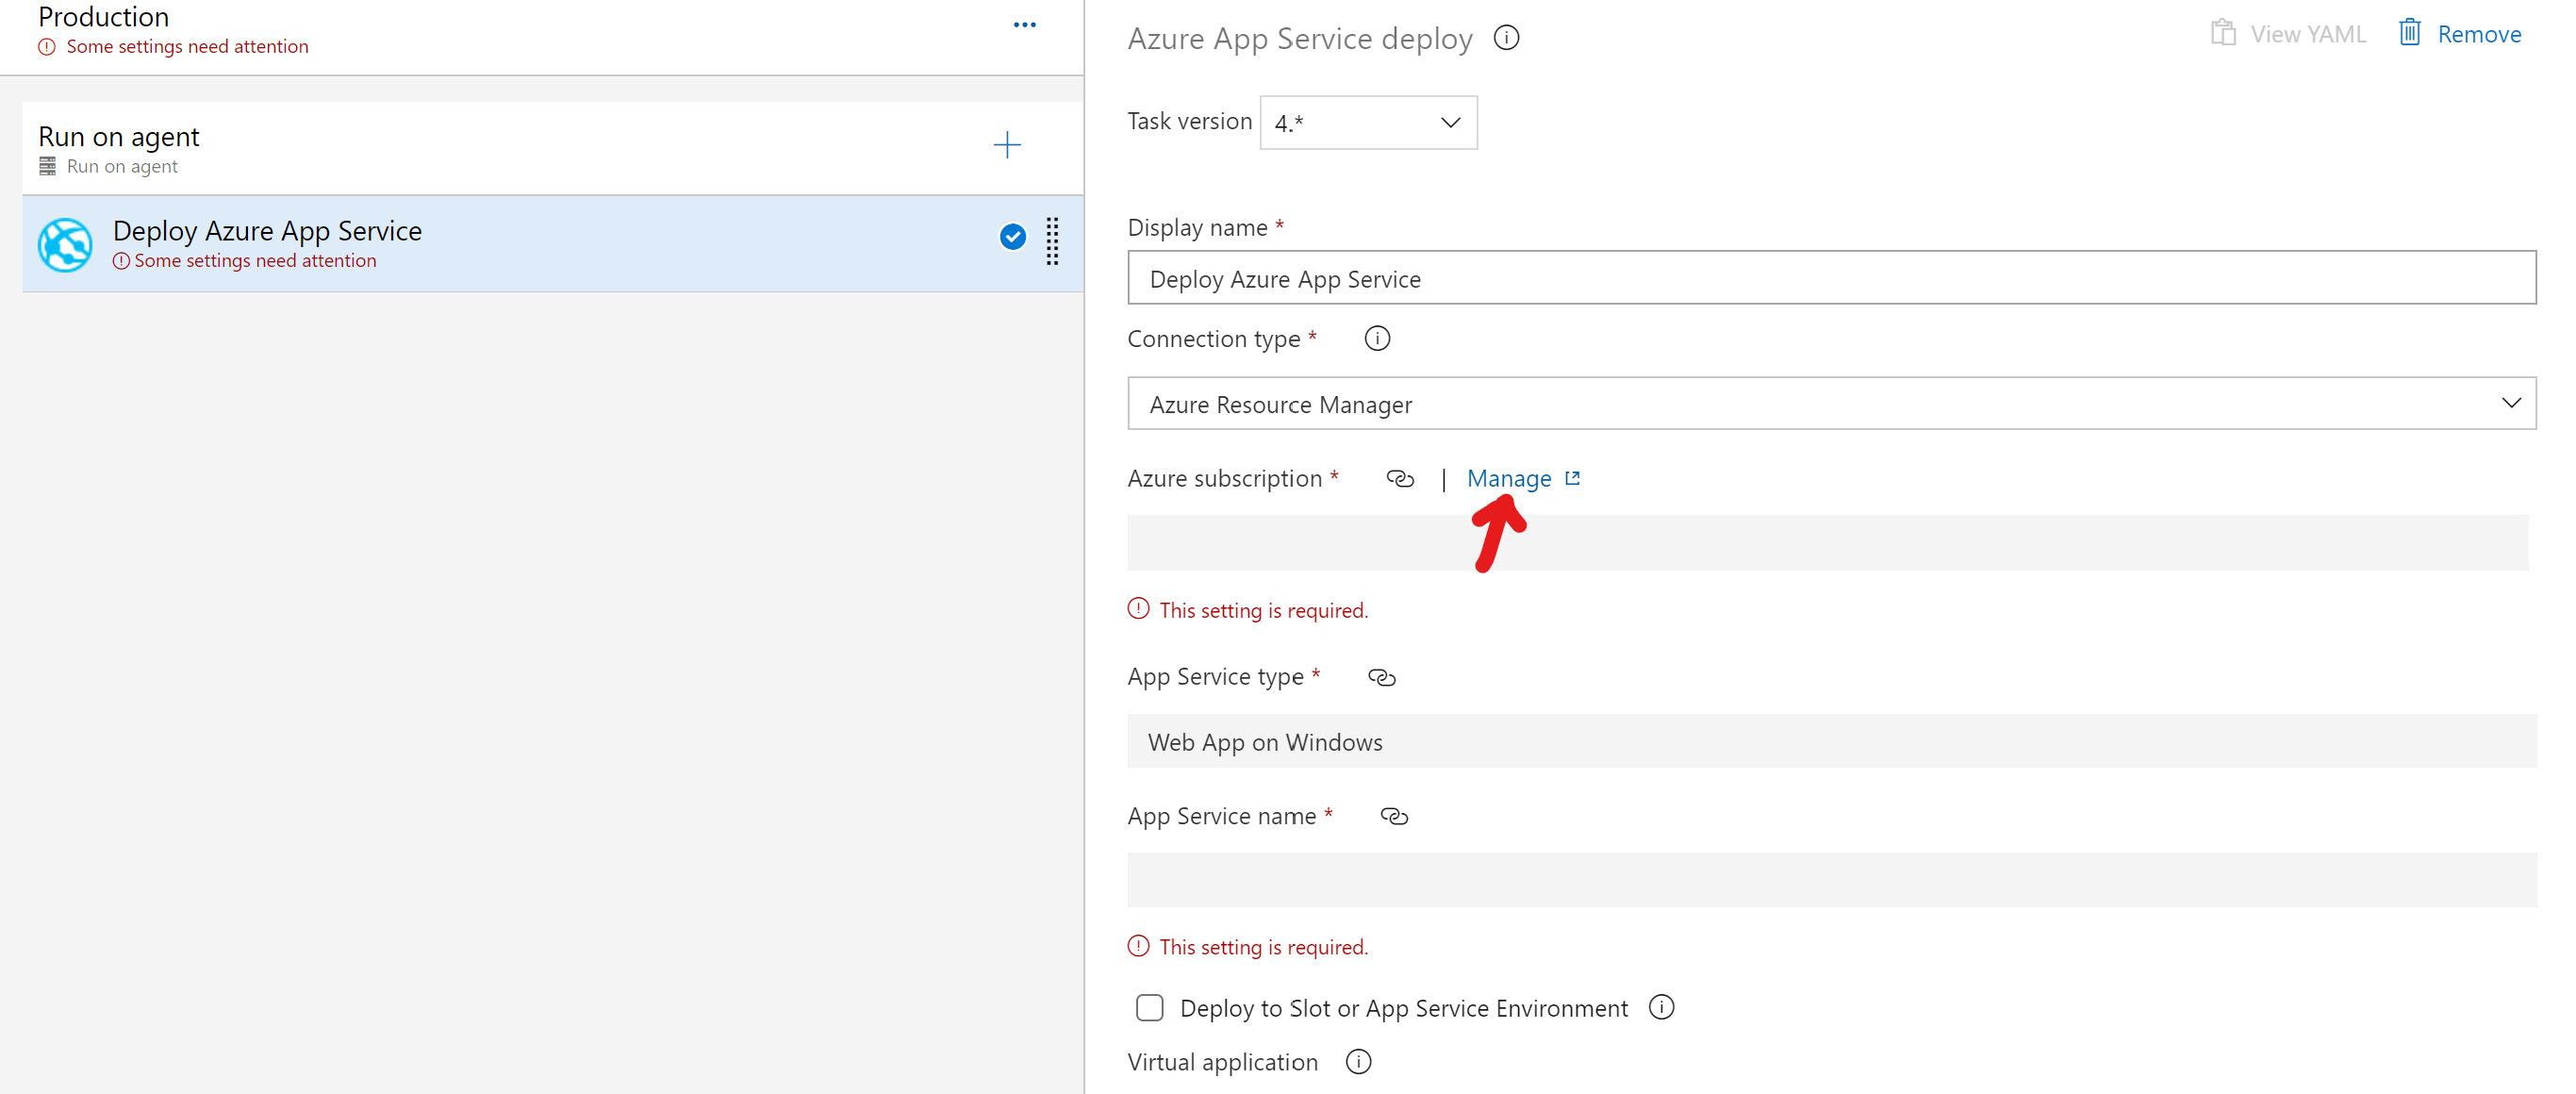
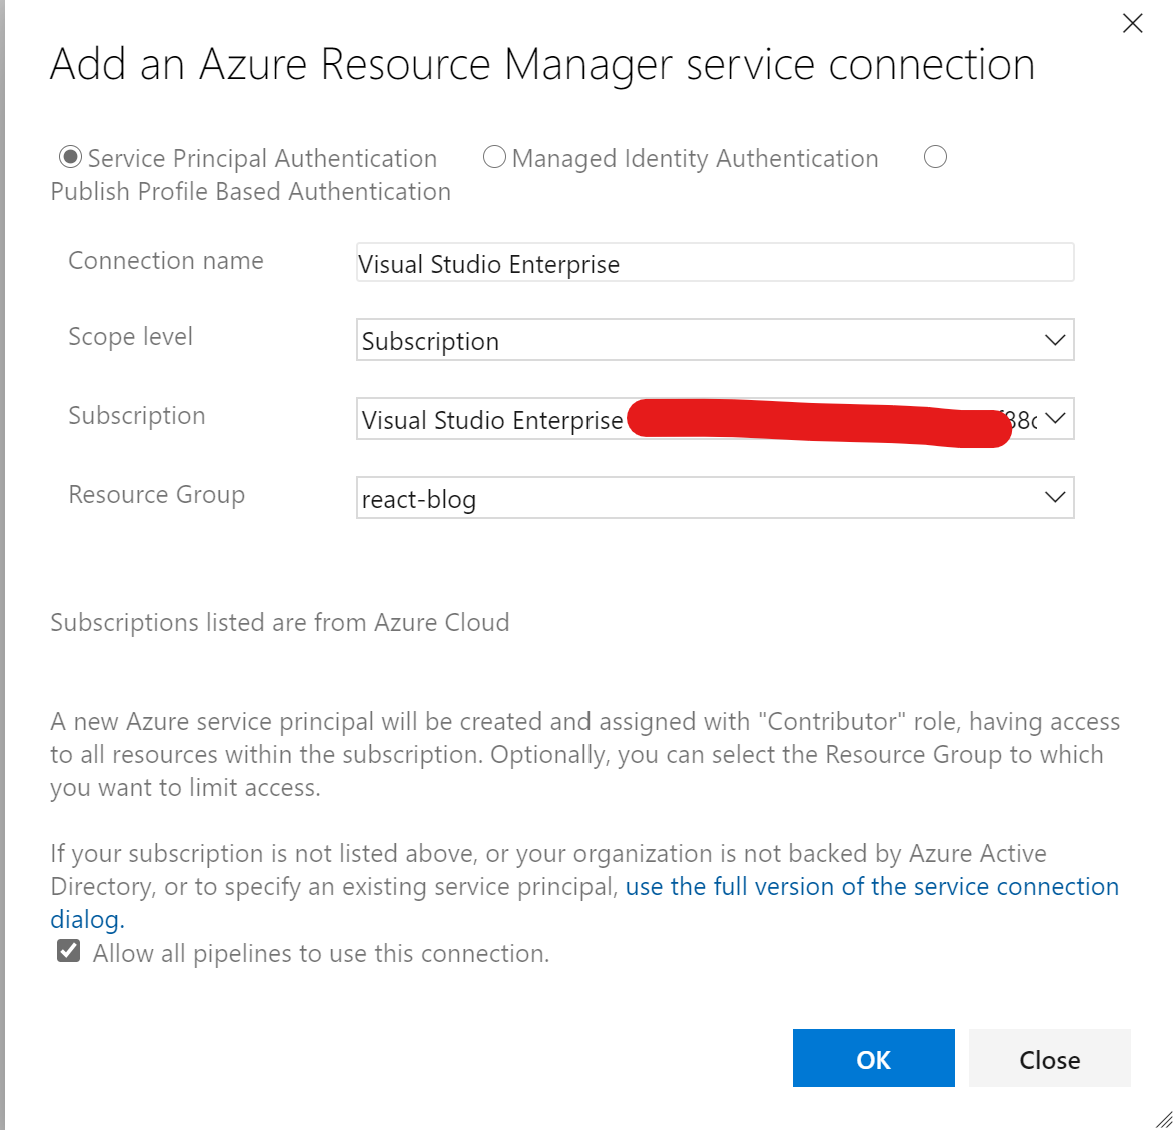
So here we are going to choose “Create service connection” -> “Azure Resource Manager”.
- Connection name (I always choose to enter my Azure Subscription since it will help me track it later)
- Select the appropriate Azure Subscription
- Select the Resource Group that has your “App service”
The result should look similar to the below image.
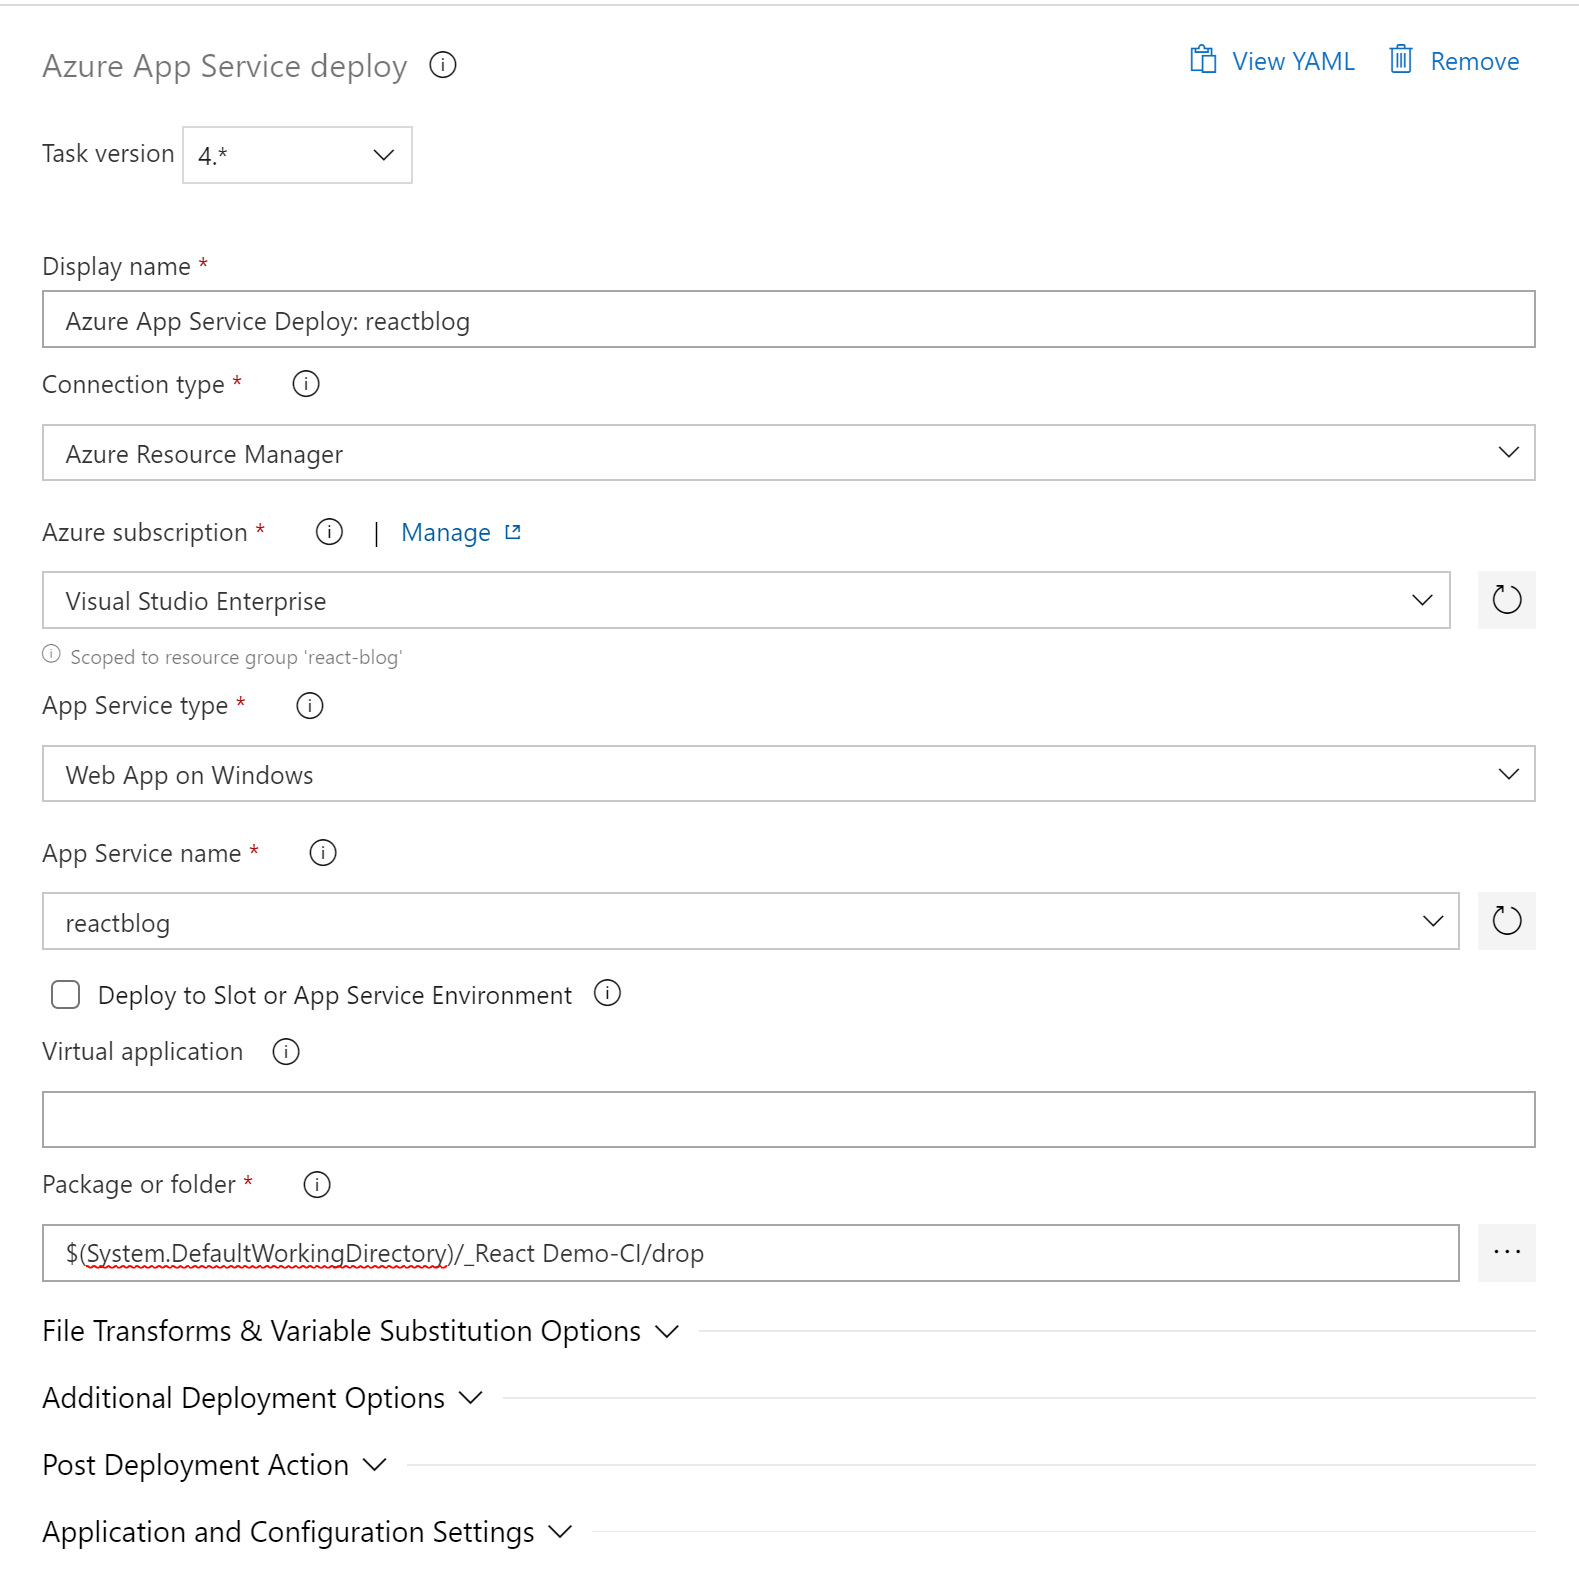
Let’s go back to our release tab and finish up:
- Display name: Azure App Service Deploy: reactblog
- Connection type: Azure Resource Manager
- Azure subscription: Visual Studio Enterprise
- App Service type: Web App on Windows
- App Service name: reactblog
- Package or folder: $(System.DefaultWorkingDirectory)/_React Demo-CI/drop
Go ahead and create a release from the pipeline created. If you visit the Azure WebApp URL, you should now see your website 😊
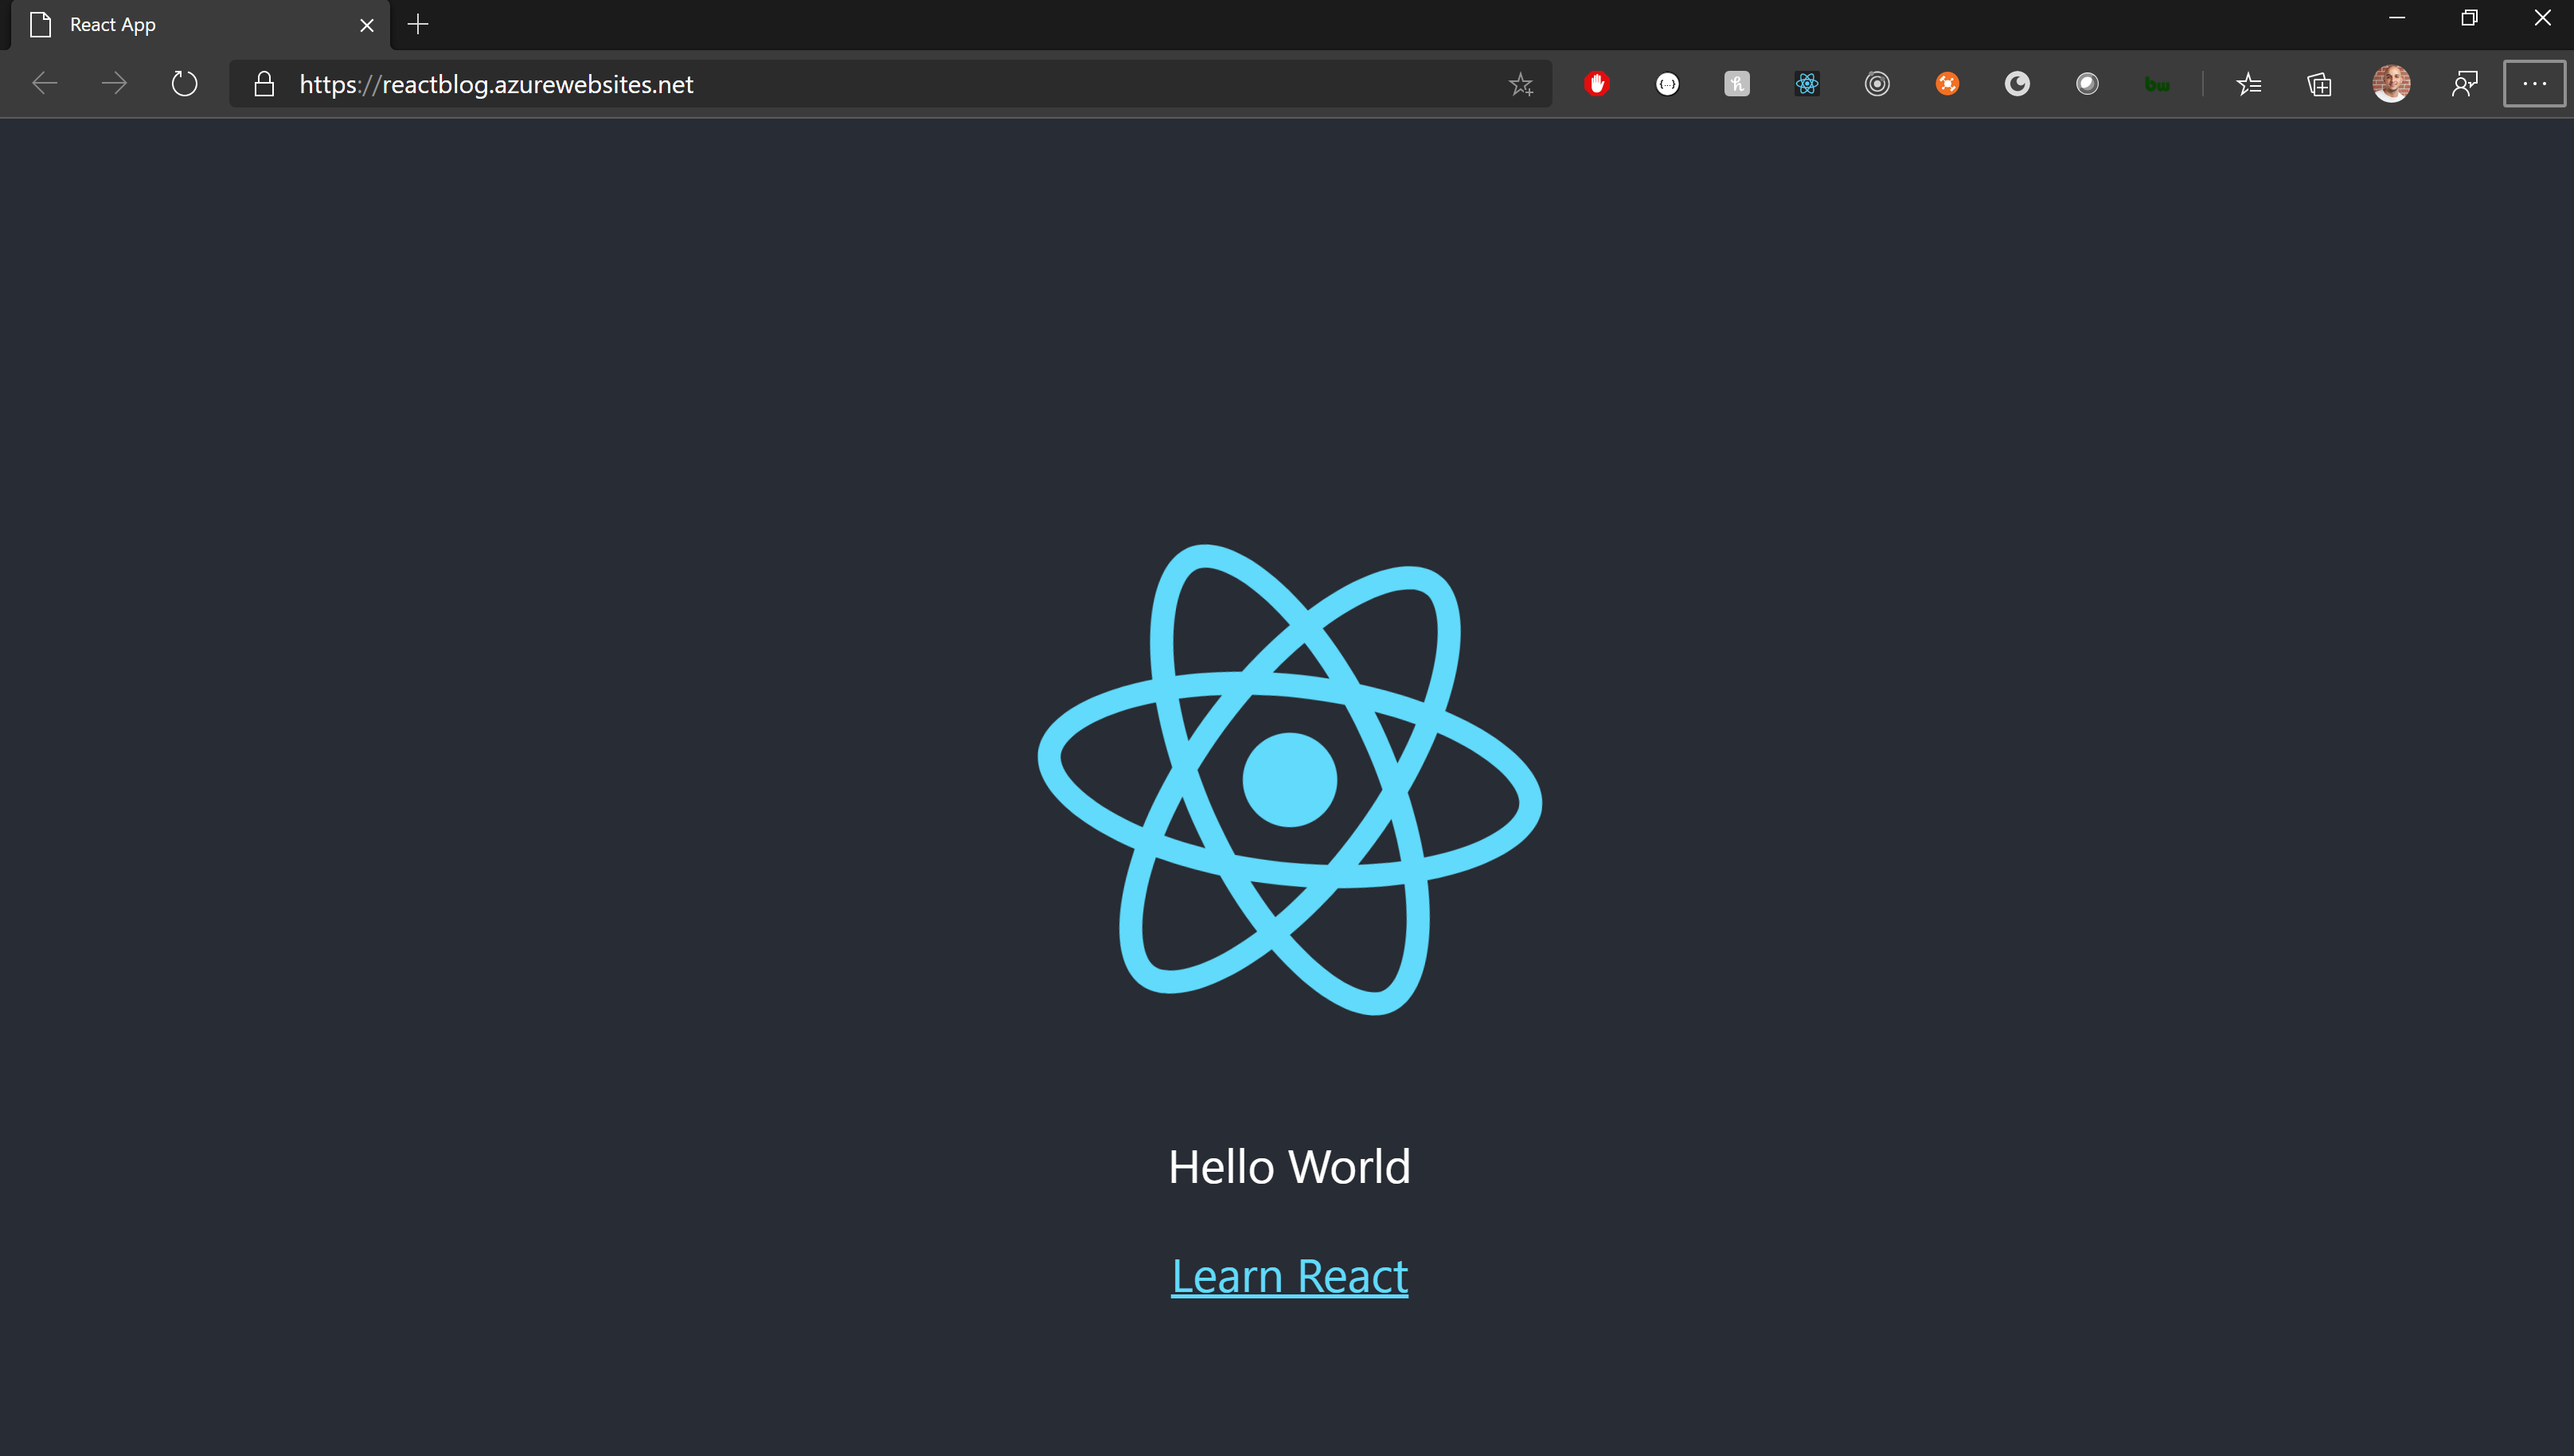
Et Voila!
If you are using client-side routing, you’ll need to add the following file “web.config” and add the following to it:
<?xml version="1.0"?>
<configuration>
<system.webServer>
<rewrite>
<rules>
<rule name="React Routes" stopProcessing="true">
<match url=".*" />
<conditions logicalGrouping="MatchAll">
<add input="{REQUEST_FILENAME}" matchType="IsFile" negate="true" />
<add input="{REQUEST_FILENAME}" matchType="IsDirectory" negate="true" />
<add input="{REQUEST_URI}" pattern="^/(api)" negate="true" />
</conditions>
<action type="Rewrite" url="/" />
</rule>
</rules>
</rewrite>
</system.webServer>
</configuration>
Happy hacking!
Hi Premier Developer Team,
I hope you are doing well,
Thank you for above blog, I have exactly followed and created a pipelines but I got an error when going to make build of my application.
remote: > react-scripts build
remote:
remote: ‘react-scripts’ is not recognized as an internal or external command,
remote: operable program or batch file.
Please help.
this takes a lot of configuration compared to competing react app deployment services like Netlify or Vercel that require almost zero configuration. For anybody else struggling to set this mess up, this blog post has a better guide on what to do https://www.kieferconsulting.com/2020/06/25/how-to-deploy-a-react-app-to-azure-using-devops-pipeline/
Edit: after following those steps it still wouldnt update on the actual website, there are cache options enabled by default that cache the old app rather than the new deployments, see here for how to disable it https://www.how2code.info/en/blog/azure-linux-web-app-not-updating-after-publish
Edit 2: Another update, it seems that the web app will not update if it is running linux, no matter what...
thank you for writing it up. It helped me deploying my react app to an app service
Step 3, after “Save & Queue” I get this error:
##[error]Publishing build artifacts failed with an error: Not found PathtoPublish: /home/vsts/work/1/s/build
Hello!
Thanks for this post! There are a few updates now for what the process looks like, but it can be figured out with a little perseverance. Yesterday I spent almost 4 hours going through and was unsuccessful.
This morning I woke up refreshed and attacked it using the exact-same naming conventions you have listed above, and it worked great. MSFT is doing some great things for us web developers, and I look forward to working with them more. Especially with their integrations with Github.
Thanks!
Hi Premier Developer Team,
Thank you for above blog, I have exactly followed and created a build and release pipelines. they all run fine however when I access my Azure app service link it gives me below error message. I am unsure what I missed. could you please advise as I am new to react.
"This react-naturalone.azurewebsites.net page can’t be found
No web page was found for the web address: https://react-naturalone.azurewebsites.net/
HTTP ERROR 404"
FYI: I am using react-router, hence added the web.config in my project and pushed the file to repo, triggered Build and release pipelines as mentioned in the link...
Hi, have you managed to solve this problem? It took me 3 hours and I’m more than happy to help if you need help.