This post is provided by Senior App Dev Manager, Fadi Andari who provides some history around Data Tools and a practical walk-through of SSDT.
I am the first to admit that the SQL Server/Visual Studio relation has been very confusing for the past few years especially when it comes to Data Tools and Source Control. In this post, I will focus on the tools while leaving Source Control, Continues Integration, and deployment to future posts.
The first emergence of SQL Server Data Tools was during the release of Visual Studio 2008 and SQL Server 2008. The tool was called “Business Intelligence Developer Studio” (BIDS), which was a Visual Studio IDE shell that only served Business Intelligence projects such as Analysis Services, Integration Services, and Reporting Services. It also provided the ability to integrate with source control as well as providing tools that allowed Schema and Data comparison, unit testing, and test data generation.
The same functionality was added to the full version of Visual Studio 2008 under “SQL Server Development Tools”, also known as “Data Dude.”
Visual Studio 2010 on the other hand did not provide Business Inelegance tools, as a result the developer still needed Visual Studio 2008 to develop any BI projects, such as Reporting Services. After a period of uncertainty regarding Visual Studio 2010 support for BI development the new “SQL Server Data Tools” (SSDT) was announced as the replacement for “Data Dude.”
SQL Server 2012 included SSDT as an optional component which, if selected, installed a Visual Studio 2010 shell. On the Other hand the full version of Visual Studio 2010 provided SSDT as a downloadable feature.
Visual Studio 2012 still supported the stand alone integrated shell and the full VS versions through updates/
Visual Studio 2013 has SQL Server Tooling built in and shipped as part of the code product. The SQL Server Tooling is also built in VS Express for Web and Express for Windows Desktop.
Visual Studio 2015 and 2017 – Since SQL Server tooling is included in Visual Studio, the updates will be pushed through Visual Studio Update and users will be prompted to do so when Visual Studio is open. If you’d like to check for updates manually, open Visual Studio 2015 and choose the Tools > Extensions and Updates menu. SQL Server tooling updates will appear in the Updates list.
Other Data Tools in Visual Studio
- Redgate Data Tools – now included in Visual Studio Enterprise 2017 and available to developers as a part of Visual Studio 2017 installation at no additional cost.
- Redgate’s SQL Search is now available across all Visual Studio 2017 editions, including Visual Studio 2017 Community and Professional.
- Redgate’s ReadyRoll Core and SQL Prompt Core are available for Visual Studio 2017 Enterprise subscribers.
Difference between Redgate’s ReadyRoll and SSDT:
SSDT is a state-based approach. For every version, the definition of each object in the database is
stored in source control. At deployment time, the target database is compared to the state in source
control (via a DacPac) and a deployment script is generated to update the target database to that
specific version.
ReadyRoll Core is a migrations-based approach. ReadyRoll Core generates a migration script for each
change at development time. It can be edited so that developers have complete control over what will
happen at deployment time. The migration scripts are stored in source control. At deployment time,
the migration scripts are stitched together to generate the deployment script. Each migration script is
only run against a target environment once.
Using SSDT in Visual Studio to manage a SQL Database project.
In this scenario both source and destination databases are located on an instance of SQL Server installed on the local computer.
CREATE TABLE [dbo].[Orders](
[OrderID] [int] NOT NULL,
[OrderDate] [date] NULL
) ON [PRIMARY]
GO
REATE TABLE [dbo].[OrderDetails](
[OrderDetailID] [int] NOT NULL,
[OrderID] [int] NULL,
[ProductID] [int] NULL,
[Quantity] [int] NULL,
[UnitPrice] [money] NULL
) ON [PRIMARY]
GO
CREATE VIEW [dbo].[View_AllOrders]
AS
SELECT dbo.Orders.OrderID, dbo.Orders.OrderDate, dbo.OrderDetails.OrderDetailID, dbo.OrderDetails.ProductID, dbo.OrderDetails.Quantity, dbo.OrderDetails.UnitPrice,
dbo.OrderDetails.Quantity * dbo.OrderDetails.UnitPrice AS Total
FROM dbo.Orders INNER JOIN
dbo.OrderDetails ON dbo.Orders.OrderID = dbo.OrderDetails.OrderID
GO
CREATE PROCEDURE [dbo].[Proc_ListOrders]
AS
BEGIN
SET NOCOUNT ON;
SELECT * FROM View_AllOrders
END
GO
Add data to the Orders and OrderDetails talbes:
INSERT INTO Orders (OrderID, OrderDate)
Values (1, ‘1/1/2017’) ,
(2, ‘1/3/2017’),
(3, ‘1/5/2017’),
(4, ‘1/11/2017’),
(5, ‘1/19/2017’)
GO
INSERT INTO OrderDetails (OrderDetailID, OrderID, ProductID, Quantity, UnitPrice)
Values (1,1,1,2,13.10),
(1,1,11,2,4.3),
(2,1,15,1,7.10),
(3,1,12,3,9.80),
(4,2,1,2,6.16),
(5,2,3,12,2.3),
(6,2,5,4,9.10),
(7,2,7,2,16.23),
(8,3,19,1,6.47),
(9,3,10,1,4.99),
(10,3,11,8,13.78),
(11,4,8,2,7.23),
(12,4,21,3,3.43),
(13,4,25,4,23.0),
(14,4,18,1,43.0),
(15,5,9,1,2.0),
(16,5,15,2,31.0)
GO
In Visual Studio:
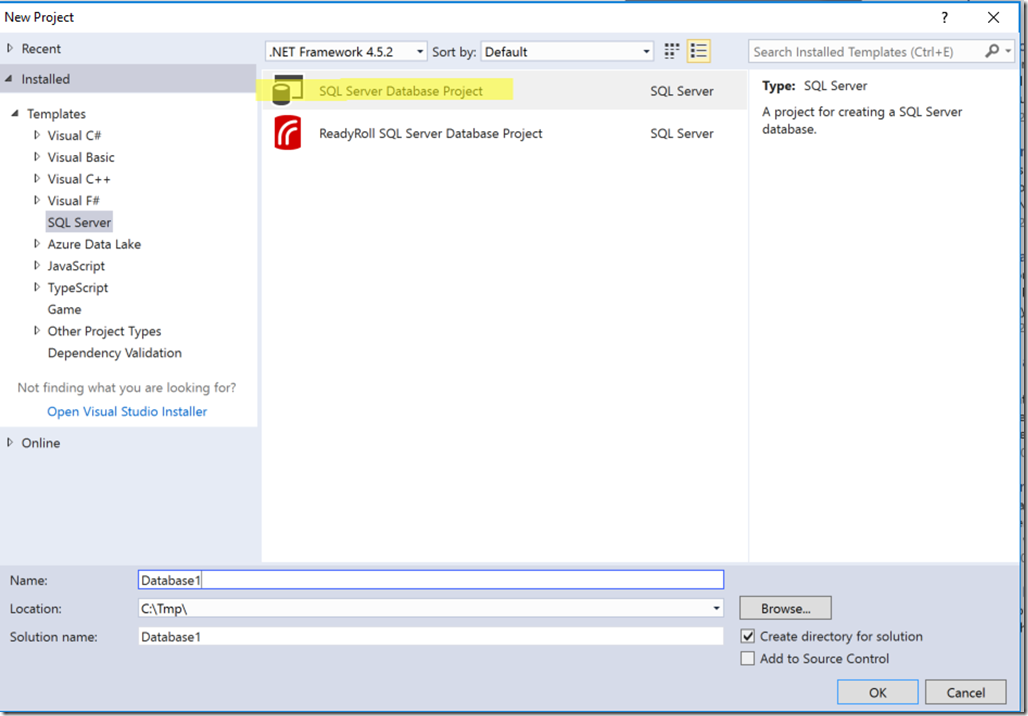
Create a new Database Project and name it “Database1”
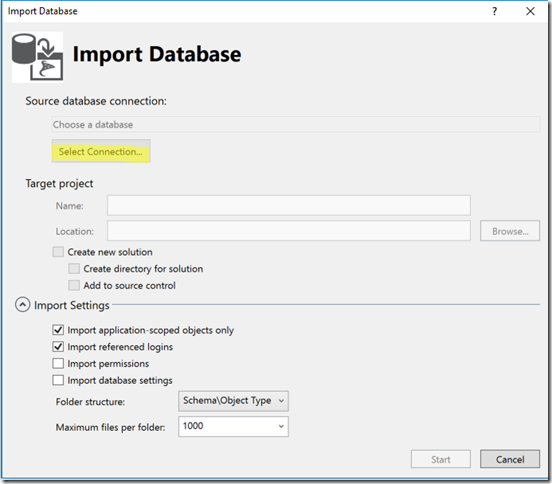
Right click the project name then select Import –> Database
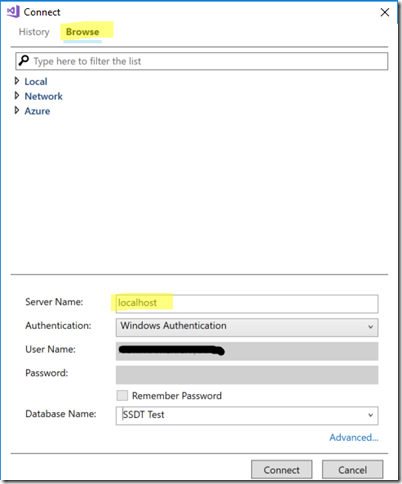
Create a connection to SQL Server and select the “SSDT Test” database.
Click on “Select Connection”
Click on “Browse”
Type “localhost” for Server Name
Select “SSDT Test” for Database Name
Click on Connect
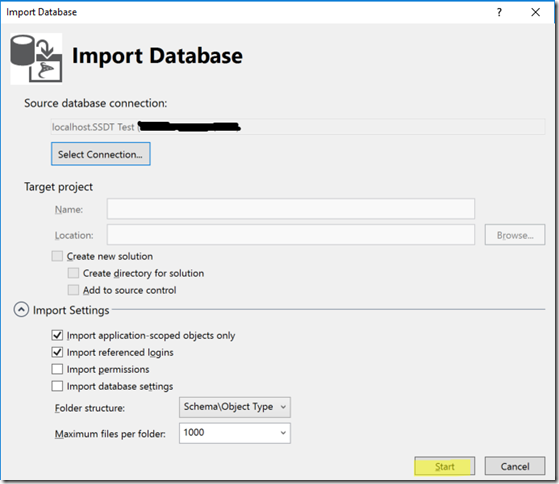
Click on Start
Once the import is complete Click on Finish
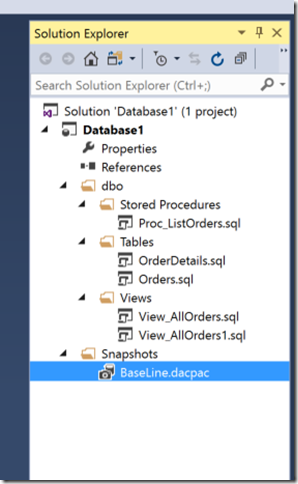
You can create a snapshot for establishing a baseline at this point.
You can also add the solution to source control for continues deployment and integration, to be discussed in another blog.
Introducing the first change and publishing the solution to our destination database:
In Solution Explorer click on “Proc_ListOrders” to open it.
Replace the content of the stored procedure with the following:
CREATE PROCEDURE Proc_ListOrders
@OrderID INT = NULL
AS
BEGIN
SET NOCOUNT ON;
IF @OrderID is NULL
SELECT * FROM View_AllOrders ORDER BY OrderID
ELSE
SELECT * FROM View_AllOrders WHERE OrderID = @OrderID ORDER BY OrderID
END
Create a deployment profile for the source both the source and destination databases:
Right click on the project name in Solution Explorer and select “Build”
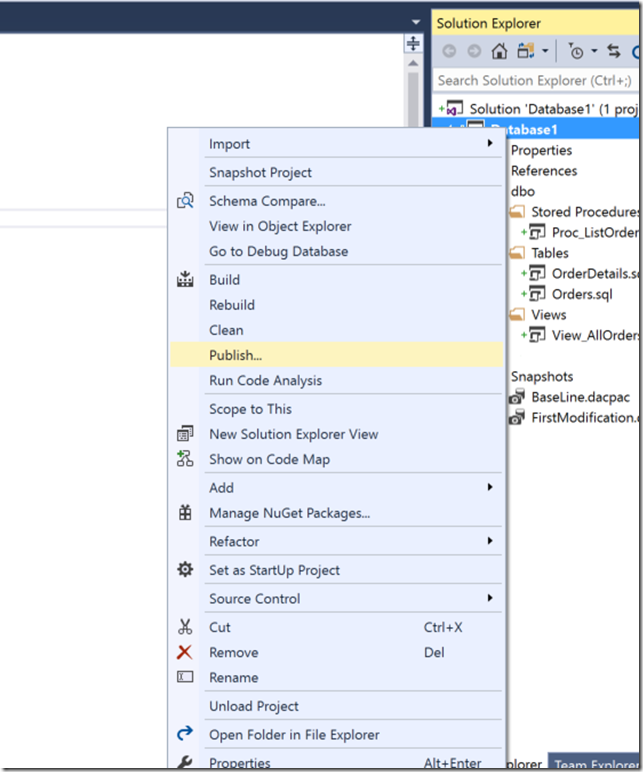
Right click on the project name in Solution Explorer and select “Publish”
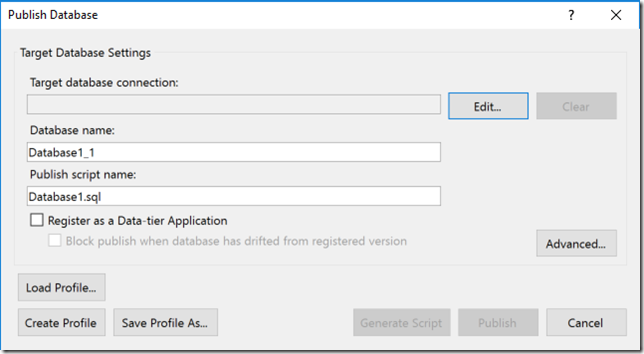
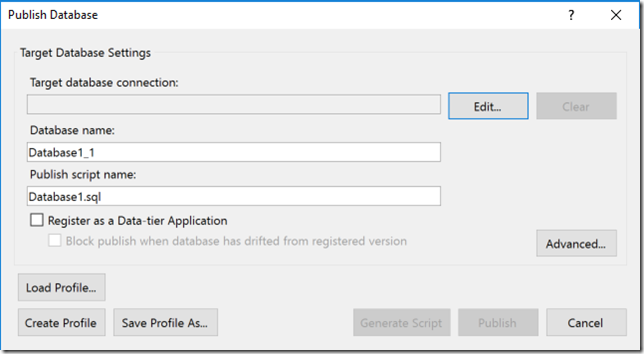
Click Edit
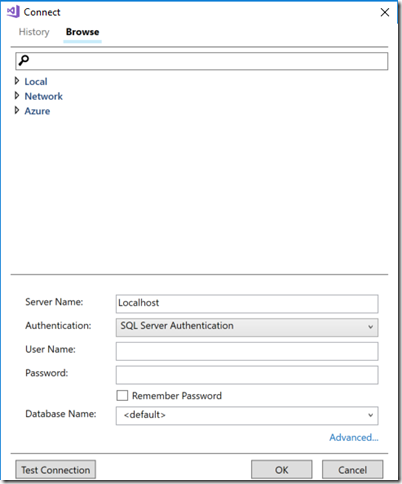
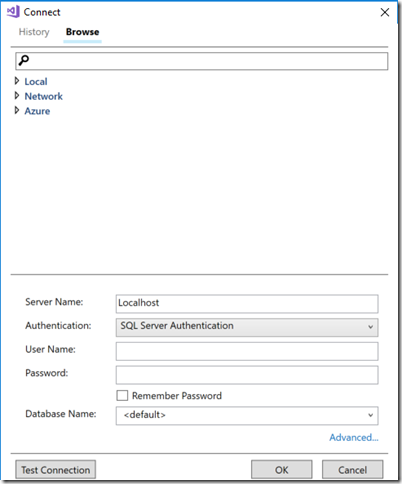
Select “Browse”
Type the server name
Click “OK”
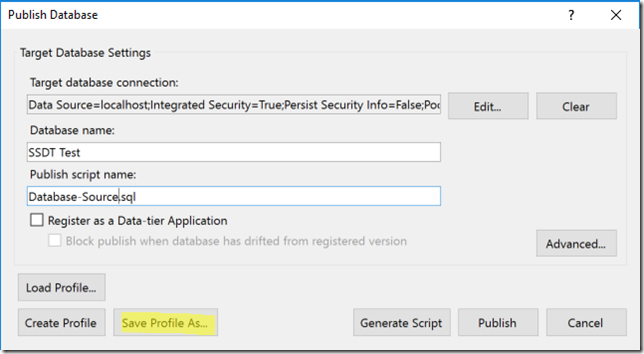
Type “SSDT Test” for the database name
Type “Database-Source.sql” for the Publish Script Name
Click “Save Profile As”
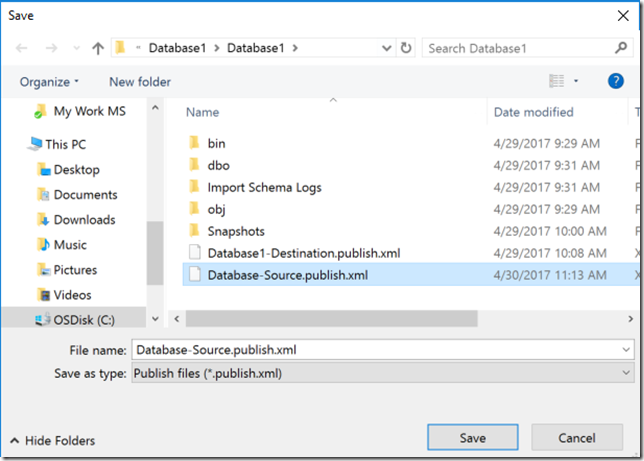
Type “Database-Source.publish.xml” for the File name” and click “Save”
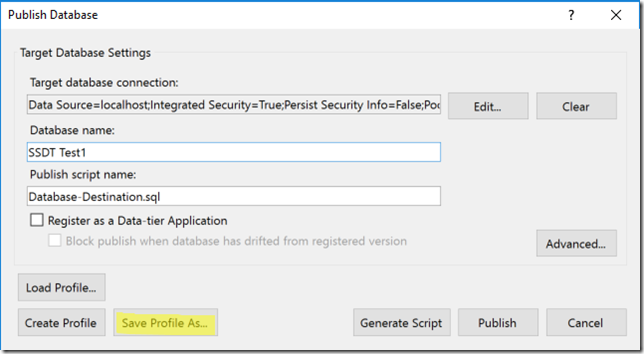
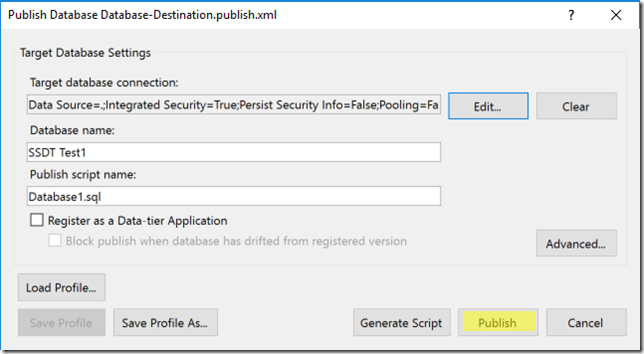
Create a profile for the destination Database
Right click on the project name in Solution Explorer and select “Publish”
Click Edit
Select “Browse”
Type the server name
Click “OK”
Type “SSDT Test1” for the database name
Type “Database-Destination.sql” for the Publish Script Name
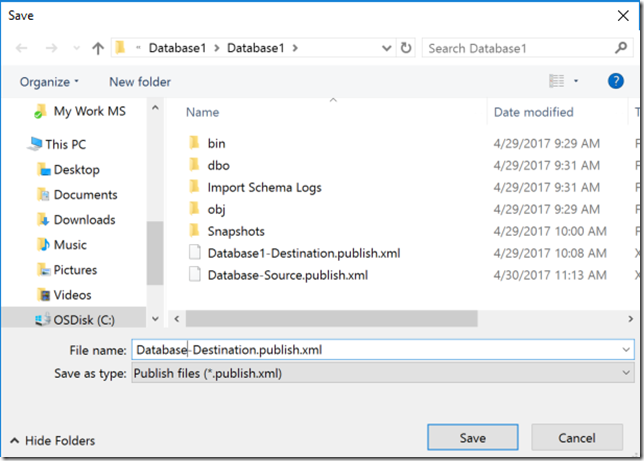
Click “Save Profile As”
Type “Database-Destination.publish.xml” for the File name and click “Save”
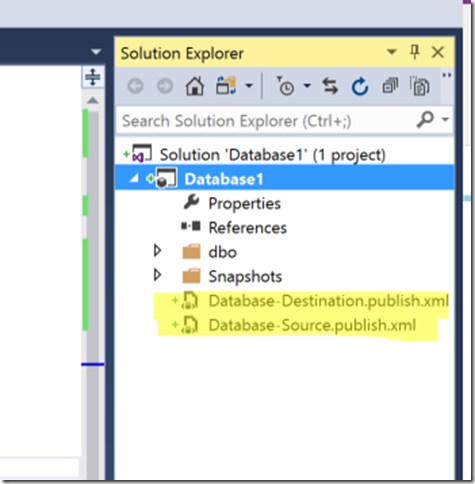
At this point you should have two publishing profiles
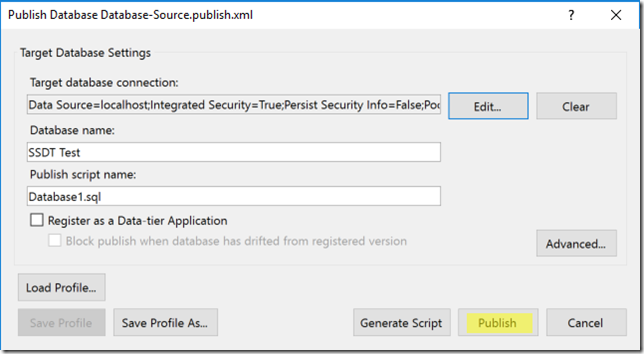
Double click the “Database-Source.Publish.xml to update SSDT Test with changes to the Stored Procedure
Click on “Publish”
Double click the “Database-Destination.Publish.xml to update SSDT Test1 with all changes in the source database
From this point forward you can publish any changes to both the source and destination databases by publishing the databases as above or by using command line tools such as “sqlpackage.exe” as below:
sqlpackage.exe /Action:Publish /SourceFile: C:\Tmp\Database1\Database1\bin\Debug\ Database1.dacpac /Profile: C:\Tmp\Database1\Database1\Database-Source.publish.xml
sqlpackage.exe /Action:Publish /SourceFile: C:\Tmp\Database1\Database1\bin\Debug\ Database1.dacpac /Profile: C:\Tmp\Database1\Database1\ Database-Destination.publish.xml
Premier Support for Developers provides strategic technology guidance, critical support coverage, and a range of essential services to help teams optimize development lifecycles and improve software quality. Contact your Application Development Manager (ADM) or email us to learn more about what we can do for you.








0 comments