
This post is provided by Premier Field Engineer, Nathan Vanderby, who walks us through how to write an Alexa skill using Azure Functions. Last updated June 2018.
Most people have heard of the Amazon Echo and the skills that provide it functions. Amazon makes it really easy to create these skills using an AWS Lambda function. These can also be backed using a REST API app or even an Azure Function. Below we will give some instructions for how to leverage Azure Functions. The steps below are almost identical to how you would configure a generic backend API with authentication except that the Azure Function needs to manually verify the JWT token instead of leveraging the [Authorize] attribute.
Step-by-step tutorial
Step 1: Create an Azure Subscription
If you haven’t already signed up for Azure you can do so here. We will use Azure AD for app registration and Azure Functions for the backend. Azure Functions creates a storage account and App. Service resources with it. The cost of doing a proof of concept should be minimal given the app registrations are free, we won’t be using the storage account and Azure Functions give 400,000 GB-s free each month.
Step 2: Create your Azure Function
We will start off by using the Azure Functions new project template in Visual Studio. This tutorial focuses on C#, but it is also possible to develop Azure Functions on any platform.
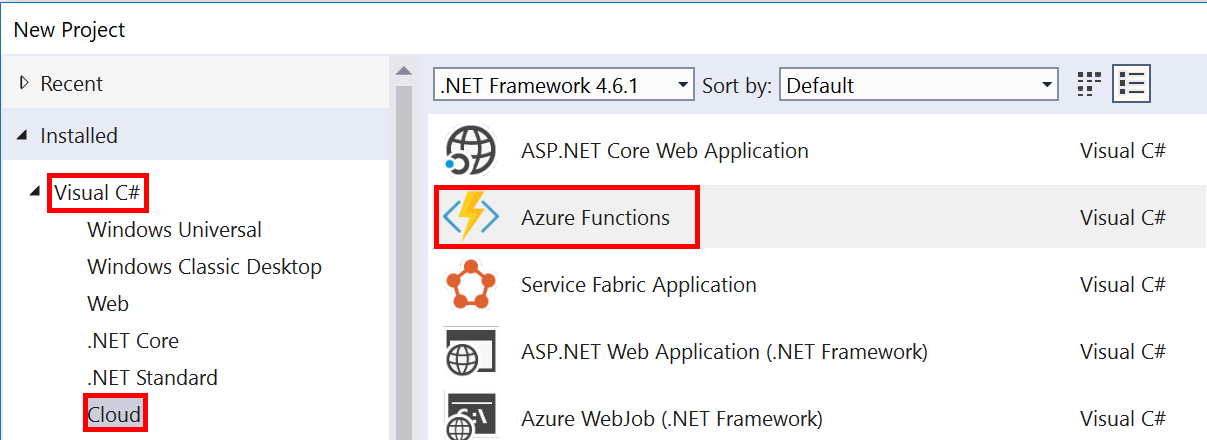
Make sure your project is at least on .NET Framework 4.6.1. This is due to the Alexa.Net NuGet package we will use to deserialize the Alexa JSON to classes. This will require us to use the Azure Function 2.x runtime version.
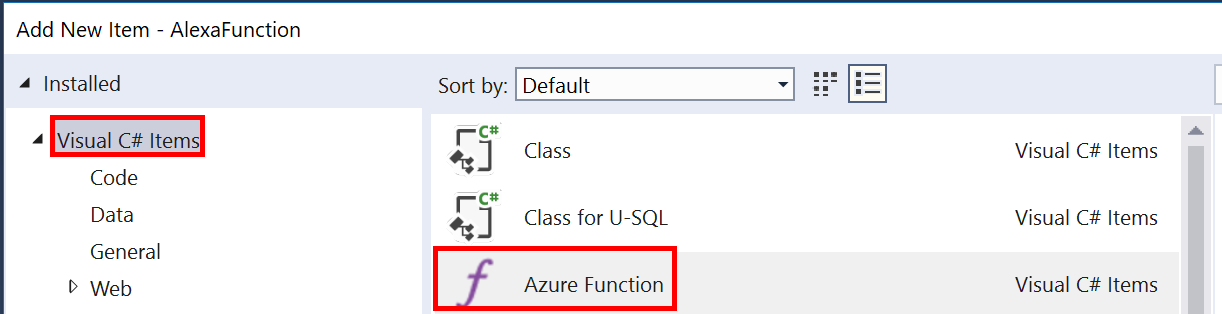
Once your project is created add a new Azure Function item to it.
Set the trigger type to Http trigger and the access rights to Anonymous.
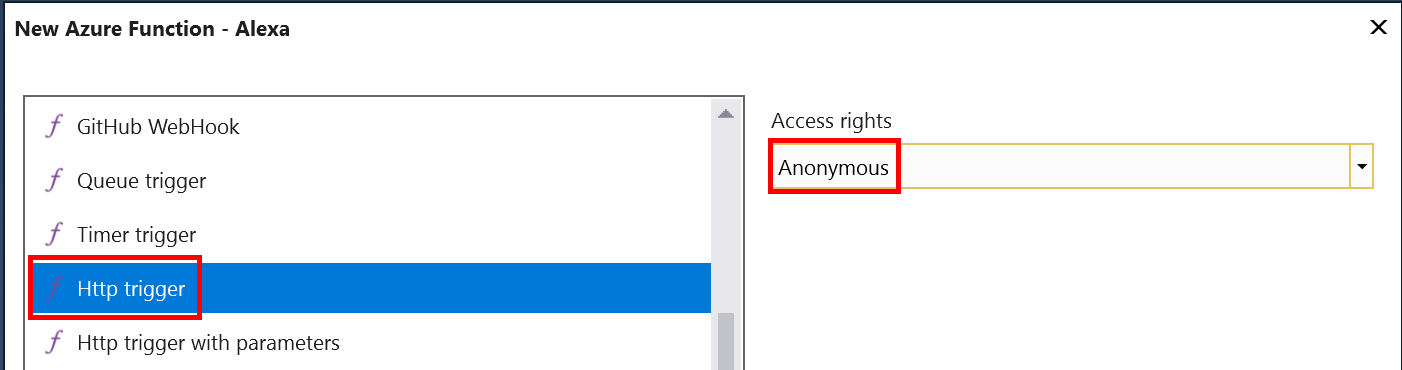
This will give us a default Run method that is attributed such that the Azure function name is what you specified in the wizard (Alexa in this case). It also sets up anonymous authorization with get and post REST methods. The inputs to the method is an HttpRequestMessage and a TraceWriter.
Add the Alexa.NET NuGet Package (https://github.com/timheuer/alexa-skills-dotnet) to the project so we can easily deserialize the JSON into classes.

Now we can add some code. First modify the method signature. We can remove the get REST API and we can leverage the [FromBody] attribute to easily deserialize the JSON into a SkillRequest. Then add some code to respond to a skill request. The code below simply looks for a first name and responds with “Hello [FirstName]”.
[FunctionName("Alexa")]
public static async Task<SkillResponse> Run(
    [HttpTrigger(AuthorizationLevel.Anonymous, "post", Route = null)]
    [FromBody]SkillRequest request, TraceWriter log)
{
    SkillResponse response = null;
    PlainTextOutputSpeech outputSpeech = new PlainTextOutputSpeech();
    string firstName = (request.Request as IntentRequest)?.Intent.Slots.FirstOrDefault(s => s.Key == "FirstName").Value?.Value;
    outputSpeech.Text = "Hello " + firstName;
    response = ResponseBuilder.Tell(outputSpeech);
    return response;
}
This code will work as an unauthenticated backend for an Alexa skill. Lets publish it and test it, then circle back to add authentication.
Step 3: Publish to Azure
To push the code to Azure simply right click on the project and select Publish. Walk through the wizard to create a new Azure Function or select from one that has been already created.
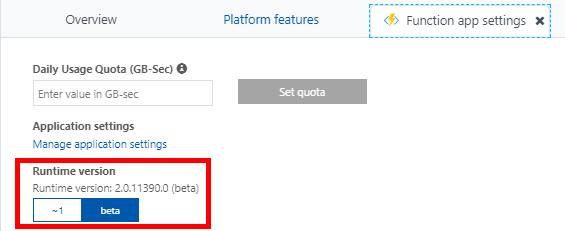
Once the Azure function is created we need to change the runtime version to V2. Go to portal.azure.com and navigate to the function you are using. From the Overview pane select Function app settings.
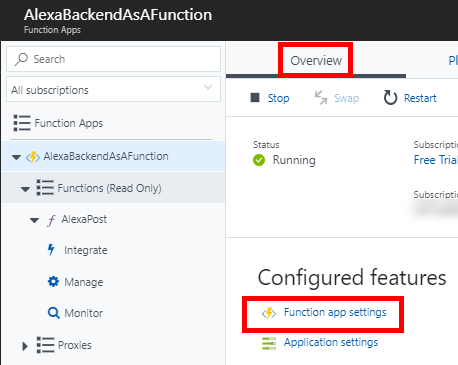
Inside the app settings change the Runtime version to be at least 2.0, currently this is the beta. This is only required since we are leveraging a NuGet that is build for .NET Standard 1.6. If you write your own library or use a different one that is compatible with .NET Framework 4.5 this is not necessary.
Now you should be able to return to Visual Studio and publish your function to Azure. Once your publish is successful you will want to go back to Azure, select that function and copy its URL for use in configuring the Alexa skill.

Step 4: Configure the Alexa Skill
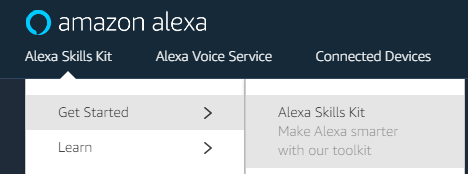
Now that we have our code in Azure we need to configure the Alexa skill. Navigate to Amazon’s developer page for Alexa, you will have to create an account. Navigate to Alexa Skills Kit -> Get Started -> Alexa Skills Kit.
Select Start a Skill then Create Skill.
Give the skill a name, click next. Select the Custom model then click Create Skill.
Invocation
Select Invocation and enter a phrase to invoke your skill. Click Save then Next to move onto the Interaction Model.
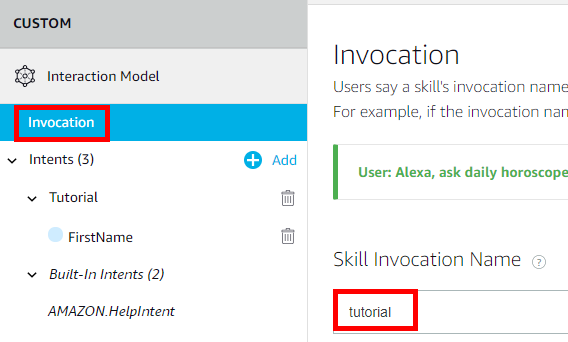
Intents
Select the Add button next to Intents and give the intent a name. We will use Tutorial.

Type in a sample utterance such as Can you greet {FirstName} and click Add to create the sample utterance and the FirstName slot.
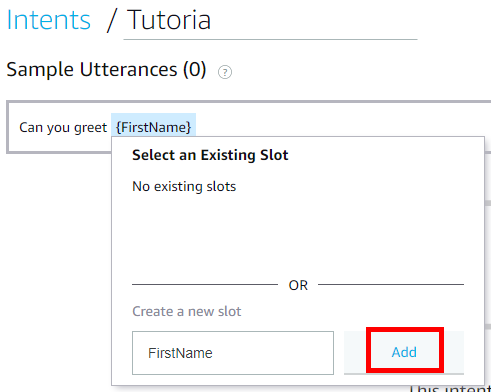
The intent here is so Alexa knows that when we talk to “Tutorial” it should also expect a parameter called FirstName. If you look back at the code in the API Post method you will see how we can read the FirstName slot from the Tutorial intent on the request.
Make sure the FirstName slot has a type of Amazon.DE_FIRST_NAME.

In the JSON Editor your skill should look like
{
    "interactionModel": {
        "languageModel": {
            "invocationName": "Tutorial",
            "intents": [
                {
                    "name": "Tutorial",
                    "slots": [
                        {
                            "name": "FirstName",
                            "type": "AMAZON.DE_FIRST_NAME"
                        }
                    ],
                    "samples": [
                        "Can you greet {FirstName}"
                    ]
                },
                {
                    "name": "AMAZON.HelpIntent",
                    "samples": []
                },
                {
                    "name": "AMAZON.StopIntent",
                    "samples": []
                }
            ],
            "types": []
        }
    }
}
Click Save Model and then Build Model
Interfaces
Here you can add various interfaces. We won’t be using any of these. The various options for these are Audio Player, Display Interface, Video App, Alexa Gadget, etc.
Endpoint
Select HTTPS for the endpoint. Under the Default Region text box enter the URL for your Azure function.

Select My development endpoint is a sub-domain of a domain that has a wildcard certificate from a certificate authority from the drop down.
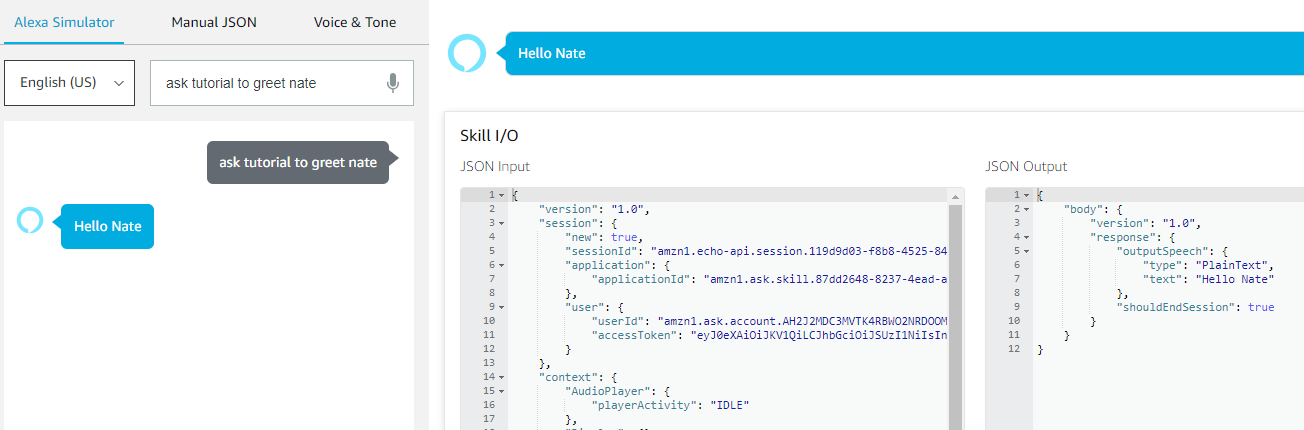
Test
In this page take note of the URL you are sending an Alexa request to and simply type in an utterance such as Tutorial can you greet Nate. You should get a service response.
Now that our skill is working we need to add authentication to it.
Step 5: Configure Azure Active Directory
App Registration
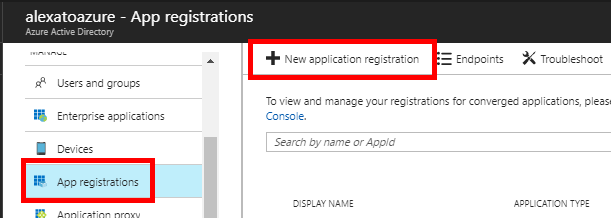
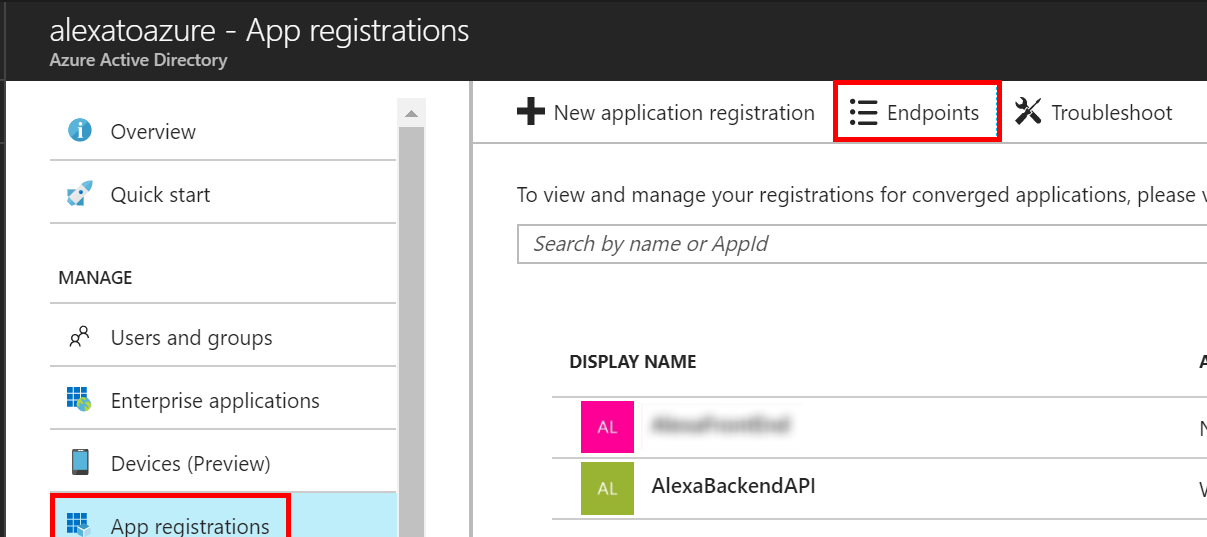
Go to the Azure portal and find the Azure Active Directory service. Then click on App registrations and New application registration.
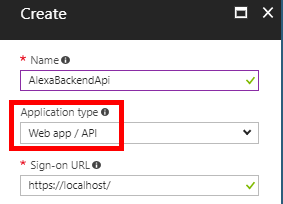
Give your registration and name, select Web app/API as its type and give it a sign-on URL. This URL doesn’t matter for this tutorial.
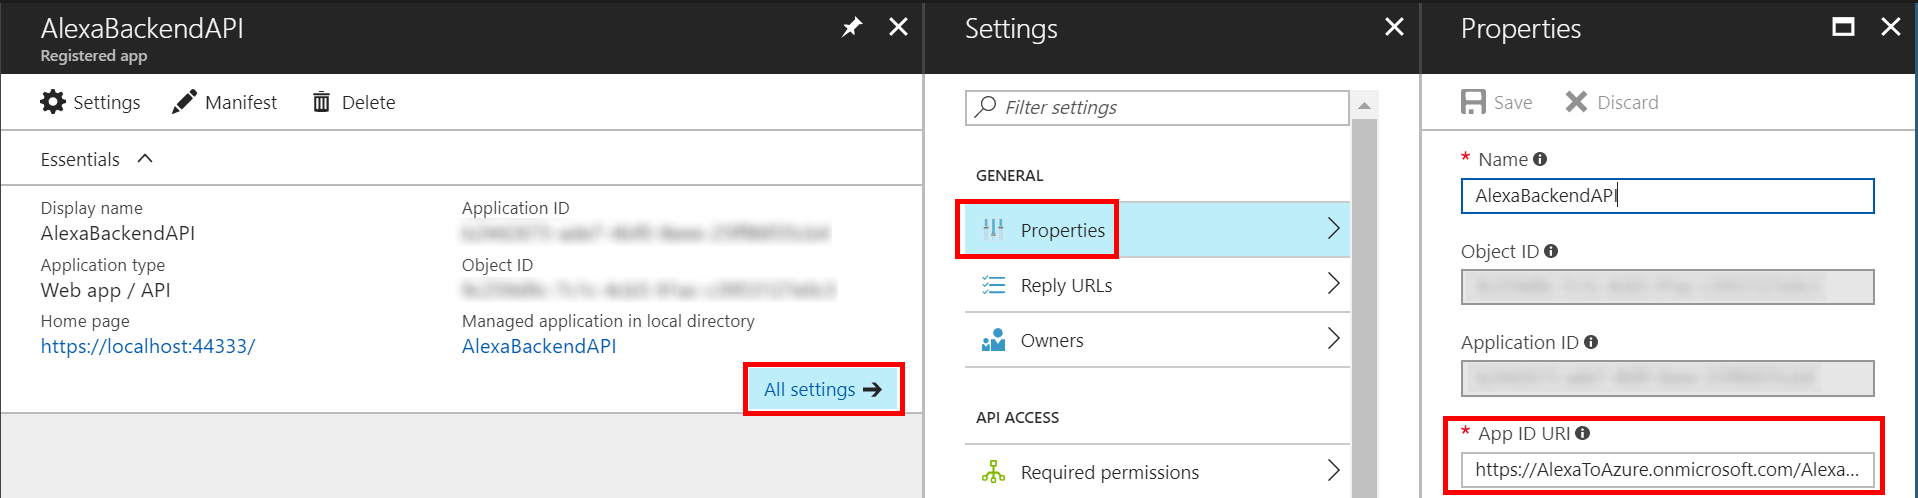
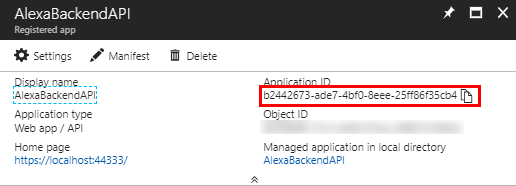
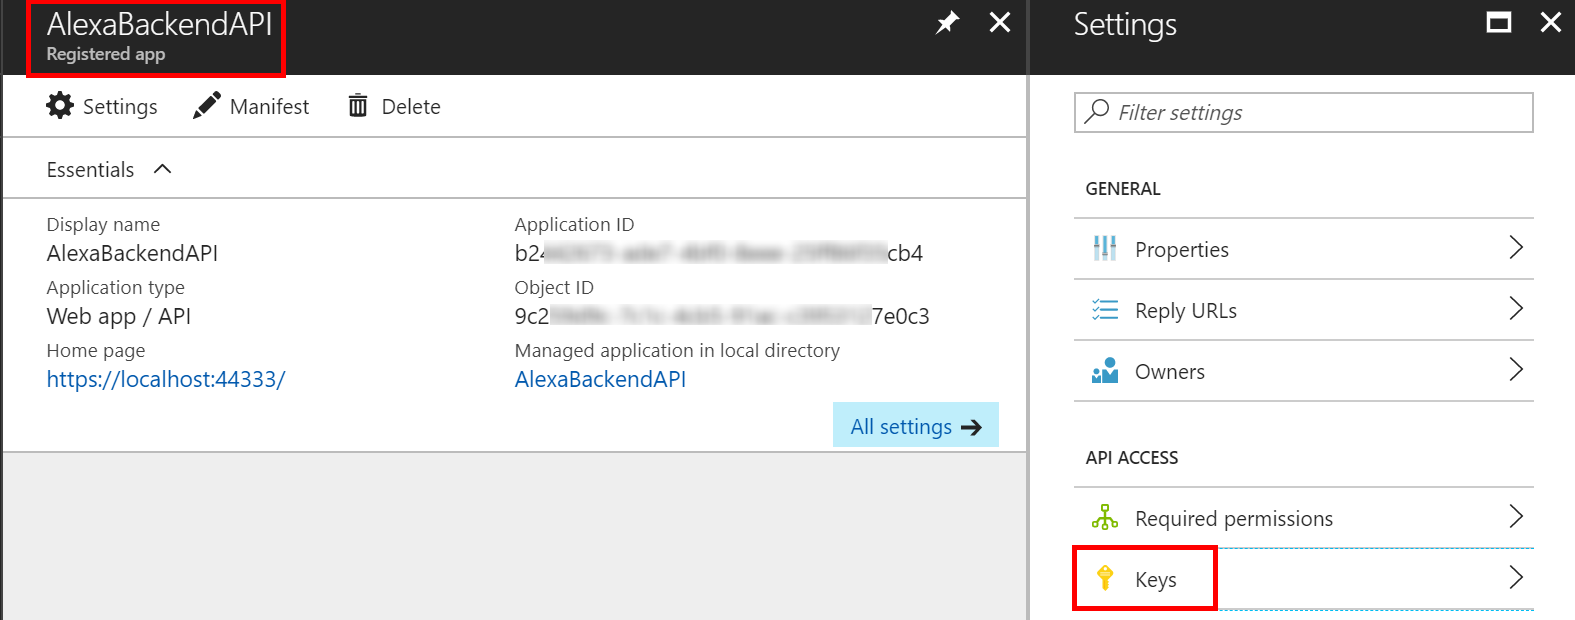
Now that the app registration is created select All settings then Properties. Note the App ID URI value. We will need this value later on in the C#.
Lastly, make note of the Keys property. We will have to come back here later to generate a key as a part of the Alexa account linking configuration.
That’s it for now. We’ll come back to the app registration later to update the Redirect URI and get a Client Secret (aka Key) as a part of configuring the account linking in the Alexa skill configuration.
Step 6: Adding Authentication in the Code
There are a few posts out there for performing token authentication without leveraging ASP.NET middleware. One of the most helpful and relevant to Azure Functions comes from Boris Wilhelms. I have leveraged his code sample below.
Create a class called Security and copy from the code below. This code is definitely sample code and not production ready. The two main variables to set are the ISSUER and AUDIENCE. The GUID for the issuer is your AAD directory ID that you can get from the properties section of the Azure AD resource. The audience value comes from the App ID URI. The code below also requires 2 additional NuGet packages. The first is System.IdentityModel.Tokens.Jwt v5.1.4 or lower. The second is Microsoft.IdentityModel.Protocols.OpenIdConnect v2.1.4 or lower. At the time of writing this if you use versions 5.1.5 or 2.1.5 respectively a runtime error occurs when Azure tries to load the function.
public static class Security
{
	private static readonly string ISSUER = "https://sts.windows.net/XXXXXXXX-XXXX-XXXX-aec1-f1f2a290f738/";
	private static readonly string AUDIENCE = "https://AlexaToAzure.onmicrosoft.com/AlexaBackendAPI";
	private static readonly IConfigurationManager<OpenIdConnectConfiguration> _configurationManager;

	static Security()
	{
		HttpDocumentRetriever documentRetriever = new HttpDocumentRetriever();
		documentRetriever.RequireHttps = ISSUER.StartsWith("https://");

		_configurationManager = new ConfigurationManager<OpenIdConnectConfiguration>(
			$"{ISSUER}/.well-known/openid-configuration",
			new OpenIdConnectConfigurationRetriever(),
			documentRetriever);
	}

	public static async Task<ClaimsPrincipal> ValidateTokenAsync(string value)
	{
		var config = await _configurationManager.GetConfigurationAsync(CancellationToken.None);
		var issuer = ISSUER;
		var audience = AUDIENCE;

		var validationParameter = new TokenValidationParameters()
		{
			RequireSignedTokens = true,
			ValidAudience = audience,
			ValidateAudience = true,
			ValidIssuer = issuer,
			ValidateIssuer = true,
			ValidateIssuerSigningKey = true,
			ValidateLifetime = true,
			IssuerSigningKeys = config.SigningKeys
		};

		ClaimsPrincipal result = null;
		var tries = 0;

		while (result == null && tries <= 1)
		{
			try
			{
				var handler = new JwtSecurityTokenHandler();
				result = handler.ValidateToken(value, validationParameter, out var token);
			}
			catch (SecurityTokenSignatureKeyNotFoundException)
			{
				// This exception is thrown if the signature key of the JWT could not be found.
				// This could be the case when the issuer changed its signing keys, so we trigger a
				// refresh and retry validation.
				_configurationManager.RequestRefresh();
				tries++;
			}
			catch (SecurityTokenException)
			{
				return null;
			}
		}

		return result;
	}
}
Next we have to modify the Run method to call into this `ValidateTokenAsyn()“ with the Alexa requests access token.
SkillResponse response = null;
if (request?.Session?.User?.AccessToken != null)
{
	ClaimsPrincipal principal = await Security.ValidateTokenAsync(request.Session.User.AccessToken);
	if (principal != null)
	{
		PlainTextOutputSpeech outputSpeech = new PlainTextOutputSpeech();
		string firstName = (request.Request as IntentRequest)?.Intent.Slots.FirstOrDefault(s => s.Key == "FirstName").Value?.Value;
		outputSpeech.Text = "Hello " + firstName;
		response = ResponseBuilder.Tell(outputSpeech);
	}
}

return response;
Publish this new code to your Azure Function and navigate to the Amazon developer portal to configure the Alexa skill for account linking.
Step 7: Alexa Account Linking Configuration
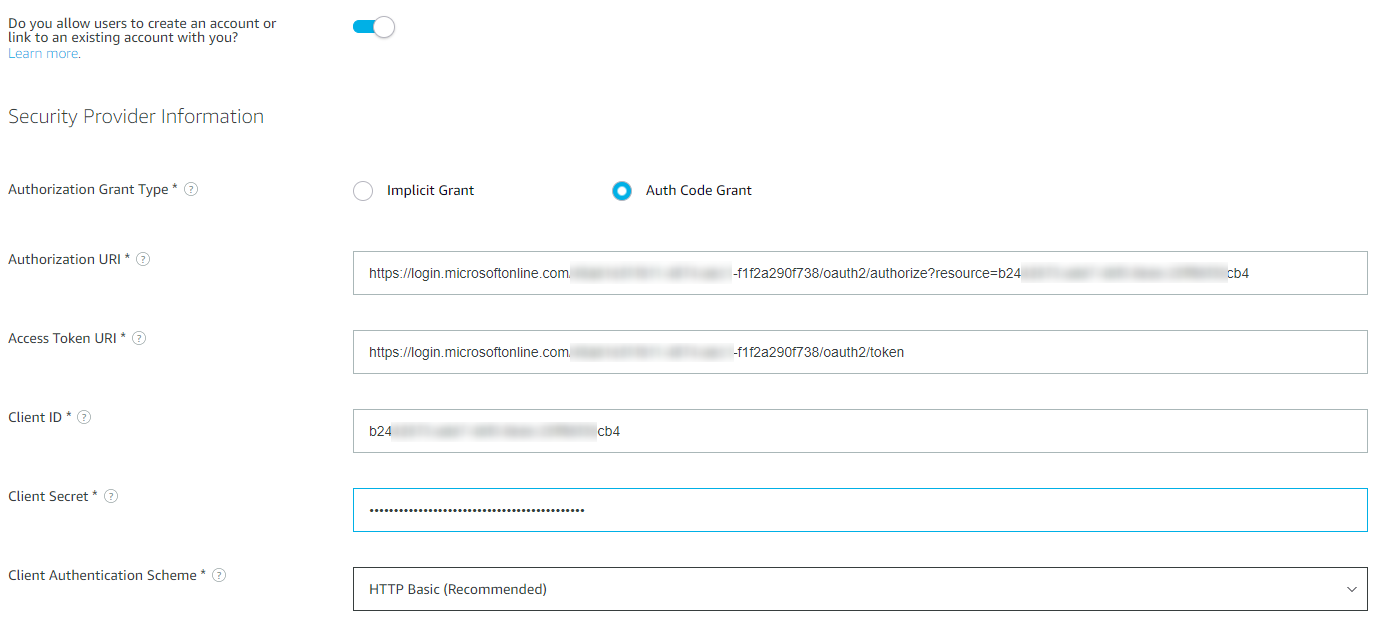
Navigate back to the Alexa skill page. In the Account Linking section enable the slider. Enter the following information into the fields:
- Authorization Grant Type: Auth Code Grant
- Authorization URI: https://login.microsoftonline.com/**{TenantId/DirectoryId}**/oauth2/authorize?resource=**{Application ID}** The TenandId/DirectoryId is the same GUID that is in the appsettings.json config file. The Application ID is the Application ID from the app registration. This parameter is required by Azure AD and it tells AAD which resource Alexa is requesting access to and defines the audience property in the JWT token returned from AAD. According to the documentation here the resource parameter is only recommended, but if you debug account linking with Postman you will notice it fails and states the resource parameter is required.
- Client Id: This is the Application Id from the app registration
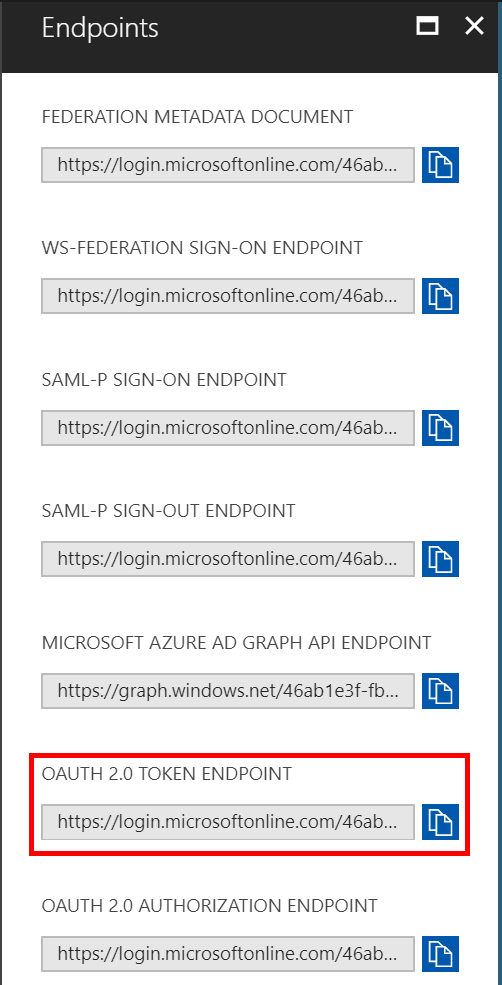
- Access Token URI: https://login.windows.net/**{TenantId/DirectoryId}**/oauth2/token This URI can be found in the Endpoints settings of the app registration blade. Copy the OAUTH 2.0 TOKEN ENDPOINT
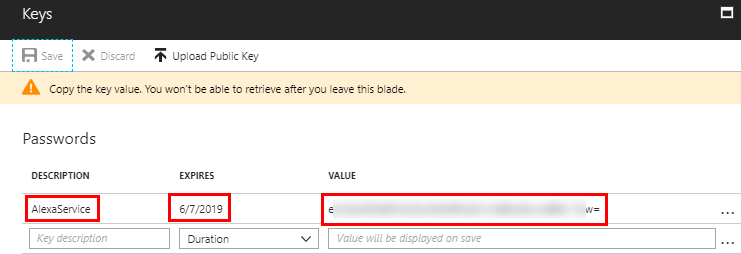
- Client Secret: This is effectively the password the Alexa service will use to allow account linking to your API backend. We will generate one now. Navigate to the Keys setting in the API app registration.
 Give a key a description and a duration. Select a 1 or 2 year duration. A key with “never expires” duration may fail account linking. Click Save. The key will be generated on the save. This will be the one time this key is displayed, so copy it.
- Client Authentication Scheme: HTTP Basic (Recommended)
In the end your Account Linking settings should look similar to this:
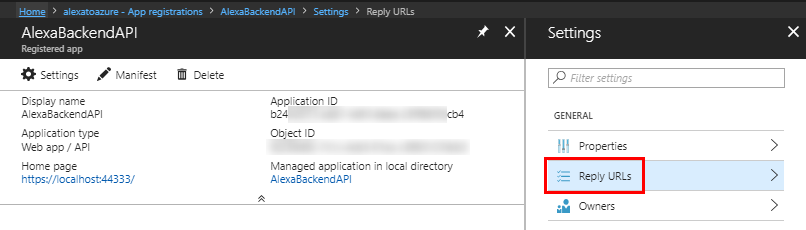
Before we move onto the next screen, notice the Redirect URIs in the settings. Copy these URLs into the Redirect URLs setting for app registration.

Step 6: Link Accounts and Test
- Login to https://alexa.amazon.com
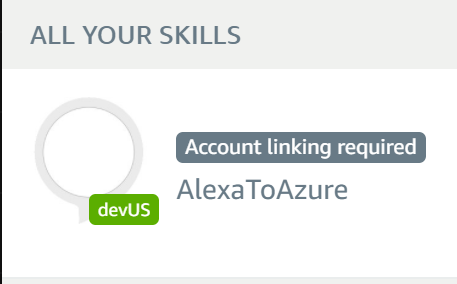
- Navigate to Skills -> Your Skills
- You should see our newly created skill. Click on it.
- Select SETTINGS
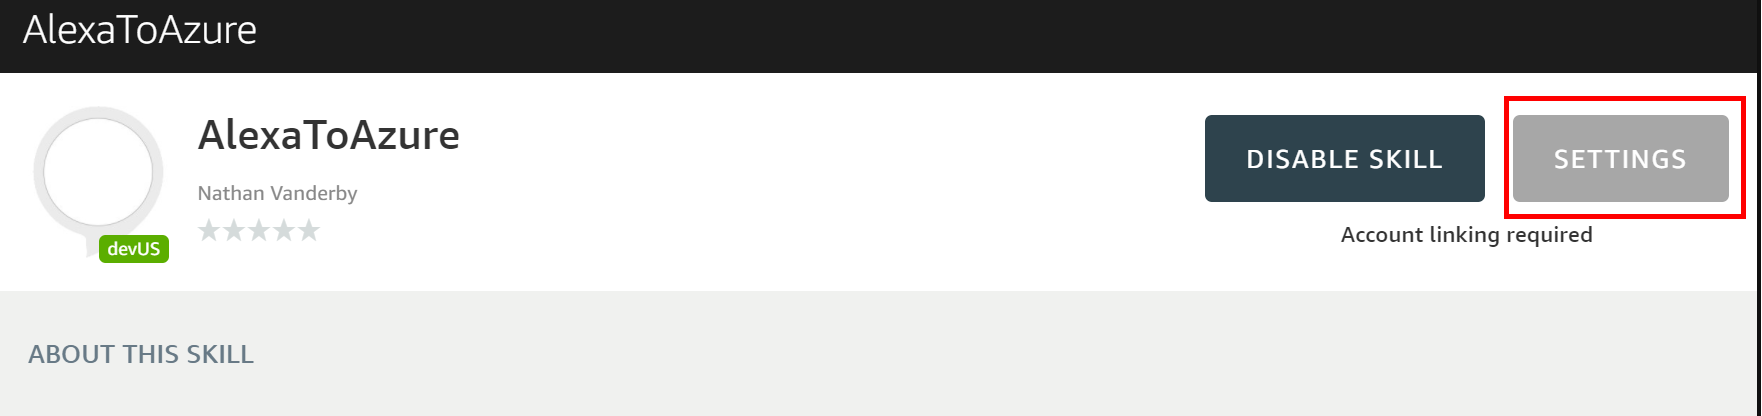
- Click on the Link Account button in the upper right corner

- You will be redirected to login to Azure Active Directory and then asked to accept the access being requested. Once you get through that result and if all goes well you should see:
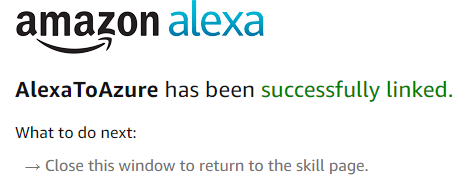
If you are unsuccessful linking your account see the troubleshooting steps below.
Step 7: Testing
We have multiple options by which to test the Alexa Integration. We can use an actual device or the Amazon Developers Portal Test client.
Amazon Developer Portal
- In the Amazon Developer portal where we configured the Alexa skill Note: If you left this tab open from the prior instructions, you will have to refresh the page after performing the account linking
- Make sure you are under the skill you are wanting to test
- Click on the test section
- In the Enter Utterance Section enter the following: ask Tutorial to greet
- = any name
- This is derived in the Invocation Model section for the skill.
- If all goes well you should see something that looks like:

- if you get a
401: Unauthorizedresult check that the skill is account linked or see some debugging tips below.
Troubleshooting
- Double check Web App settings in Azure aren’t overriding the web.config settings
- F12 browser tool
- If you need to look at the HTTP Request Response stream pressing F12 from Explorer, Edge, Chrome will open integrated developer tools.
- JWT.IO – https://jwt.io/
- This is a browser based tool where you can take your JWT token from the request and decode it and verify the signature
- If account linking works and your still getting a
401 unauthorizedresponse try the following:- Refresh the Amazon develop page and try again (this makes Amazon request a new token)
- Check the skill is successfully account linked.
- Enabling diagnostic logs, detailed error messages and leveraging live streaming of logs in the Azure portal for the web app is very useful for debugging
- Use Postman to troubleshoot account linking problems. A video on how to do this can be found here.
Sample Code
The companion source code for the Azure Function portion of this tutorial can be located on GitHub at https://github.com/vanderby/AlexaToAzureFunction
Links
- Azure SDKs and Tools
- ASP.NET Authentication attribute documentation
- Amazon developer documentation
- How to use Postman to debug account linking
Premier Support for Developers provides strategic technology guidance, critical support coverage, and a range of essential services to help teams optimize development lifecycles and improve software quality. Contact your Application Development Manager (ADM) or email us to learn more about what we can do for you.
0 comments