Timing Captures
Please see this page for information about Timing Captures in the most recent versions of PIX. The documentation below describes an old version of Timing Captures that is not available in the latest versions of PIX.
PIX timing captures record information about when each piece of work was carried out by the CPU and GPU. This data is gathered in realtime while the game is running, and with minimal overhead, so you can see things like how work is distributed across CPU cores, the latency between graphics work being submitted by the CPU and executed by the GPU, and how GPU rendering workloads are overlapping with async compute.
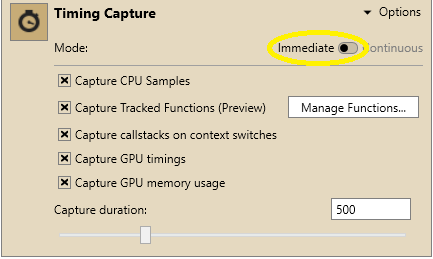
Timing captures display time-oriented data from a variety of sources both from within your title and from the system itself. Data from the instrumentation you’ve added to your code using PIX events and PIX markers will always be displayed. PIX can also optionally capture callstacks for context switches, CPU samples, functions defined in your title and D3D specific GPU timing information. These additional types of data enable additional profiling scenarios, but enabling these options increases the overhead of collection.
Timing captures can optionally capture call stack information and/or D3D12 specific GPU timing information. This data can be useful, but enabling it increases overhead of the collection.
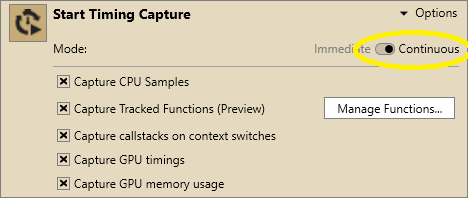
Timing captures support multiple ways to capture. By default timing captures are taken as continuous captures and are integrated with the System Monitor. In order to start or stop a continuous timing capture press the icon next to Start Timing Capture after setting the mode to Continuous:
Once the capture is stopped a green range will appear on the System Monitor control, which allows selection of the range of timing capture data to open:
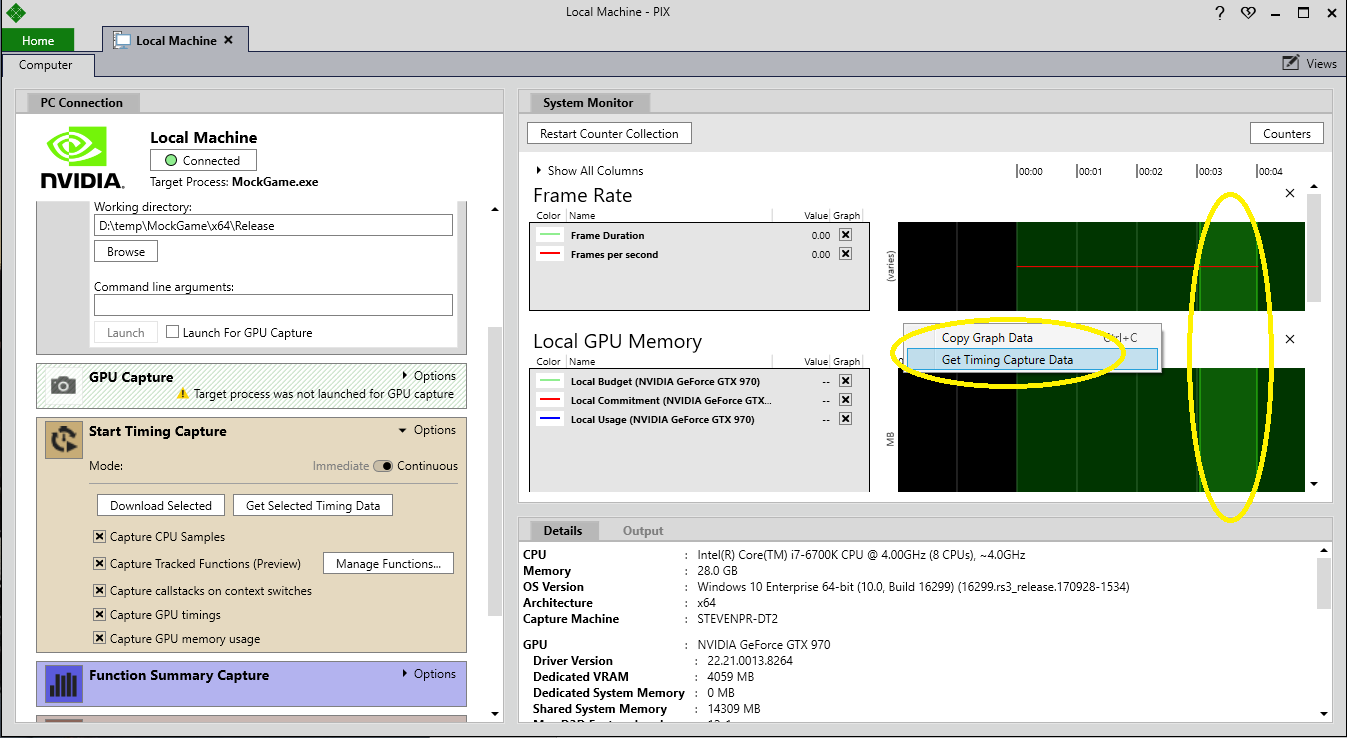
The range of timing data that can be opened is currently limited to 2 seconds.
The other option for capturing timing data is through an immediate mode capture which starts, stops and then opens the timing capture after pressing the icon next to Timing Capture:
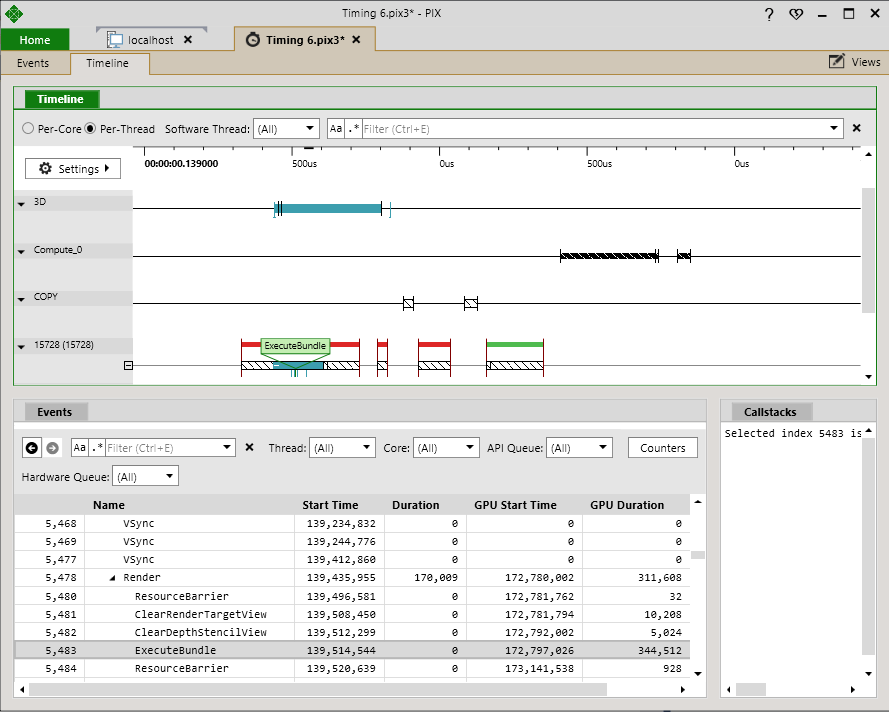
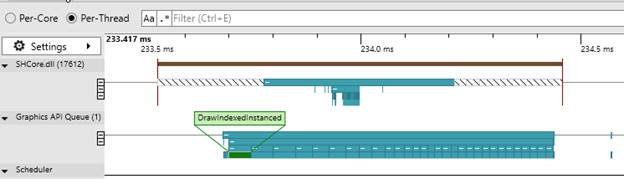
Timing captures support multiple event list views. The CPU Order event list builds hierarchies for PIX events based on the order the events were executed on per individual thread. The GPU Order event list builds hierarchies based on the GPU start time of each event per API Context (D3D12CommandQueue) that it was executed on. The Function Calls event list shows the CPU samples that were collected, and the functions that were tracked, while the capture was running.
The timeline has two different ways to view lanes. Per-core shows a hardware perspective by visualizing the available cores and available GPU hardware engines that are reported by the driver. Per-thread shows an API perspective by visualizing the per-thread activity of an application for the CPU and the execution of GPU work per D3D12CommandQueue. If you are running Windows 10 Creators Update, aka RS2, or higher, you can also use the SetThreadDescription API to label your threads so they are easier to identify in the timeline.
In addition to collecting data corresponding to PIX events, timing captures can also track GPU memory usage, collect CPU samples, track individual functions in your title, and render correlation arrows indicating where threads or command queues wake up as a result of a fence being signaled.
By tracking GPU memory usage, PIX can show how heaps and resources are created and managed with respect to the underlying GPU memory. This can be used to understand and optimize heap residency and troubleshoot performance issues caused by paging between local and non-local GPU memory.
Collecting CPU samples and tracking functions provides detailed information about the code that is running on a thread or core at any time, not just those times that correspond with PIX events. Rather than adding more instrumentation and rebuilding, you can use samples and tracked functions to determine what’s going on in areas of your title that aren’t fully instrumented with PIX events.
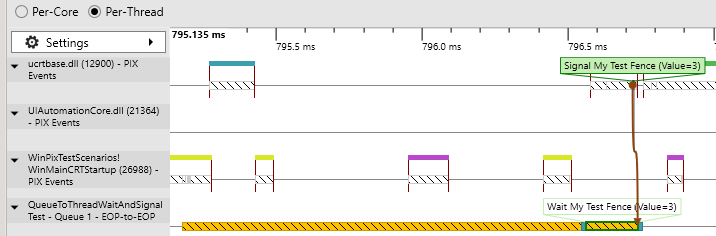
By rendering correlation arrows for fence operations, PIX can show where threads and GPU command queues wake up and start performing work. This can be used to understand and optimize where delays may be occurring in the application. A correlation arrow is drawn starting from a fence Signal operation to where a thread or command queue wakes up. Correlation arrows between command queues are automatically tracked by PIX with no additional work required by the developer.
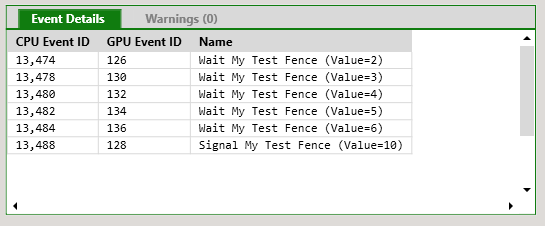
Command Queue Fence Signal waking up a different Command Queue waiting on multiple fence values

In addition to the correlation arrows being rendered on the timeline, PIX will also show a list of all Event IDs in the Event Details View of the Wait and Signals being tracked for a selected event.
PIX requires some additional information to be able to track a fence correlation back to a CPU thread. PIXNotifyWakeFromFenceSignal was added to the WinPixEventRuntime for this purpose. PIXNotifyWakeFromFenceSignal notifies PIX that an event handle was set as a result of a D3D12 fence being signaled. The event handle specified must have the same handle value as the handle used in ID3D12Fence::SetEventOnCompletion. This api should be called immediately after the event handle has been unblocked.
DWORD result = WaitForSingleObject(eventHandle, INFINITE);
switch (result)
{
case WAIT_OBJECT_0:
   PIXNotifyWakeFromFenceSignal(eventHandle); // The event was successfully signaled, so notify PIX
   DoSomeAppWork();
   break;
default:
   // WAIT_ABANDONED, WAIT_TIMEOUT, WAIT_FAILED returned..
   // App does some error handling here...
   break;
}
Command Queue Fence Signal waking up a thread currently waiting
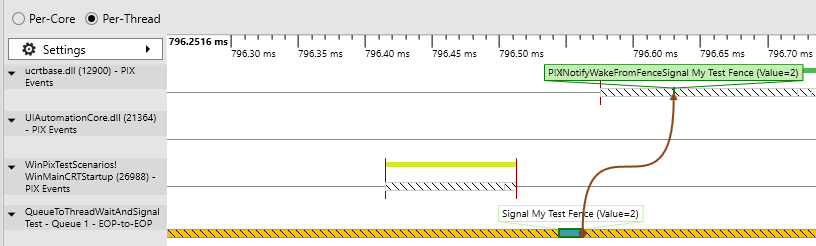
Thread Fence Signal waking up a Command Queue currently waiting