

In the Deep insert support in OData webapi blog post, we demonstrated how to add deep insert capabilities to an OData service. In this blog post, we demonstrate how to add deep insert capabilities in OData client.
In the following sections, we implement a client app.
Create a Console application
- Start Visual Studio 2022 and select Create a new project.
- In the Create a new project dialog:
- Enter
Consolein the Search for templates search box. - Select Console App project template and select Next.
- Enter
- Name the project ODataClientDeepInsert and select Next.
- In the Additional information dialog:
- Select .NET 6.0 (Long Term Support).
- Check Do not use top-level statements – not necessary if you’re comfortable with using top-level statements that limits you to using local variables and local functions.
- Select Create.
Install required packages
In our client application, we are going to use the Microsoft.OData.Client library that offers APIs for building deep insert requests and consuming deep insert responses.
Run the following command on the Visual Studio Package Manager Console to install the Microsoft.OData.Client nuget package:
Install-Package Microsoft.OData.Client
Generate proxy class
We generate a strongly-typed OData client proxy using the OData Connected Service extension.
If OData Connected Service extension is not installed, follow the steps below to install from the Visual Studio marketplace:
- From the Visual Studio Extensions menu, select Manage Extensions.
- From the Manage Extensions window, type “OData Connected Service” on the Search box.
- The OData Connected Service 2022+ extension should appear on the list if you’re using Visual Studio 2022.
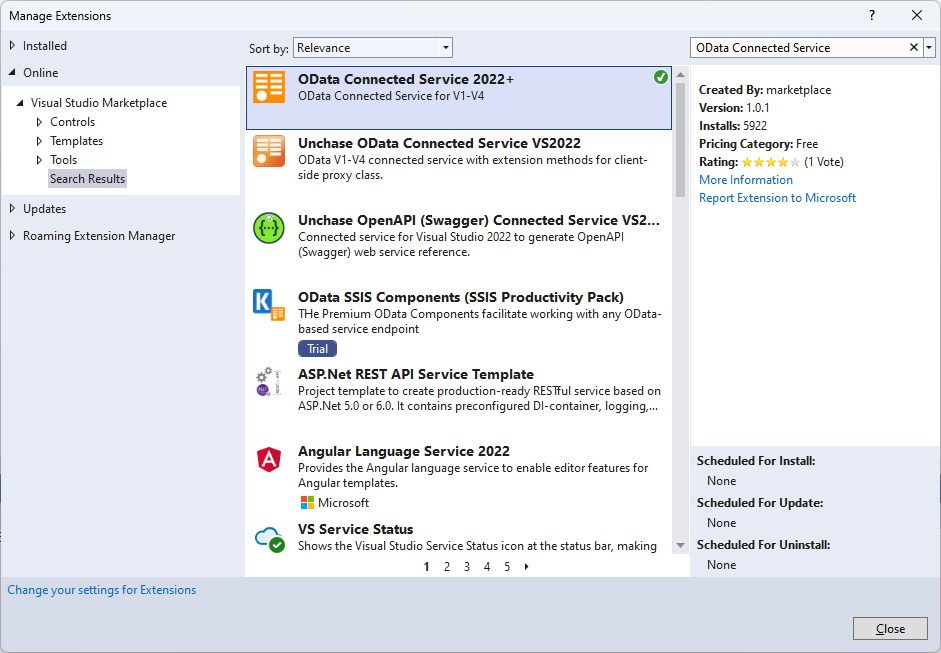
- A button labelled Download should appear on the list item if the extension is not installed. Click the button to install the extension.
Ensure that the ASP.NET Core application created in Deep insert support in OData webapi is running before proceeding with the following steps to generate the OData client proxy:
- In Solution Explorer, right-click ODataClientDeepInsert project. Click Add > Connected Service to open the Connected Services view.
- Click OData Connected Service (under Other Services) to launch the OData Connected Service wizard.
- On the Endpoint wizard page, provide a suitable service name (e.g., DeepInsertService) and enter the endpoint which the OData service from Deep insert support in OData webapi is listening on, e.g., http://localhost:5000. If you specified a route prefix for the OData service, make sure to append it to the endpoint, e.g., http://localhost:5000/ROUTE_PREFIX.
- Click Next to move to the Schema Types Selection wizard page. Leave everything unchanged.
- Click Next again to move to the Function/Action Imports Selection wizard page. Leave everything unchanged.
- Click Next again to move to the Settings wizard page. If you wish, you can provide your own name for the client proxy, e.g. ODataClientDeepInsertProxy. Leave the other settings unchanged.
- Click Finish to trigger the generation of the client proxy.
Create a deep insert request
We will explore various methods that we use to create deep insert requests.
AddRelatedObject method
In the Program.cs file’s Main method, add the code below:
Example 1
DataServiceContext context = new Container(new Uri("http://localhost:5000"));

Person person = new Person
{
    ID = 100,
    Name = "Person 100"
};

Car car = new Car
{
    ID = 1001,
    Name = "Car 1001"
};

context.AddObject("Persons", person);
context.AddRelatedObject(this.person, "Cars", car);

DataServiceResponse response = this.context.DeepInsert<Person>(this.person);
AddRelatedObject method adds a related object to the context and creates the link that defines the relationship between the two objects (Person and Car) in a single request. The nested property MUST be a collection-valued navigation property.
Below is the request payload created:
{
  "ID": 100,
  "Name": "Person 100",
  "Cars": [
    {
      "ID": 1001,
      "Name": "Car 1001"
    }
  ]
}
We could call AddRelatedObject to support multiple nestings of related objects: Let’s update the code in Program.cs to look like below:
Example 2
DataServiceContext context = new Container(new Uri("http://localhost:5000"));

Person person = new Person
{
    ID = 100,
    Name = "Person 100"
};

Car car = new Car
{
    ID = 1001,
    Name = "Car 1001"
};

Manufacturer manufacturer = new Manufacturer
{
    ID = 11,
    Name = "Manu-A"
};

Country country = new Country
{
    ID = 101,
    Name = "CountryA"
};

context.AddObject("Persons", person);
context.AddRelatedObject(person, "Cars", car);
context.AddRelatedObject(car, "Manufacturers", manufacturer);
context.AddRelatedObject(manufacturer, "Countries", country);

DataServiceResponse response = this.context.DeepInsert<Person>(person);
Below is the request payload created:
{
  "ID": 100,
  "Name": "Person 100",
  "Cars": [
    {
      "ID": 1001,
      "Name": null,
      "Manufacturers": [
        {
          "ID": 11,
          "Name": "Manu-A",
          "Countries": [
            {
              "ID": 101,
              "Name": "CountryA"
            }
          ]
        }
      ]
    }
  ]
}
AddLink method
In the Program.cs file’s Main method, add the code below:
Example 3
DataServiceContext context = new Container(new Uri("http://localhost:5000"));

Person person = new Person
{
    ID = 100,
    Name = "Person 100"
};

Car car1 = new Car
{
    ID = 1001,
    Name = "Car 1001"
};

Car car2 = new Car
{
    ID = 1002,
    Name = "Car 1002"
};

context.AddObject("Persons", person);
context.AttachTo("Cars", car1);
context.AttachTo("Cars", car2);
context.AddLink(person, "Cars", car1);
context.AddLink(person, "Cars", car2);

DataServiceResponse response = this.context.DeepInsert<Person>(person);
AddLink method adds the specified link to the set of objects the DataServiceContext is tracking. The nested property MUST be a collection-valued navigation property.
In the code above, we called AttachTo so that the dataservicecontext can track car1 and car2. Then we call AddLink method to create a link between person and car1 and another link between person and car2.
Below is the request payload created:
{
  "ID": 100,
  "Name": "Bing",
  "Cars": [
    {
      "@id": "http://localhost:5000/Cars(1001)"
    },
    {
      "@id": "http://localhost:5000/Cars(1002)"
    }
  ]
}
@id can be used interchangeably with @odata.id.
If we looked keenly, AddLink and AddRelatedObject methods above are used to link or add objects to collection-valued navigation properties. We will now discuss methods that are used to link or add objects to single-valued navigation properties.
SetRelatedObject method
In the Program.cs file’s Main method, add the code below:
Example 4
DataServiceContext context = new Container(new Uri("http://localhost:5000"));

VipPerson vipPerson = new VipPerson
{
    ID = 100,
    Name = "Person 100"
};

Car car = new Car
{
    ID = 1001,
    Name = "Car 1001"
};

context.AddObject("VipPersons", vipPerson);
context.SetRelatedObject(vipPerson, "Car", car);

DataServiceResponse response = this.context.DeepInsert<VipPerson>(vipPerson);
SetRelatedObject method Adds a related object to the context and creates the link that defines the relationship between the two objects (VipPerson and Car) in a single request. The nested property MUST be a single-valued navigation property.
Below is the created payload:
{
  "ID": 100,
  "Name": "Person 100",
  "Car": {
    "ID": 1001,
    "Name": "Car 1001"
  }
}
SetRelatedObjectLink
In the Program.cs file’s Main method, add the code below:
Example 5
DataServiceContext context = new Container(new Uri("http://localhost:5000"));

VipPerson vipPerson = new VipPerson
{
    ID = 100,
    Name = "Person 100"
};

Car car = new Car
{
    ID = 1001,
    Name = "Car 1001"
};

context.AddObject("VipPersons", vipPerson);
context.AttachTo("Cars", car);
context.SetRelatedObjectLink(vipPerson, "Car", car);

DataServiceResponse response = this.context.DeepInsert<VipPerson>(vipPerson);
SetRelatedObjectLink method adds the specified link to the set of objects the DataServiceContext is tracking. The nested property MUST be a single-valued navigation property.
In the code above, we called AttachTo so that the DataServiceContext can track the car object. Then we call SetRelatedObjectLink method to create a link between person and car.
Below is the created payload:
{
  "ID": 100,
  "Name": "Bing",
  "Car": {
    "@id": "http://localhost:5000/Cars(1001)"
  }
}
Handle a deep insert response
Responses from deep insertrequests are stored in a DataServiceResponse.
The DataServiceResponse object includes a sequence of OperationResponse objects that, in turn, contain a sequence of EntityDescriptor or LinkDescriptor instances that represent the changes persisted or attempted. When an entity is created or modified in the data service, the EntityDescriptor includes a reference to the updated entity, including any server-generated property values, such as the generated ID value.
Each OperationResponse can contain a nested sequence of OperationResponse objects.
Below will be the json response from the deep insert request in example 2
{
  "@context": "http://localhost:5000/$metadata#Persons(Cars())/$entity",
  "ID": 100,
  "Name": "Person 100",
  "Cars": [
    {
      "ID": 1001,
      "Name": null,
      "Manufacturers": [
        {
          "ID": 11,
          "Name": "Manu-A",
          "Countries": [
            {
              "ID": 101,
              "Name": "CountryA"
            }
          ]
        }
      ]
    }
  ]
}
Let’s look at how we can extract values from a deep insert response in example 2
DataServiceResponse response = this.context.DeepInsert<Person>(this.person);

ChangeOperationResponse changeOperationResponse = response.First() as ChangeOperationResponse;
EntityDescriptor entityDescriptor = changeOperationResponse.Descriptor as EntityDescriptor;
Person returnedPerson = entityDescriptor.Entity as Person;

ChangeOperationResponse nestedResponseCars = changeOperationResponse.NestedResponses[0] as ChangeOperationResponse;
EntityDescriptor carDescriptor = nestedResponseCars.Descriptor as EntityDescriptor;
Car returnedCar = carDescriptor.Entity as Car;

ChangeOperationResponse nestedResponseManufacturers = nestedResponseCars.NestedResponses[0] as ChangeOperationResponse;
EntityDescriptor manuDescriptor = nestedResponseManufacturers.Descriptor as EntityDescriptor;
Manufacturer returnedManufacturer = manuDescriptor.Entity as Manufacturer;

ChangeOperationResponse nestedResponseCountries= nestedResponseManufacturers.NestedResponses[0] as ChangeOperationResponse;
EntityDescriptor countryDescriptor = nestedResponseCountries.Descriptor as EntityDescriptor;
Country returnedCountry = countryDescriptor.Entity as Country;
Handling failed responses
When the have failed responses, the DataServiceResponse will still be created with the sequence of OperationResponse objects.
OperationResponse objects for failed responses will contain the Error property which is an Exception object that contains the error.
Conclusion
This blog post provides an overview of the various methods we use to create deep insert requests and handle responses. We hope this is the starting point for you to add more capabilities to your OData client projects.
0 comments