
Teams Toolkit introduced some new features earlier this year that have been added in the latest version to improve your debugging experience – Prerequisite Checker and Customizing Debug Settings. With the latest Toolkit in v.4.1.0 and greater, you can now customize the debugging experiences even more!
If this is your first time with Teams Toolkit, please check out these tutorials before you begin:
- Beginners’ crash course to build apps for Teams using Teams Toolkit for Visual Studio Code
- Roll A Dice! – Building a Command Bot for Microsoft Teams Using Team Toolkit v4 with VS Code
🐛 Debugging experiences in Teams Toolkit
Debugging in VS Code is casually referred to as F5 among developers, is one of the key features of Visual Studio Code, and this built-in debugger helps accelerate your edit, compile, and debug loop.
When you created any project with Teams Toolkit in VS Code, you also use this F5 debugger to run the code. While you are waiting, Teams Toolkit runs various process, check prerequisites, and output the results like this:
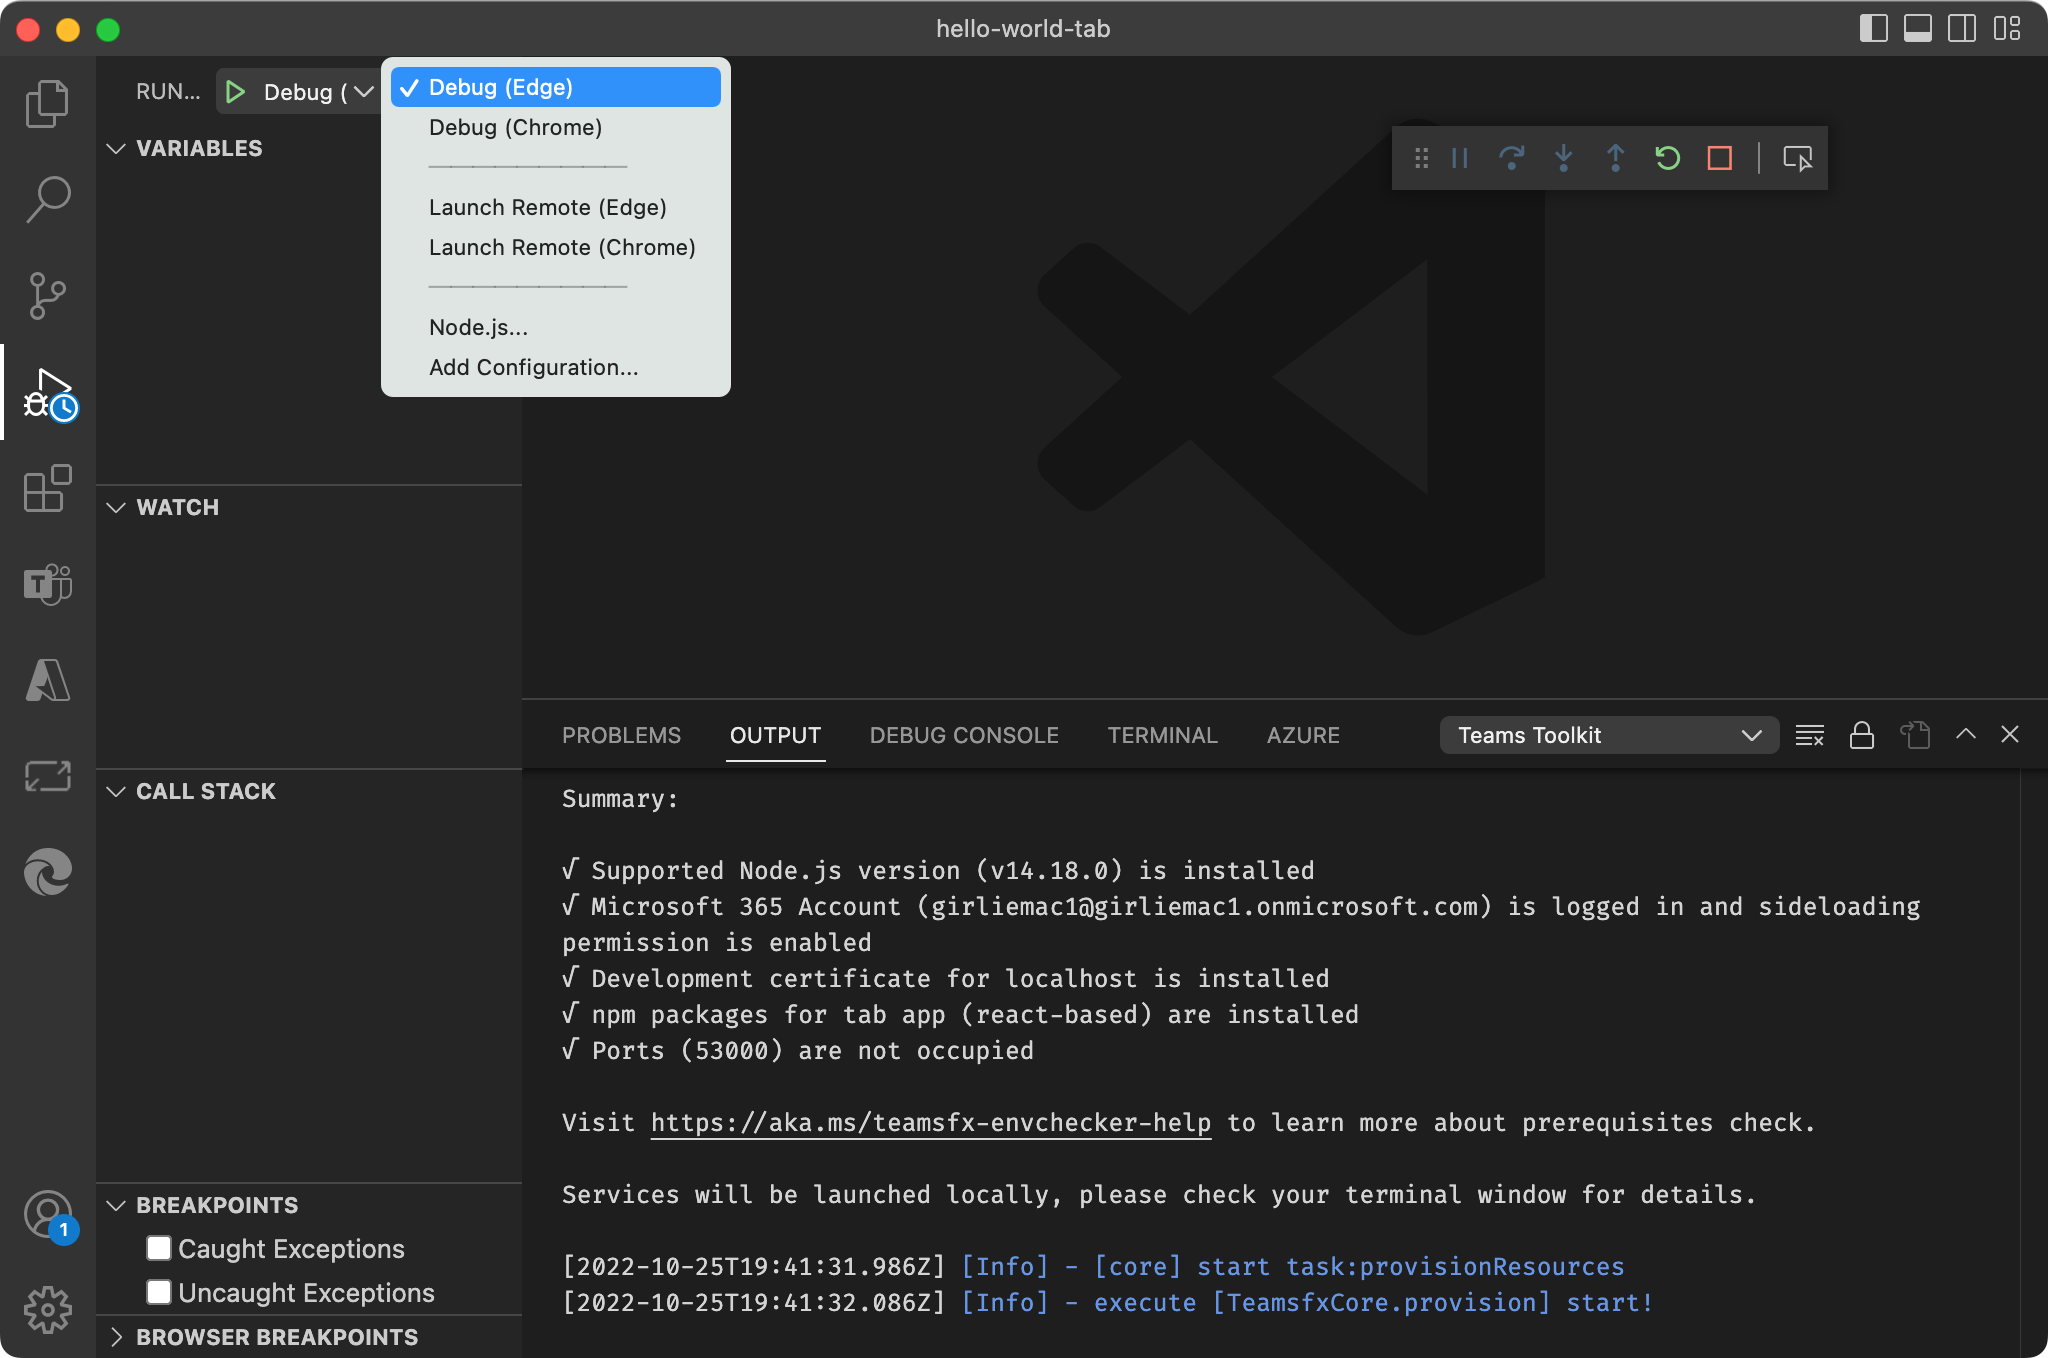
In the Output section, you can view what the debugger is doing. In this screenshot, you can see a checklist, including whether you have a specific Node.js, your Microsoft 365 account status, etc.
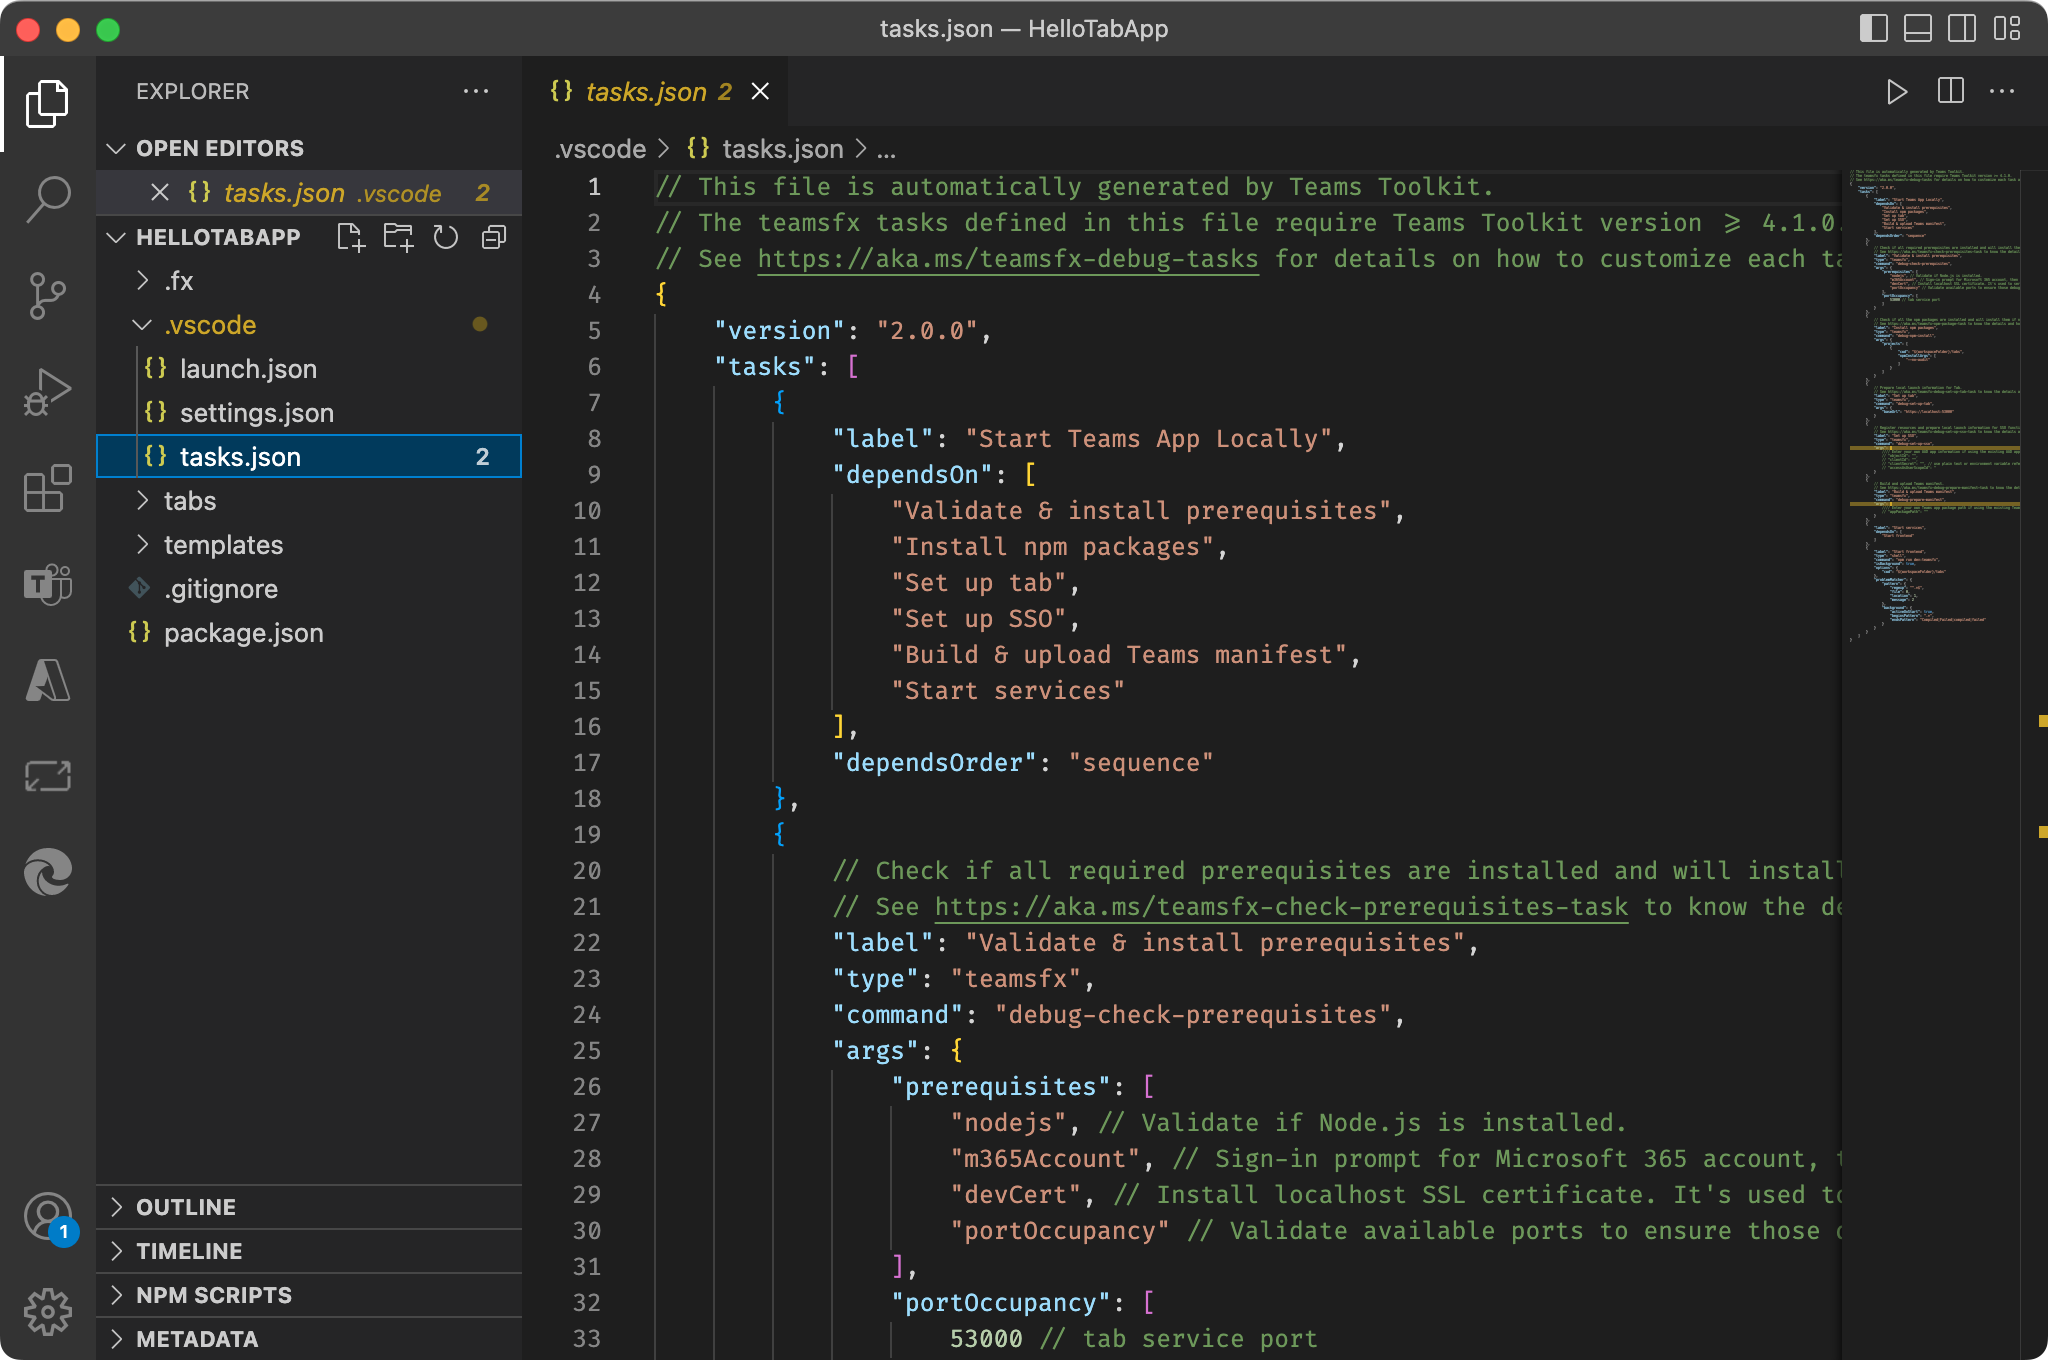
So, where are these tasks and the checklist are defined? It is in .vscode/tasks.json in the generated project, and you can customize in the way you want. Let’s take a look at some customization examples for both a tab app and bot app.
🗂 Customizing tasks.json for tab apps
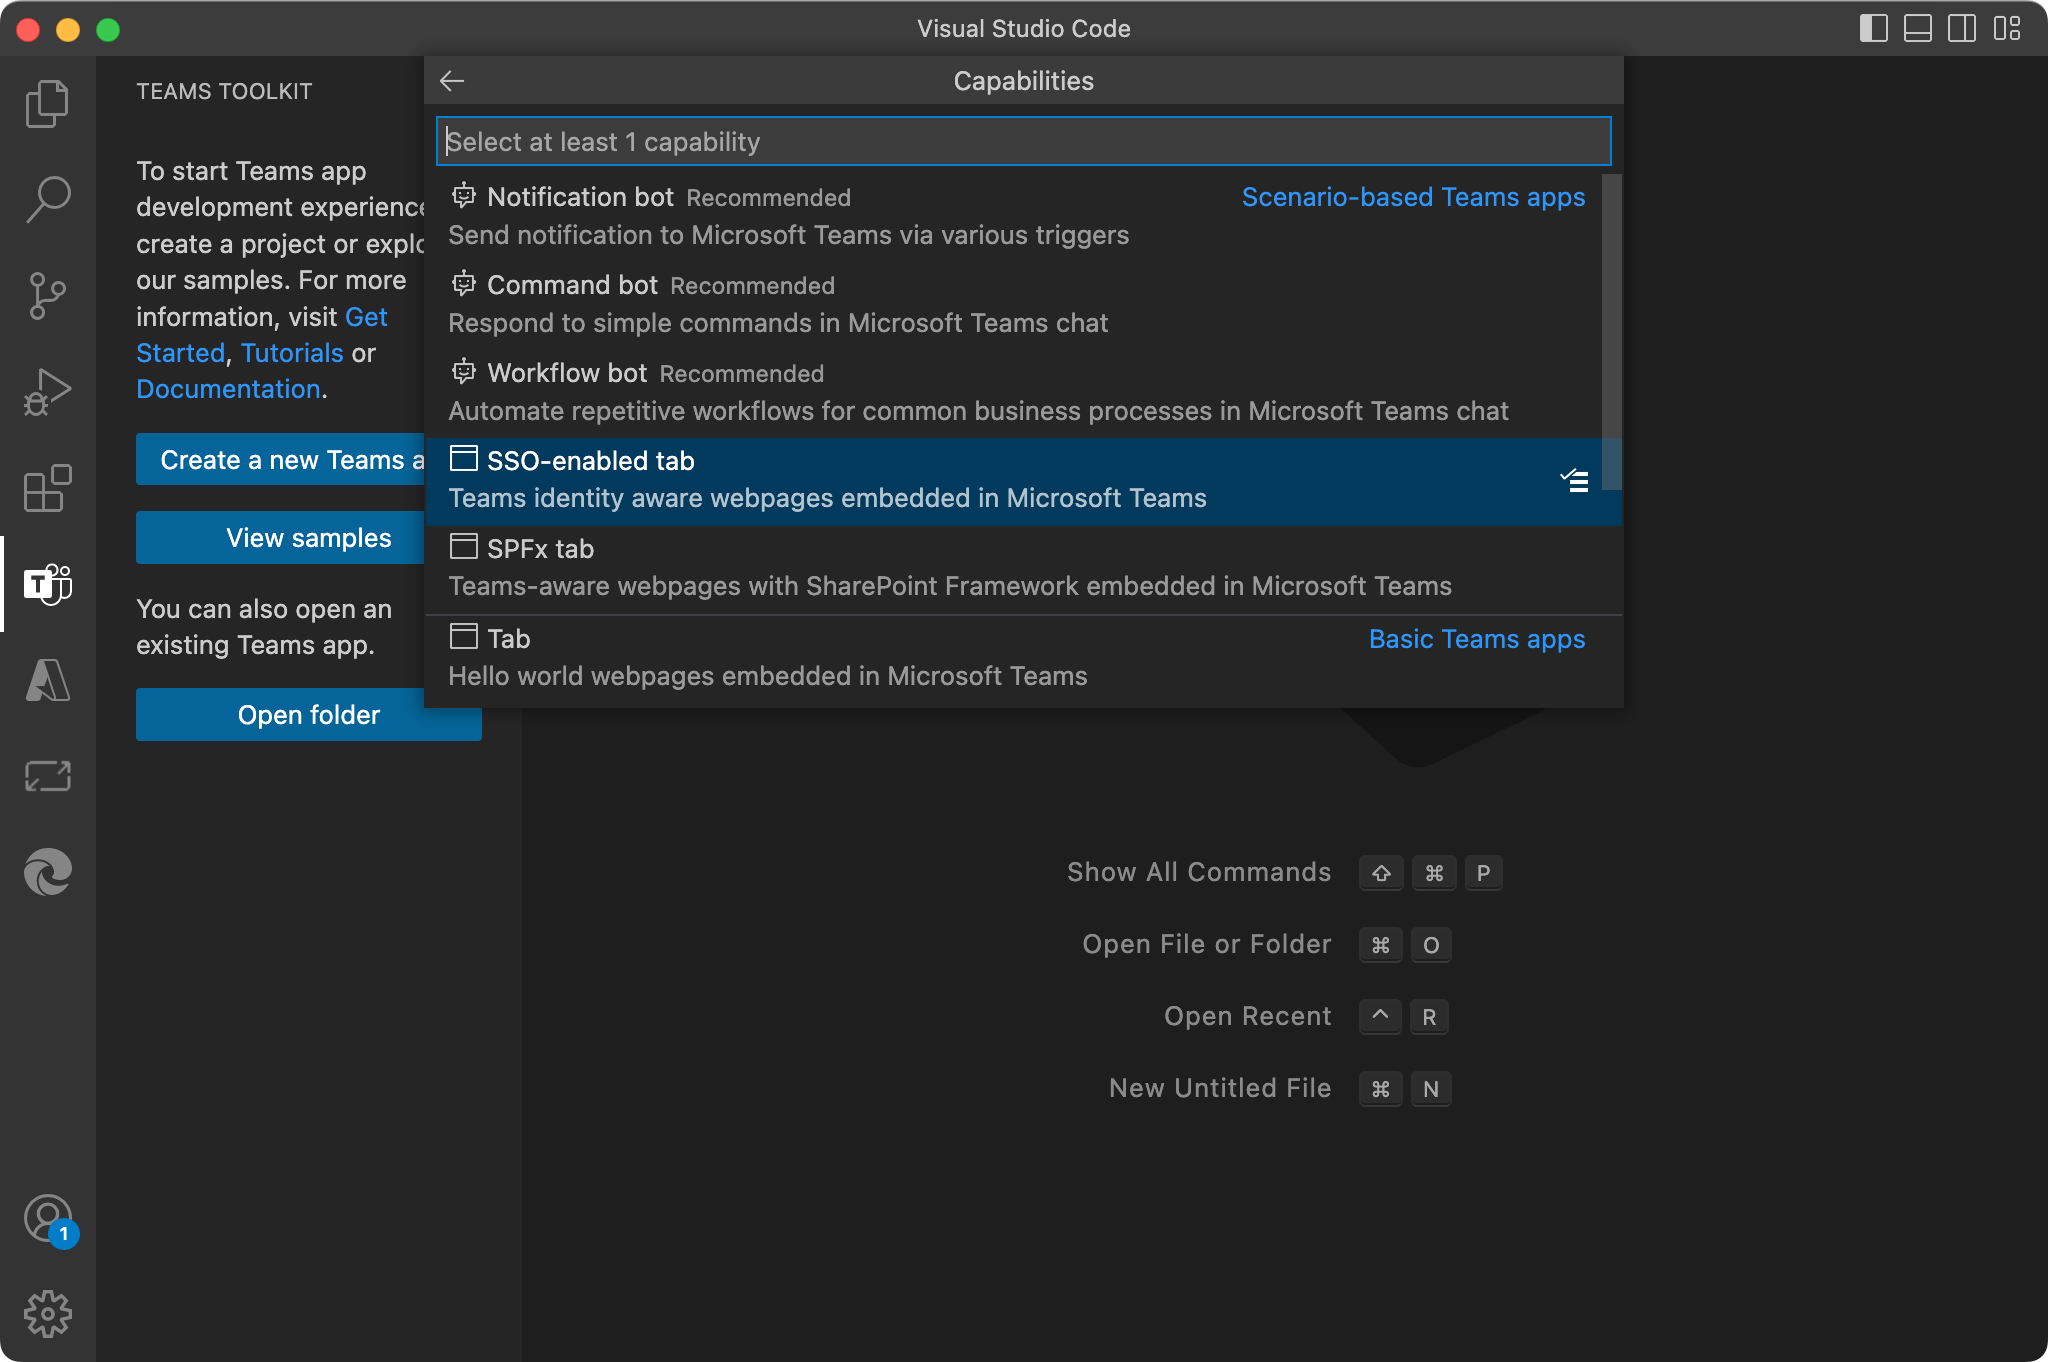
First, let’s create a new app by choosing the single sign-on (SSO)-enabled tab from the menu:
Once the project is generated, open .vscode/tasks.json and see what is defined:
You may want to try debugging to see how each item defined in the tasks.json runs and display in the Output by default:

Now, let’s see how to customize the debugging flow by editing the tasks.json file.
✅ Customizing prerequisites
If you want to skip certain processes, such as checking prerequisites and installing npm packages, just comment out where they are defined in "tasks":
"tasks": [
  {
    "label": "Start Teams App Locally",
    "dependsOn": [
      //"Validate & install prerequisites",
      //"Install npm packages",
      "Set up tab",
      "Set up SSO",
      "Build & upload Teams manifest",
      "Start services"
  ],
Or you can select prerequisites validation independently. Scroll down to the next object in JSON then editing these lines. For example, if you want to skip checking if Node.js is installed, comment the line out:
{
  "label": "Validate & install prerequisites",
  "type": "teamsfx",
  "command": "debug-check-prerequisites",
  "args": {
    "prerequisites": [
      //"nodejs",
      "m365Account",
      "devCert",
      "portOccupancy"
    ],
Try running F5 to see if the processes are skipped.
🛎 Customizing npm commands
Also, you can customize npm install commands by adding an optional argument, for example, --force to force npm to fetch remote resources even if a local copy exists:
{
  "label": "Install npm packages",
  "type": "teamsfx",
  "command": "debug-npm-install",
  "args": {
    "projects": [
      {
        "cwd": "${workspaceFolder}/tabs",
        "npmInstallArgs": [
          "--no-audit",
          "--force" // added!
        ]
...
🛳 Changing service port
Tabs in tab apps are basically web pages embedded in Teams client, and they run on a specific port when you debug locally. By default, it is set 53000 and the web portion of your app can be debugged in https://localhost:53000. The Toolkit debugger checks if the port is available.
If you would like to change the port, you need to edit two places in the JSON file:
{
  "label": "Validate & install prerequisites",
  "type": "teamsfx",
  "command": "debug-check-prerequisites",
  "args": {
    "prerequisites": [
      "nodejs",
      "m365Account",
      "devCert",
      "portOccupancy"
    ],
    "portOccupancy": [
        33000 // was 53000
    ]
  }
and
{
  "label": "Set up tab",
  "type": "teamsfx",
  "command": "debug-set-up-tab",
  "args": {
    "baseUrl": "https://localhost:33000" // was 53000
  }
},
And you can customize more by deleting/commenting out lines, edit values, and add values in the JSON file.
Some values are commented out by default, such as SSO setup, so you can enable some by uncommenting the lines too. Just customize as your app needs!
🤖 Customizing tasks.json for bots
Next, let’s take a look at a bot app. You can customize the tasks in the way I showed you for tab apps (such as the prerequisites checks), except there are some differences between tabs and bots.
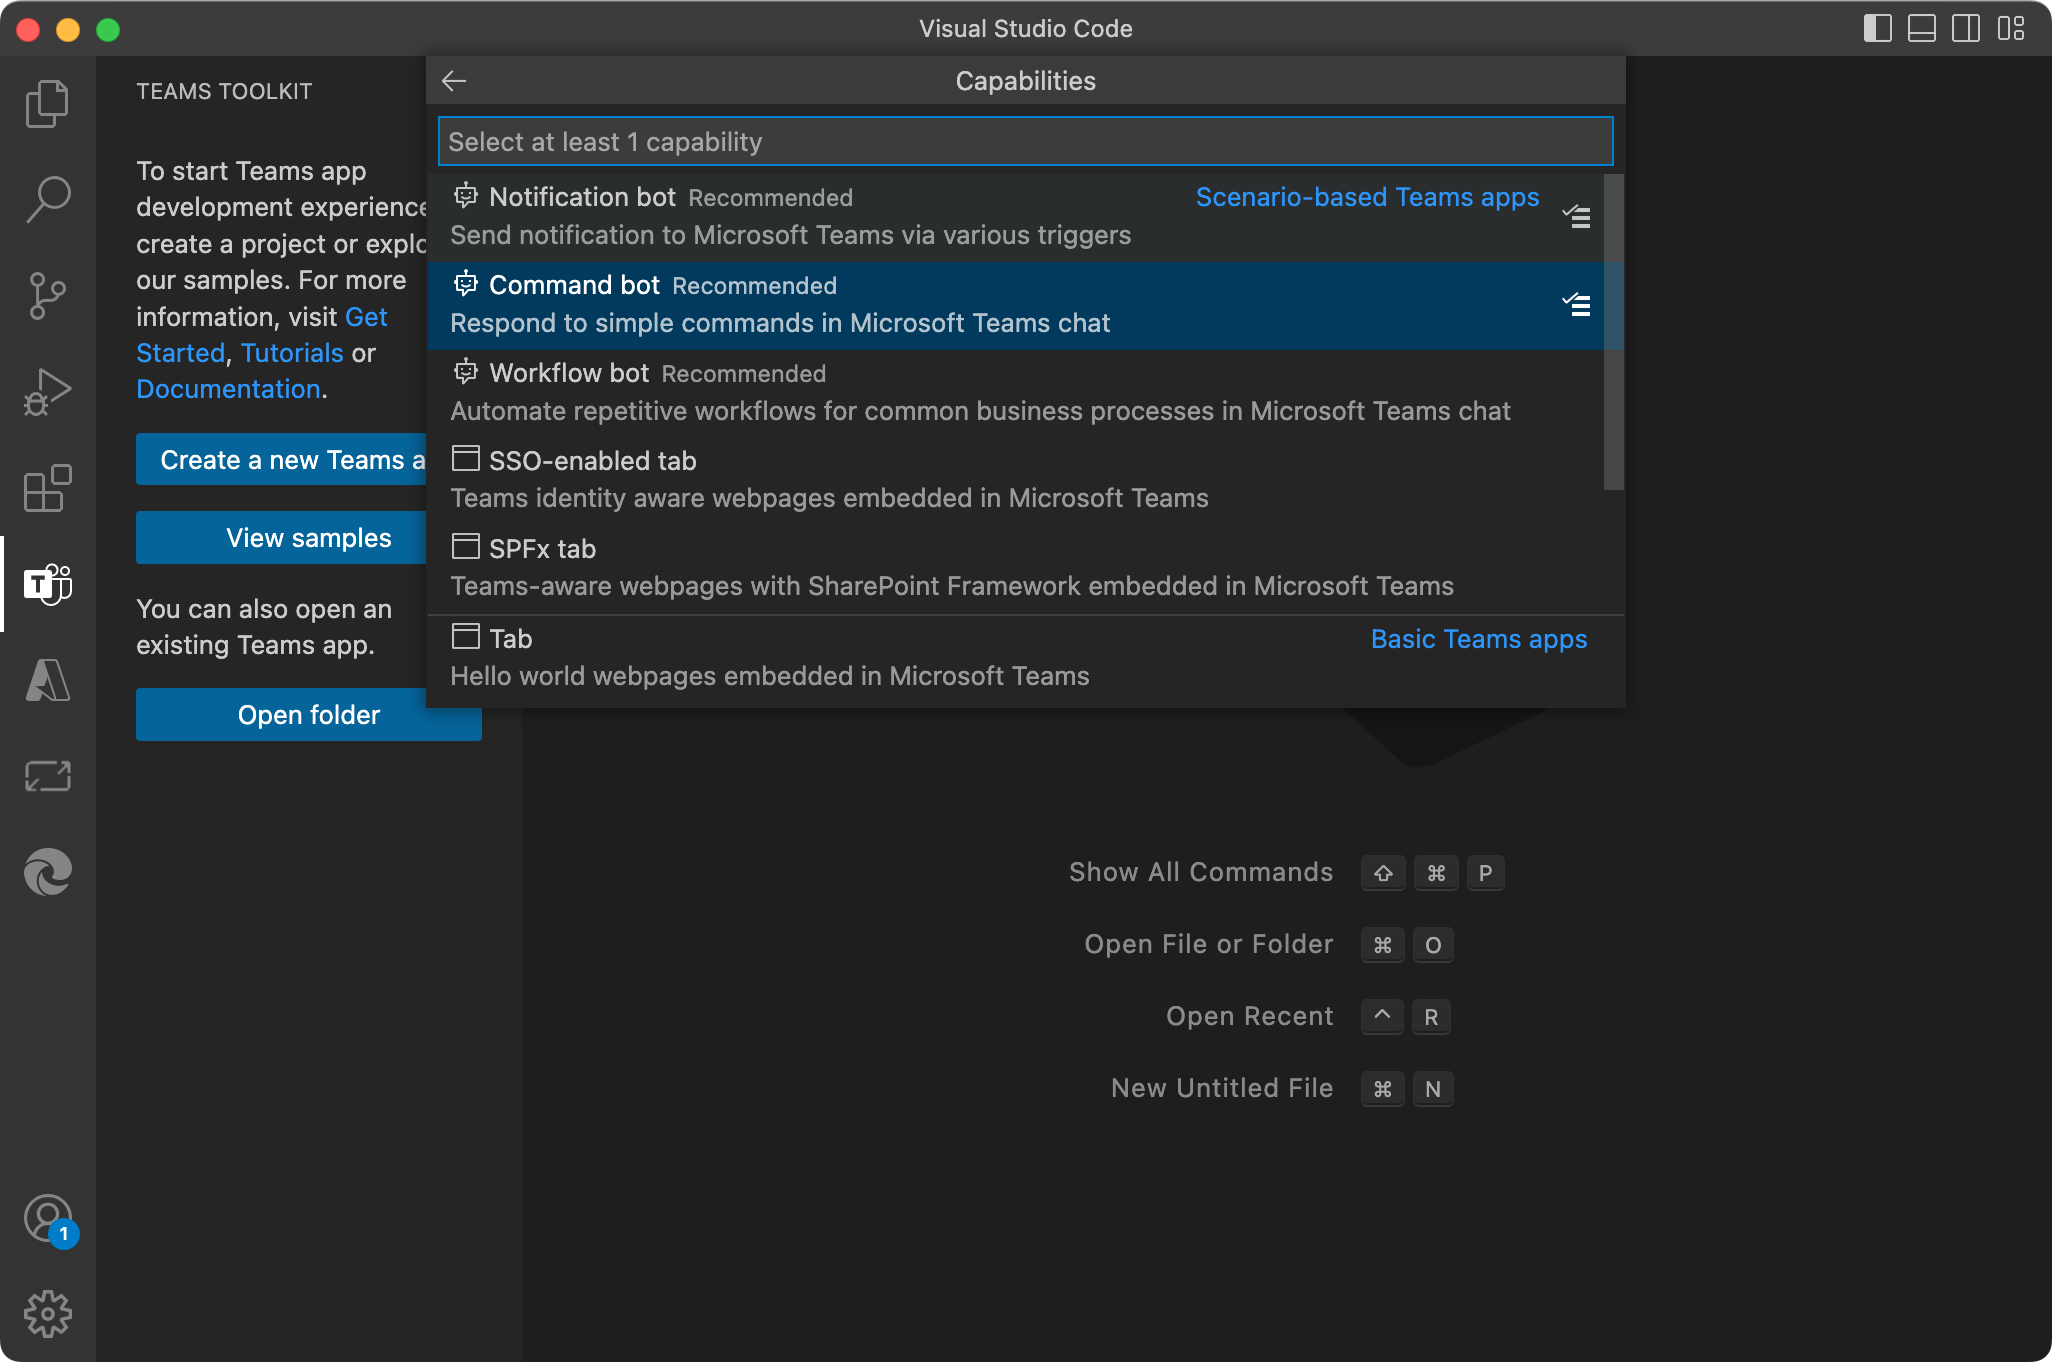
Let’s create a new command bot and see how the tasks are different.
Open the file at .vscode > tasks.json. You can see some tasks are different from the tab app. There are bot-specific tasks including, “Set up bot” and “Start local tunnel”:
"tasks": [
  {
    "label": "Start Teams App Locally",
    "dependsOn": [
      "Validate & install prerequisites",
      "Install npm packages",
      "Start local tunnel",
      "Set up bot",
      "Build & upload Teams manifest",
      "Start services"
    ],
    "dependsOrder": "sequence"
  }
...
When you run the debugger, you can see the process in the Output pane, in the same way you saw for the tab app.
Customization can be done in the same manner, so if you want to skip certain tasks, you can comment the lines out.
Next, let’s take a look at the bot-specific tasks and settings.
🛳 Changing bot service port
Bots use ports to run bot services, where tabs run web services.
Just like the port for tabs you just learned, you can manually change the "PortOccupancy". Let’s change the bot service port to something different from the default, 3978:
"args": {
  "prerequisites": [
    ...
  ],
  "portOccupancy": [
    4978, // bot service port. By default it it 3978
    9239 // bot inspector port for Node.js debugger
  ]
}
And you also need to change this in "ngrokArgs" setting, as well as in another file. You can search and replace the port number:

🏔 Using your own local tunneling service
By default, the local tunnel is created with a tool called, ngrok, however, you can replace it with something else you prefer.
To make the change, first, comment out the “Start local tunnel” from the tasks’ "dependsOn":
"tasks": [
  {
    "label": "Start Teams App Locally",
    "dependsOn": [
      "Validate & install prerequisites",
      "Install npm packages",
      //"Start local tunnel",
      "Set up bot",
      "Build & upload Teams manifest",
      "Start services"
    ],
...
Then, change the "botMessagingEndPoint" to your own tunnel URL at the bot setup task. I want to use my contoso service, so I am using the preferred path:
{
  "label": "Set up bot",
  "type": "teamsfx",
  "command": "debug-set-up-bot",
  "args": {
   "botMessagingEndpoint": "https://contoso.com/api/message"
  }
},
Note: Contoso is a fictional service, in case you are not familiar with this Microsoft’s favorite fake company name 😉
Run F5 and see the changes.
I didn’t cover every possible task scenario here, but I hope you found the article helpful for debugging your Teams apps. Please don’t hesitate to drop your comments and feedback here.
Mahalo and see you soon 👋
📚 Learn more
📢 Shoutout
Teams Toolkit Engineering team, especially Ji Dong 🌟
0 comments