

Microsoft 365 Code | Decode is a series that focuses on breaking down topics for developers to understand concepts better. In this blog, Zhidi Shang and Rabia Williams demystify Teams Toolkit for Visual Studio Code to build apps for Microsoft Teams by deep diving into various features available that simplify the developer experience.
Watch this video and keep reading to get a detailed breakdown.
What is Teams Toolkit?
Teams Toolkit is an extension for Visual Studio Code and Visual Studio 2022, that you can use to build and deliver apps faster for Microsoft Teams. Developers can focus on building amazing applications instead of solving problems like tunnelling, identity, deployment, distribution of app and more.
How does Teams Toolkit help a new developer?
The toolkit comes with the Get Started page that has a checklist of everything you, as a developer, need to build an application.
- Get your development environment ready
- Create the base project
- Create a sandbox development environment for you (If you don’t already have one) to test your application
- Preview your application locally
- Provision Azure resource instances your app needs and deploy your application logic to host them.
👀Let’s look at these features more closely.
Get your developer environment ready
Check your development environment and get ready to build your first Teams application by running the prerequisite checker.
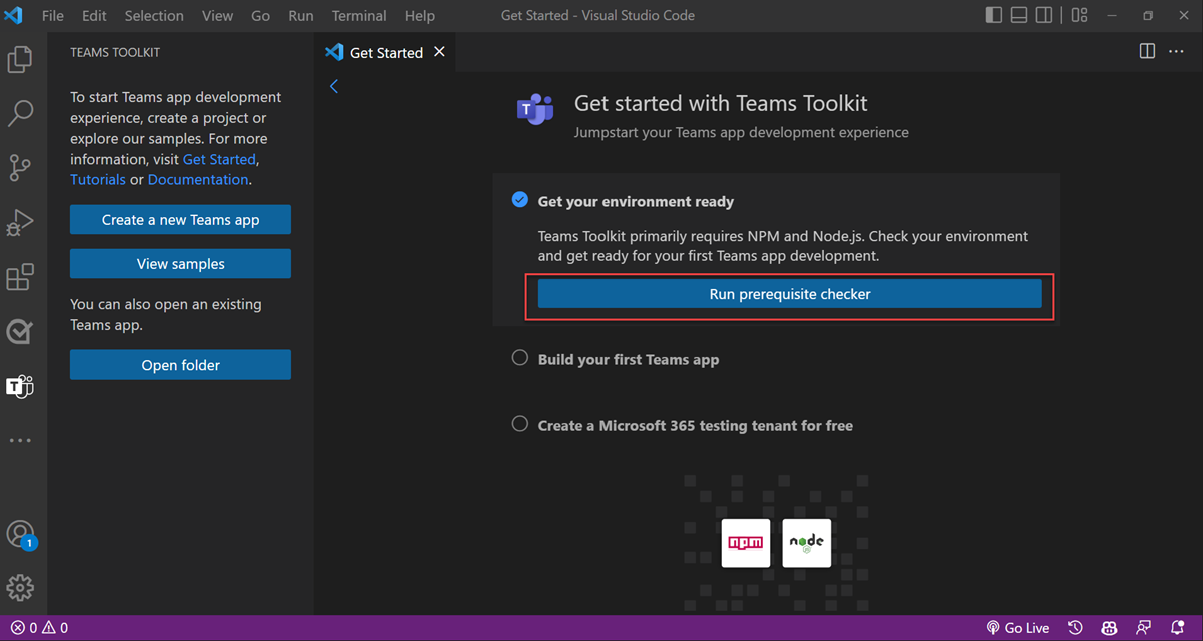
The tool requires npm and node.js and it keeps up with the LTS versions. Nice and easy! The fewer prerequisites, the better, for you to get started.
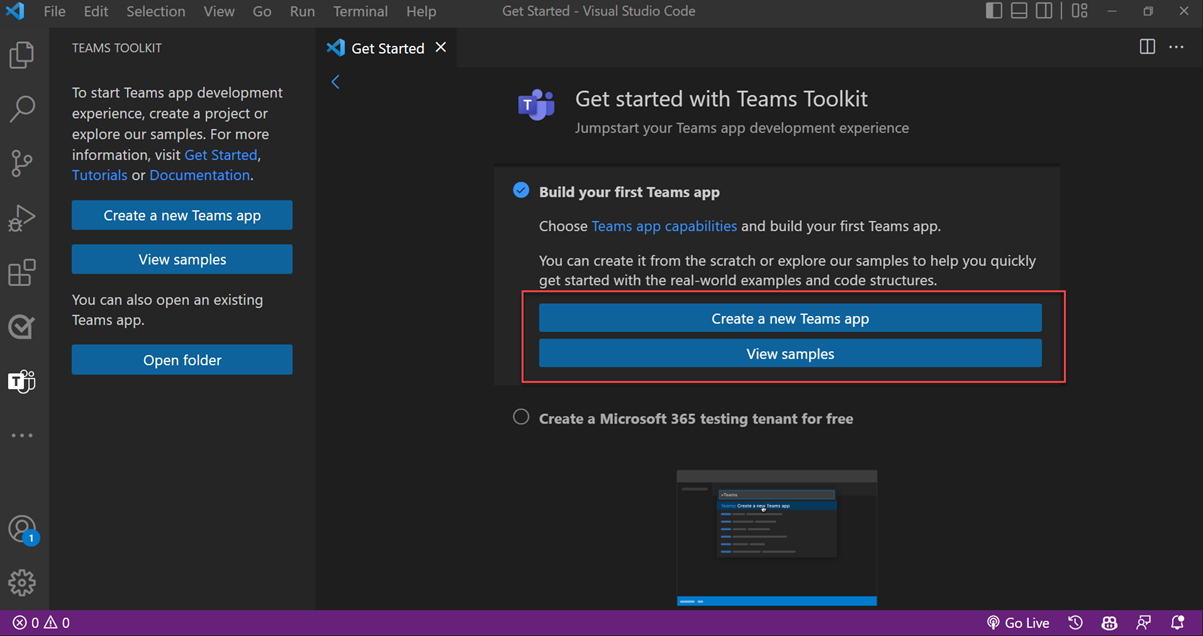
Build your first Teams app
This step lets you scaffold the project out, based on the Teams app capabilities you choose. You can either create a new app or start from a sample available online.
Create a Microsoft 365 test tenant for free
You’ll need a Microsoft 365 developer sandbox environment to test your application. If you don’t have one, the tool gives you an option to create one for free. If you already have a developer tenant, then you can sign into it to get started.

Preview your Teams app locally
Press F5 to run and debug your app locally! The tool provides hot reload and lets you preview your app locally.
For a very long time, developers struggled with ngrok tunnelling while developing apps for Teams. ngrok provides the encryption needed for https, which is needed for Teams applications. But now, thanks to Teams Toolkit, you don’t have to worry about that. The tool supports URL tunnelling using ngrok which is integrated in the tool.

Deploy Teams apps
The tool lets you provision cloud resource instances and deploy your app’s source code to the provisioned resources from within the tool. You can also choose as many environments as you’d like, including dev, staging, etc., for deployment and distribution of your app in various environments.

Build a sample app using Teams Toolkit
Now, we explore the Scenario-based Teams apps available in the tool, ready to be scaffolded out into our machine. There are also Basic Teams apps for simple apps.
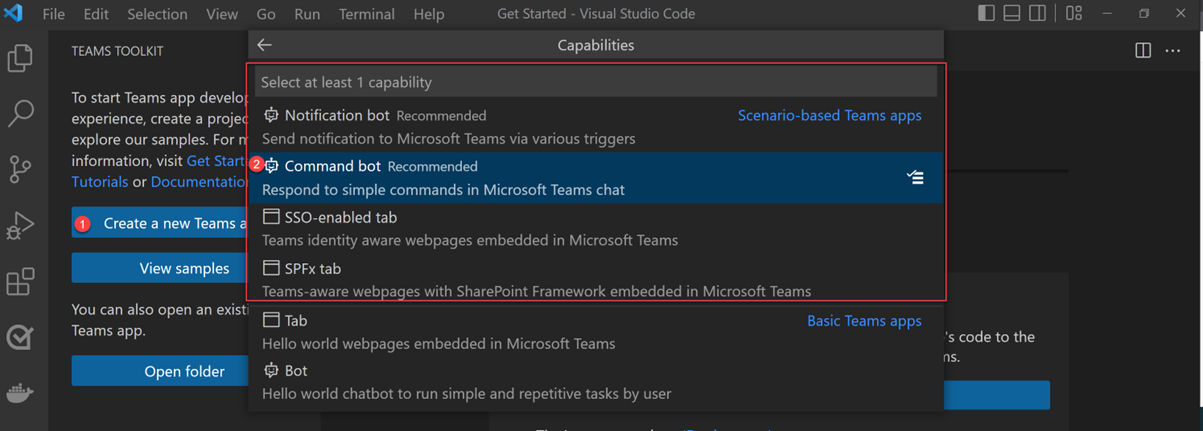
We chose Command bot under Scenario-based Teams apps which responds to simple commands and gives a response back in chat.
👉🏽If you want to learn more about command bots, check out this video on how to create a “Roll a dice” chat bot by Tomomi Imura.
Once the project is chosen to be scaffolded out, you can sit back and wait for the tool to do all the groundwork that sets up your project and the needed configuration files. This will be quick so you may not get to sit back for long! 😉
Once done, you can open the project folder which looks something like this.
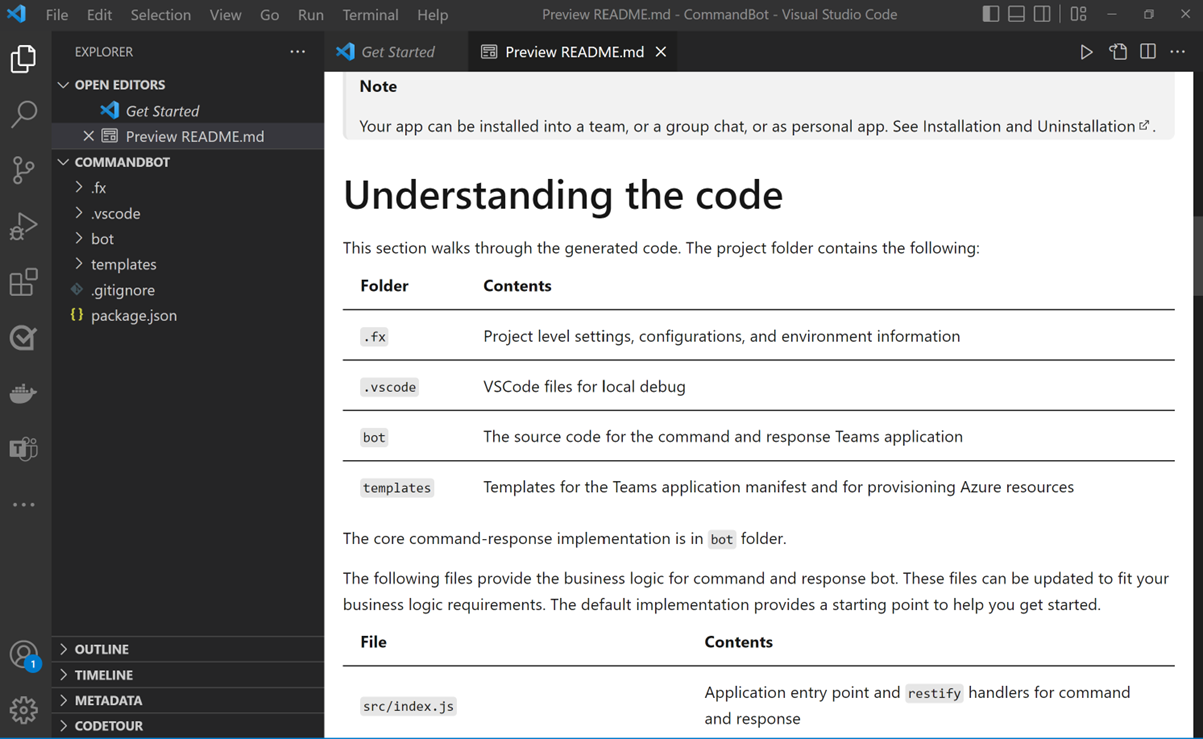
ℹ️ Remember to read the README.md file to understand the code and how you can run the application. We cannot emphasis this enough.
Understanding the project structure
The project that is scaffolded is not just the bot source code. We have the toolkit related settings and templates also created in the root folder. Let’s take a look at the structure.
- . fx folder holds all the files needed for multiple environment configurations, states and templates
- .VSCode is your file needed for VSCode to debug your app locally
- bot folder holds the source for your command bot app
- templates folder has the Teams app package files like manifest and icons and all the provision and deploy files (bicep files) for Azure resources needed for your app.
Except for the bot folder and maybe the manifest file template, none of the files in other folder need to be updated by the developer (unless the need arises). It is good to understand what is going on, but the toolkit takes care of all these aspects for the developer so you can focus on building your application.
We recommend you read the README.md file to check out the bot’s business logic.
Understanding the features of Teams Toolkit
The left-hand sidebar that pops up when you select the Visual Studio Code extension icon for Teams Toolkit is the entry point for you to use Teams Toolkit to its full potential after a project is scaffolded.
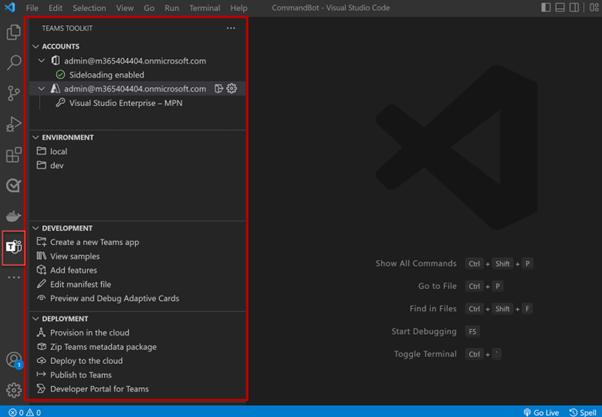
Let’s deep dive into understanding the features in this section, once you have a project created using Teams Toolkit.
Accounts in Teams Toolkit
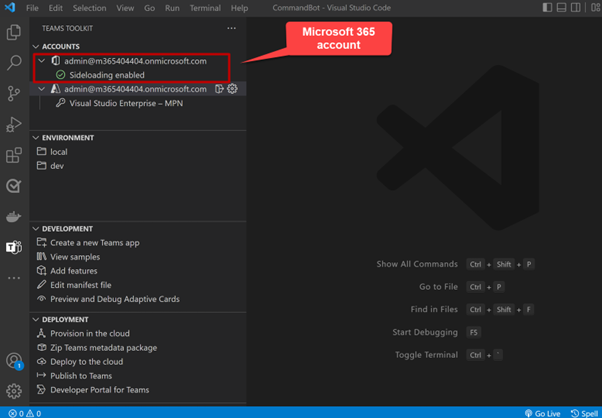
Teams Toolkit allows you to preview your application locally by making it available just for you to test. For this reason, it needs you to sign into a development sandbox environment where sideloading is enabled. This is your Microsoft 365 account that you need.
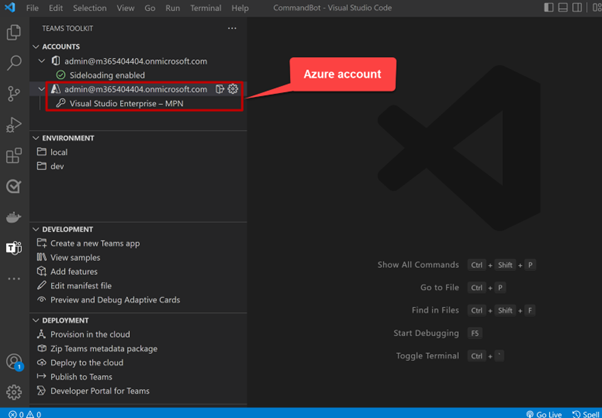
If you choose to deploy your app for distribution, Teams Toolkit will require you to have an Azure subscription. You need to sign you into this account before it can provision any Azure resource instances.
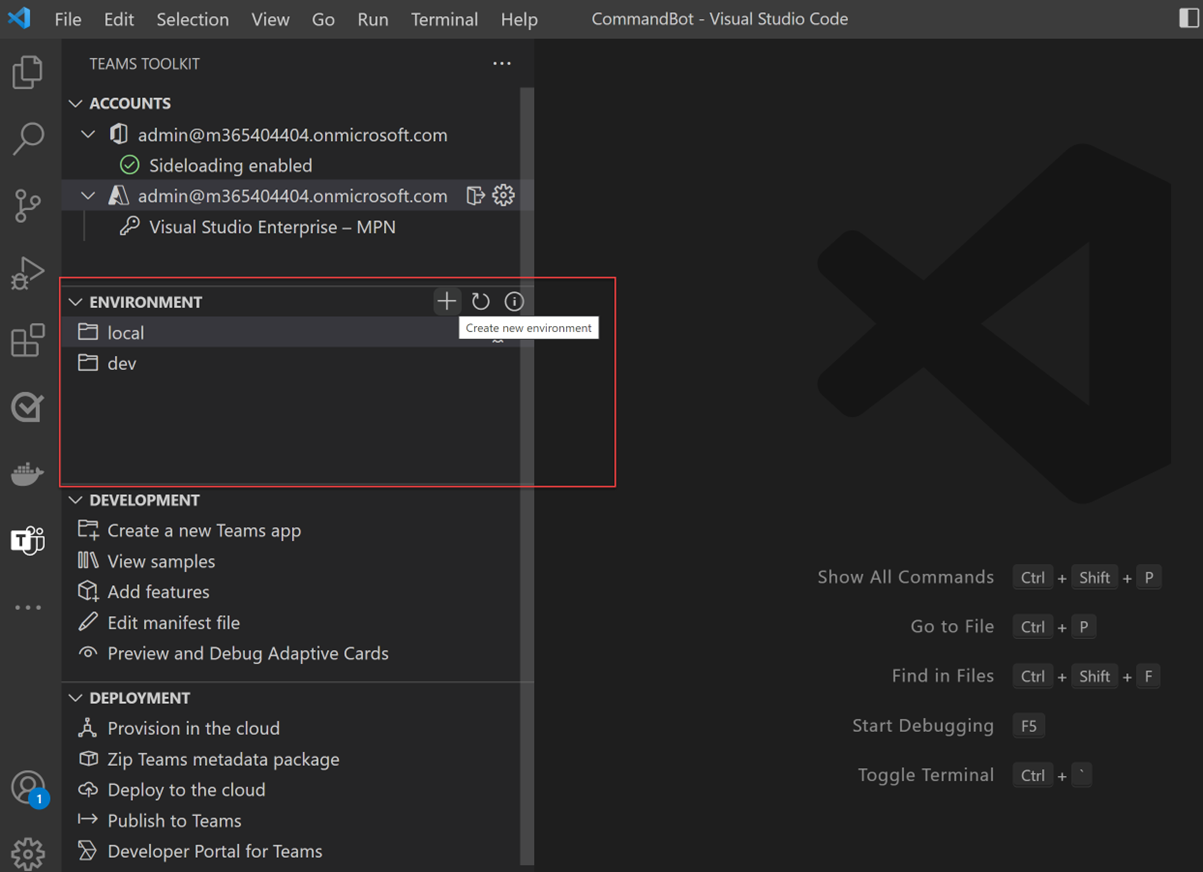
Environment to test and distribute your app
Teams Toolkit lets you create and manage multiple environments to test and distribute your application.
Initially you have a local and dev environment already added for you by the tool scaffold. Local is your default environment to test your application locally and dev is your cloud environment where you have your Azure account signed in.
You can add as many cloud environments as you want, and the tool will take care of all the templates and configurations that each environment needs.
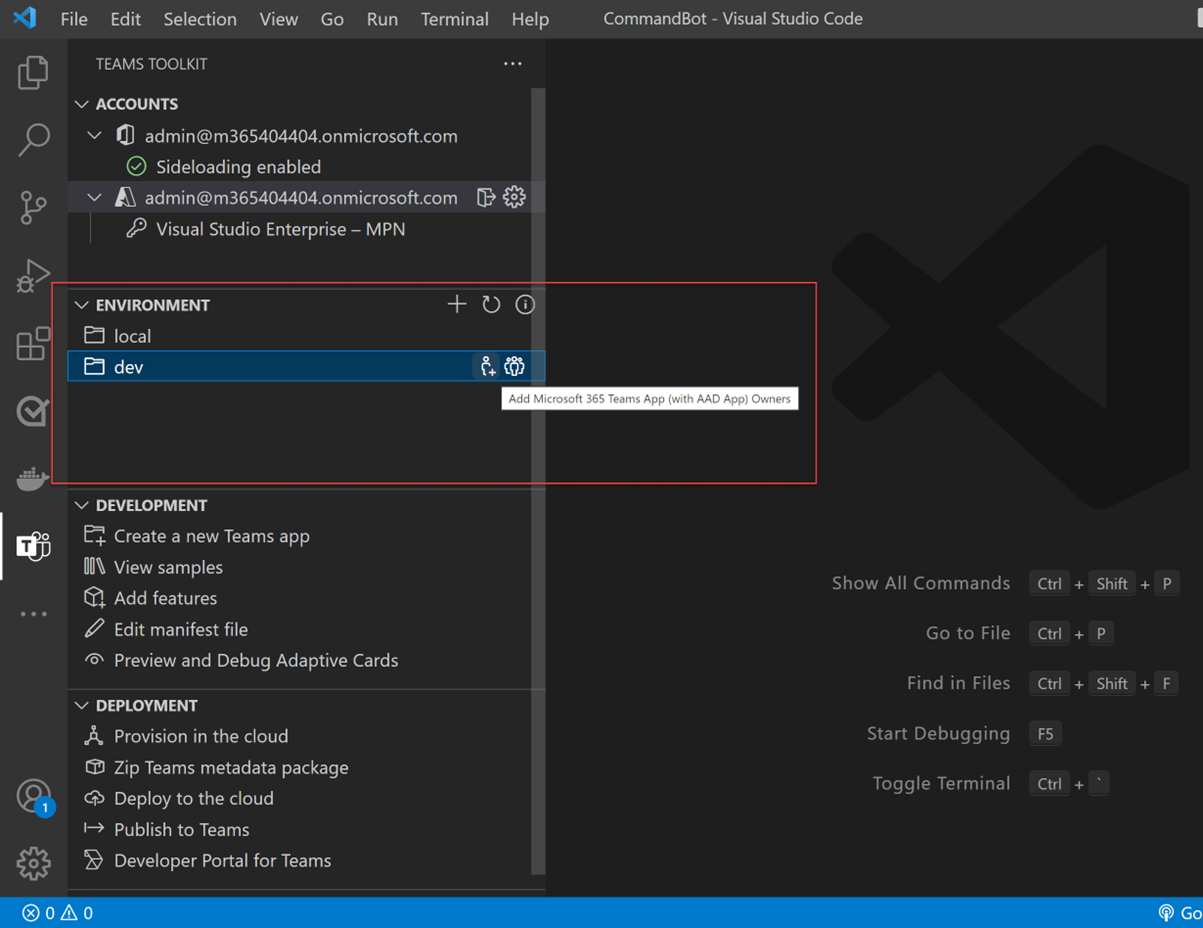
The cloud environment like the dev, lets you share your application with other members in the same tenant. This is for you to collaborate on your application. Read more about collaboration here.
If you look into the project folder, .fx folder holds all of the configurations and states (output of all the provision per environment) plus the app package/Azure resource template files. Every time a new environment is added by the developer, a new set of these files will also get added into the .fx folder.
Development using Teams Toolkit
As a developer, you can create a new app or view samples from the development section. But what is more interesting in this section, in the sidebar, is the Add features link which lets you add new features on top of the app you’ve already built using Teams Toolkit.
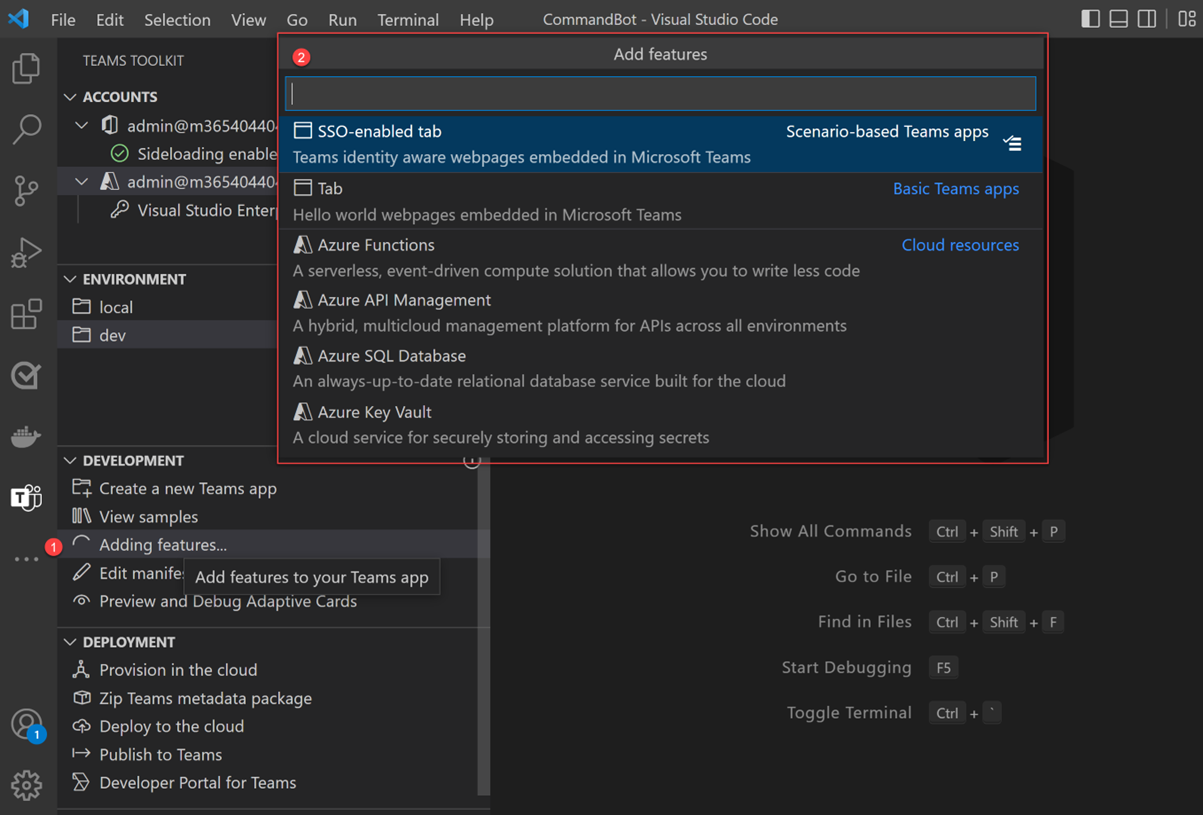
You can add a single sign on enabled tab or a basic tab on top of the command bot we already have. You can also add other cloud services such as Azure key vault, Azure functions, Azure API management and Azure SQL database.
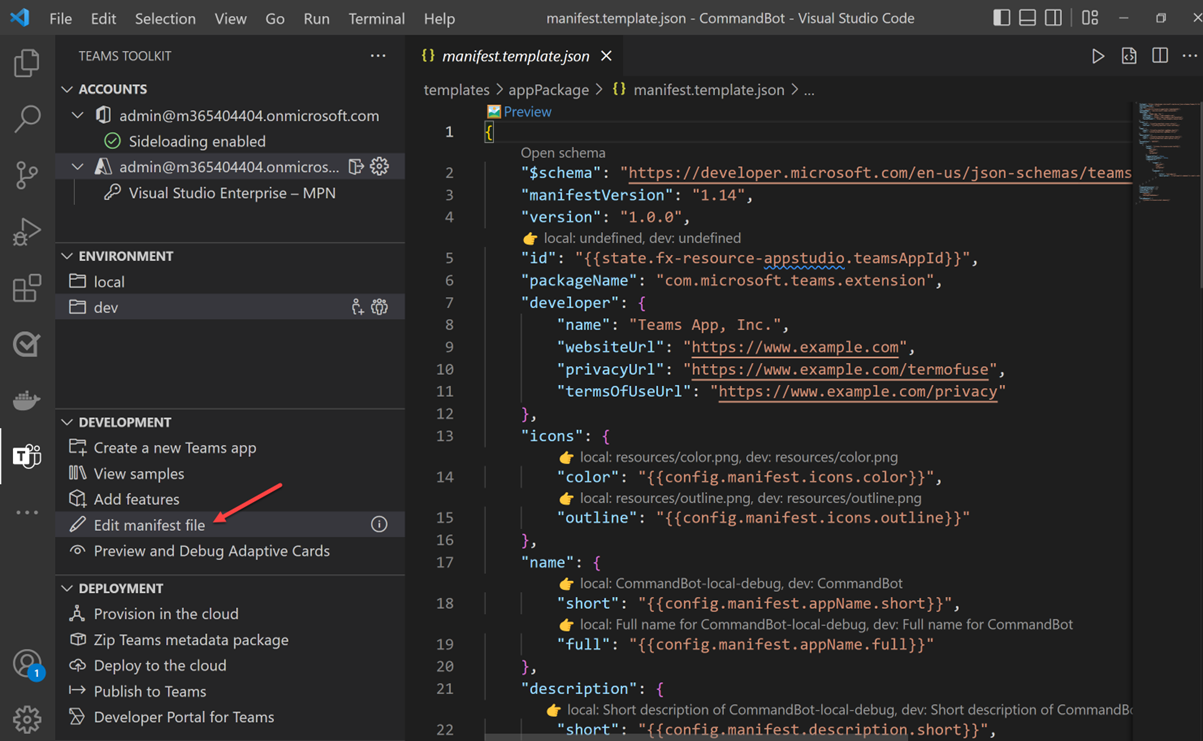
Edit manifest lets yoiu preview and make changes to the manifest file which then becomes the app package for a Teams application. Most of the properties in this file come from the config files for each environment and care should be taken to do it the right way. Read all about this here.
The Preview and Debug Adaptive Cards feature in the toolkit, allows you to view the Adaptive Cards in your project with data so you can easily make changes to them while designing. This is all meant to make it easier to stay focused in developing your application without switching context.


You can also add other sample cards available from the Online cards section as shown in the screen. Selecting a card in this, will add the selected card into your project folder.
Teams Toolkit Deployment
The Teams Toolkit’s most powerful features lie in this section under Deployment.

You can host your application in Azure with a click of a button using the tool. You can provision Azure resources using Provision in the cloud which is a one-time activity. So, if you have a command bot application, it will make sure it provisions instances for the bot service, the web app to host your bot application etc.
You can also deploy your application’s business logic to Azure resources, which are already provisioned, by selecting Deploy to the cloud from within the project. Every time you make changes to the app, you can deploy it again.
You can validate and package your Teams application to distribute it using Zip Teams metadata package. This will check for any errors in the manifest file and build the app package based on the environment you choose so it can be distributed. It usually builds the package and saves it in a build folder on your local machine where your project lies.
Publish to Teams lets you build the app package so it can be either manually uploaded to the portal or use the tool to upload the app package to the Teams app portal, so it can be published by the admin.
Developer Portal for Teams is a quick link to access the Developer Portal to manage your Teams apps.
Help and Feedback
Finally, if you are looking for tutorials, documentation and a place to submit your valuable feedback on the tool, there is a dedicated section for that as well.

Overall, this tool simplifies the developer experience for thanks to the feedback from our developer community and partners. We look forward to continued suggestions and feedback. Visit aka.ms/ttk.
Teams Toolkit resources
About the tool
- Install Teams Toolkit: Teams Toolkit – Visual Studio Marketplace
- Documentation: Teams Toolkit Overview – Teams | Microsoft Learn
- Microsoft Teams Toolkit for Visual Studio Code: Microsoft Teams Toolkit for Visual Studio Code now generally available – Microsoft 365 Developer Blog
- Debugging Microsoft Teams app locally with Teams Toolkit: Debugging Microsoft Teams app locally with Teams Toolkit – Microsoft 365 Developer Blog
Samples
- Post notifications to Microsoft Teams with .NET: Post notifications to Microsoft Teams with .NET using Teams Toolkit for Visual Studio, now generally available – Microsoft 365 Developer Blog
- Build a productivity dashboard: (124) Build a productivity dashboard with Microsoft Teams Toolkit for Visual Studio – YouTube
- Build a stock update notification bot : Build a stock update notification bot for Microsoft Teams using Teams Toolkit for Visual Studio Code – Microsoft 365 Developer Blog
- Explore more samples: OfficeDev/TeamsFx-Samples: Scenario-focused sample applications that help you get started with building Microsoft Teams App. (github.com)
Teams app development
Get started with Teams app development: Get started building Microsoft Teams apps
ngrok
ngrok to develop Microsoft Teams apps: Do you need ngrok to develop Microsoft Teams apps? | Tips & Tricks
Happy coding!
0 comments