

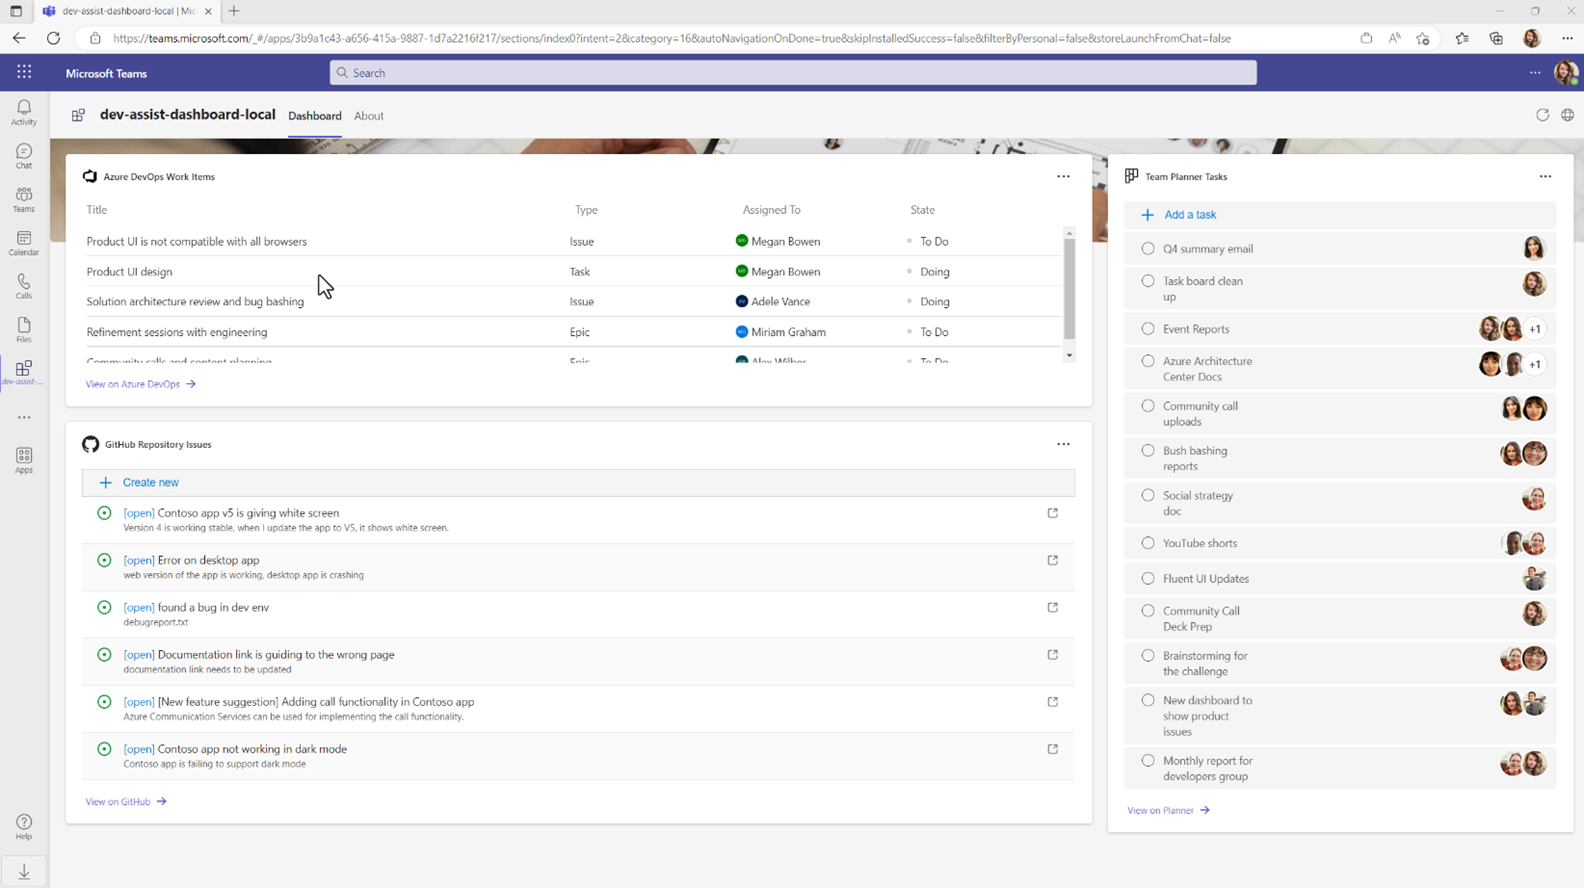
As developers, we spend most of our time in between Azure DevOps, GitHub, and internal task management tools such as Microsoft Planner. What if we bring all these features together within a dashboard on Microsoft Teams that can be used by all the developers, project managers in your team?
In this tutorial, we cover how to build a developer assist dashboard for Microsoft Teams using Teams Toolkit for Visual Studio Code and integrate GitHub, Azure DevOps, and Planner widgets.
In this project, we will use Teams Toolkit v5 pre-release and we will build a developer assist dashboard tab that will work across Microsoft Teams, Outlook web and Microsoft 365 app. If you are interested in learning more about the updates on Teams Toolkit and v5 pre-release, please Junjie Li’s blog from last week: Teams Toolkit for Visual Studio Code update – March 2023
Get started building a developer assist dashboard with Teams Toolkit
Let’s get started building a developer assist dashboard using Teams Toolkit for Visual Studio Code v5.0 pre-release. To complete this project, we will follow the steps mentioned below:
- Set up and install Teams Toolkit for Visual Studio Code v5.0 pre-release.
- Create your first dashboard tab using dashboard template.
- Enhance your dashboard by implementing new widgets.
- Test and debug your dashboard on Teams, Outlook, and Microsoft 365 app.
- Challenge yourself!
This project is available as a part of the Samples on Teams Toolkit for Visual Studio Code. You can also access to the source code on TeamsFx Samples Repository.
Step 1: Setup and install Teams Toolkit for Visual Studio Code v5.0 pre-release
Before starting to build apps with Teams Toolkit for Visual Studio Code, let’s complete the setup and pre-requisites.
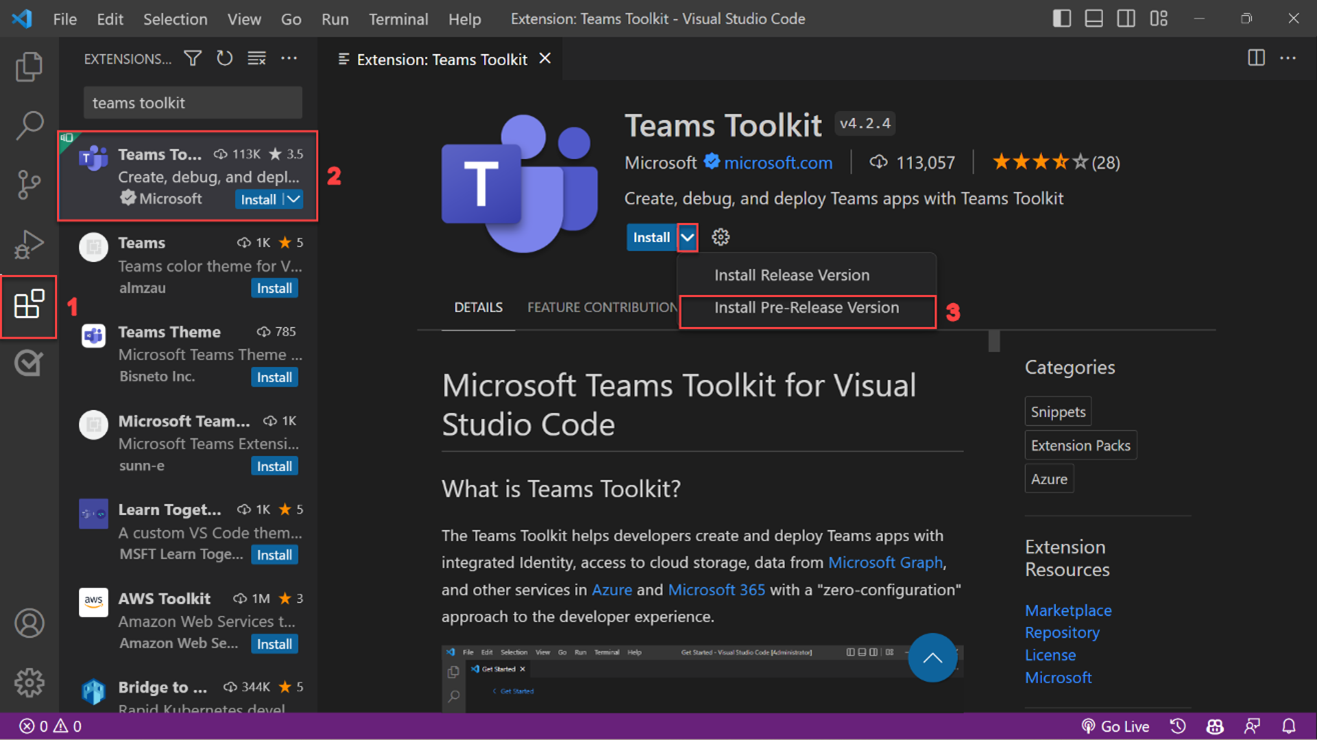
Install Teams Toolkit for Visual Studio Code and enable v5.0 pre-release:
- Open Visual Studio Code and select extensions, search for Teams Toolkit, and select the arrow on the right side of Install button and select Install Pre-Release Version.
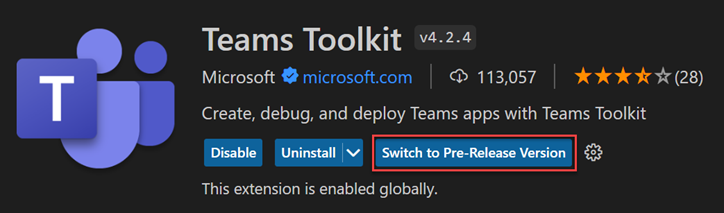
- If you already have Teams Toolkit installed on Visual Studio Code, select Switch to Pre-Release Version.
Make sure to have Node JS installed. It is recommended to install latest Node JS version 18.
Step 2: Create your first dashboard tab using dashboard tab template
Once the setup is complete, let’s create a dashboard tab using Teams Toolkit for Visual Studio Code:
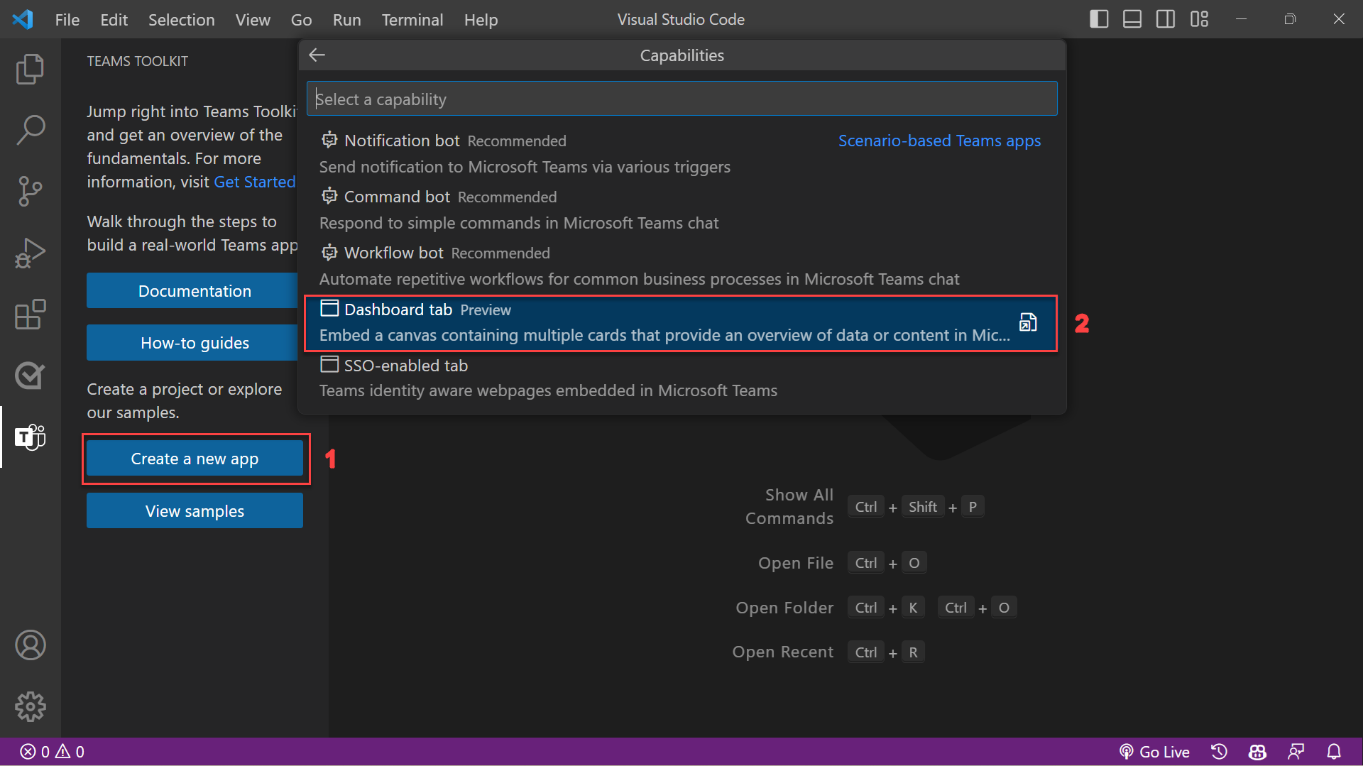
- Select Teams Toolkit extension on Visual Studio Code, select Create a new app and then Create a new Teams app.
- In the capabilities section, select Dashboard tab, select TypeScript as the programming language.
- Select a folder to scaffold your project, give a name for your project.
When your project is scaffolded, let’s quickly run the dashboard tab and see the default dashboard template that Teams Toolkit provides. Press the F5 key to run your project. When the dashboard tab is deployed to Teams, select Add to view your dashboard with sample widgets.
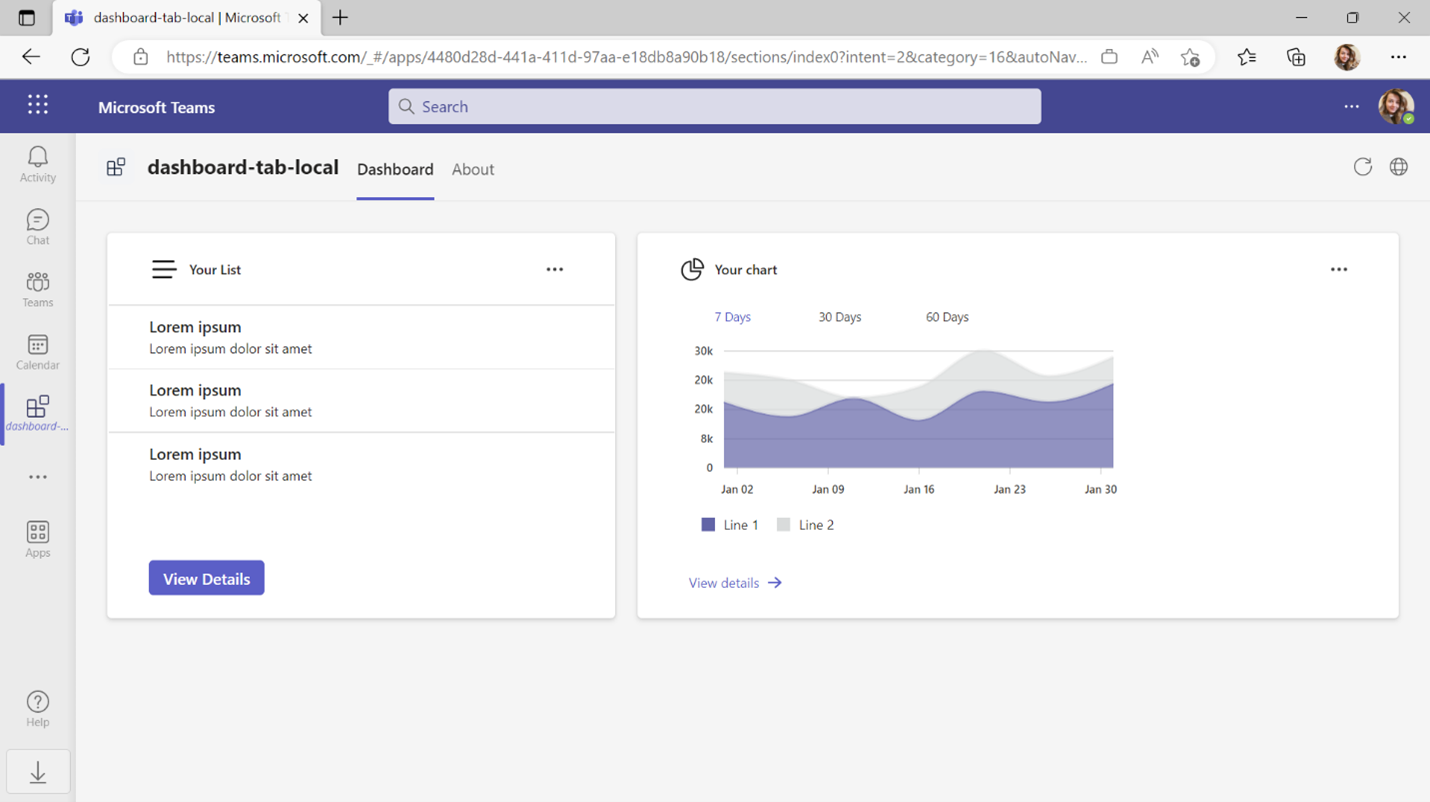
Dashboard tab code structure
Let’s go through the code structure of the dashboard tab that we’ll include our widgets in the next steps.
- App configuration: teamsapp.yml and teamsapp.local.yml
- App environment information: env
- Frontend code is available under src/views inside dashboards, widgets, and styles folders.
- Backend code is available under src inside services and models folders.
Step 3: Enhance your dashboard by implementing new widgets
Our goal is to create a developer assist dashboard, so that we will bring the most popular developer tools in our dashboard! We will create three new widgets to implement Azure DevOps, GitHub, and Microsoft Graph. The widgets we are building are:
- Azure DevOps Work Items widget
- GitHub Issues widget
- Planner Tasks widget
To create each widget, we’ll need a model, service, and widget file in our project.
Azure DevOps work items widget
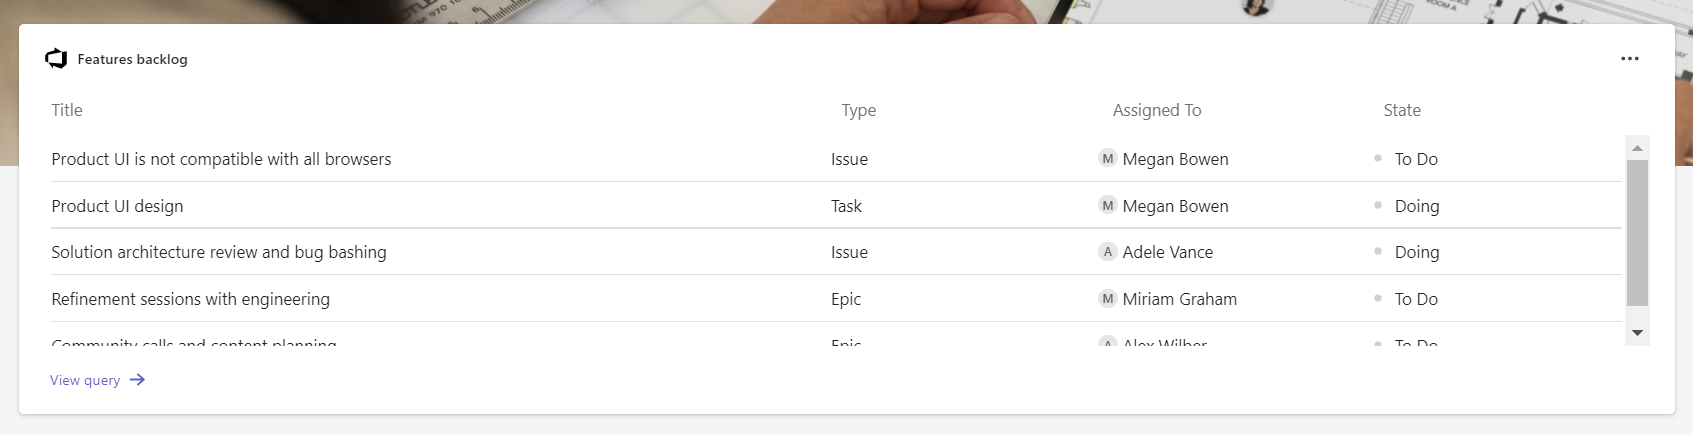
Let’s get started creating the first widget and integrate DevOps Work Items.
Create DevOps model
Select src > models folder and create a new file with the name devOpsModel.ts. Copy the following code in the devOpsModel.ts file: devOpsModel.ts
Create DevOps service
Select src > services folder and create a new file with the name devopsService.ts. In this file, we’ll integrate DevOps API to get the work items from Azure DevOps. Copy the following code in the file to make an HTTP call to DevOps API:
https://gist.github.com/aycabas/188a5b82cb0bd43976a0320b1fcced2b
Replace ORGANIZATION_NAME and PROJECT_NAME with your DevOps organization and project names. Also, replace DEVOPS_PERSONAL_ACCESS_TOKEN with your DevOps personal access token for testing purposes.
Note
We don’t recommend using DevOps personal access token in production. Consuming personal access token in this sample is for testing purposes only.After getting the response from Azure DevOps, retrieve the response value by including the below code snippet inside try and return devopsItems:
https://gist.github.com/aycabas/bb523bda4cded0b246a5cc70d9b9ca0d
Create DevOps widget
Select src > views > widgets folder and create a new file with the name DevOpsWidget.tsx. In this file, we’ll build our widget using Fluent UI. Copy the following code in the DevOpsWidget.tsx file:
https://gist.github.com/aycabas/af61ca9fd484693d1eb95cf1dd09bf0e
In DevOpsWidget.tsx:
- getData() method is used for getting the data from the DevOps service.
- headerContent() is used for customizing the content of the widget header.
- bodyContent() is used for customizing the content of the widget body.
Finally, let’s style the DevOps widget by creating a CSS file for DevOps. Create a new file with the name DevOps.css under src > views > styles folder in your project. Copy the css from the following file: DevOps.css
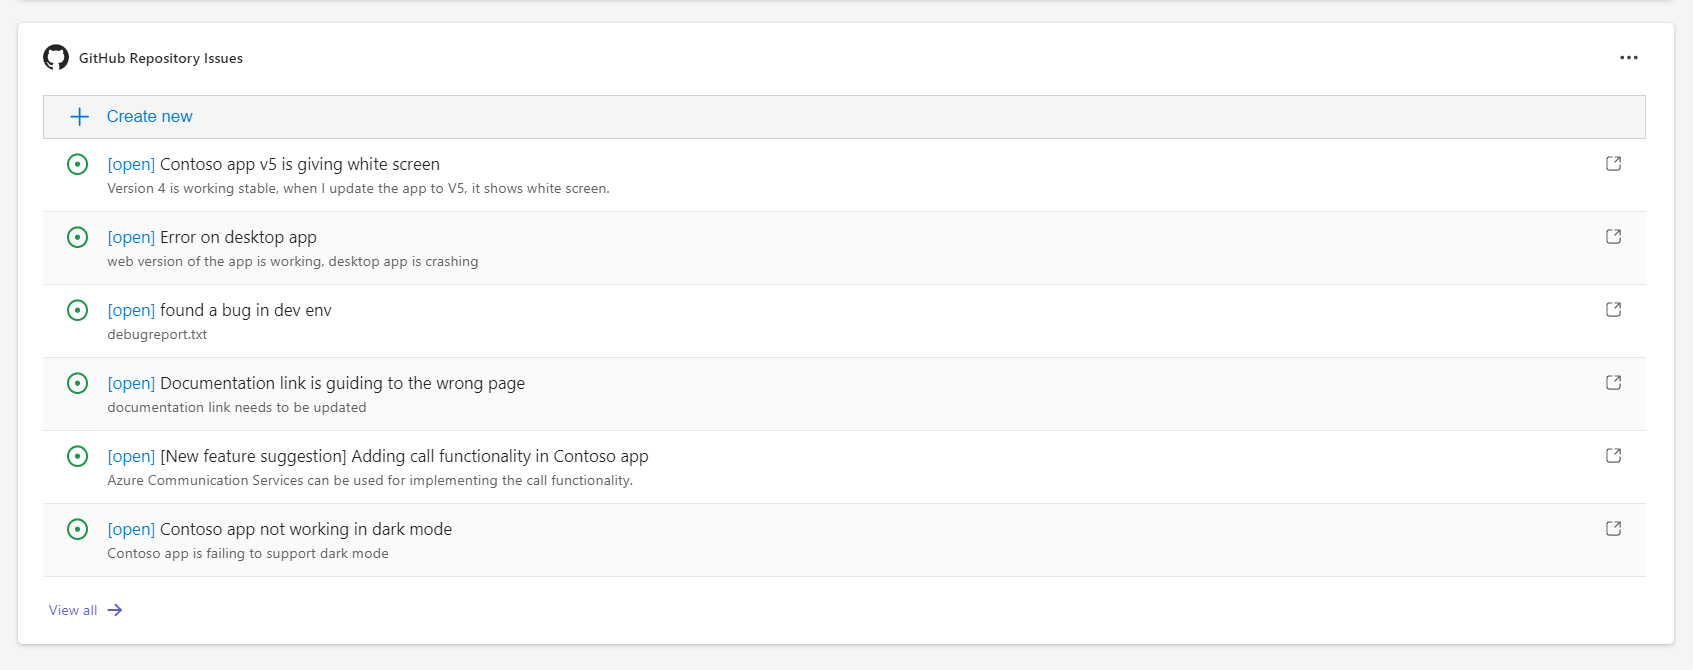
GitHub issues widget
Let’s get started creating the second widget to show the GitHub issues. Open the terminal in Visual Studio Code and run the following script in project root:
npm install octokit
Create GitHub model
Select src > models folder and create a new file with the name githubIssuesModel.ts. Copy the following code in the githubIssuesModel.ts file: githubIssuesModel.ts
Create GitHub service
Select src > services folder and create a new file with the name githubService.ts. In this file, we’ll integrate GitHub API to get the issues from GitHub. Copy the following code in the file to make an HTTP call to GitHub API:
https://gist.github.com/aycabas/67d3366f2ff7fd3857ca18e5bca25c68
Replace GITHUB_PERSONAL_ACCESS_TOKEN with GitHub personal access token for testing purposes. Also replace OWNER_NAME with your GitHub handle and REPOSITORY_NAME with the repository you’d like to read the issues.
Note
We don’t recommend using GitHub personal access token in production. Consuming personal access token in this sample is for testing purposes only.Create GitHub widget
Select src > views>widgets folder and create a new file with the name GitHubWidget.tsx. In this file, we’ll build our widget using Fluent UI. Copy the following code in the GitHubWidget.tsx file:
https://gist.github.com/aycabas/3b92a83b3cce74514bd64aa032048d62
Finally, let’s style the Github widget by creating a CSS file for GitHub. Create a new file with the name GitHub.css under src > views > styles folder in your project. Copy the css from the following file: GitHub.css
Step 4: Test your dashboard on Teams, Outlook, and Microsoft 365 app
Before testing your dashboard tab, implement your widgets inside the dashboard. Select src > views > widgets > dashboards folder and open SampleDashboard.tsx file. Replace the code with the following code snippet:
https://gist.github.com/aycabas/6d77b7f466ba4c58261eefd08a75c1e3
Select F5 to preview your app on Microsoft Teams. When the dashboard tab is deployed to Teams, select Add to view your dashboard with DevOps and GitHub widgets.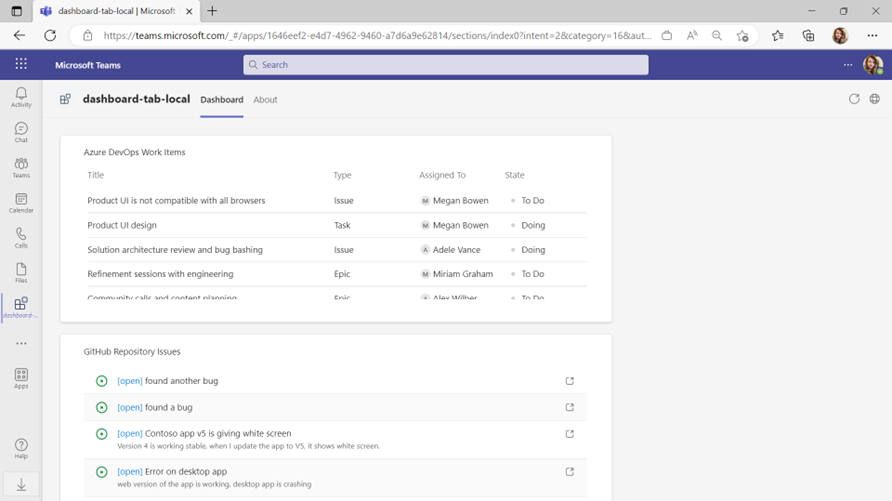
To debug your app locally on Outlook and Microsoft 365 app, select .vscode > launch.json file in your project, add the following code snippet under the configurations:
https://gist.github.com/aycabas/01d785b7267595ed75698b3e70503497
Also add the following code snippet under the compounds:
https://gist.github.com/aycabas/e7c73115e7f1871d94af5bce3d32d9b9
Select Run and Debug from the left side bar on Visual Studio Code and select the Debug button to view all available debugging options.
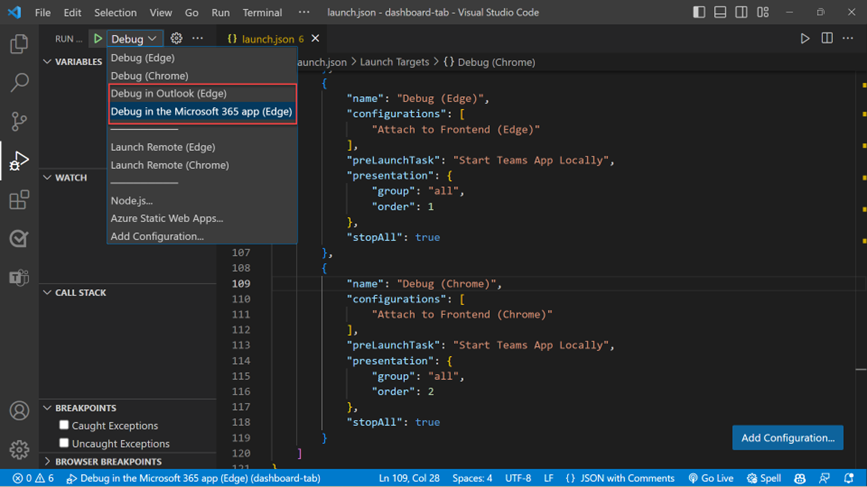
To test your app on Outlook or Microsoft 365 app, select Debug in Outlook or Debug in the Microsoft 365 app, Teams Toolkit will initiate your app on Outlook or Microsoft 365 app based on your selection:

Step 5: Challenge yourself!
Now that you know the basics of dashboard template and widgets, I challenge you to enhance the dashboard further to make it more interesting.
Build a new widget to integrate Microsoft Planner tasks into your developer assist dashboard. You will need to create a new model, service, and widget files for Planner tasks. You will use Microsoft Graph API in the Planner service to retrieve tasks from the Planner:
GET /planner/plans/{plan-id}/tasksGraph Explorer and Microsoft Graph documentation are the best places to get more information. Comment below if you need further assistance.
This project is available as a part of the Samples on Teams Toolkit for Visual Studio Code. You can also access to the source code on TeamsFx Samples Repository.
Happy coding! 🌸
Special thanks to Junjie Li, Hui Miao, Frank Qian and Ellie Yuan for their collaboration on developer assist dashboard 💜
Thank you for sharing the blog and samples.