
In this post, I’ll explore on how you can integrate a bot with a Kaizala group. Bot aids a lot of scenarios and can be a part of the conversations and adding value. In a regular group, the messages are received and seen by all users, and can result in a chatty experience. Public groups (managed hub and spoke groups) are well suited for this scenario where the user or subscriber types in a query allowing a bot to respond – while keeping these out of the purview of other users in the group. In order to implement this, following are the steps that will take you through this experience.
- Enabling text messaging in a Public group
- Registering WebHook for TextMessageCreated event
- Configuring bot user in the group
- Replying to user input as a bot
Step-1: Enabling text messaging in public group
By default, in a managed hub & spoke group, text messaging is disabled (to avoid chattiness). However, we could flip a group policy to enable text messages. However, only admins would received these messages – allowing them to be processed by a bot.
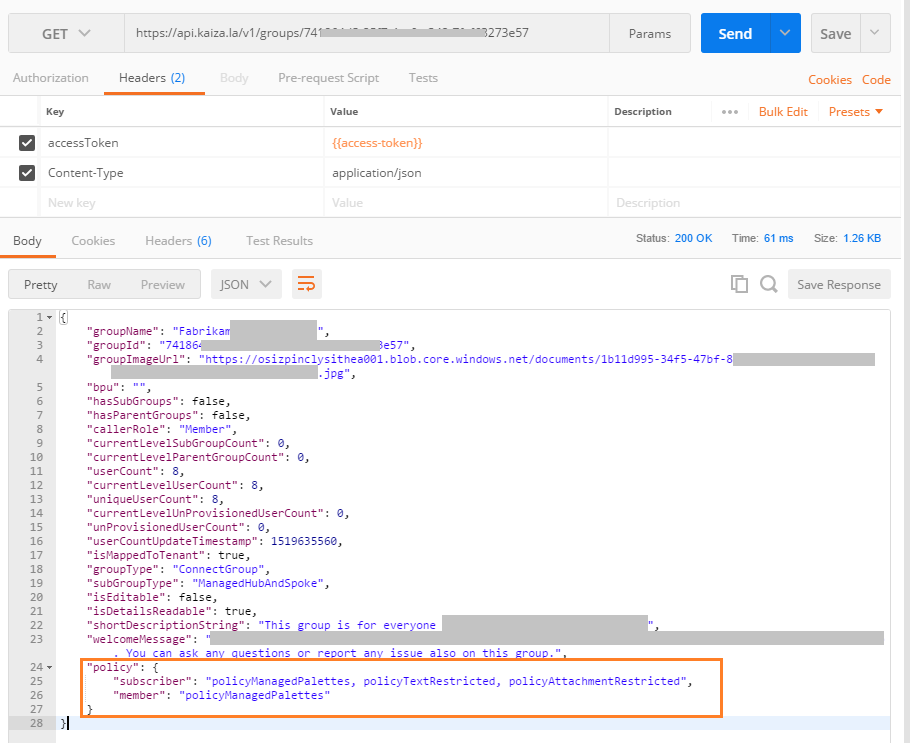
1.1) Fetching group policies applied to the group
In order to remove the policy that restricts text, lets query the policies applied on the group (illustrated below). Notice the policyTextRestricted in the policy returned.
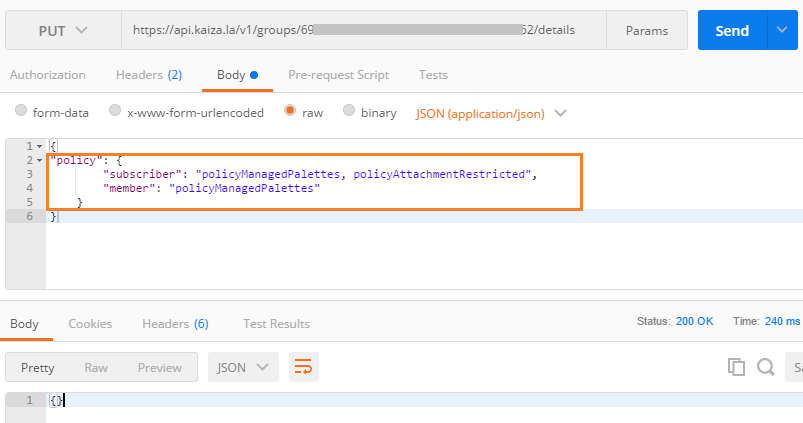
1.2) Removing text restriction from policy
To remove the text message restriction, we will apply all the policies barring the group policy – policyTextRestricted. This is illustrated in the following screenshot.
Step-2: Registering WebHook for TextMessageCreated event
Once you have the text message enabled for subscribers, they will be able to send text messages. You will need to register a WebHook to tap into the text messages being sent – for which you will need to subscribe to the TextMessageCreated event.
In the interest of keeping this post short, I will not revisit WebHooks here – it has been covered in Exploring Kaizala WebHooks.
Step-3: Configuring bot user in the group
Once you start receiving the text message from the subscriber(s), you will need to respond to them. You could choose to respond to them as the admin user itself – in which case:
- It will be difficult to identify that the message / response was from a system
- People could ping the admin with queries
In order to avoid these, you could create a bot user with a name and profile pic – using which you could respond to the queries.
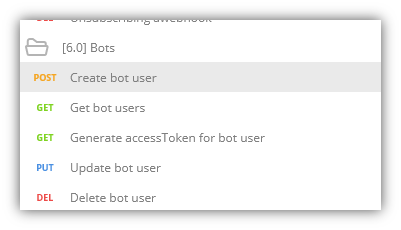
Bot user APIs have been documented in Microsoft Kaizala Postman API collection. To view, click the Run in Postman button from the Kaizala API documentation].
3.1) Creating a bot user
To create a bot user, we will need to post to the v1/bot endpoint. On success, you would get a botUserId in the response.
|
METHOD |
POST |
|
URL |
{{endpoint-url}}/v1/bot |
|
REQUEST BODY |
{ “name”:”<<bot user name>>”, “profilePic”:”<<Media resource string of profile pic>>” } |

3.2) Adding the bot user to the group
To add a bot user to the group, we will need to post to the v1/groups/{{group-id}}/bot endpoint with the botUserId generated in step 3.1.
|
METHOD |
POST |
|
URL |
{{endpoint-url}}/v1/groups/{{group-id}}/bot |
|
REQUEST BODY |
{ “botUserId”:”<<bot user id>>” } |

3.3) Generating access-token for the bot user
To generate access-token for the bot user, we will need to do a GET to the v1/bot/accessToken/{{bot-user-id}} endpoint.
|
METHOD |
GET |
|
URL |
{{endpoint-url}}/v1/bot/accessToken/{{bot-user-id}} |
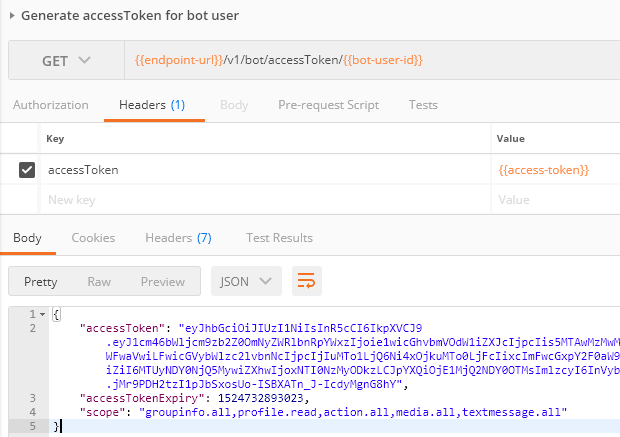
Note: The accessToken used in the header for steps 3.1, 3.2 and 3.3 are the access token that belong to the group admin. Only from the next step will we be using the accessToken of the bot user.
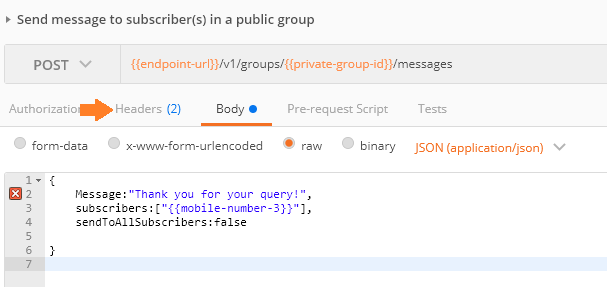
Step-4: Replying to user input as a bot
Now, using the token generated in step 3.3, you could send a message (or attachment / action) – but with the accessToken of the bot. When it appears for the subscriber, it would appear with the test bot’s name.
Sample screenshot of the message received on phone:

Tapping on the bot name, (GLS test bot1 here), opens up a contact card for the bot that looks like this (name and profile pic used while creating bot in step-1):

Hope that was helpful, do let me know of what you think through the comments. Thank you for reading!
0 comments