

Context
During our engagement with a big Brazilian financial company, we did a trade study of different durable workflow orchestration platforms for microservice architecture [Azure Durable Functions, Dapr, Temporal]. Temporal was selected because of workflow readiness, Java support, and being cloud-agnostic. After that, we started to check Temporal characteristics like performance, scalability, and security. This blog focuses on sharing our findings on how Temporal secures data in transit using Mutual Transport Layer Security (mTLS) and setting up user authentication and authorization.
Introduction
The Temporal platform is designed with security in mind, and there are many features that you can use to keep both the Platform itself and your users’ data secure.
A secured Temporal Server has its network communication encrypted and has authentication and authorization protocols set up for API calls made to it. Without these, your server could be accessed by unwanted entities.
Temporal security features:
- Network communication: Mutual Transport Layer Security (mTLS) used for securing network communication with and within a Temporal cluster.
- Data isolation and encryption:
- Namespaces: help isolate code (data and workflows) from each other.
- Data Converter: helps encrypt data at rest (in data store).
- Authentication and Authorization: authenticate and control access to all API calls.
- Servers: To prevent spoofing and man in the middle attacks you can specify the server name in the client section of your respective mTLS configuration.
- Client connections: To restrict a client’s network access to cluster endpoints you can limit it to clients with certificates issued by a specific Certificate Authority (CA).
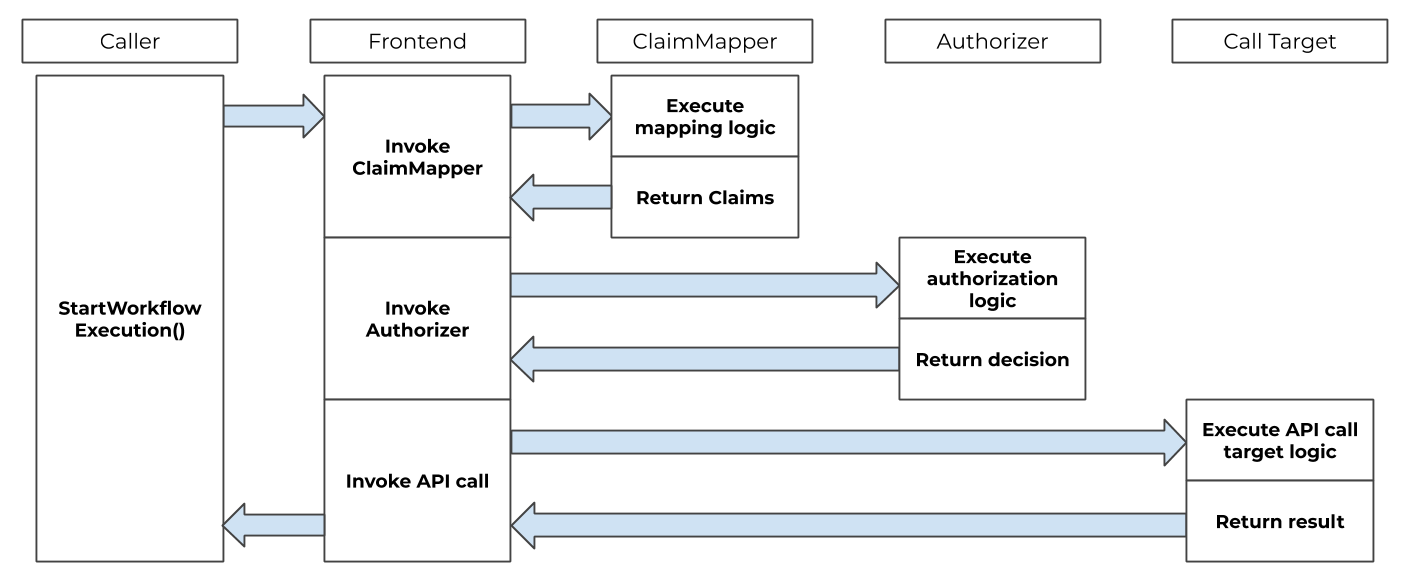
- Users and Clients: To restrict access to specific users or client through extensibility plugins (Authorizer and ClaimMapper).
- Authorizer: allows a wide range of authorization logic, including call target, role/permissions claims, and other data available to the system.
- ClaimMapper: component that extracts claims from JSON Web Tokens (JWT).
- Single sign-on: Temporal Web offers SSO authentication by integrating with multiple OAuth providers.
This post consists of two parts describing how to implement critical Temporal security features using Azure services:
- Part 1: Enable and configure mTLS using Azure Key Vault for generating and storing TLS certificates.
- Part 2: Users authentication and authorization using Azure Active Directory (AAD) as identity provider.
Part 1: Configure Temporal mTLS using Azure KeyVault as a certificates store
This part demonstrates the fundamental concepts and pieces needed to setup and configure a Temporal cluster with mTLS enabled and use Azure Key Vault to generate and store the mTLS certificates in a secure way.
Note: The sample is using self-signed certificates signed with a custom CA for TLS setup. For production or public-facing environments, certificates issued by a trusted CA(Certificate Authority) must be used.
Complete source code here at temporalio-mtls repository.
Temporal supports mTLS as a way of encrypting network traffic between the services of a cluster and also between application processes and a cluster. Self-signed or properly minted certificates can be used for mTLS. mTLS is set in Temporal’s TLS configuration. The configuration includes two sections where intra-cluster and external traffic can be encrypted with different sets of certificates and settings:
- Internode: Configuration for encrypting communication between nodes in the cluster.
- Frontend: Configuration for encrypting the frontend’s public endpoints.

Self-signed vs. Trusted CA-signed Certificates
Let’s start with a brief overview of the certificate types that could be used in mTLS.
Self-signed certificates are created, issued, and signed by the same entities for whom the certificates are meant to verify their identities. This means that the individual developers or the companies that have created and/or own the website or software in question are, essentially, signing off on themselves.
CA-signed certificate, on the other hand, is signed by a third-party, publicly trusted certificate authority (CA). The popular CAs are Symantec, DigiCert, GeoTrust, GlobalSign, GoDaddy, and Entrust. These entities are responsible for validating the person or organization that requests each certificate. read more here.
How to use each certificate:
- Self-signed certificates are suitable for sites or services that are used in internal (intranet) or testing environments.
- CA certificates are suitable for all public-facing websites and software.
CA (Certificate Authority) has two types:
- Trusted CA: publicly trusted certificate authority (CA) to sign certificates for production environments;more details.
- Azure Key Vault natively supports (DigiCert – GlobalSign)
- Custom CA: It is created locally by the company or developer to sign and verify the self-signed certificates for internal, development, and testing environments.
Certificate generation tools: Azure Key Vault and OpenSSL are used for this sample.
The following diagram shows the flow of creating a new certificate using an Azure Key Vault custom or non-integrated CA provider, more details

Start Temporal Cluster with mTLS enabled
To start a Temporal cluster with mTLS enabled, three steps need to be executed in order:
- 1. Generate the required certificates
- 2. Deploy and start a Temporal Cluster
- 3. Start Temporal Worker
1. Generate the required certificates
Temporal has some requirements from the CA and end-entity certificates listed here. The simplest Temporal TLS environment requires three certificates:
- CA certificate: the certificate used for signing and verifying the cluster and client certificates.
- Cluster certificate: encrypting communication between nodes in the cluster.
- Client certificate: encrypting communication between worker and the cluster front-end service.
More advanced environment setup can be found in Temporal samples repository
The list of configuration required to create the new certs:
Full source code generate-test-certs-keyvault.sh
###################################################
# Create a custom CA certificate to be used for
# signing both cluster and client the certificate
###################################################
# Variables
certDir=./certs
certName="ca"
keyVault="<key-vault-name>"

# `az rest` is used instead of `az keyvault certificate create`
# because the latter does not support creating a CA self-signed certificate
# https://github.com/Azure/azure-cli/issues/18178
az rest \
    --method post \
    --body @$certName-cert-policy.json \
    --resource "https://vault.azure.net" \
    --headers '{"content-type":"application/json"}' \
    --uri "https://$keyVault.vault.azure.net/certificates/$certName/create" \
    --uri-parameters 'api-version=7.2'

# Wait for cert to be ready
status="inProgress"
while [ "$status" != "completed" ]
do
    status=$(az keyvault certificate pending show --vault-name=$keyVault --name=$certName --query status --output tsv)
    sleep 1
done

# Download the certificate from Key Vault
az keyvault secret download --vault-name $keyVault --name $certName --file "$certDir/$certName.pem"

# Export private key
openssl pkey -in "$certDir/$certName.pem" -out "$certDir/$certName.key"

# Export certificate
openssl x509 -in "$certDir/$certName.pem" -out "$certDir/$certName.cert"
###################################################
# Create a certificate signed by the custom CA certificate generated above
# The same script is used to generate both the cluster and client certs
###################################################
# Variables
certDir=./certs
certName="cluster"
caCertName="ca"
keyVault="<key-vault-name>"
# Create a new certificate in Key Vault
CSR=$(az keyvault certificate create --vault-name $keyVault --name $certName --policy "@$certName-cert-policy.json" | jq -r '.csr')
# Create the certificate CSR(Certificate signing request) file
CSR_FILE_CONTENT="-----BEGIN CERTIFICATE REQUEST-----\n$CSR\n-----END CERTIFICATE REQUEST-----"
echo -e $CSR_FILE_CONTENT >> "$certDir/$certName.csr"
# Download the private key from Key Vault in PEM Format
az keyvault secret download --vault-name $keyVault --name $certName --file "$certDir/$certName.pem"
# Export private key from the downloaded pem file
openssl pkey -in "$certDir/$certName.pem" -out "$certDir/$certName.key"
# Create the signed certificate using the downloaded CSR (certificate signing request)
openssl x509 -req -in $certDir/$certName.csr -CA $caCertName.cert -CAkey $caCertName.key -sha256 -CAcreateserial -out $certDir/$certName.cert -days 365 -extfile $certName.conf -extensions $exts
local chain_file="$certDir/$certName.cert"
if [[ $no_chain_opt != no_chain ]]; then
chain_file="$certDir/$certName-chain.cert"
cat $certDir/$certName.cert $caCertName.cert > $chain_file
fi
# Generate the updated pem file with both cert and key to be imported into the Key Vault
cat "$certDir/$certName.key" $chain_file > "$certDir/$certName.pem"
# Import new pem into the Key Vault to be safely stored and used by the application
CERT_IMPORT_RESPONSE=$(az keyvault certificate import --vault-name $keyVault --name $certName --file "$certDir/$certName.pem")2. Deploy and start Temporal cluster
After generating the certificates, we can now start up the Temporal cluster using:
- docker-compose.yml: contains the definition for cluster nodes and configurations.
- start-temporal.sh: Script to set the environment variables and compose the cluster.
3. Start Temporal Worker (Client)
Full source code Client.java
// client certificate, which should look like:
InputStream clientCert = new FileInputStream(env.getProperty("temporal.tls.client.certPath"));
// client key, which should look like:
InputStream clientKey = new FileInputStream(env.getProperty("temporal.tls.client.keyPath"));
// certification Authority signing certificate
InputStream caCert = new FileInputStream(env.getProperty("temporal.tls.ca.certPath"));

 // Create SSL Context using the client certificate and key
 var sslContext = GrpcSslContexts.configure(SslContextBuilder
    .forClient()
    .keyManager(clientCert, clientKey)
    .trustManager(caCert))
    .build();

/*
* Get a Workflow service temporalClient which can be used to start, Signal, and
* Query Workflow Executions, This gRPC stubs wrapper talks to the Temporal service.
*/
WorkflowServiceStubs service = WorkflowServiceStubs.newServiceStubs(
            WorkflowServiceStubsOptions
                .newBuilder()
                .setSslContext(sslContext)
                .setTarget(temporalServerUrl)
                .setChannelInitializer(c -> c.overrideAuthority(temporalServerCertAuthorityName)) // Override the server name used for TLS handshakes
                .build());

// WorkflowClient can be used to start, signal, query, cancel, and terminate Workflows.
workflowClient = WorkflowClient.newInstance(service);
Please follow this readme to run the full sample on your local machine
Part 2: Temporal Authentication and Authorization using Azure AD
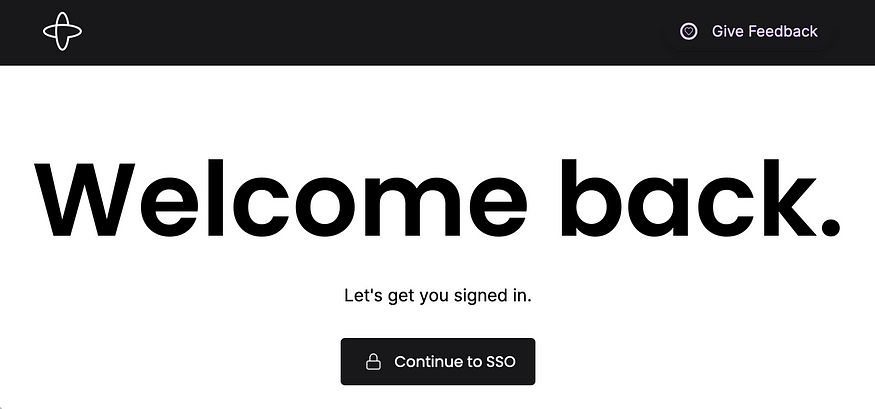
This part describes how to enable single-sign-on(SSO) for Temporal web UI users and using the Azure Active directory (AAD) as Oauth identity provider for authenticating users and generating JWT access tokens.
These steps will be used to enable Temporal SSO using Azure AD:
- Create an app registration in AAD for authentication
- Create app roles to set users’ permissions per namespace
- Enable SSO for Temporal Web UI configuration
- Query an access token used for Temporal Worker apps and CLI (tctl)
1. Creating an App Registration in AAD
When you register your application, Azure AD assigns a unique Application ID to it and allows you to add certain capabilities such as credentials, permissions, and sign-ons. The default settings allow only users from the tenant under which your app is registered to sign into your application.
Step 1 (Create app registration)
- In Azure portal, select
Azure Active Directoryand thenApp registrations. - Click on
New registrationand fill in the following info:- Name:
temporal-auth-demo - Other fields: leave default
- Name:
- Click on
Registerto create application.
Step 2 (Create login Redirect URIs)
- Go to
Authenticationmenu, click onAdd a platformand selectWeb. - Later in this post, we will be running the Temporal Web UI locally at port 8080 so to enable SSO, we need to add a redirect URI for it:
http://localhost:8080/auth/sso/callback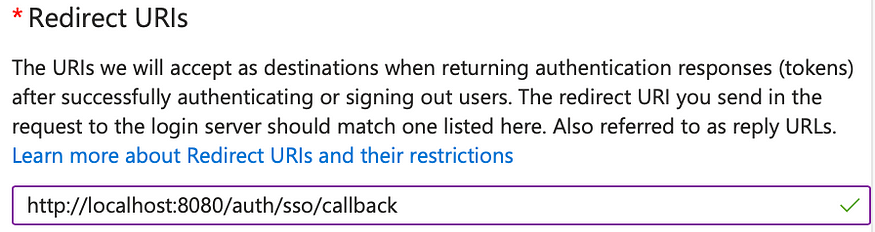
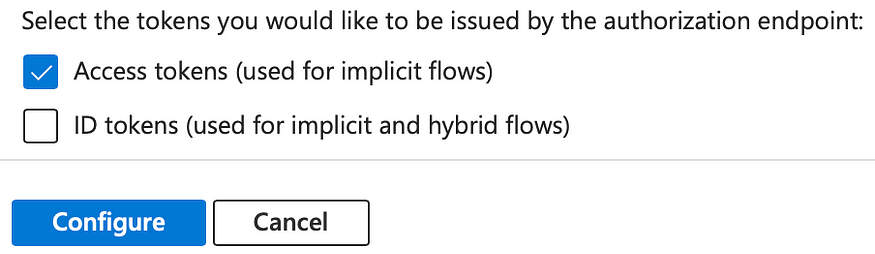
- Remember to check
Access tokensand click onConfigure. - Click on
Add URIto add another one for Postman, which will be used later for querying access tokens for Temporal CLI:https://oauth.pstmn.io/v1/callback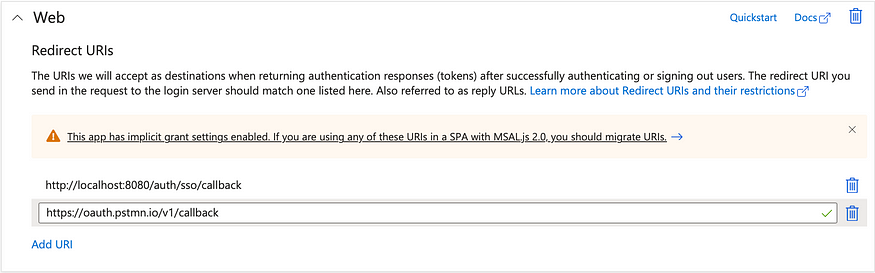
- Click on
Saveto finish.
Step 3 (Create a default scope)
Next we will need to create a default scope for the app registration.
- Navigate to
Expose an APImenu, click onAdd a scope. - Leave the application ID URI as its default value:
api://{Client ID}and click onSave and continue. - Set the scope name to
defaultand fill in other required fields.
Step 4 (Create a client secret)
- Go to
Certificates & secretsmenu - Click on
New client secret - Enter a description for the secret and click on
Add. - Remember to copy the client secret’s value for later use.
Step 5 (Testing with Postman)
At this point, we can try querying an access token using Postman.
Open Postman and go to Authorization tab, then select:
Type: OAuth 2.0
Grant Type: Authorization Code
Check Authorize using browser
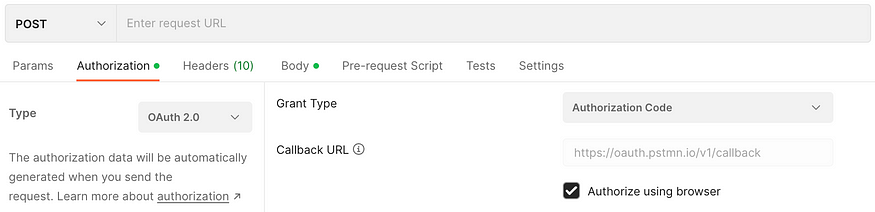
Fill in the required info as below:
- Auth URL:
https://login.microsoftonline.com/{Tenant ID}/oauth2/v2.0/authorize - Access Token URL:
https://login.microsoftonline.com/{Tenant ID}/oauth2/v2.0/token - Client ID: The application (client) ID
- Client Secret: The application (client) secret
- Scope:
api://{Client ID}/default - Then click on
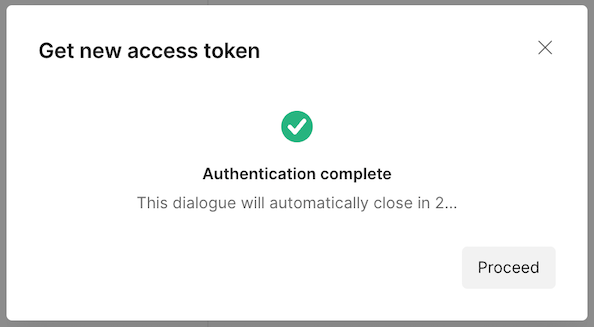
Get New Access Tokenand sign in using your browser: - Make sure that your browser allows pop-up windows and can communicate with Postman to provide access tokens. If everything works properly, you can click on
Proceedin Postman to see the returned access token:
Finally, go to jwt.ms to decode the access token and check all available claims. We will need to add more claims later for authorization.
2. Creating App Roles for User Permissions
Basing on the security docs on the Temporal website, the access token needs to have a permissions claim containing a collection of roles for the caller:
 "permissions":[
    "system:read",
    "default:write"
 ]
In the example above, the caller have the read permission to the system namespace and the write permission to the default namespace.
To create these claims in AAD, we can use App roles.
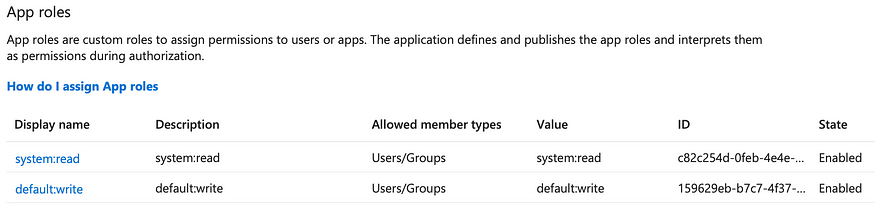
Step 1 (Create App roles)
- In Azure portal, go to the
temporal-auth-demoapp registration. - Navigate to
App rolesmenu, click onCreate app roleand fill in the following info to create a new role:- Display name:
system:read - Allowed member types: Users/Groups
- Value:
system:read - Description:
system:read - Check
Do you want to enable this app role? - Click on
Apply
- Display name:
- Next click on
Create app roleagain to add another role fordefault:write:
Step 2 (Assign roles to a user)
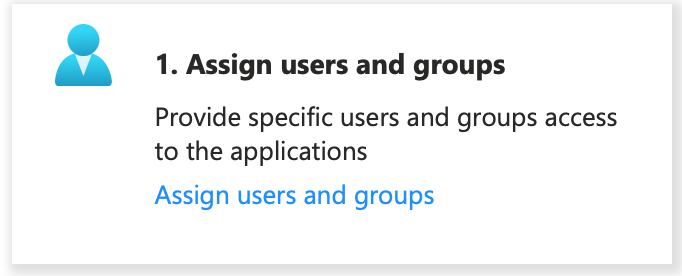
To assign roles to a user, click on How do I assign App roles and then Enterprise applications:
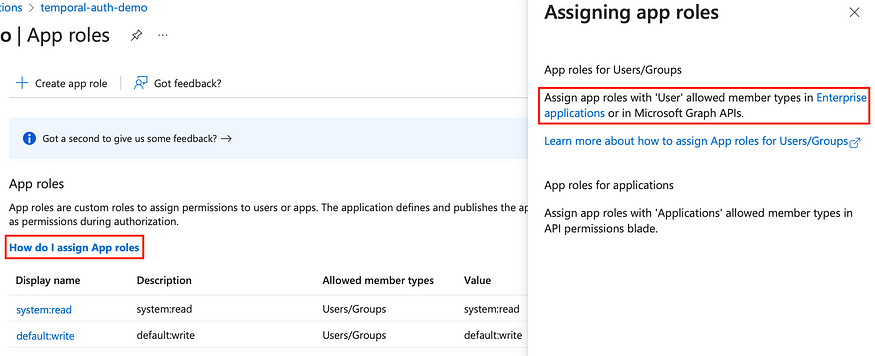
Then click on Assign users and groups:
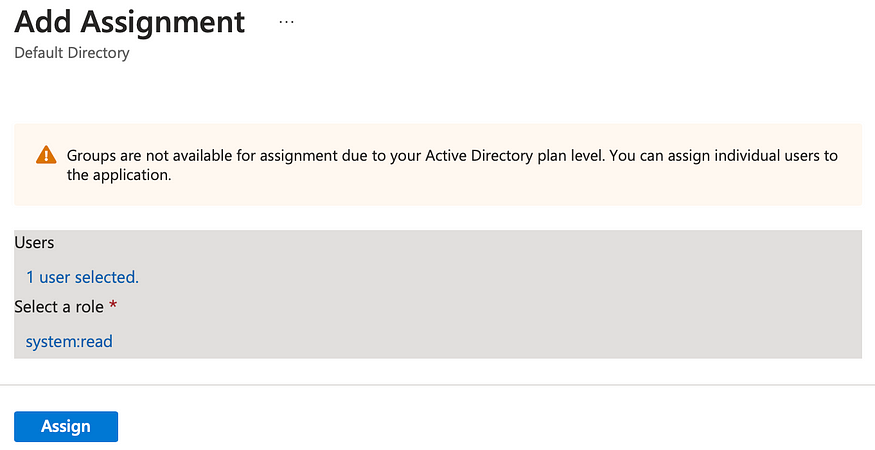
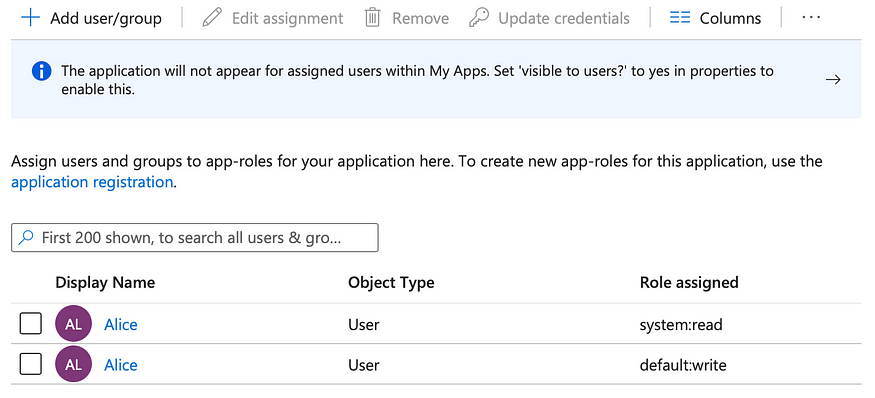
Click on Add user/group to start adding assignment. Select a user and assign him/her both roles: system:read and default:write.
Step 3 (Testing with Postman)
Now try querying an access token using Postman again and notice the following new claims have been added:
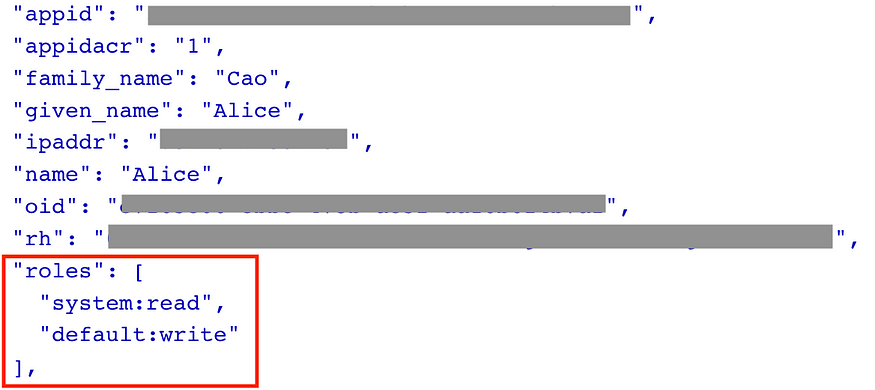
Now you may wonder that the claim name is roles instead of permissions, which is expected by Temporal. We will address this issue in the next section.
3. Running Temporal Server with authorization enabled
In this example, we will be using this repository and running the Temporal server locally.
After cloning the repository, make the following changes:
1- In the deployment/tls-simple/docker-compose.yml file, enable authorization in the Temporal server:
temporal:
    image: temporalio/auto-setup:${SERVER_TAG:-latest}
    ports:
      - "7233:7233"
    volumes:
      - ${DYNAMIC_CONFIG_DIR:-../config/dynamicconfig}:/etc/temporal/config/dynamicconfig
      - ${TEMPORAL_LOCAL_CERT_DIR}:${TEMPORAL_TLS_CERTS_DIR}
    environment:
      - "CASSANDRA_SEEDS=cassandra"
      - "DYNAMIC_CONFIG_FILE_PATH=config/dynamicconfig/development.yaml"
      - "SERVICES=frontend:matching:history:internal-frontend:worker"
      - "SKIP_DEFAULT_NAMESPACE_CREATION=false"
      - "TEMPORAL_TLS_SERVER_CA_CERT=${TEMPORAL_TLS_CERTS_DIR}/ca.cert"
      - "TEMPORAL_TLS_SERVER_CERT=${TEMPORAL_TLS_CERTS_DIR}/cluster.cert"
      - "TEMPORAL_TLS_SERVER_KEY=${TEMPORAL_TLS_CERTS_DIR}/cluster.key"
      - "TEMPORAL_TLS_REQUIRE_CLIENT_AUTH=true"
      - "TEMPORAL_TLS_FRONTEND_CERT=${TEMPORAL_TLS_CERTS_DIR}/cluster.cert"
      - "TEMPORAL_TLS_FRONTEND_KEY=${TEMPORAL_TLS_CERTS_DIR}/cluster.key"
      - "TEMPORAL_TLS_CLIENT1_CA_CERT=${TEMPORAL_TLS_CERTS_DIR}/ca.cert"
      - "TEMPORAL_TLS_CLIENT2_CA_CERT=${TEMPORAL_TLS_CERTS_DIR}/ca.cert"
      - "TEMPORAL_TLS_INTERNODE_SERVER_NAME=tls-sample"
      - "TEMPORAL_TLS_FRONTEND_SERVER_NAME=tls-sample"
      - "TEMPORAL_TLS_FRONTEND_DISABLE_HOST_VERIFICATION=false"
      - "TEMPORAL_TLS_INTERNODE_DISABLE_HOST_VERIFICATION=false"
      - "TEMPORAL_CLI_ADDRESS=temporal:7236"
      - "TEMPORAL_CLI_TLS_CA=${TEMPORAL_TLS_CERTS_DIR}/ca.cert"
      - "TEMPORAL_CLI_TLS_CERT=${TEMPORAL_TLS_CERTS_DIR}/cluster.cert"
      - "TEMPORAL_CLI_TLS_KEY=${TEMPORAL_TLS_CERTS_DIR}/cluster.key"
      - "TEMPORAL_CLI_TLS_ENABLE_HOST_VERIFICATION=true"
      - "TEMPORAL_CLI_TLS_SERVER_NAME=tls-sample"
      # Enable jwt authorization
      - "USE_INTERNAL_FRONTEND=true"
      # Enable default authorizer and claim mapper
      - "TEMPORAL_AUTH_AUTHORIZER=default"
      - "TEMPORAL_AUTH_CLAIM_MAPPER=default"
      # specify the permissions source property in jwt token
      - "TEMPORAL_JWT_PERMISSIONS_CLAIM=roles"
      # JWK containing the public keys used to verify access tokens
      - "TEMPORAL_JWT_KEY_SOURCE1=https://login.microsoftonline.com/{Tenant ID}/discovery/v2.0/keys"
      - "TEMPORAL_JWT_KEY_REFRESH=30m"
2- In the deployment/tls-simple/docker-compose.yml file, enable SSO in the Temporal Web UI:
temporal-ui:
    image: temporalio/ui:${UI_TAG:-latest}
    ports:
      - "8080:8080"
    volumes:
      - ${TEMPORAL_LOCAL_CERT_DIR}:${TEMPORAL_TLS_CERTS_DIR}
    environment:
      - "TEMPORAL_ADDRESS=temporal:7233"
      - "TEMPORAL_TLS_CA=${TEMPORAL_TLS_CERTS_DIR}/ca.cert"
      - "TEMPORAL_TLS_CERT=${TEMPORAL_TLS_CERTS_DIR}/cluster.cert"
      - "TEMPORAL_TLS_KEY=${TEMPORAL_TLS_CERTS_DIR}/cluster.key"
      - "TEMPORAL_TLS_ENABLE_HOST_VERIFICATION=true"
      - "TEMPORAL_TLS_SERVER_NAME=tls-sample"
      # Uncomment to enable SSO authentication and authorization
      - "TEMPORAL_AUTH_ENABLED=true"
      # Specify authorization server and issuer
      - "TEMPORAL_AUTH_PROVIDER_URL=https://login.microsoftonline.com/{Tenant ID}/v2.0"
      - "TEMPORAL_AUTH_ISSUER_URL=https://login.microsoftonline.com/{Tenant ID}/v2.0"
      # Specify client ID and secret
      - "TEMPORAL_AUTH_CLIENT_ID={Client ID}"
      - "TEMPORAL_AUTH_CLIENT_SECRET={Client Secret}"
      # Specify callback URL which is the redirect URI in the app registration
      - "TEMPORAL_AUTH_CALLBACK_URL=http://localhost:8080/auth/sso/callback"
      # Specify the authentication scope
      - "TEMPORAL_AUTH_SCOPES=openid,api://{Client ID}/default"
    depends_on:
      - temporal
3- Run make start-cluster-mtls command to start the Temporal server and other components.
Now you can test the Temporal Web UI at http://localhost:8080. It does require users to login with their AAD credentials:
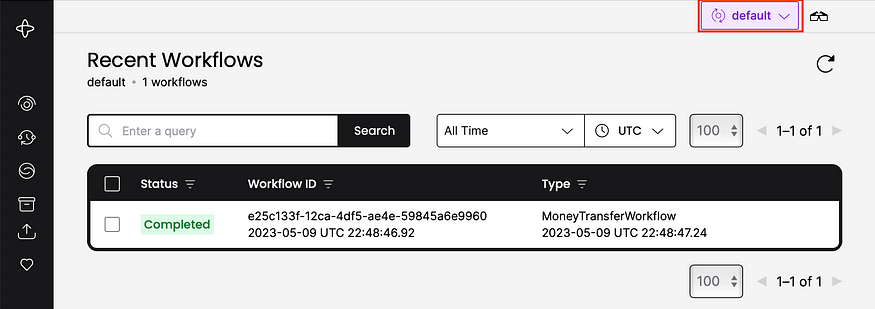
After signing in successfully, users can only access the namespaces that are granted to them. In the following screenshot, you can see all workflows in the default namespace since you have the default:write value in the permission claim:
To test Temporal access using tctl, use Postman to grab an access token and run the following command to list all namespaces:
# Replace the access token below
auth="Bearer {Access Token}"
tctl --auth "$auth" namespace list
4. Start Temporal Worker (WorkflowClient)
Full source code Client.java
// Implement code to retrieve an access token, then provide it below.
 AuthorizationTokenSupplier tokenSupplier = () -> "Bearer {Access Token}";

WorkflowServiceStubs service = WorkflowServiceStubs.newServiceStubs(
    WorkflowServiceStubsOptions
        .newBuilder()
        .setSslContext(sslContext)
        .setTarget(temporalServerUrl)
        .addGrpcMetadataProvider(new AuthorizationGrpcMetadataProvider(tokenSupplier)) // set token provider
        .build());
Run make start-worker to start the Temporal WorkflowClient (Worker)
Conclusion
A secured Temporal server has its network communication encrypted and has authentication and authorization protocols set up for API calls made to it. Without these, your server could be accessed by unwanted entities. Temporal has many features that you can use to keep both the platform and your users’ data secure, and we can leverage Azure services to implement these features to provide scalable enterprise level solution.