
Azure IoT Edge Tools (Preview) for Visual Studio 2017 allows you to easily develop and debug Azure IoT Edge modules locally. To learn how to use this extension to develop and debug Edge modules locally, you can refer these documents:
Easily Develop and Debug Azure IoT Edge C Modules with Azure IoT Edge Tools
Use Visual Studio 2017 to develop and debug modules for Azure IoT Edge (Preview)
However, remote debugging module container running in Edge device is not straightforward. This tutorial will use Raspberry Pi to demonstrate how to remotely debug C/C# Linux module container from dev machine.
For Windows platform, you can refer this blog:
Debug IoT Edge C / C# Windows Module Container with Visual Studio Azure IoT Edge Tools
Let’s see how it works.
Prerequisites
Setup Your Raspberry Pi
- Install Raspbian on your Raspberry Pi by following this tutorial.
- Setup your Raspberry Pi as an IoT Edge device – Follow the instructions to install Azure IoT Edge runtime on Linux(arm32v7/armhf).
- Enable remote API for dockerd on Raspberry Pi:
sudo nano /lib/systemd/system/docker.service to append -H tcp://0.0.0.0:2375 at the line starting with “ExecStart”:
ExecStart=/usr/bin/dockerd -H fd:// -H tcp://0.0.0.0:2375
sudo systemctl daemon-reload
sudo systemctl restart docker
- Manage Docker as a non-root user on your Raspberry Pi, so that you don’t need to preface the docker command with sudo.
Setup Your Development Machine
- OS: Windows 10
- Visual Studio 2017 with update 7 or later, including workloads “.NET desktop development”, “Windows desktop development with C++” and “Azure development workload”
- Download and install Azure IoT Edge extension (Preview) for Visual Studio
- Download and install Docker Desktop for Windows
- Set up your local development environment to debug, run, and test your IoT Edge solution by installing the Azure IoT EdgeHub Dev Tool. Install Python (2.7/3.6) and Pip and then install the iotedgehubdev package by running the following command in your terminal. Make sure your Azure IoT EdgeHub Dev Tool version is equal or greater than 0.8.0.
pip install --upgrade iotedgehubdev
- Install the PuTTY on your machine, which is used to generate SSH keys.
- [Optional] Install azure-iot-sdk-c for windows-x64 through vcpkg
git clone https://github.com/Microsoft/vcpkg

cd vcpkg

.\bootstrap-vcpkg.bat

.\vcpkg install azure-iot-sdk-c:x64-windows

.\vcpkg --triplet x64-windows integrate install
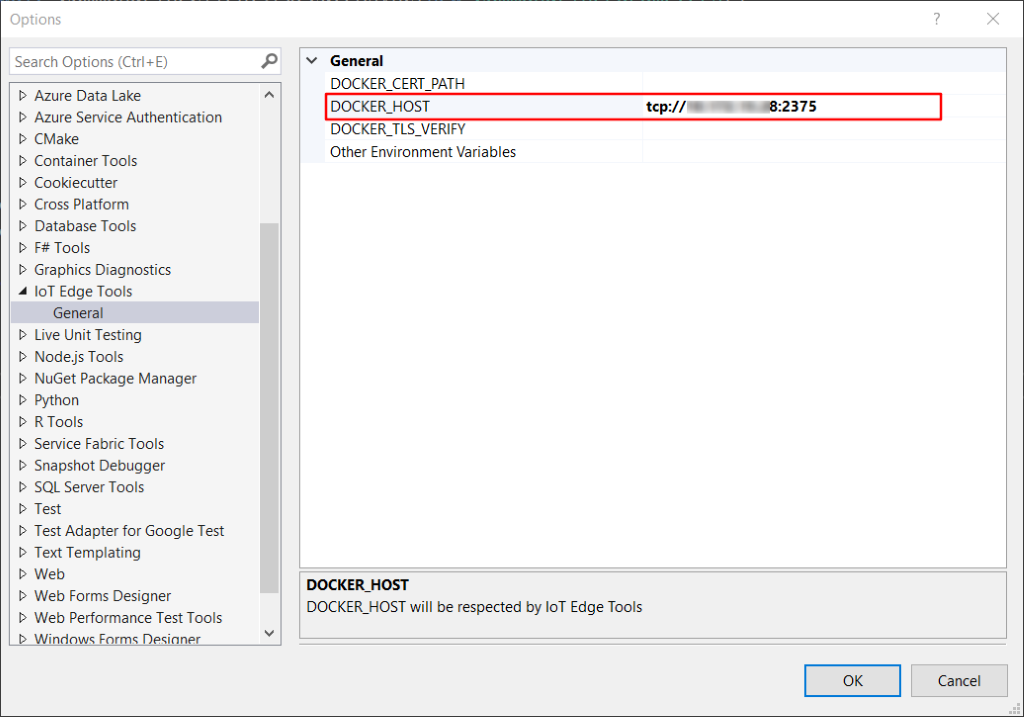
Configure DOCKER_HOST in Extension Settings
- Open Visual Studio 2017, click menu Tools->Azure IoT Edge Tools -> IoT Edge Tools Settings, set DOCKER_HOST as IP and port of your Raspberry Pi as below, for example it is tcp://10.172.14.127:2375 for my Raspberry Pi:
Debug C / C# Module Container Running in Remote Edge Device
- Open Visual Studio 2017 and click menu File -> New ->Project. In the New Project dialog, select Installed -> Azure IoT, select Azure IoT Edge (Linux arm32v7), enter a name for your project and specify the location, and then select OK.

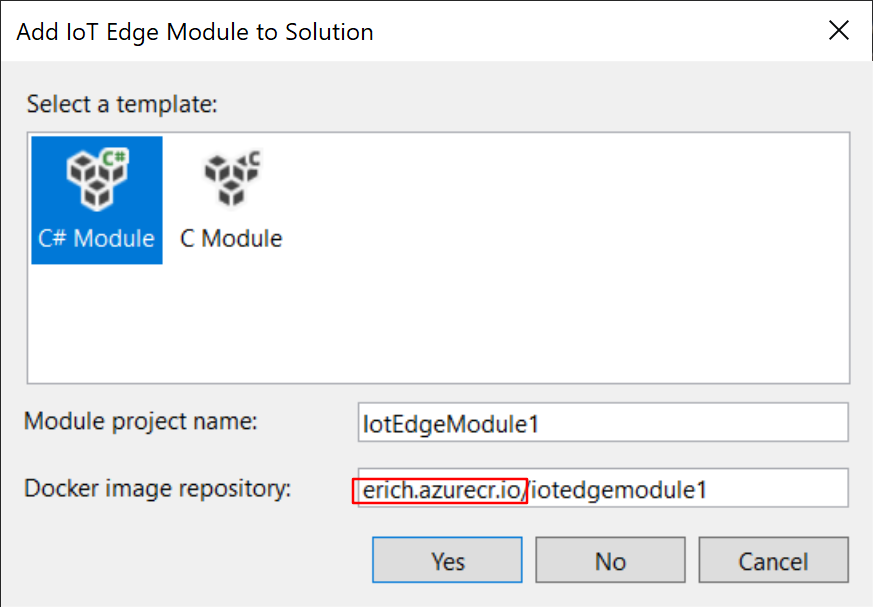
- In the project wizard, select C or C# Module, and replace localhost:5000 with your own registry info, then click Yes:

- Now there’re two projects in the solution, one is Edge module project, which is just simple .Net Core or C project, the other one is called Edge project.
- To debug C / C# module in Linux container, we need to update Dockerfile.arm32v7.debug to enable SSH service:For C module, update the Dockerfile.arm32v7.debug file as below: Dockerfile for Azure IoT Edge ARM32 C Module with Remote Debug SupportFor C# module, update the Dockerfile.arm32v7.debug file as below: Dockerfile for Azure IoT Edge ARM32 C# Module with Remote Debug Support
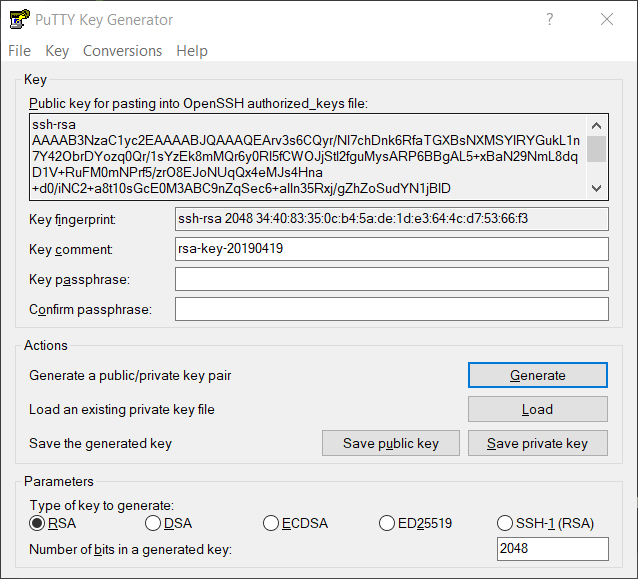
- Open PuTTYgen.exe, select RSA and 2048 bits, click Generate and follow instructions to generate a key

- Copy the public key (entire contents of the textarea) into IotEdgeModule1/authorized_keys, and export private key (Conversions -> Export OpenSSH key -> (no passphrase) -> overwrite) to IotEdgeModule1/openssh_privatekey.
- Edit deployment.template.json file in Azure IoT Edge project to expose 22 port which would be used by SSH service. Here we use 9022 as host port but you may specify a different port, which will be used as SSH port to connect into IotEdgeModule1 container.
"IotEdgeModule1":{ "version":"1.0.0", "type":"docker", "status":"running", "restartPolicy":"always", "settings":{ "image":"${MODULES.IotEdgeModule1}", "createOptions":{ "HostConfig":{ "Privileged":true, "ExposedPorts":{ "22/tcp":{ } }, "PortBindings":{ "22/tcp":[ { "HostPort":"9022" } ] } } } } } - Right click on the Edge project to open context menu, then click Properties, select Configuration Properties in the left pane of pop-up window, make sure you select Debug for Target Configuration, click OK to close the window, then click “File -> Save All” in the context menu to make sure the configuration change is written into project file.

- If you’re using private registry like Azure Container Registry, use the following Docker command to sign in.
docker login -u <ACR username> -p <ACR password> <ACR login server>
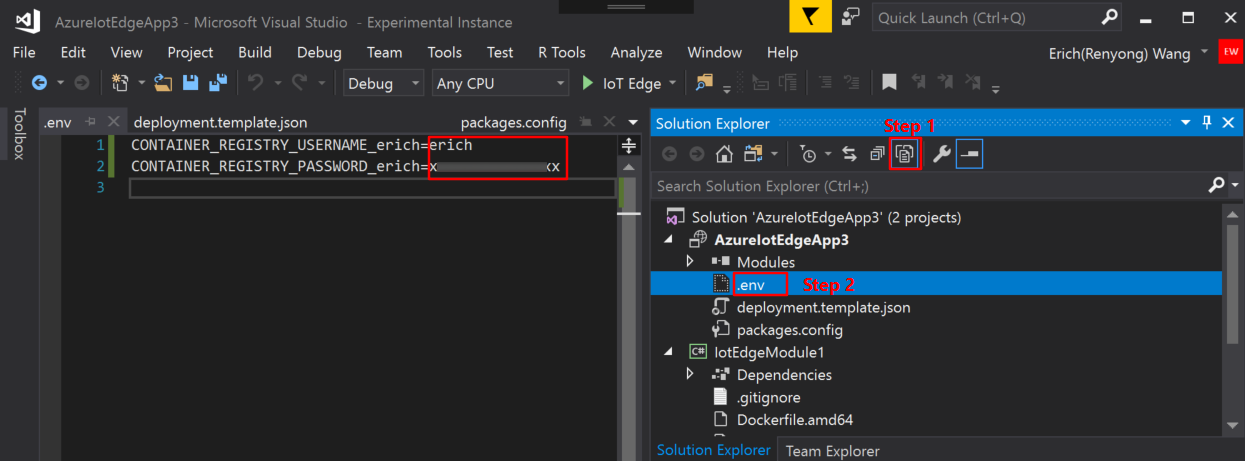
- Click Show All Files icon as below, a .env file should be displayed under Edge project, open the .env file to input credential for your registry, this credential will be used by IoT Edge runtime to pull module images after deployment.

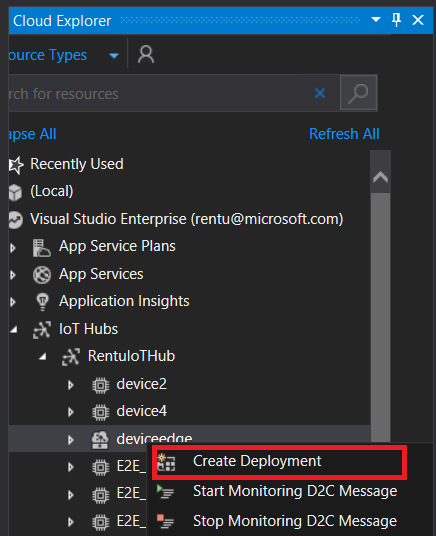
- Right click on the Edge project and click Build and Push IoT Edge Modules to build, push the Docker image for the C or C# module. After push is done, open Cloud Explorer by clicking View -> Cloud Explorer, expand your subscription and find the IoT Edge device corresponding to your Raspberry Pi device, right click on the IoT Edge device to create a deployment for it, you need to select the deployment manifest file under the path below:
$AzureIoTEdgeAppSolutionDir\$AzureIotEdgeAppX\config\deployment.arm32v7.debug.json

- Run the following command to start ssh for module container in Raspberry Pi
docker exec -it -d [Your Edge Module Container ID] service ssh start
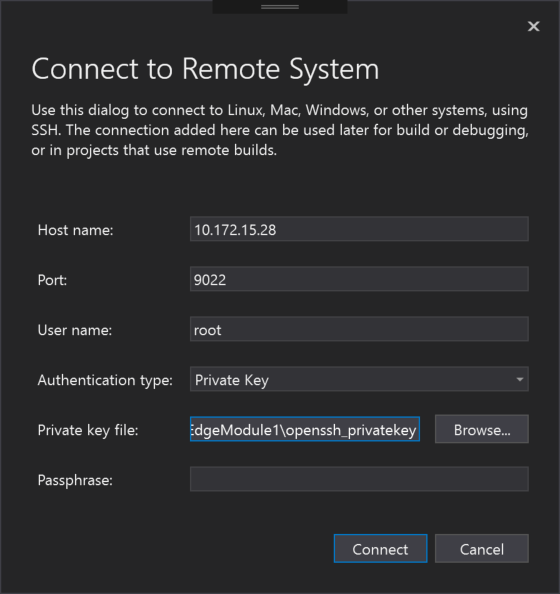
- After successfully starting SSH service, click Debug -> Attach to Process, set Connection Type to SSH and Connection target to the IP address of your Raspberry Pi, it is 10.172.15.28 for my Raspberry Pi, and then type Enter. In the pop-up window, input the following configurations:
Host name: 10.172.15.28 Port: 9022 User name: root Authentication type: Private Key Pivate key file: openssh_privatekey file path generated in step 7

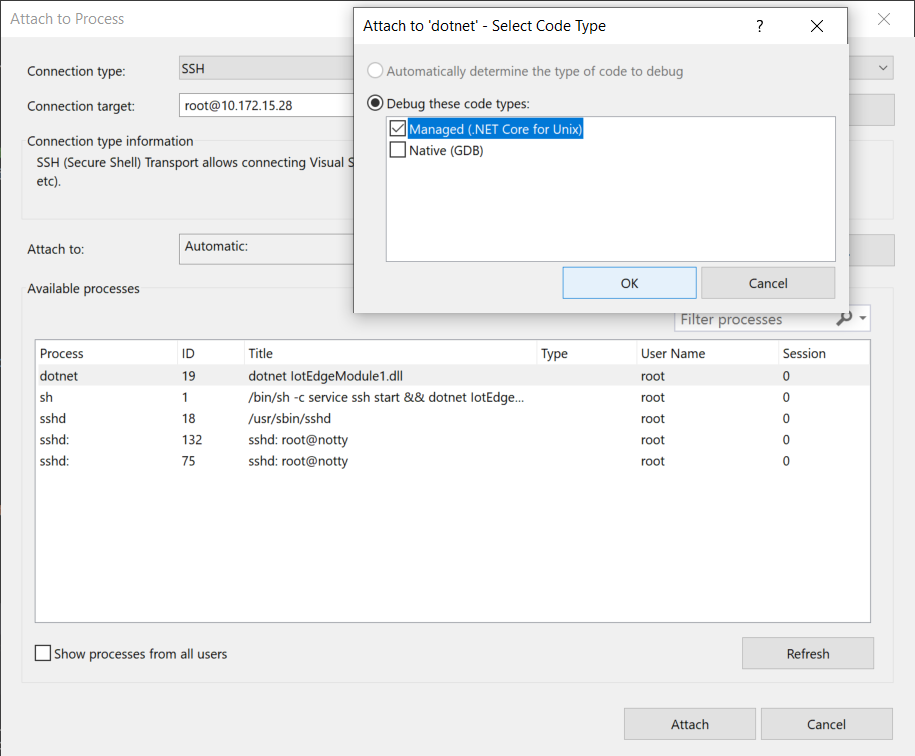
- After successfully connecting to the SSH, then you can choose the process and click Attach. For C module, you need to choose process main and “Attach to” to Native code. For C# module you need to choose process dotnet and “Attach to” to Managed (CoreCLR).

- Now you can set breakpoint and debug your C or C# module


Samples Projects
- Azure IoT Edge C Linux ARM remote debug sample: https://github.com/Azure-Samples/azure-iot-edge-csharp-linux-arm-container-debug-sample
- Azure IoT Edge C# Linux ARM remote debug sample: https://github.com/Azure-Samples/azure-iot-edge-c-linux-arm-container-debug-sample
Would you be so kind to let us know when a more tightly integrated Visual Studio solution becomes available? For example, the developer only needs to set up his/her Raspbian device manually, then provides VS its username and password. VS will than automate the build/ deploy/ debugging into the Pi with a single F5.
Thanks
Remote debugging for C# enhancement is coming soon. For C it is in our roadmap. We will publish new posts when it is available.